Introduction
Today’s software is largely based on libraries that are freely available. New features do not always have to be completely reimplemented if they are already publicly available. Often, a development team can fall back on libraries in the open source world. This is more cost-effective and also has the advantage that code included is often tested by multiple parties. It is not necessary to reinvent the wheel. Indeed, you can say that due to the complexity of today’s software, it is almost impossible to do modern project development without these dependencies of the open source world.
It is normal that larger project have uncountable numbers of dependencies that they need for different features.
Security Vulnerabilities
With a huge amount of dependencies it is only a matter of time before one of these dependencies has a security gap. As a result, a risk to a system to become vulnerable to attacks will gradually increase if these issues are’nt resolved.
It’s not easy to find vulnerabilities in dependencies manually. This is due to different reasons:
- The code is outsourced, so it is not maintained in the incorporating project.
- The external library is mostly zipped and compiled, which makes analysis difficult.
- Existing dependencies are usually not automatically lifted, as the resulting side effects are not transparently visible in a project, so that even if the developers fix the external dependency, it may not migrate directly into the project.
That means by implication: The integrating project has to notice in another way that there are new issues in dependencies and do that in a timely manner. But how can these faulty libraries be recognized and made visible at an early stage?
This first part of the Secure Software Development series describes how to check a Java program for dependencies. This is shown on the command line. After that I describe the whole thing in a downstream system called Jenkins.
Specifically, I will treat:
- … how to check dependencies on the command line (section Checking on the command line).
- … can perform the same things in a downstream system called Jenkins. The main part refers to this system (section Jenkins).
- … how to check the same dependencies with a tool called Sonarqube. Sonarqube can be used to calculate metrics in a project (section Sonarqube).
- … finally there’s a little summary of this blog (section Summary].
First, let’s take a look at the underlying tool of this entire blog article:
Checking on the command line
OWASP Dependency Check
OWASP Dependency Check is an instrument to check the dependencies in your project for vulnerabilities: It takes existing libraries of a project and tests them against a database for security holes. As a database, the tool uses the National Vulnerability Database, NVD for short. In this database you can find for each library version the corresponding previously known reports.
Dependency Check can be used in two variants in the Java Universe:
- Configured into a build management system
- Via command line
The following description shows how to use it via command line and how to use a continuous integration and Inspection system.
A continuous integration system allows you to automatically go over your latest code. In the simplest case, this is used to see if the latest can be build or if errors have occurred when new code was checked in.
On the other hand, a continuous inspection system shows immediately after reported to the system whether certain metrics of the code are fulfilled.
Both continuous integration and inspection report errors and warnings, e.g. directly via e-mail. They can now be supplemented with Dependency Check, so that after installing a new library, the developers can see if there exists problems at certain new point.
To illustrate everything, we will use a sample Docker infrastructure in this article, so that the reader can follow the individual steps directly by her/himself or test it, in case s/he wants to launch it in his project.
The steps here are given for a Mac, but should work similarly to other operating systems
Required software
First of all you need:
- OWASP Dependency Checker
- Apache maven
- Docker
The installation of 1 and 2 can be done with the following command:
brew update && brew install maven dependency-check
Docker can be installed according to its homepage.
We will now use these tools throughout the rest of this guide.
Container IDs
In the following description, <containerid_namedescontainer> means the Docker ID of the respective container. This ID can be determined using the docker ps -a command while Docker is running.
Example infrastructure
Next, we build an infrastructure with a continuous integration server. For this we use Jenkins and Docker.
First we create the necessary directory structure and build a local Git server. Important to note:
The root directory secureci is the starting point for many of the following commands. The reader should therefore take care that he is at this level.
# Clone repo with branch java
git clone -b java https://github.com/secf00tprint/secureci.git
cd secureci
# Create mount directories for docker
./init.sh
After that the directory secureci should look like this:

How to scan a Java Project
To scan a Java project using OWASP Dependency Check on the command line, the following steps can be performed in the root directory of the secureci project:
1 Setting up a Java example project:
cd localproject

mvn archetype:generate \
-DarchetypeGroupId=org.apache.maven.archetypes \
-DarchetypeArtifactId=maven-archetype-quickstart \
-DarchetypeVersion=1.3 \
-DgroupId=de.mydomain \
-DartifactId=old_depproject \
-Dversion=1.0-SNAPSHOT \
-Dpackage=de.mydomain -B

cd old_depproject
2 Delete old dependencies and download the up-to-date dependencies into the project:
mvn clean dependency:copy-dependencies
3 Copy all dependencies to a subdirectory alllibs:
if [ -d alllibs ]; then; rm -rf ./alllibs; fi;\
mkdir ./alllibs;\
find . -iname '*.jar' -exec cp {} ./alllibs/ \; 2> /dev/null;\
find . -iname '*.class' -exec cp {} ./alllibs/ \; 2> /dev/null
4 Start the scanner:
dependency-check \
--project "Example Project" \
-s ./alllibs \
-l dependency.log
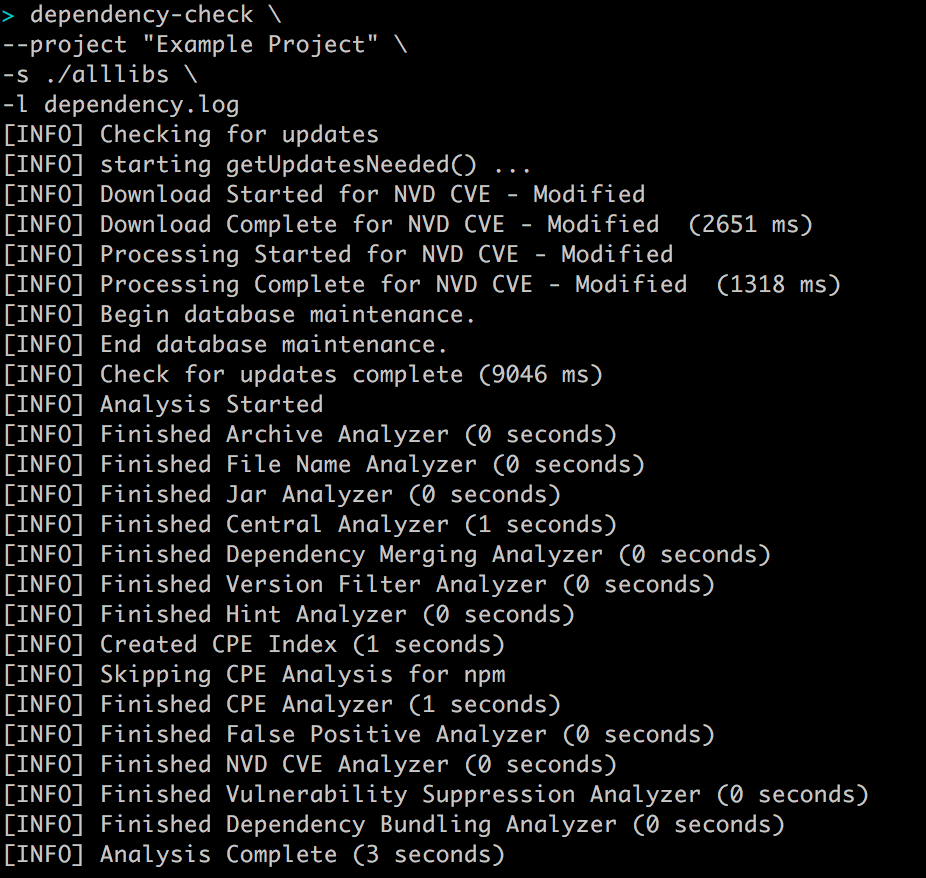
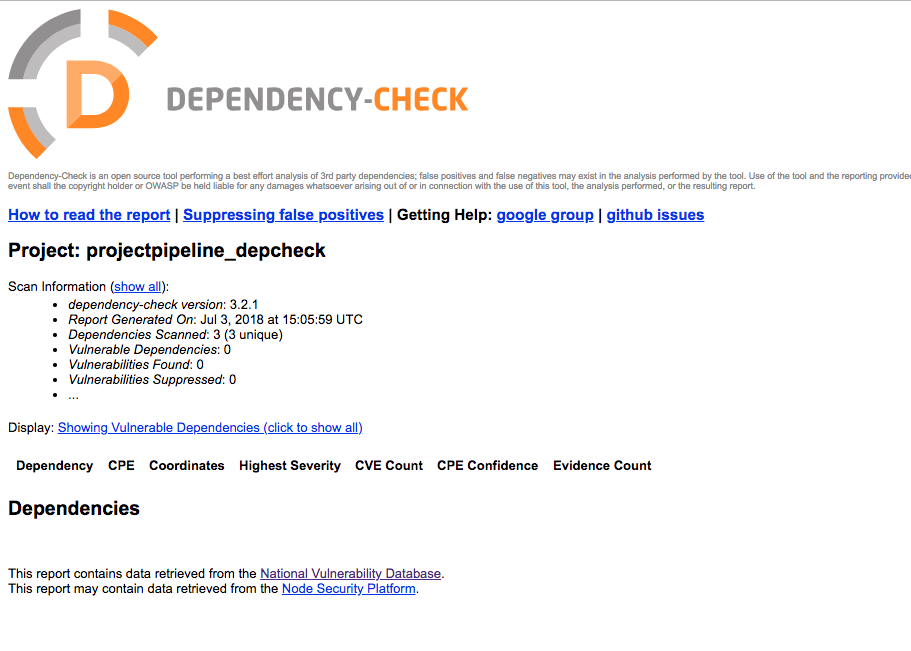
5 Evaluation of results:
open dependency-check-report.html
In order to cause a result with issues, we add a library to the dependencies used by the project that contains a security vulnerability.
For this we append a dependencies section in the file pom.xml, which Maven uses for building:
<dependencies>
 ...
      <dependency>
         <groupId>commons-fileupload</groupId>
         <artifactId>commons-fileupload</artifactId>
         <version>1.2.2</version>
     </dependency>
</dependencies>
and perform steps 2 to 5 again.
Now there should be an issue in the result report:
open dependency-check-report.html

Creating a git server
Now we can build the git server (The server is based on the code the project jkarlosb git server - thanks to this really cool docker image):
cd gitserver
docker build -t gitserver .
cd ..
Create a key pair (double press enter for the passphrase):
cd mykeys
ssh-keygen -t rsa -f gitkey
cp gitkey.pub ../mnt/gitserver/keys
cd ..
Now we can run the git server: We have to make sure that we are in the root directory.
docker run -d -p 127.0.0.1:22:22 \
-v `pwd`/mnt/gitserver/keys:/git-server/keys \
-v `pwd`/mnt/gitserver/repos:/git-server/repos \
gitserver
We can check whether we can connect to the server (root directory!) using:
ssh git@127.0.0.1 -i mykeys/gitkey
Registration possible
As response we should see:
Welcome to git-server-docker!
You've successfully authenticated, but I do not
provide interactive shell access.
Connection to 127.0.0.1 closed.
No registration possible
The following error message may appear, in case we should already have assigned an IP:
@@@@@@@@@@@@@@@@@@@@@@@@@@@@@@@@@@@@@@@@@@@@@@@@@@@@@@@@@@@
@    WARNING: REMOTE HOST IDENTIFICATION HAS CHANGED!     @
@@@@@@@@@@@@@@@@@@@@@@@@@@@@@@@@@@@@@@@@@@@@@@@@@@@@@@@@@@@
IT IS POSSIBLE THAT SOMEONE IS DOING SOMETHING NASTY!
To solve this, we open the file ~/.ssh/known_hosts and remove the corresponding line containing the IP or comment it out with#.
Creating an external git repository
Now we create a git project locally and copy the repo into our git server:
cd localproject
git init --shared=true
git add .
git commit -m "my first commit"
cd ..
git clone --bare localproject mnt/gitserver/repos/project.git
docker restart <containerid_gitserver>
We can now test if the code has been committed by:
ssh-add mykeys/gitkey
mkdir temp && cd temp
git clone ssh://git@127.0.0.1/git-server/repos/project.git
cd ..
Then the temp directory can be deleted by
rm -rf temp
Jenkins
In the following chapter we now build and use the continuous integration system named Jenkins.

Get Jenkins up and running
Next we start Jenkins.
For this we go to the directory conintserver:
cd conintserver
and build the image:
docker build -t conintserver .
cd ..
Then we start the server from the root directory with:
docker run -p 127.0.0.1:8080:8080 -p 127.0.0.1:50000:50000 -v `pwd`/mnt/conintserver/jkhome:/var/jenkins_home -v `pwd`/mnt/conintserver/project/:/home conintserver
And open the server in the browser:
open http://127.0.0.1:8080
There is an entry in the docker console:
*************************************************************
*************************************************************
*************************************************************
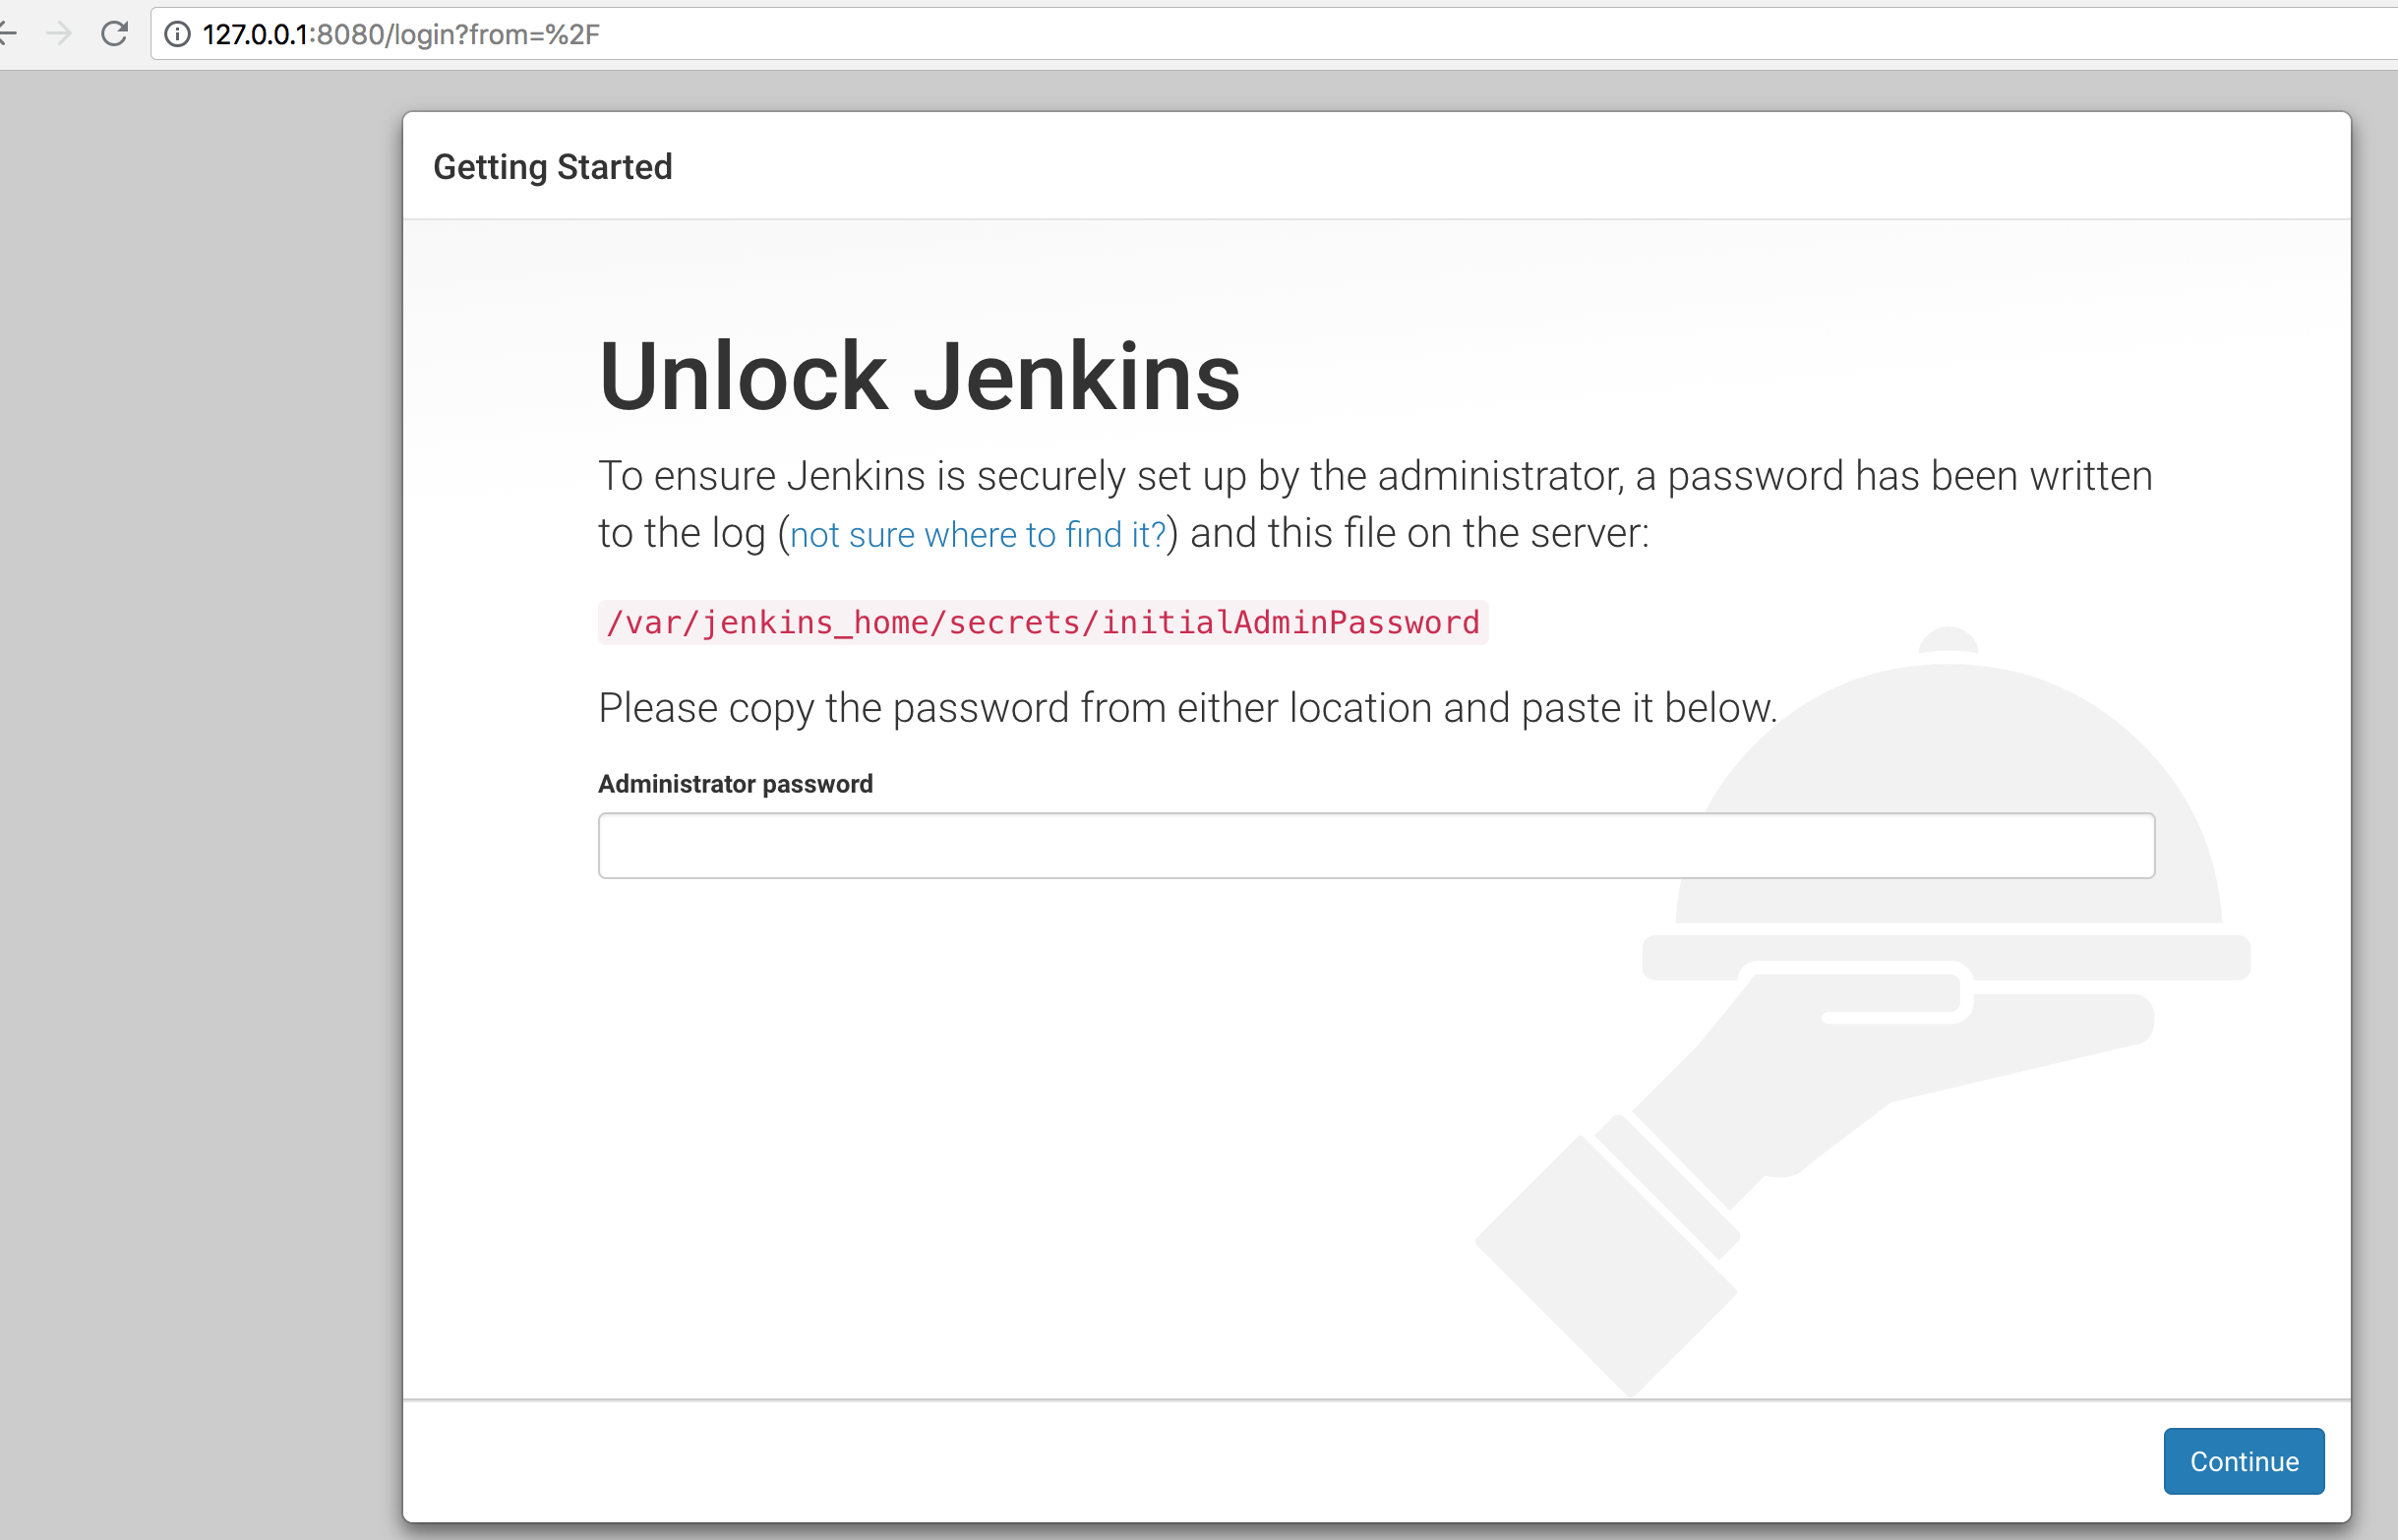
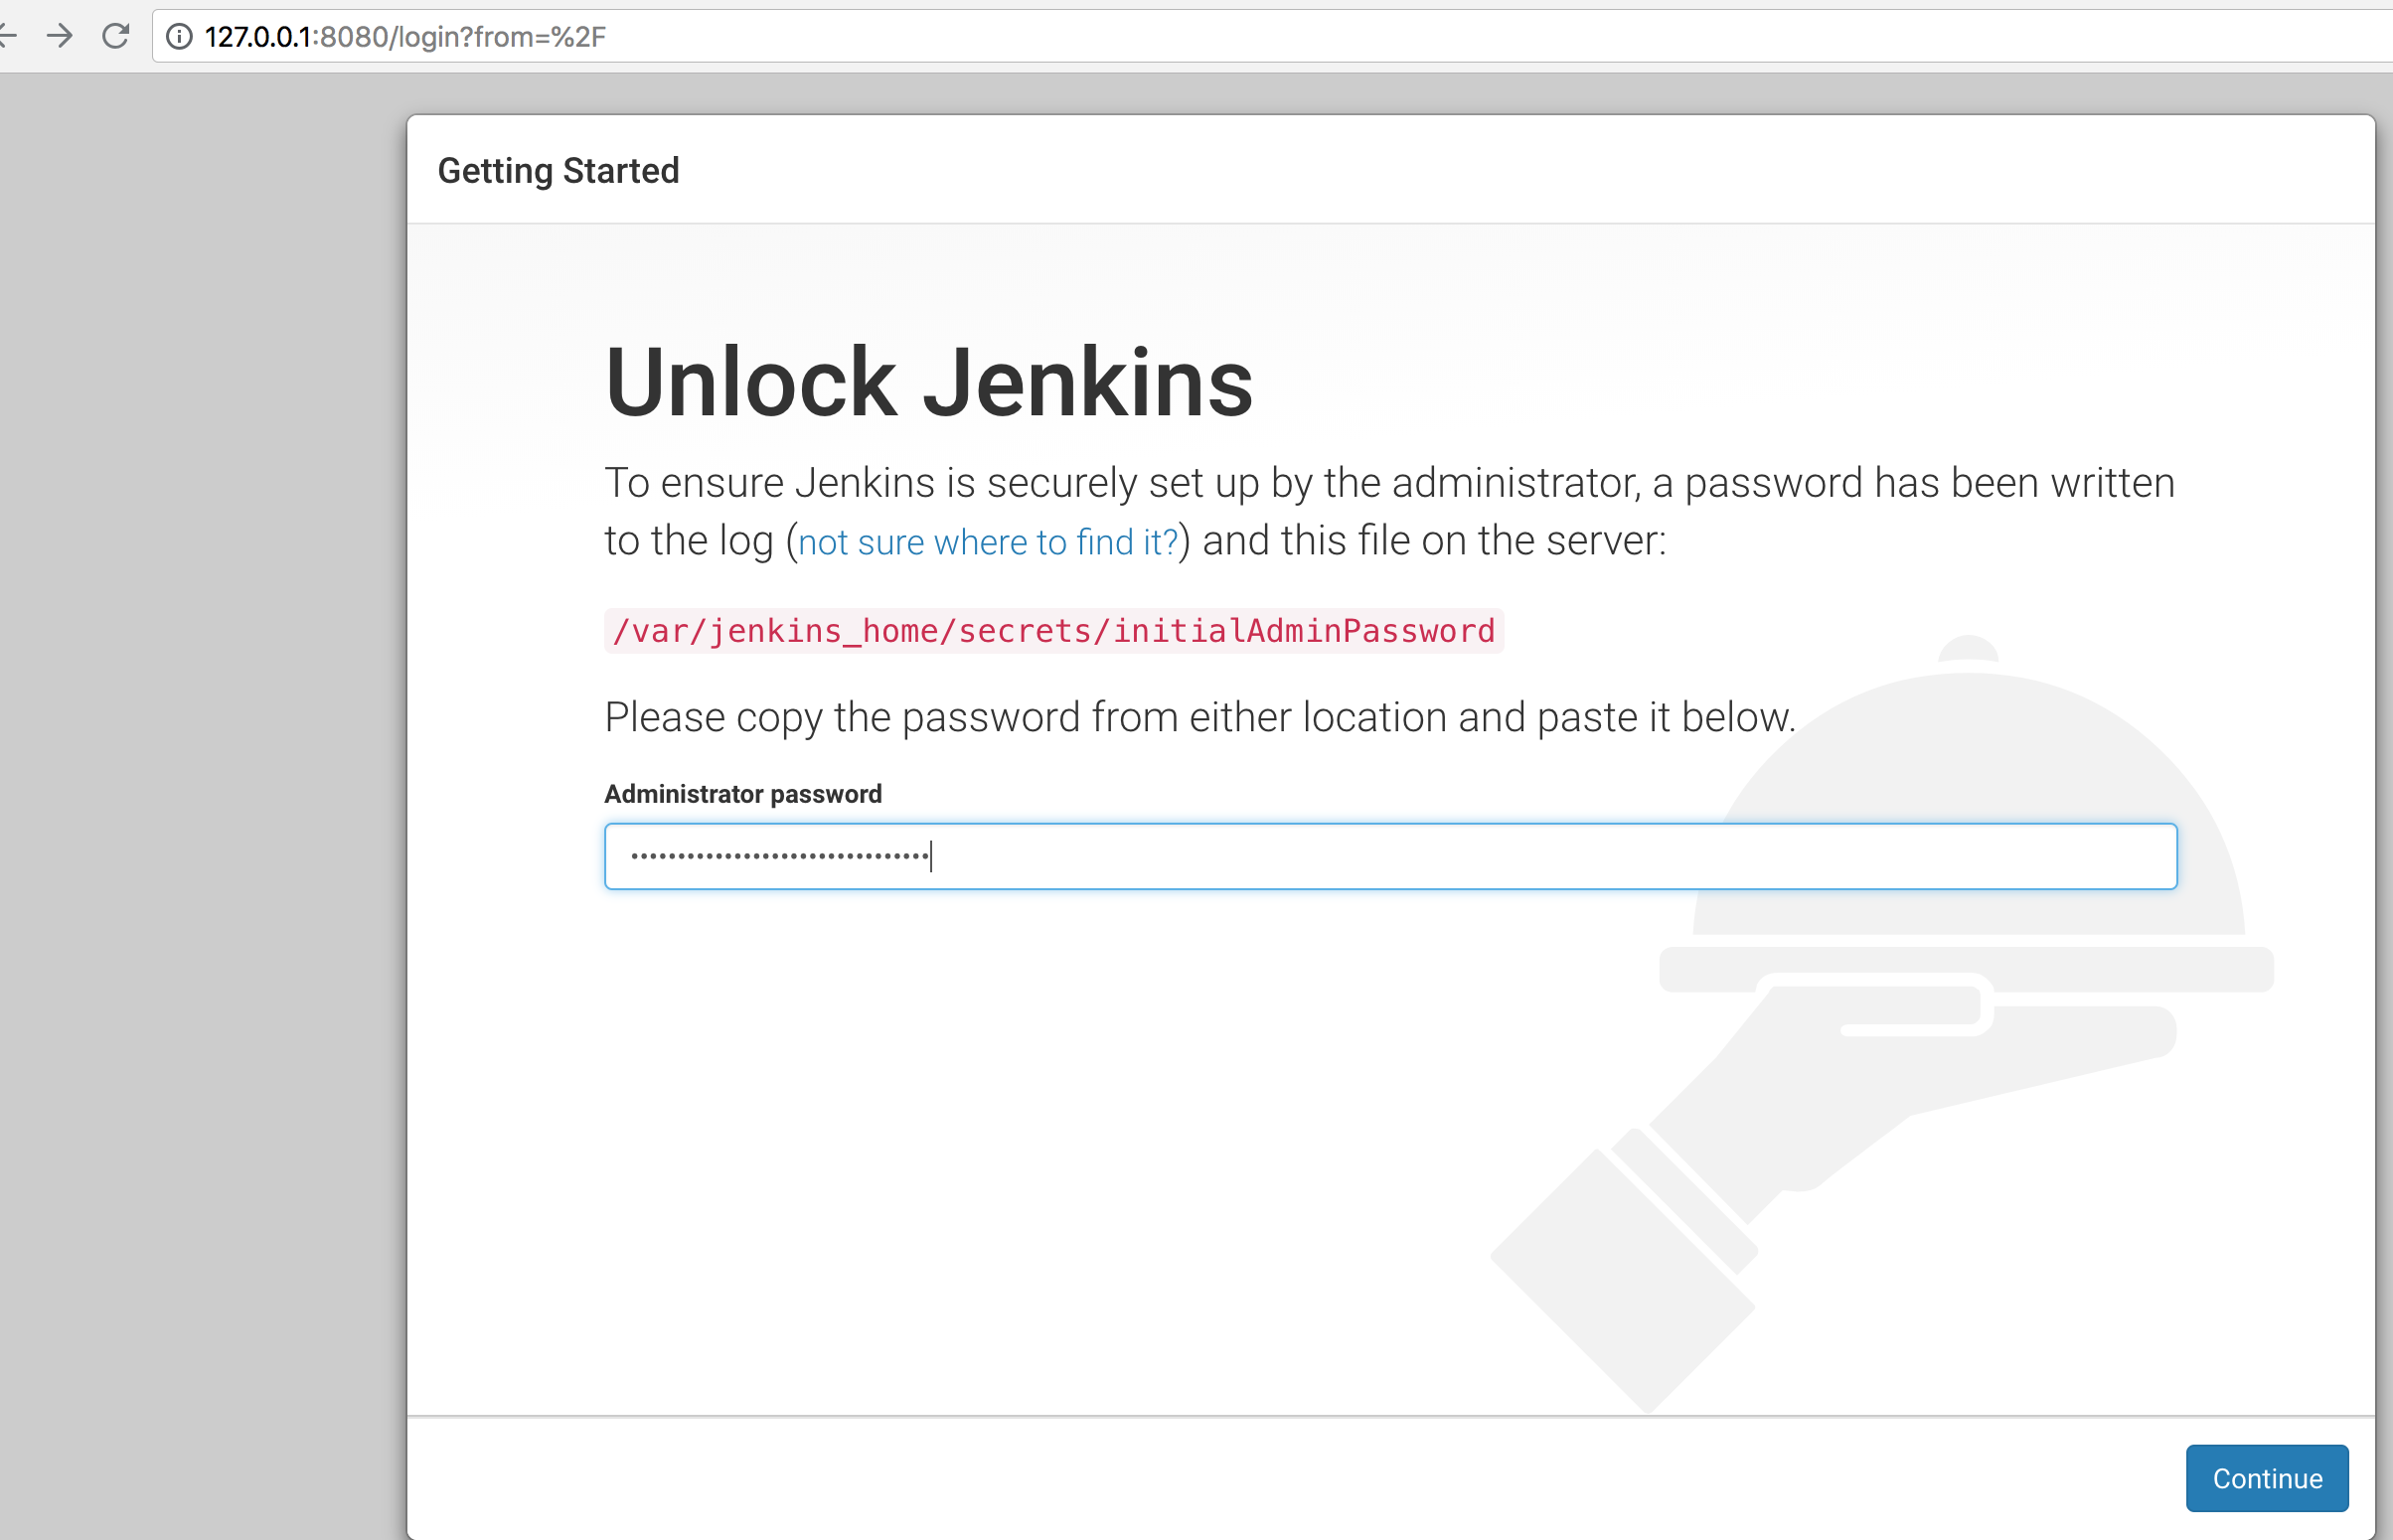
Jenkins initial setup is required. An admin user has been created and a password generated.
Please use the following password to proceed to installation:
XXXXXXXXX
This may also be found at: /var/jenkins_home/secrets/initialAdminPassword
*************************************************************
*************************************************************
*************************************************************
We copy the code XXXXXXXXX from the logs into the browser input field.
If the output from Docker is currently unavailable, it can be viewed by using
docker logs <containerid_jenkins> --tail 30
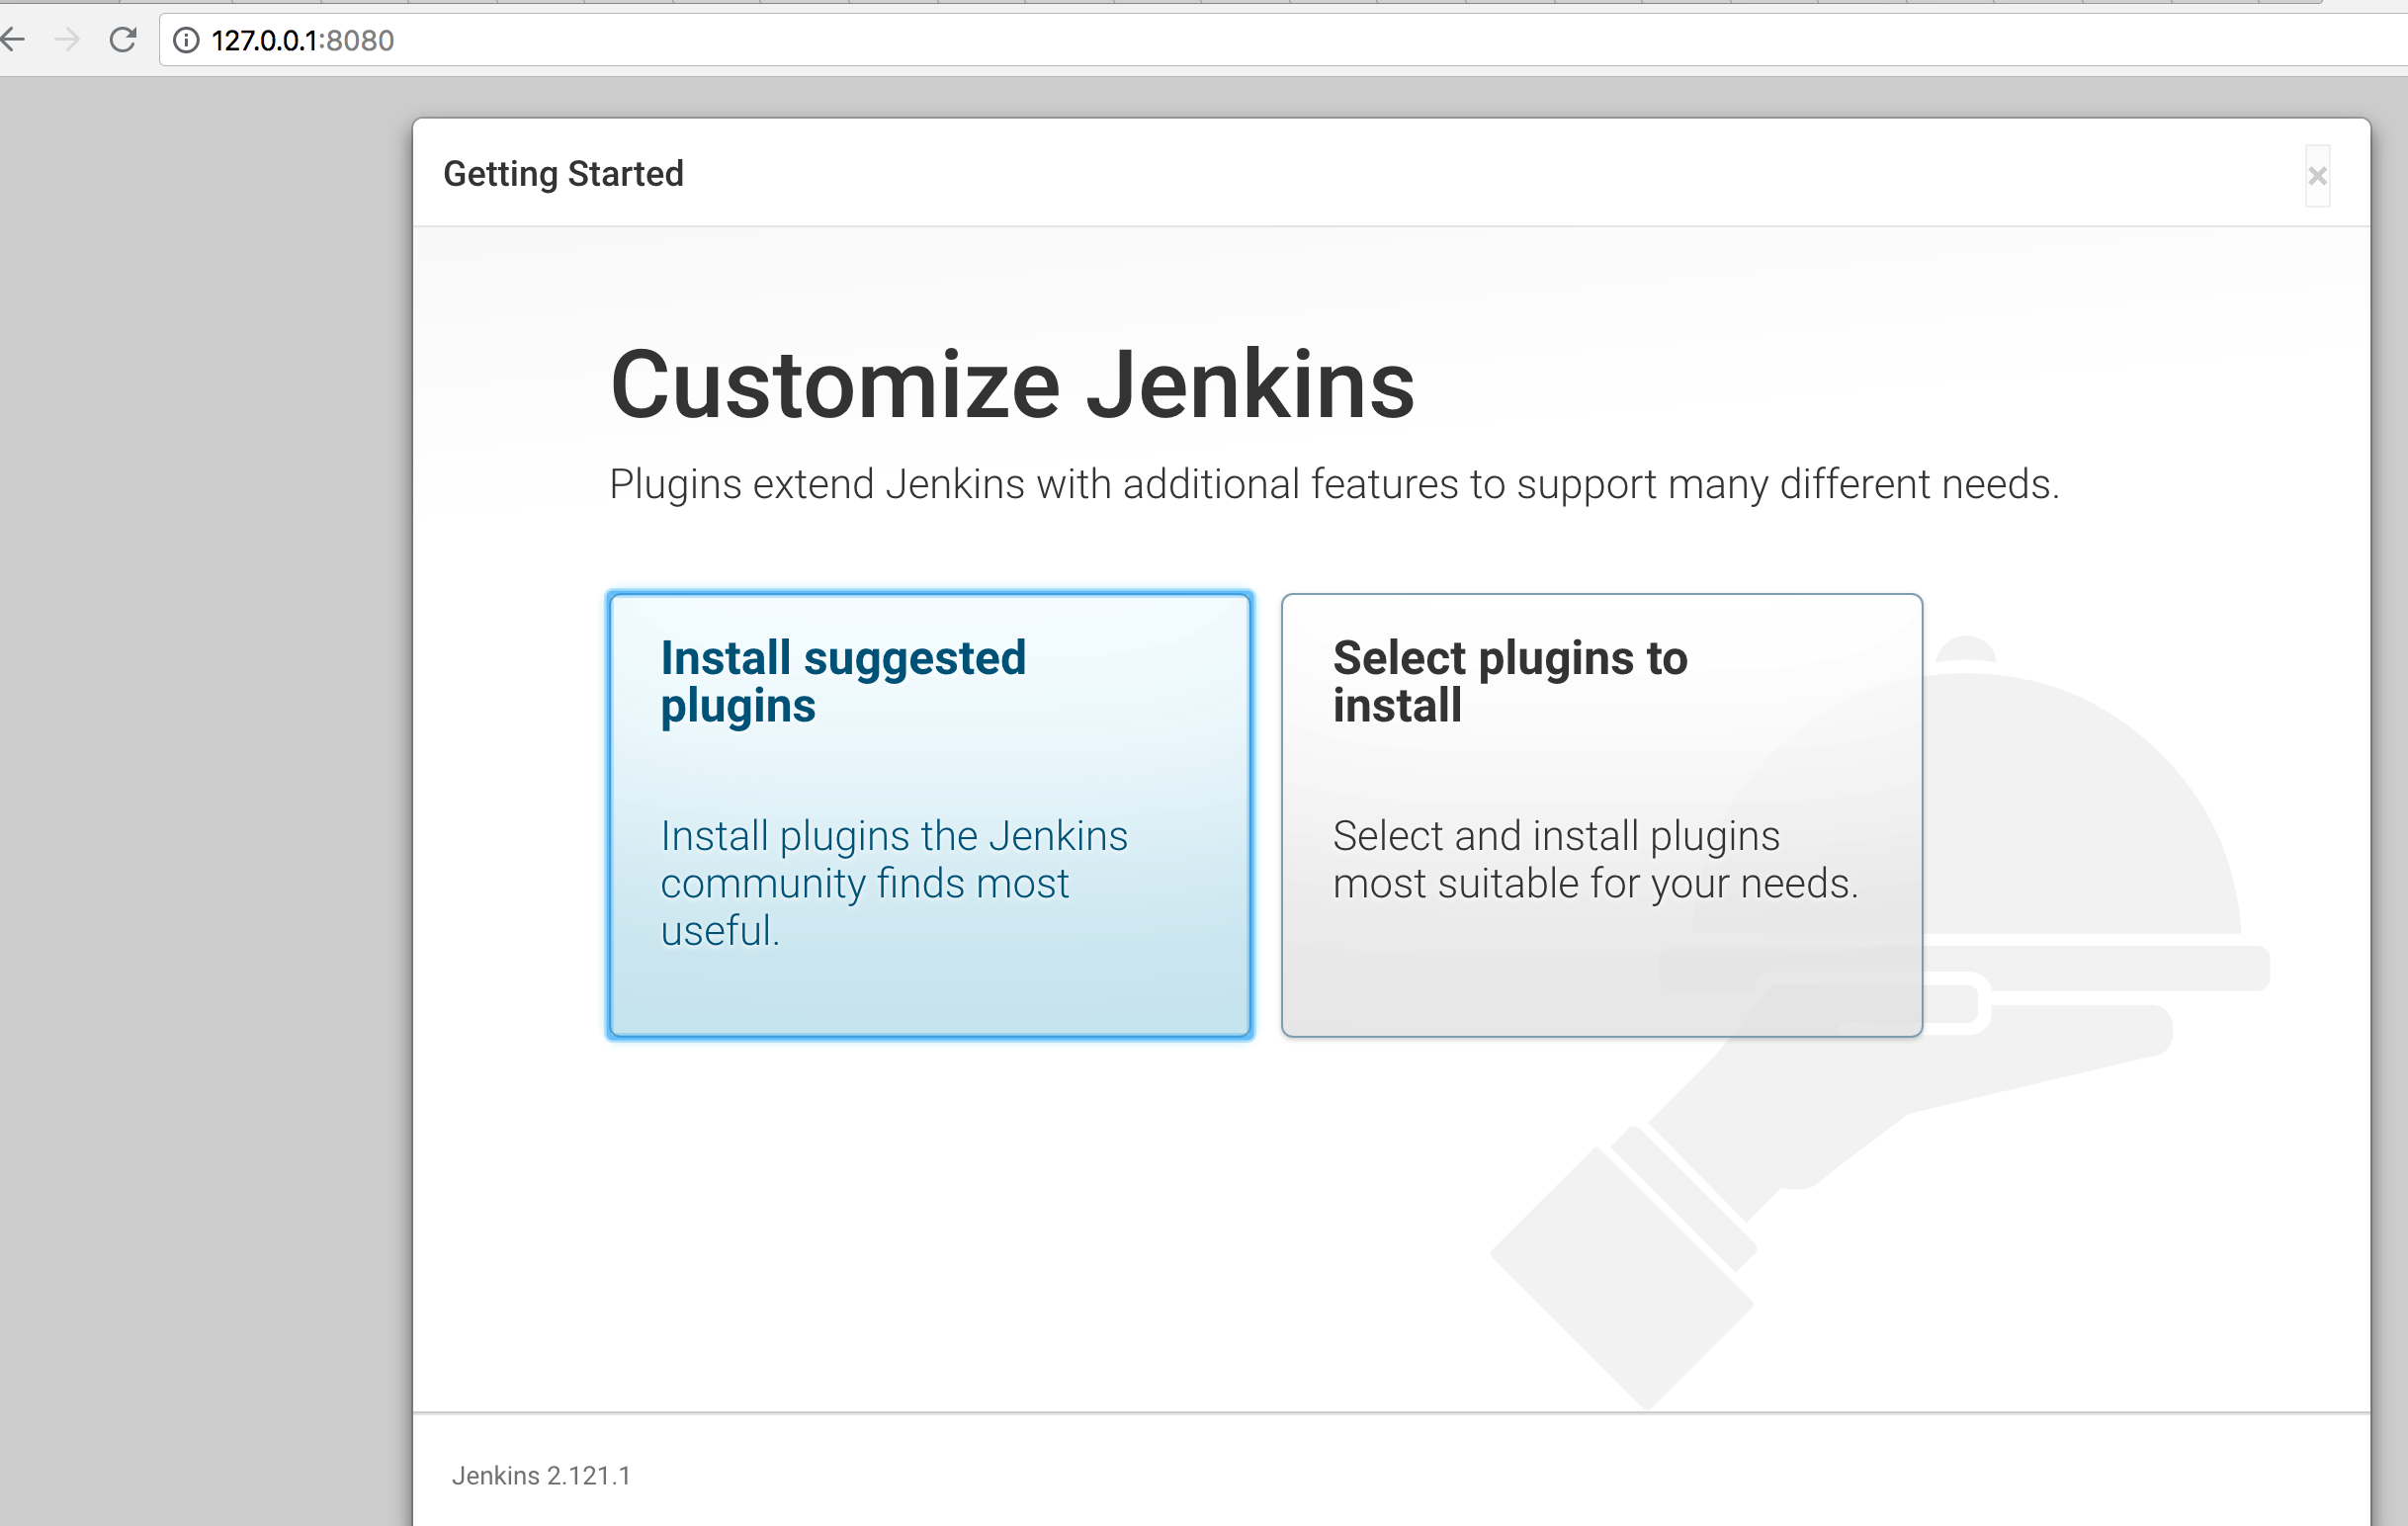
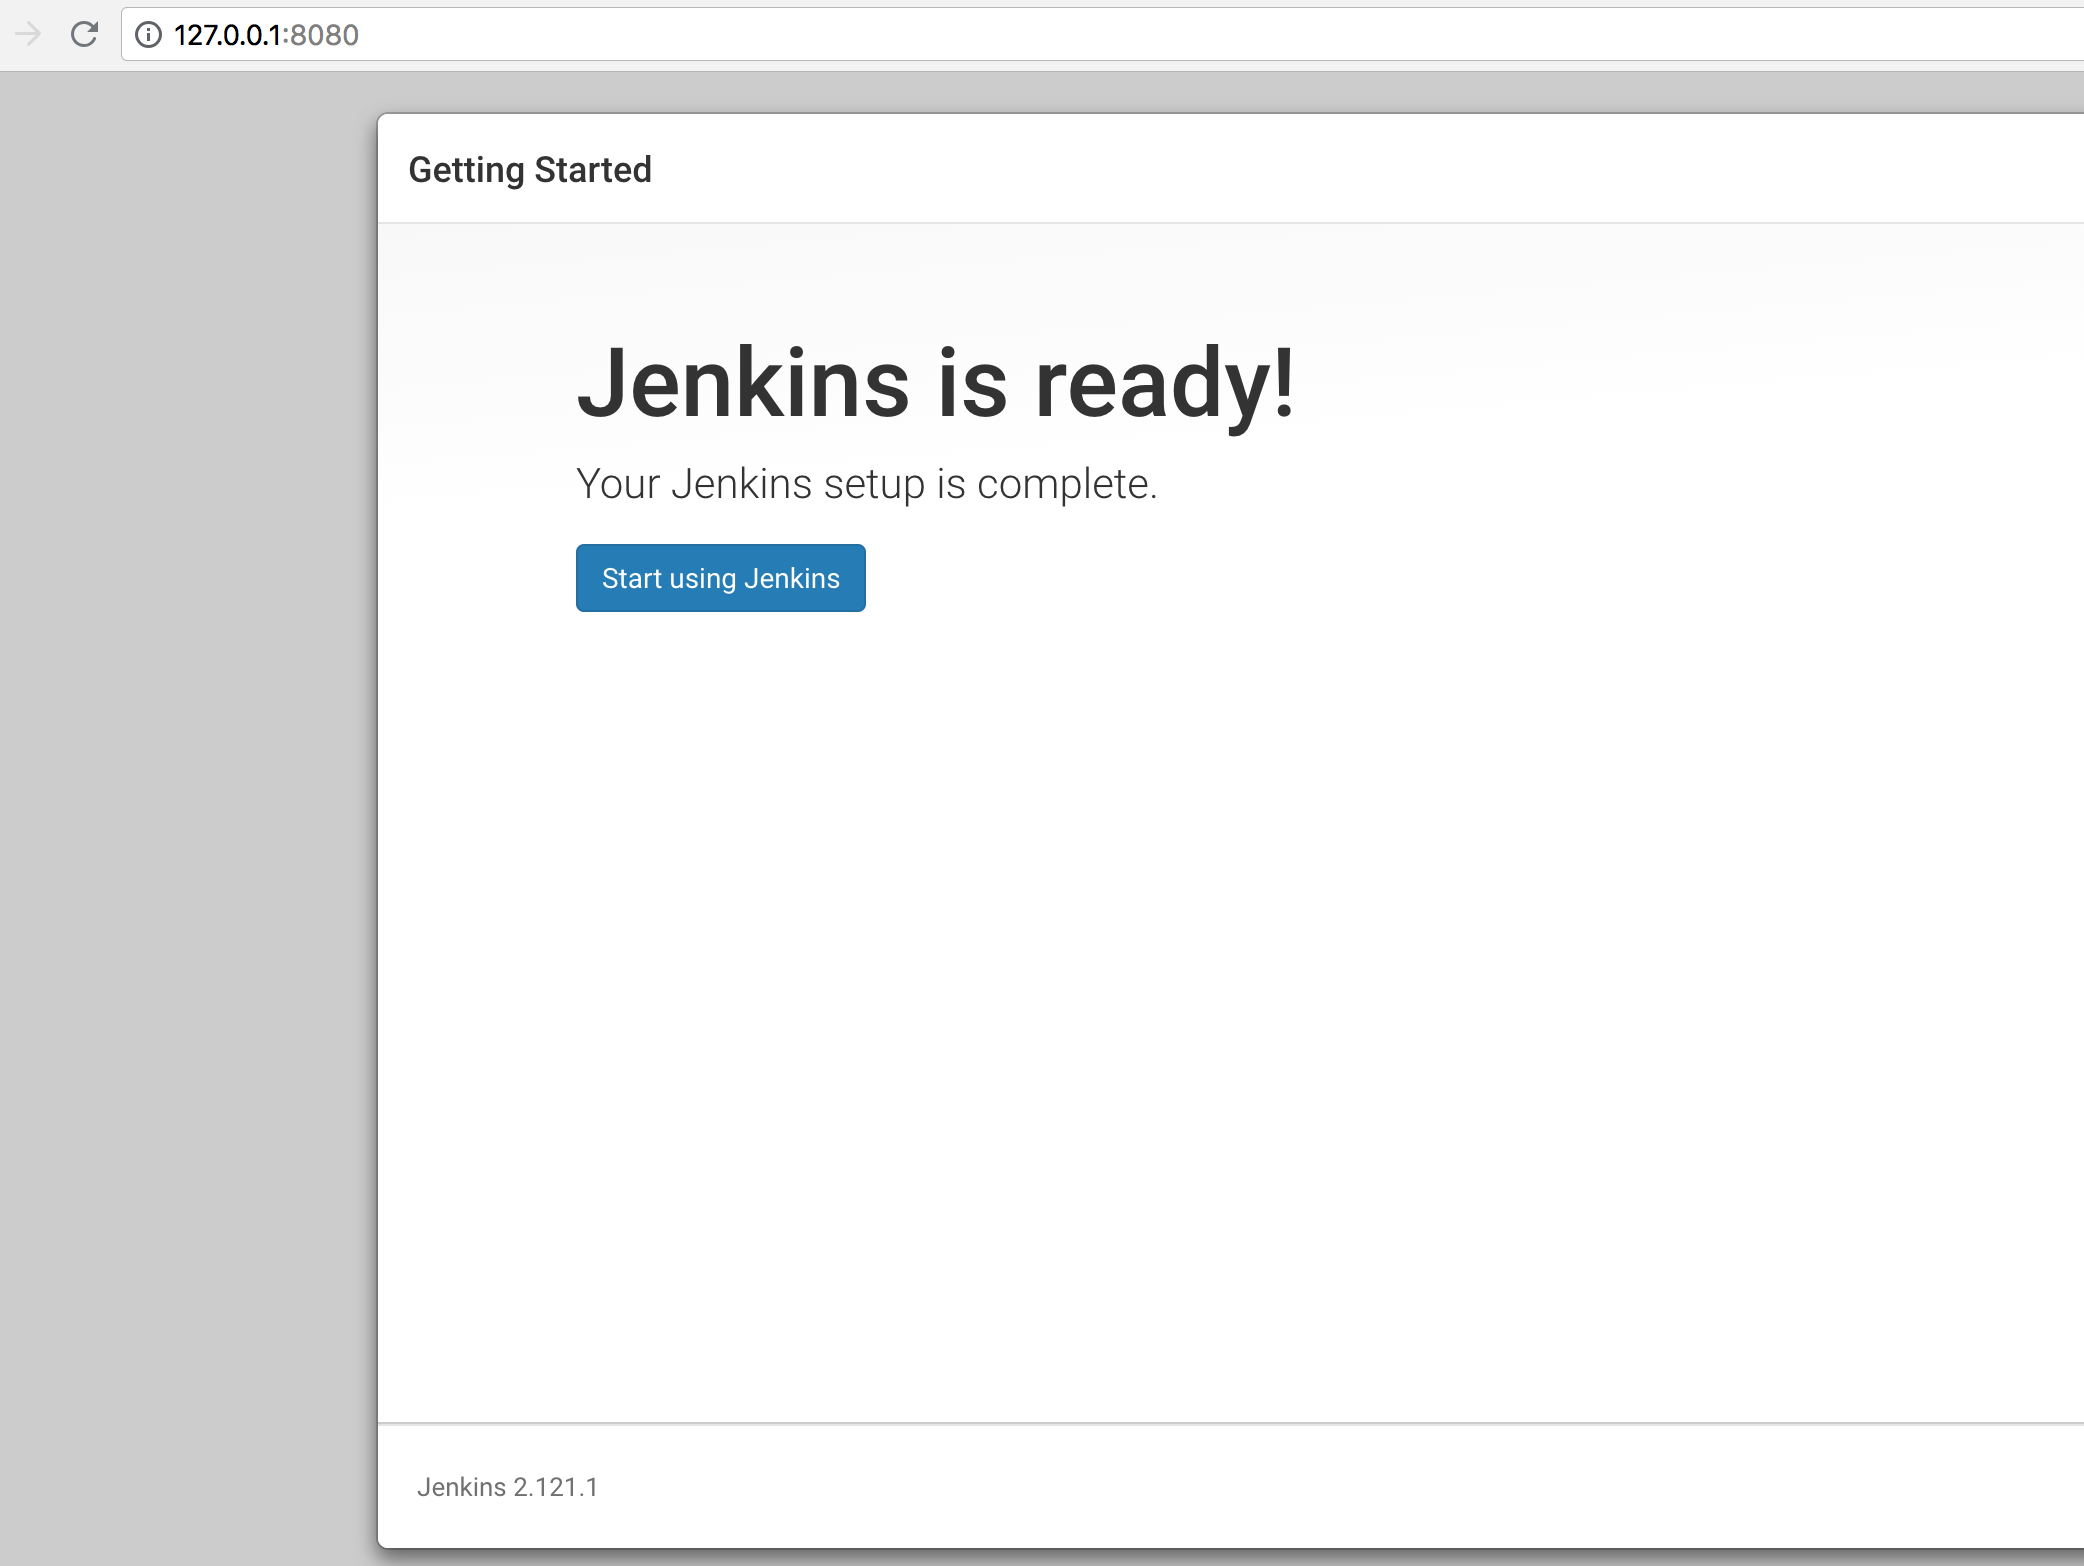
Next we click on ‘Continue’
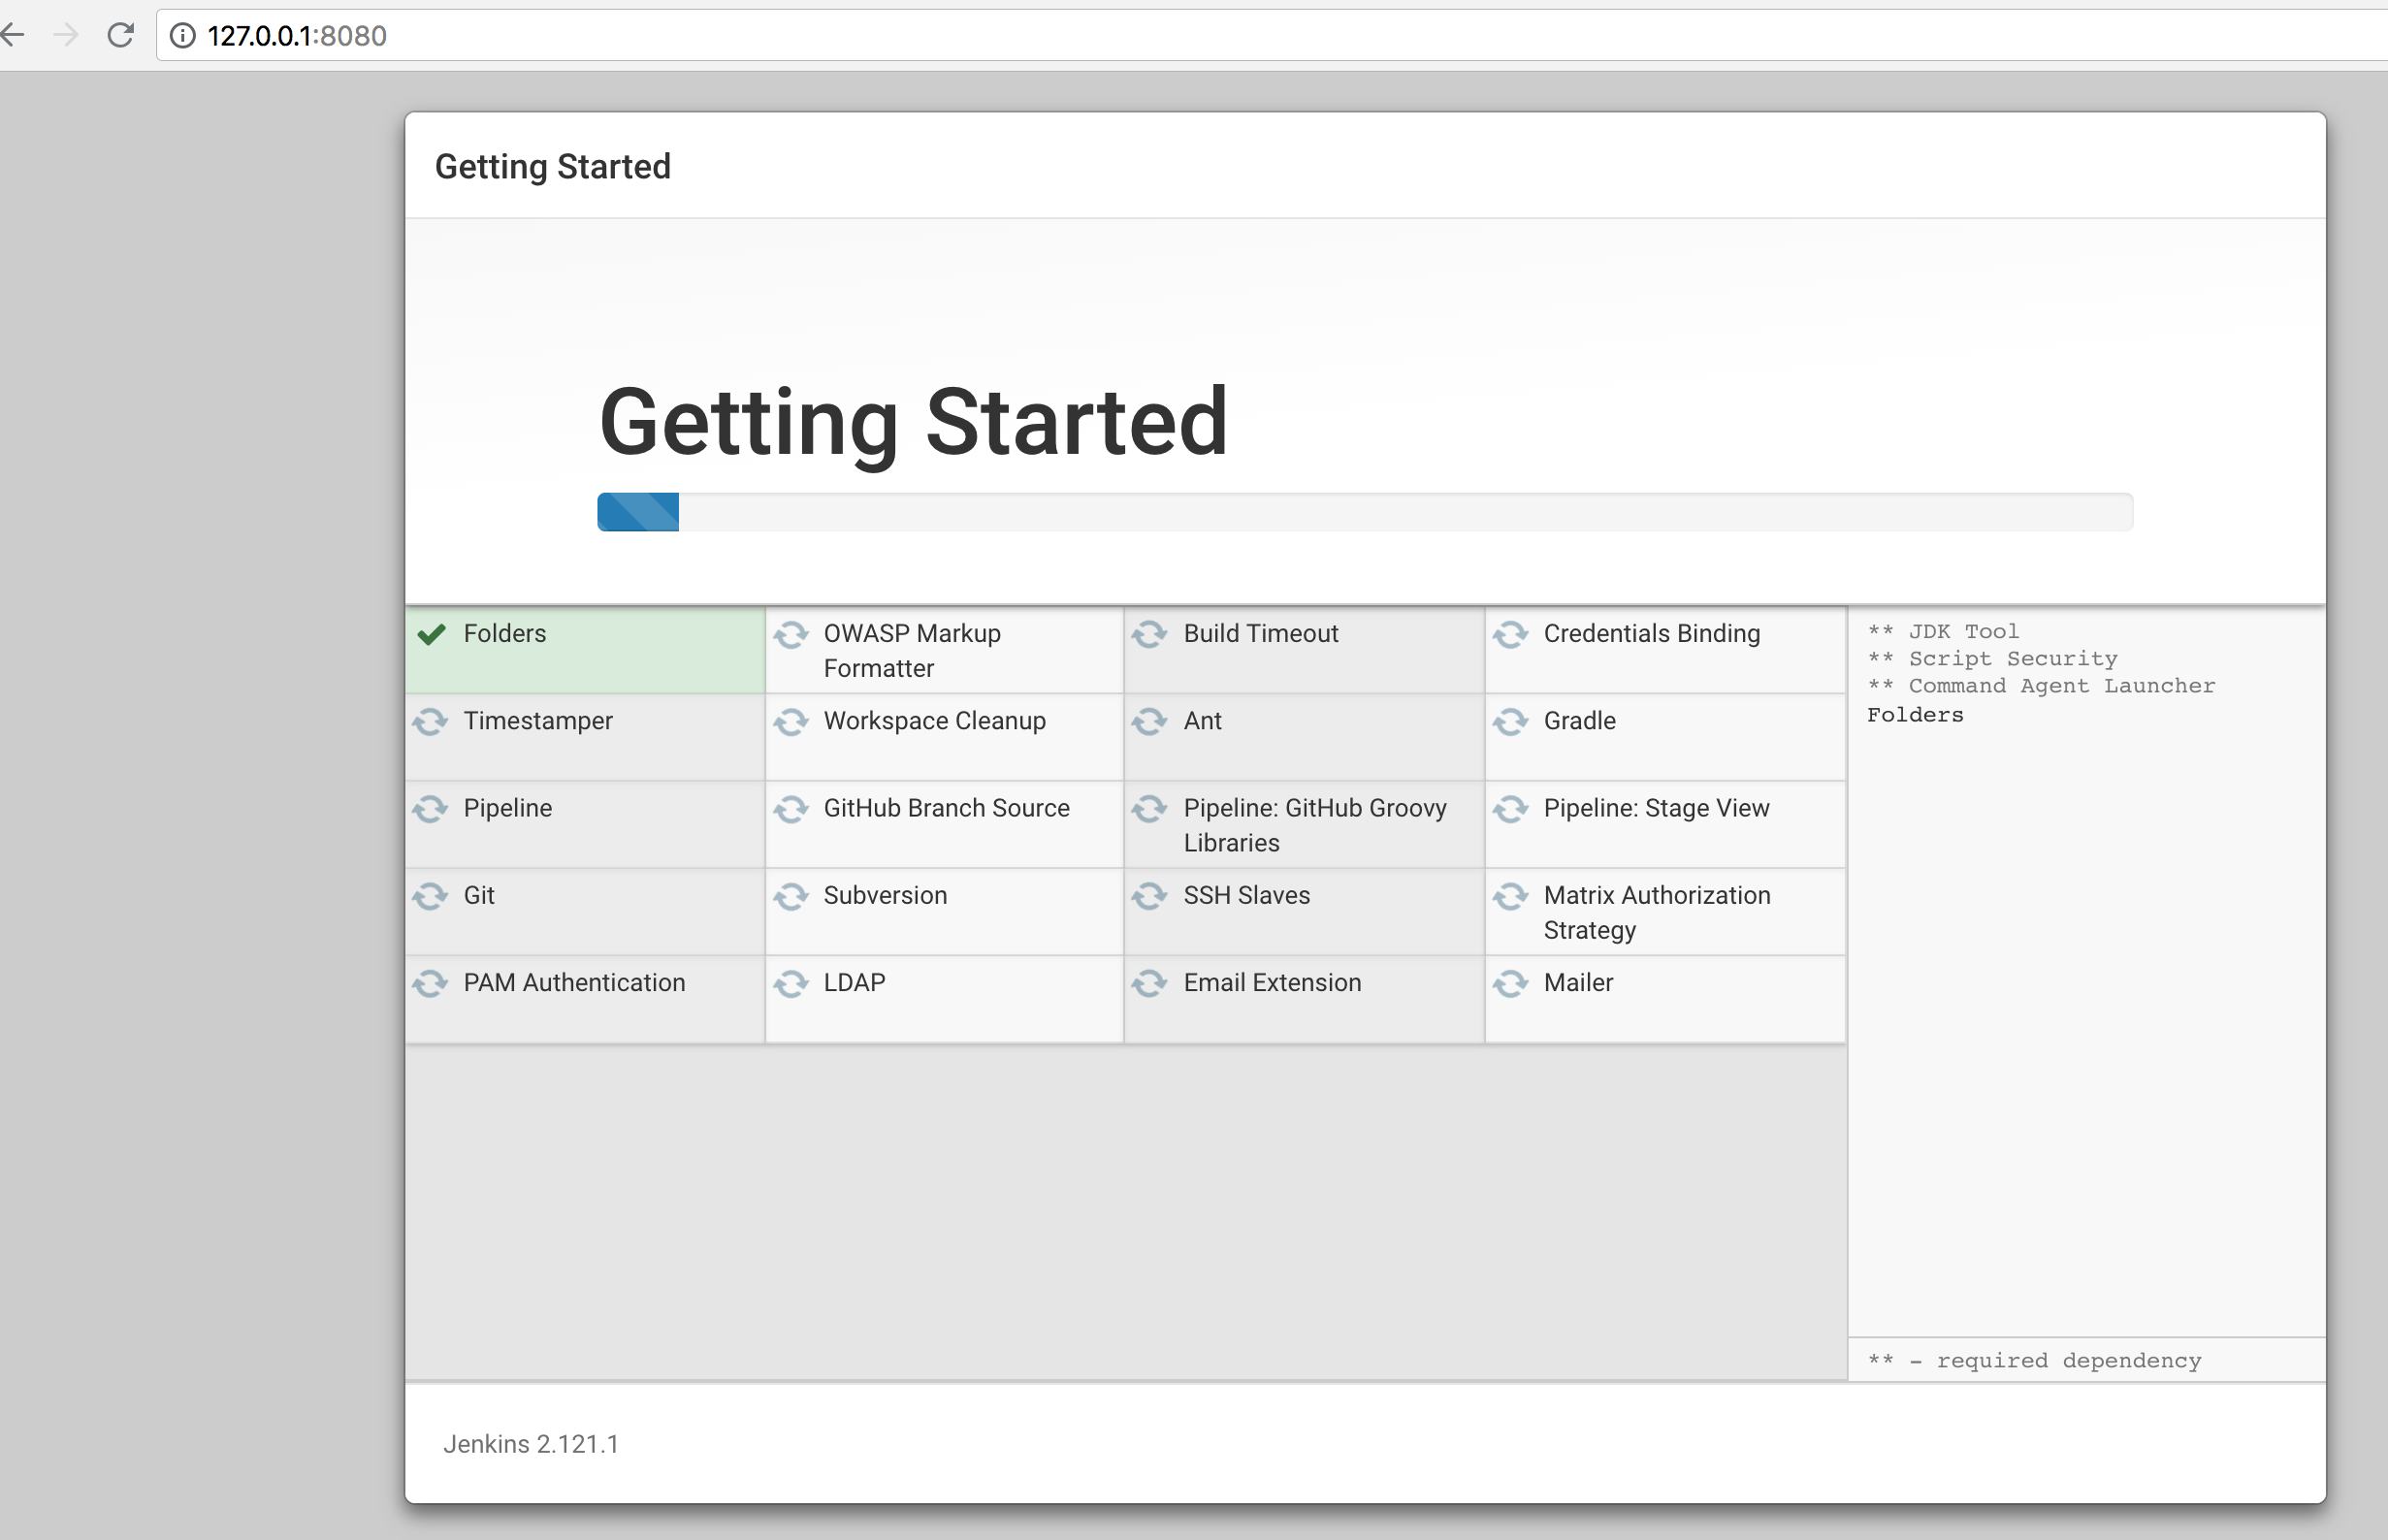
and on ‘Install suggested plugins’:
In the following form we enter a name, password and e-mail and remember this data:
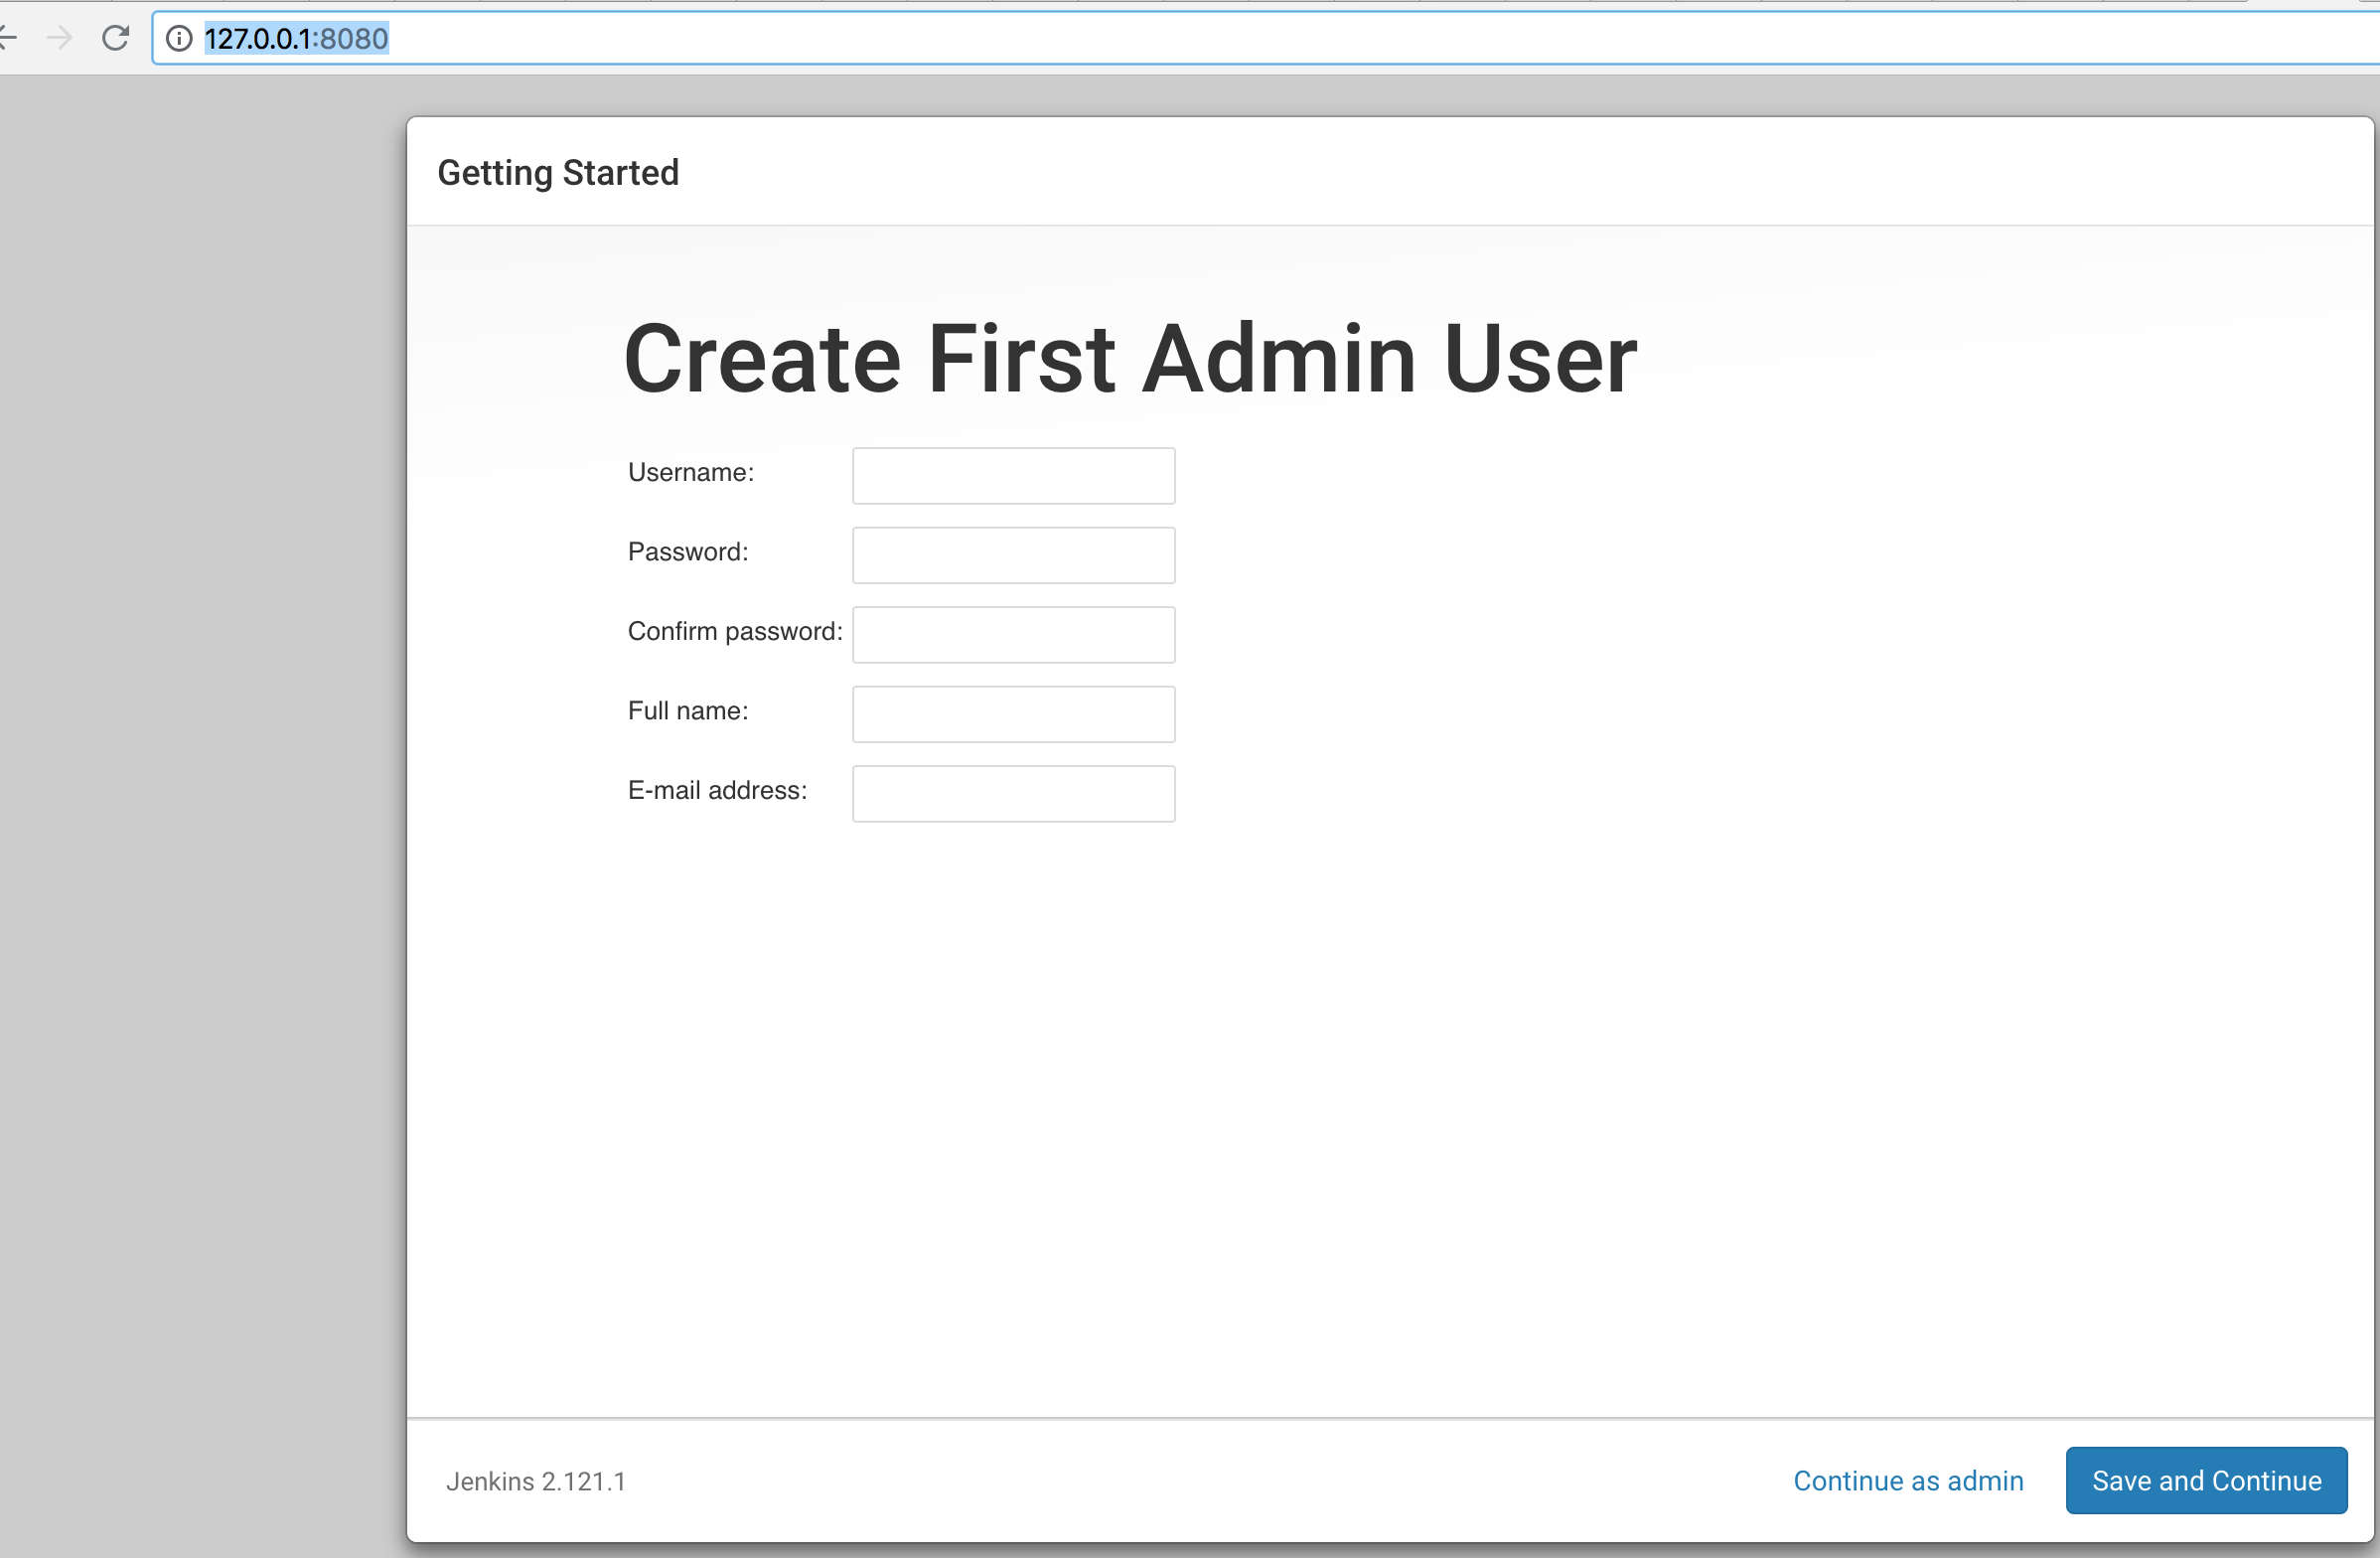
So, for example:
| Username | Password | Full name | |
|---|---|---|---|
| secf00tprint | e.g. by using pwgen -ync 40 one the command line* |
secf00tprint | youraccount@yourdomain.tld |
* pwgen can be installed by entering
brew install pwgen
Click on ‘Save and Continue’.
We set the Jenkins URL,

and lastly we save and finish.
Installing Dependency Check as a plugin
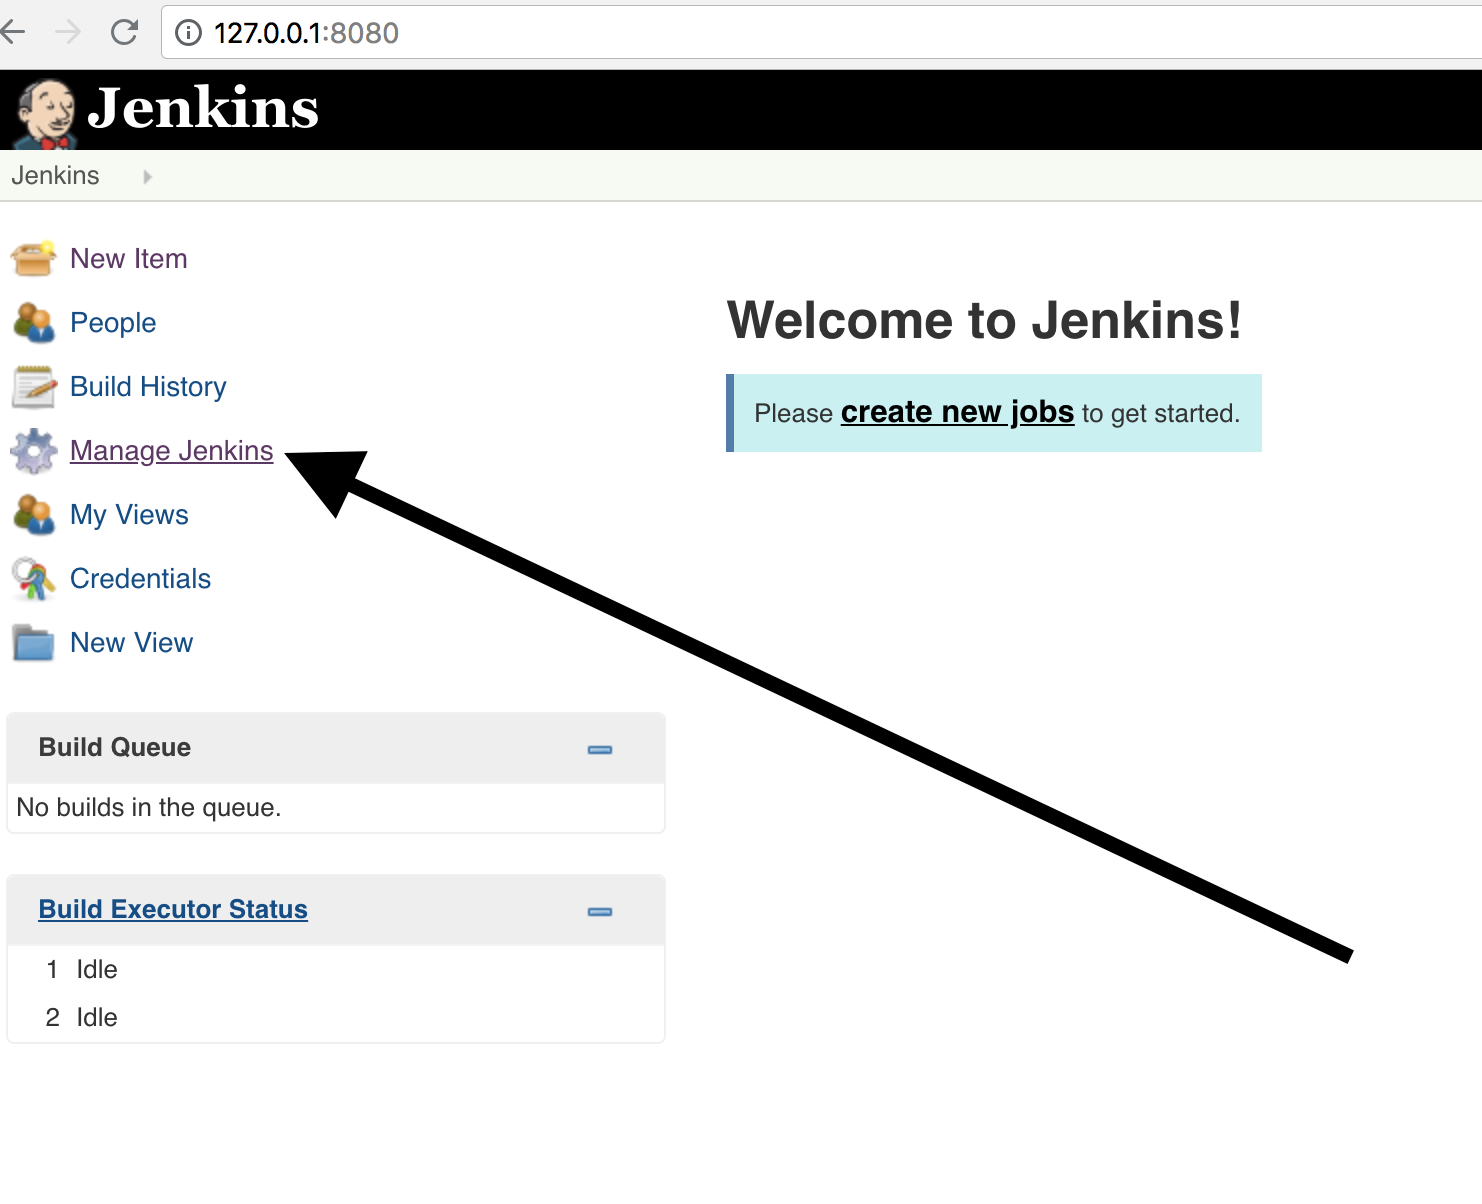
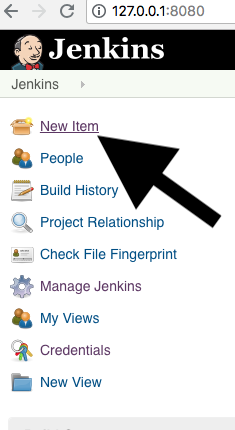
- First, we select ‘Manage Jenkins’:
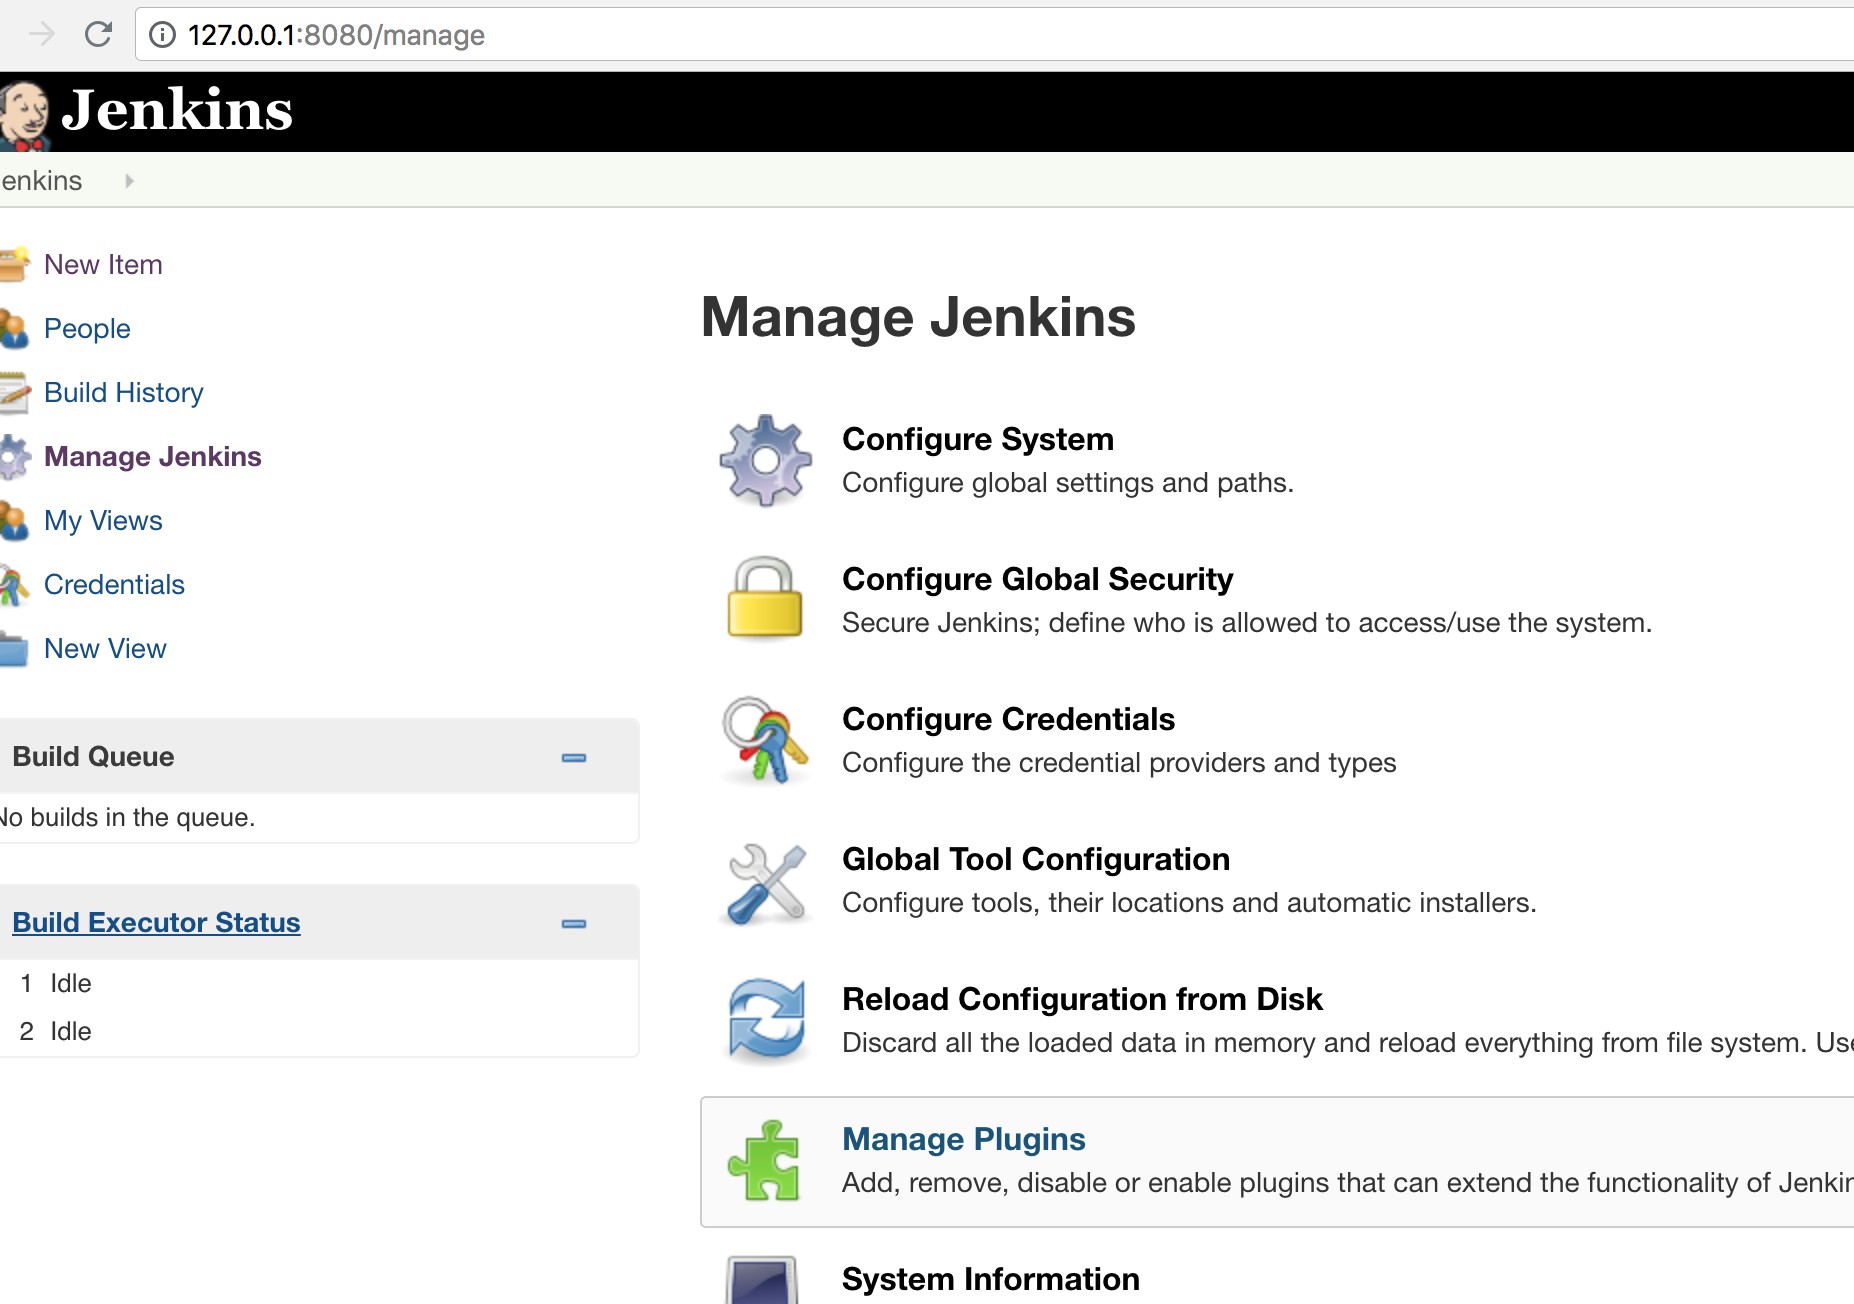
- Then ‘Manage Plugins’:
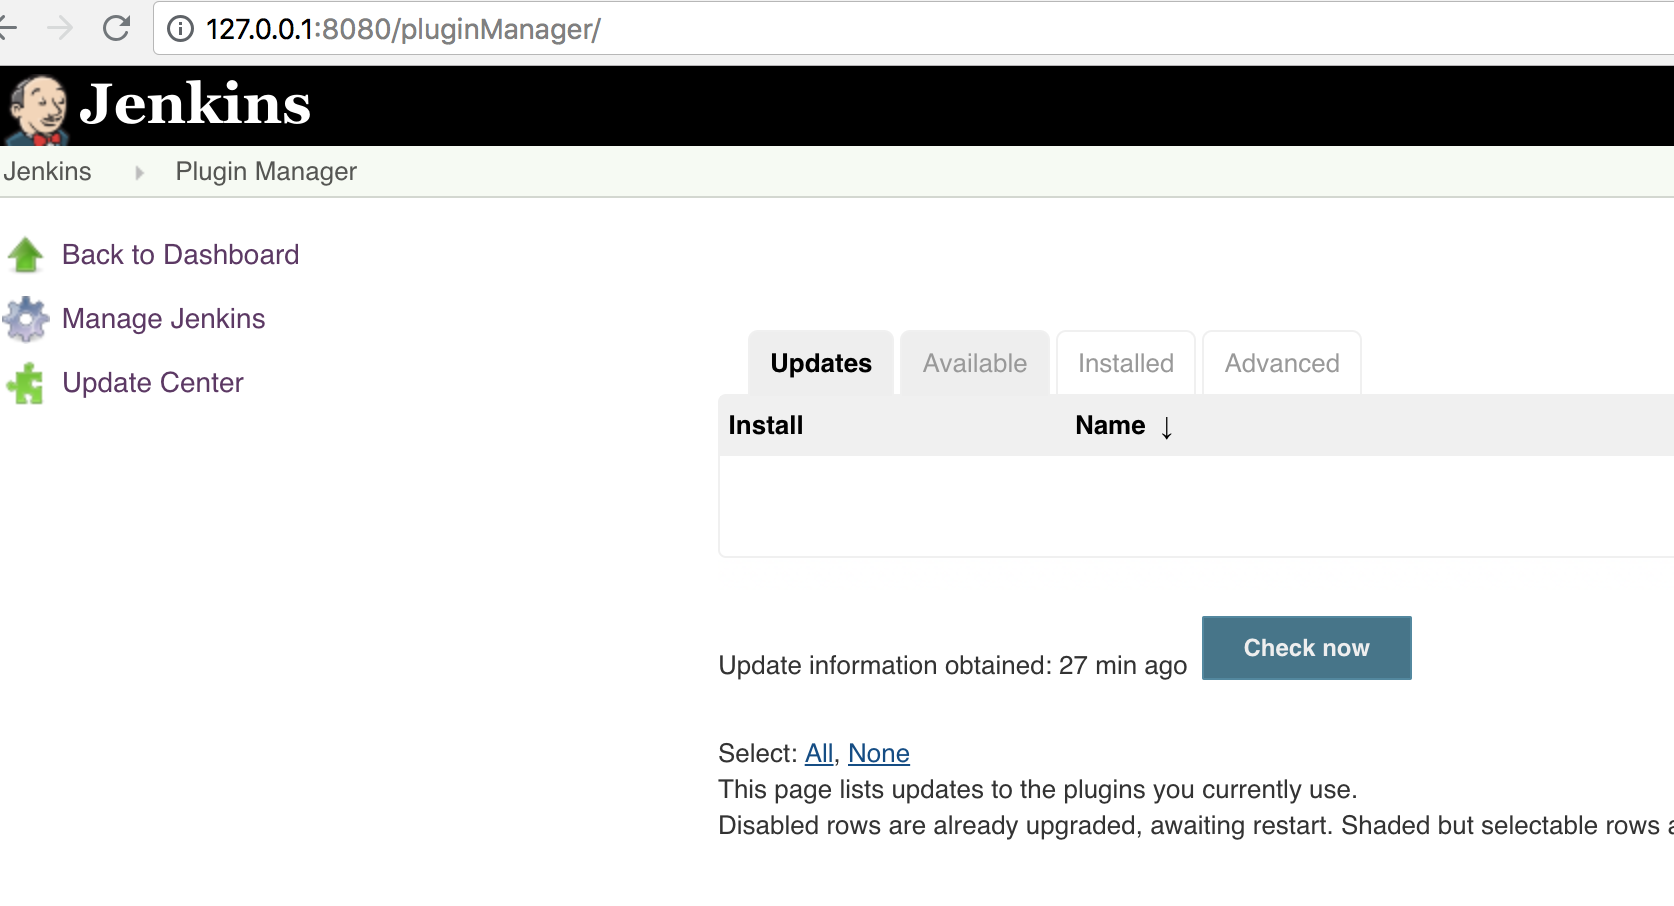
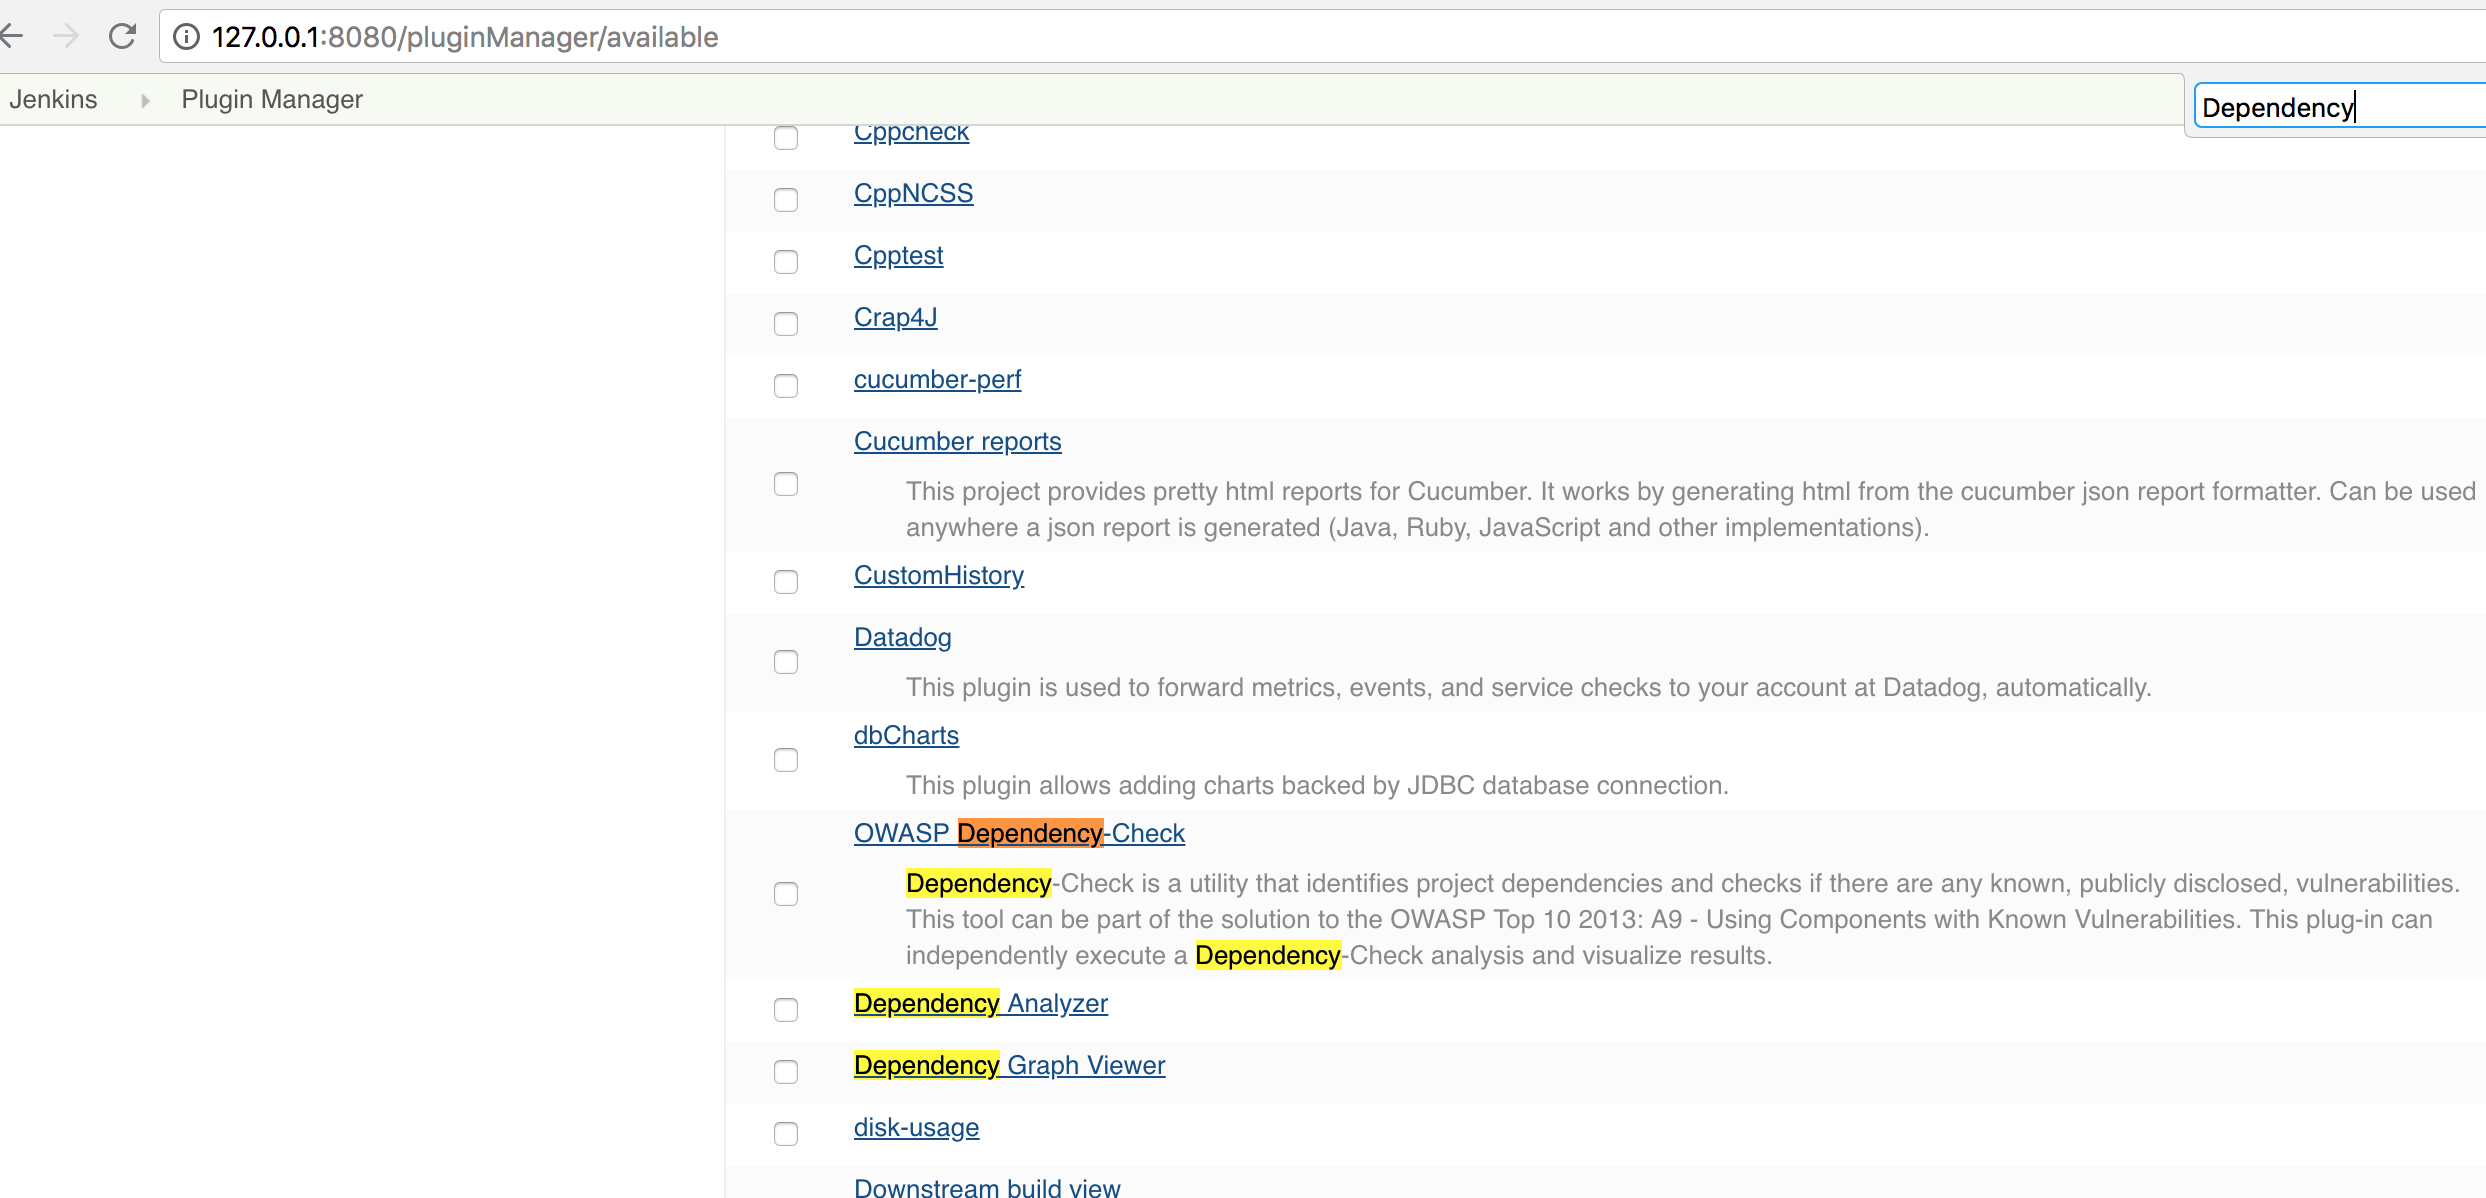
- ‘Available’ plugins:
- OWASP Dependency Check:
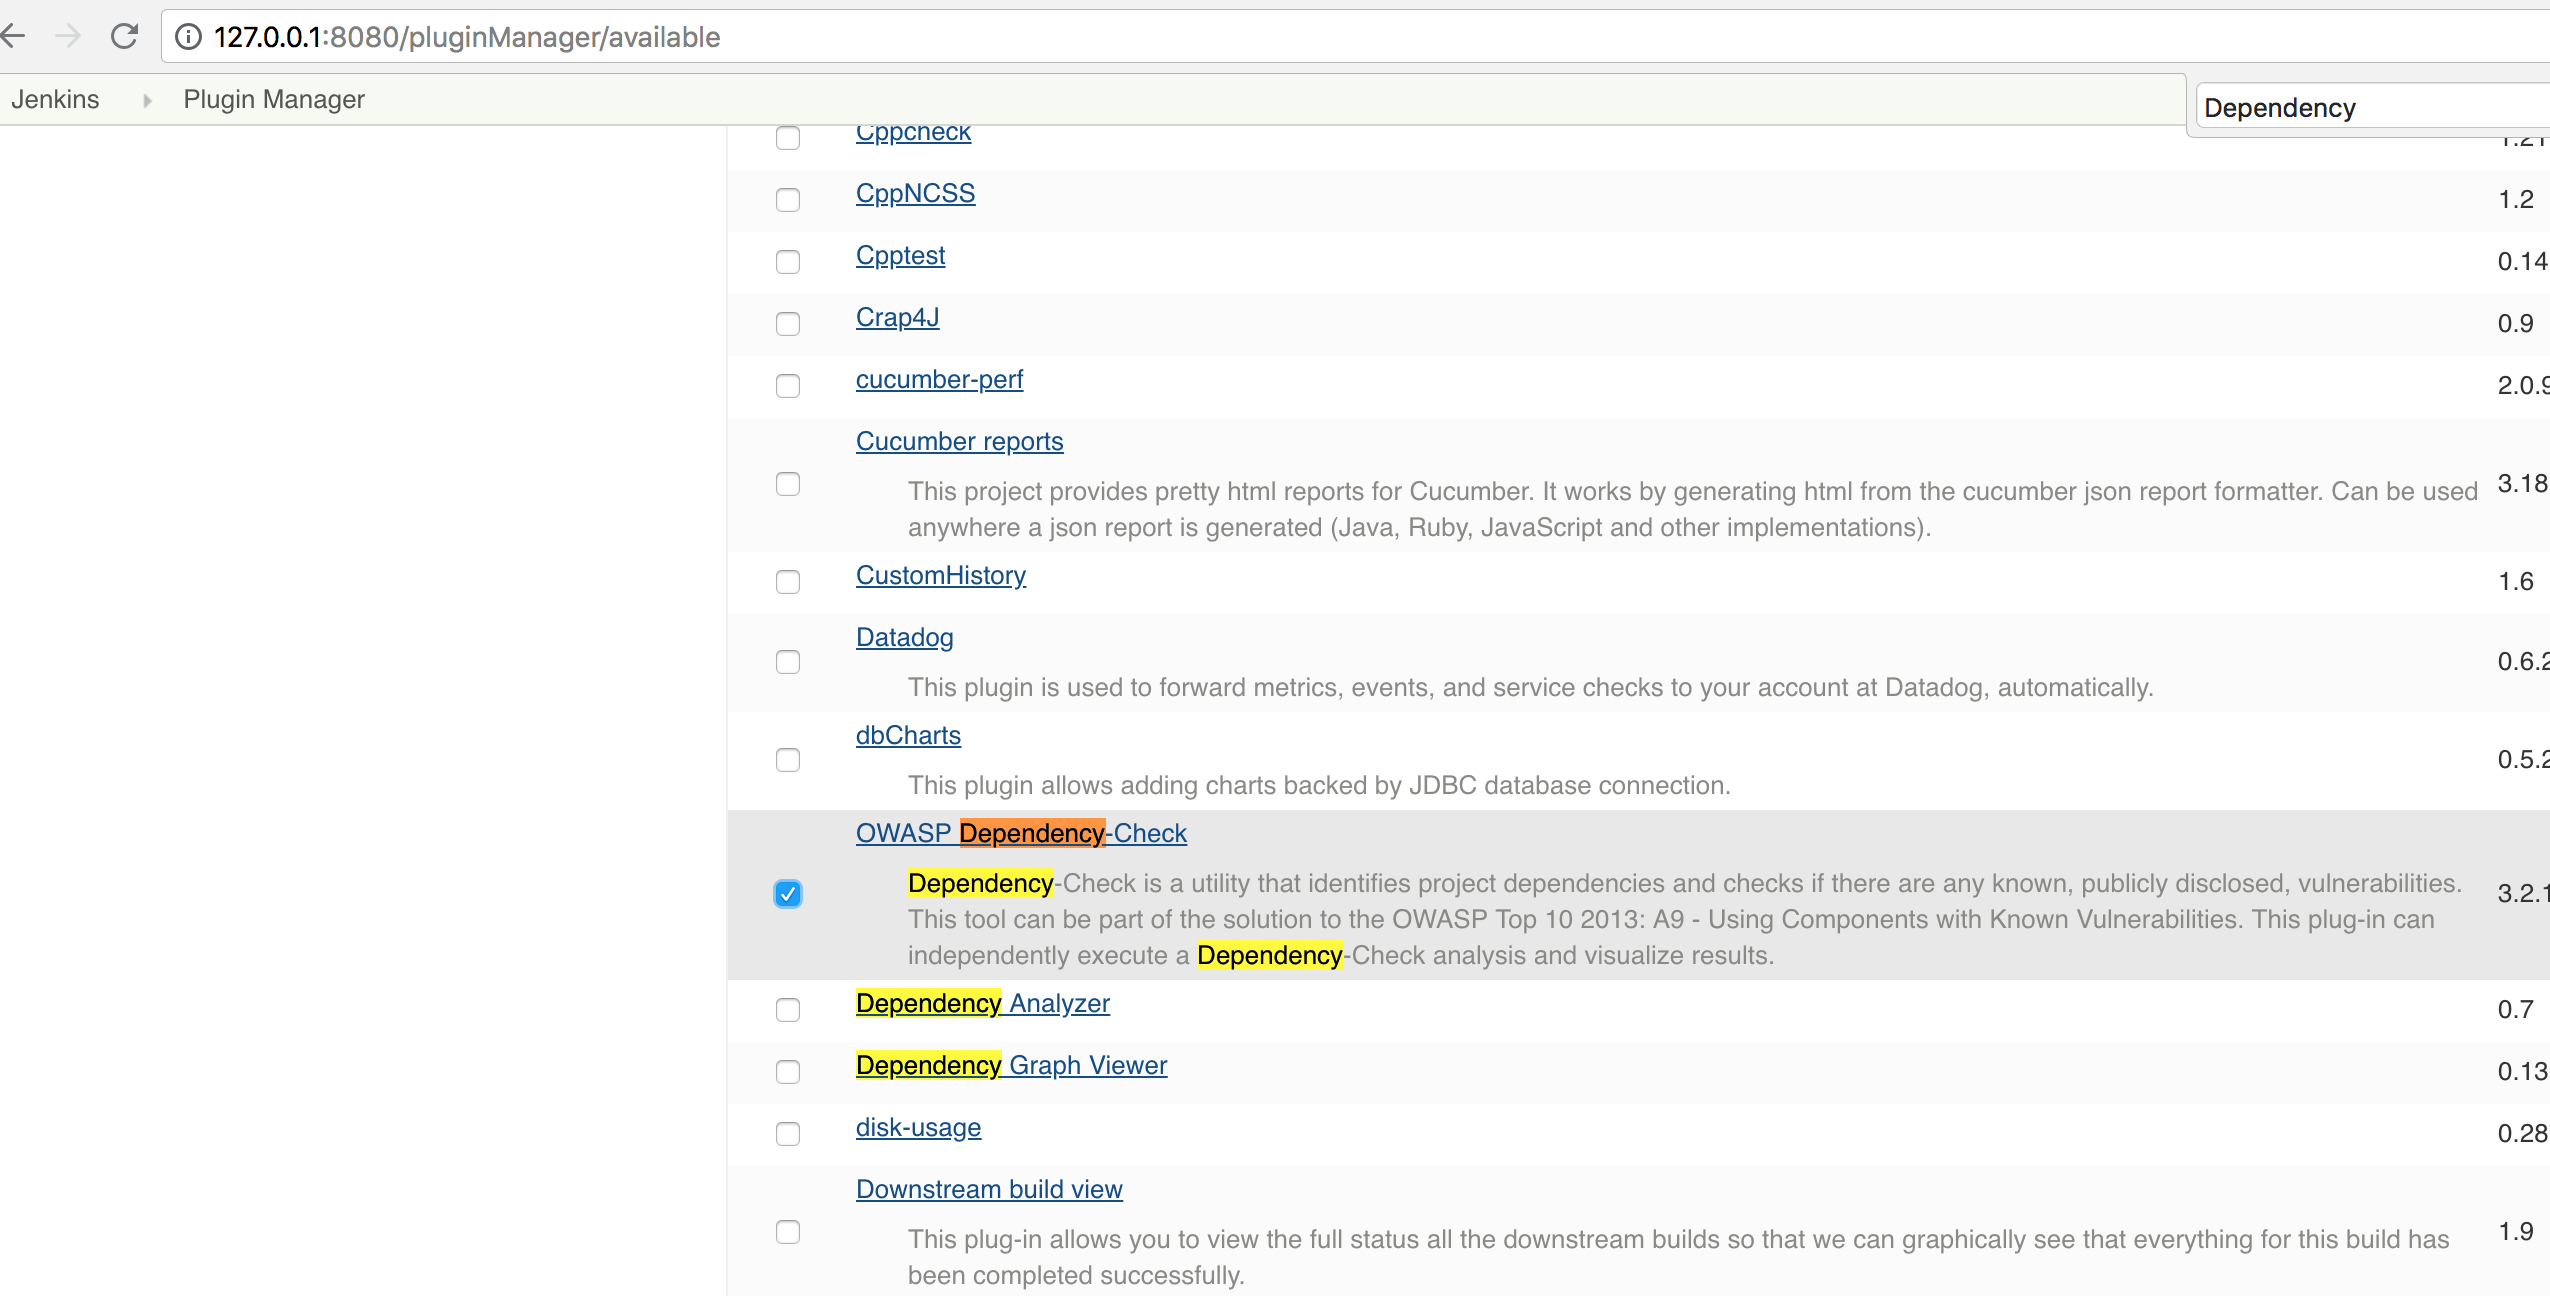
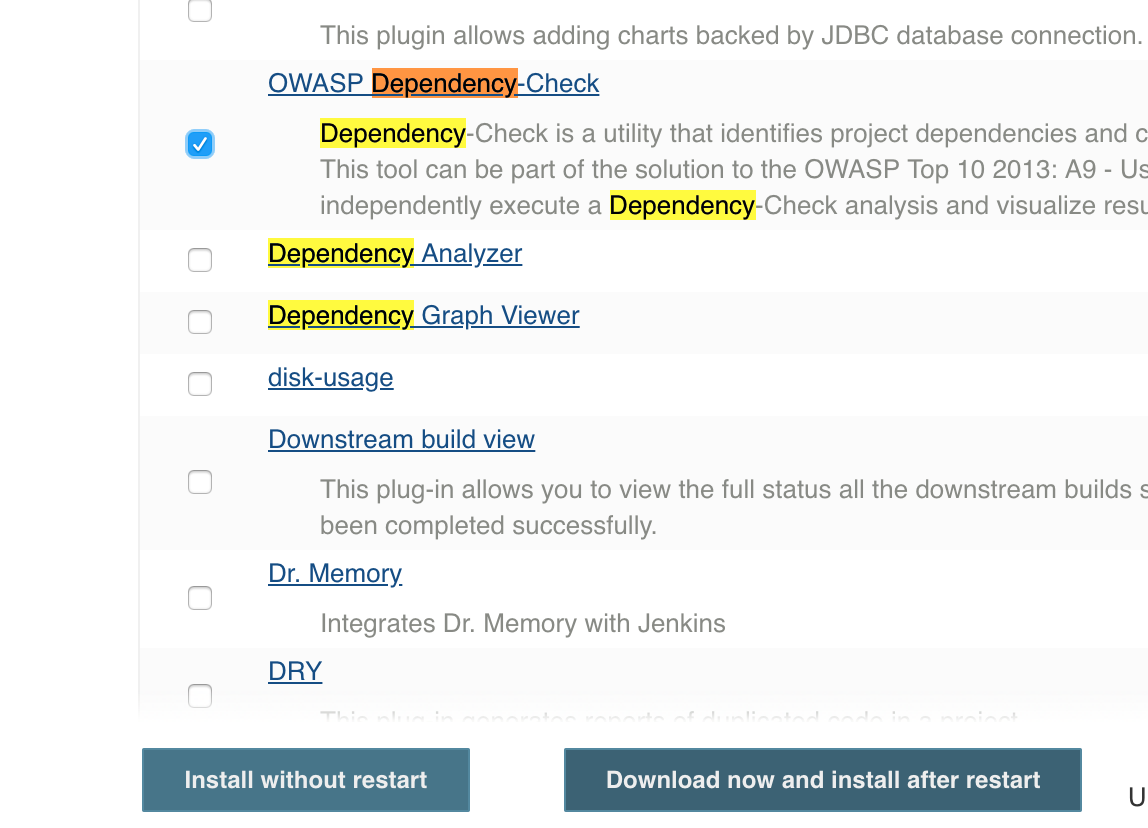
- We choose ‘Download now and install after restart’:
- We click on ‘Restart Jenkins when installation is complete’
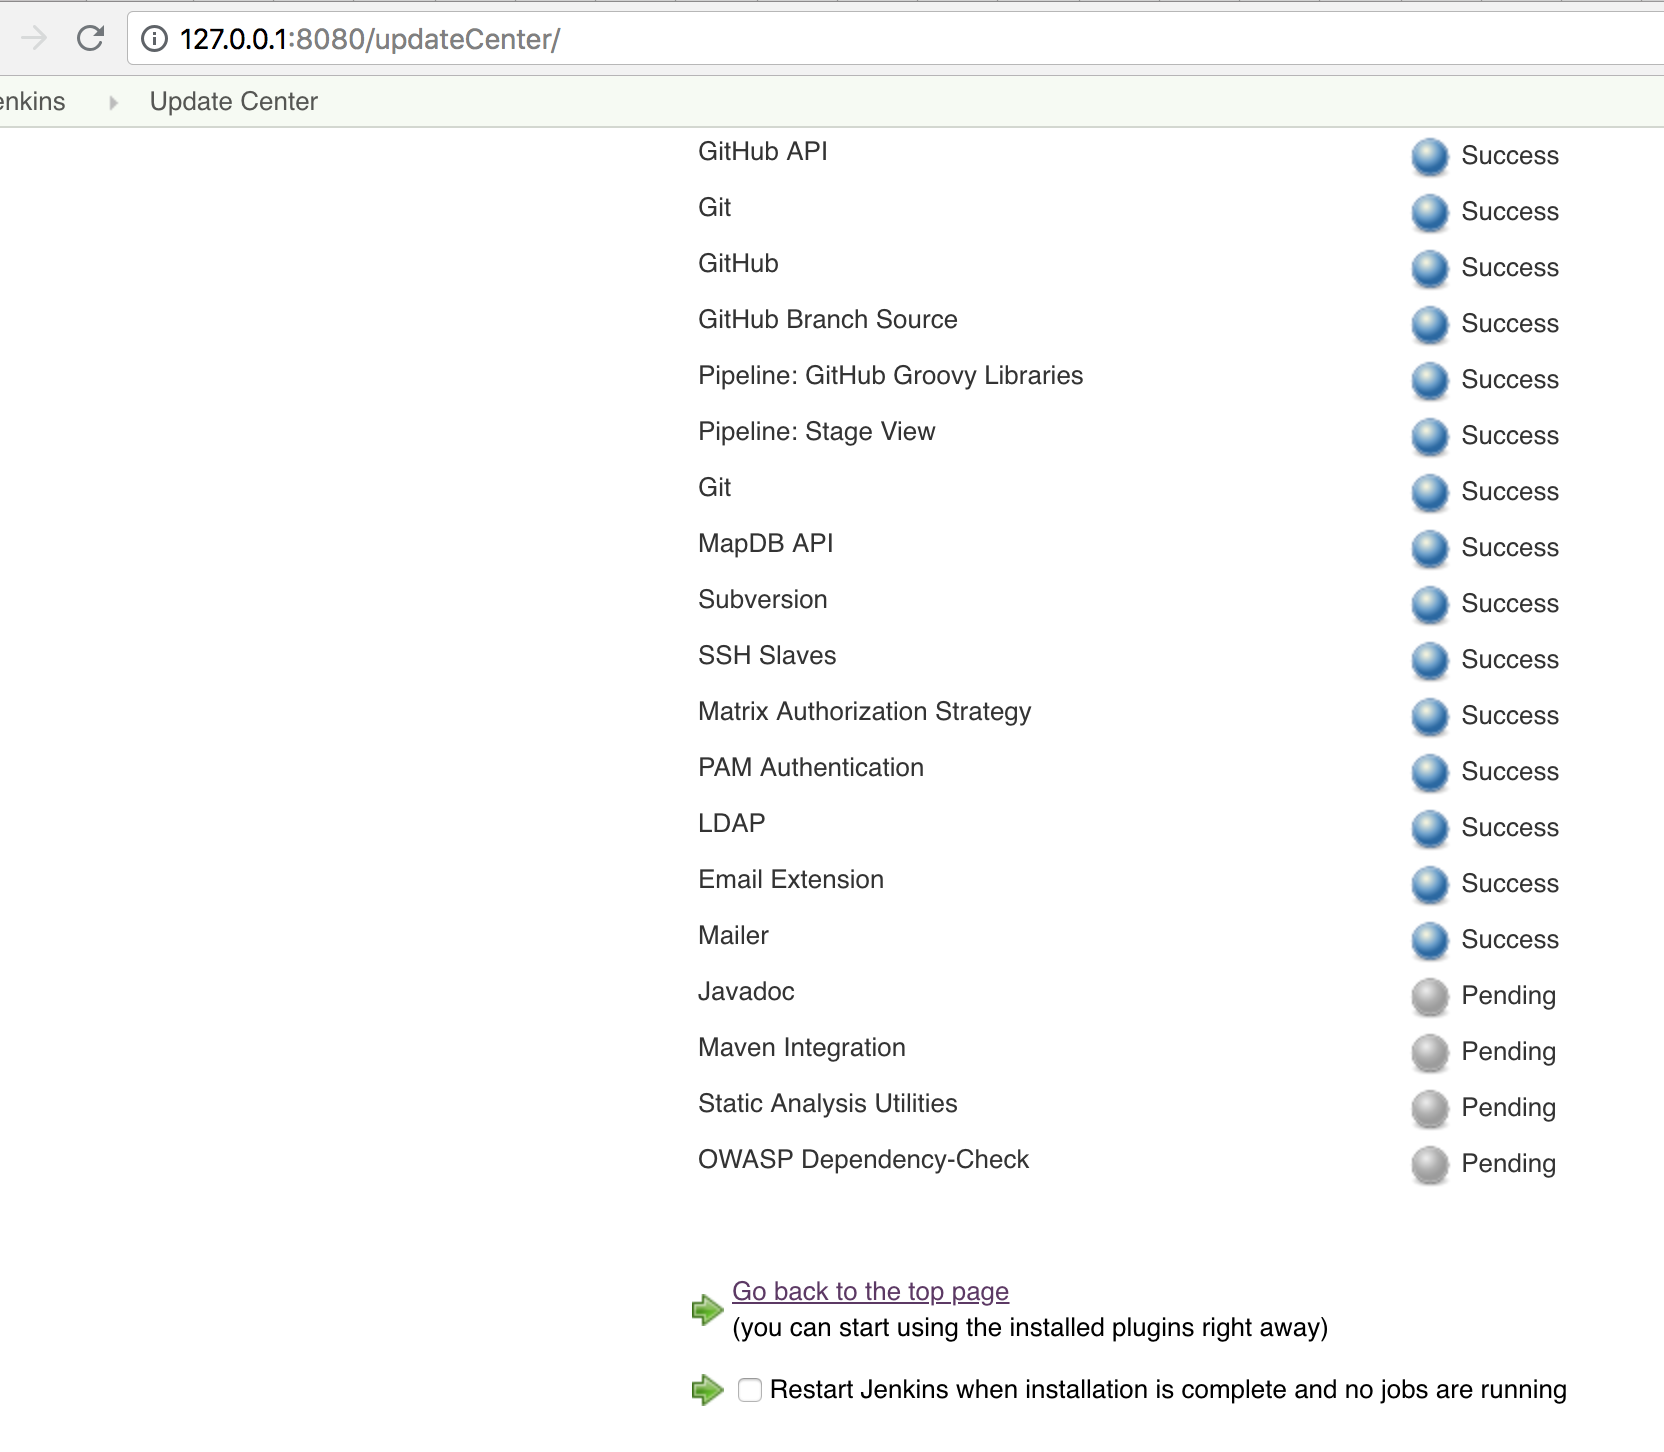
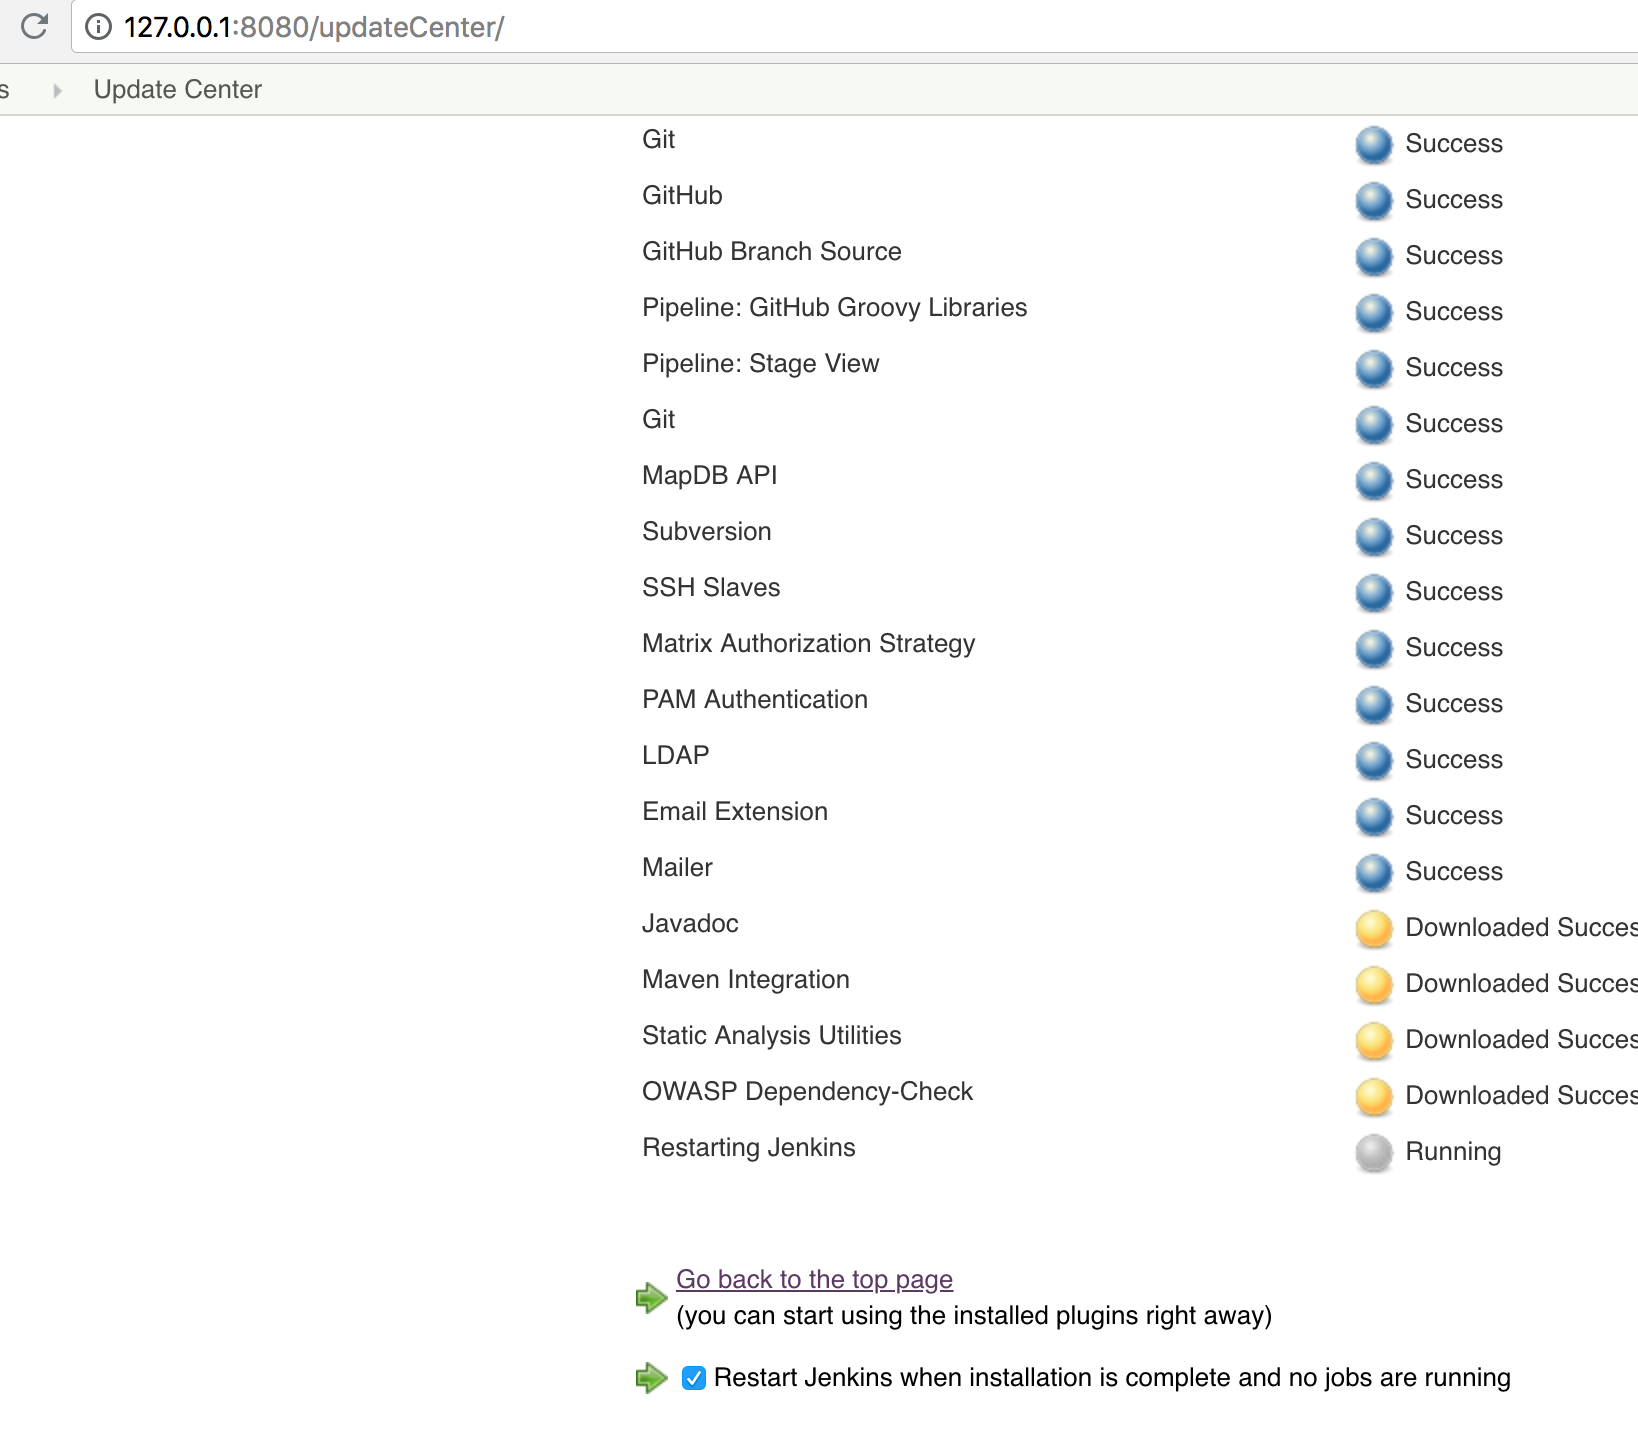
We look into the docker logs until we see INFO: Jenkins is fully up and running.
At the end we go to http://127.0.0.1:8080 and log in with the noted credentials.
Deposit git credentials
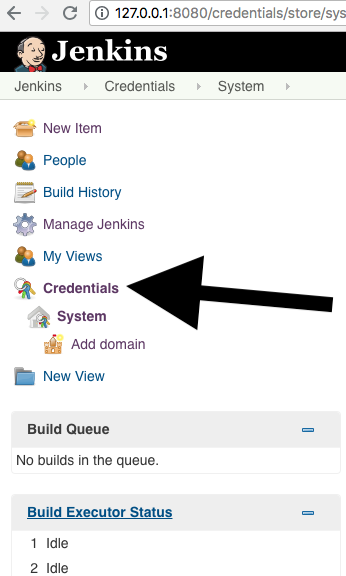
First, we have to deposit the appropriate credentials in Jenkins for our git docker:
For this we click on ‘Credentials’ in the main menu :
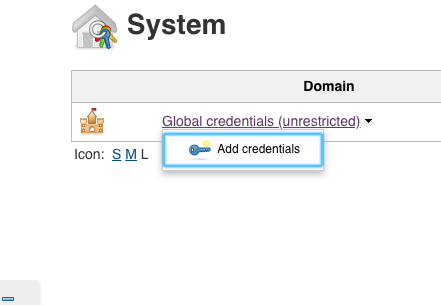
Then to ‘Global Credentials’, ‘Add Credentials’:
Choose ‘SSH Username with private key’:
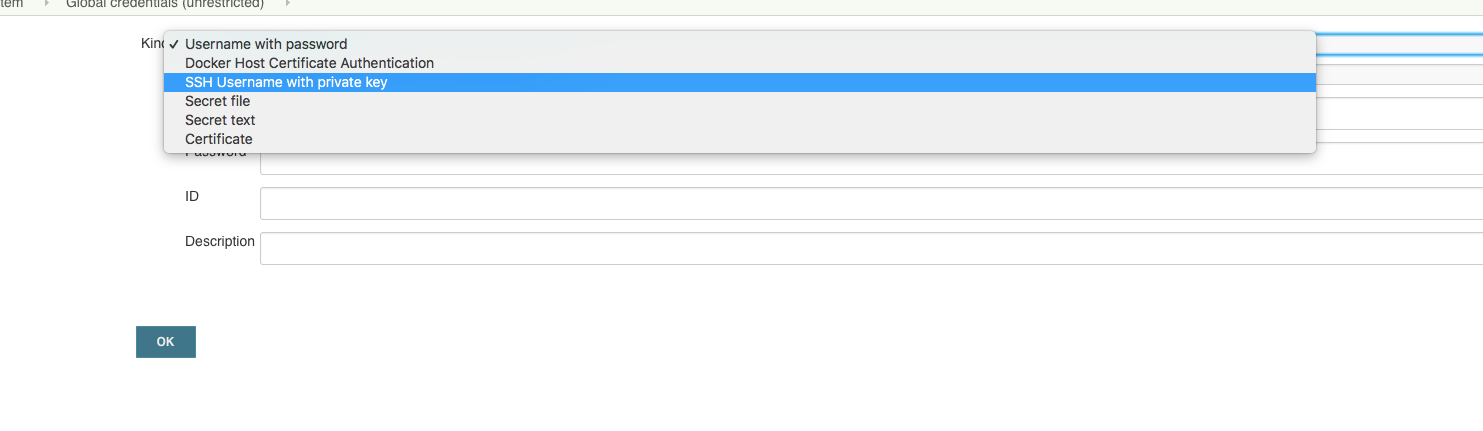
Enter ‘git’ as user and the private key:
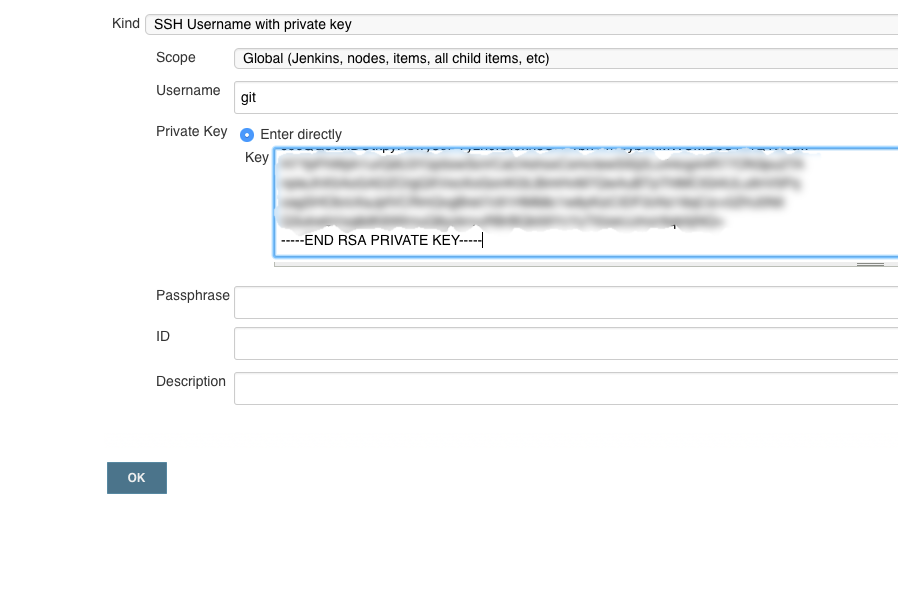
The private key for copying can be displayed by using
cat mykeys/gitkey
on the console.
Click on ‘Ok’, so the credentials for our git are deposited in Jenkins.
Variants OWASP Dependency Check Jenkins
Now there are two ways to run the OWASP Dependency Check on your project:
Either as part of a pipeline build or as part of a standard GUI build.
In the following both variants are explained.
The two build variants differ:
If you use the Jenkins Pipeline Build, the project team describes the steps of the build in a text file. This can be done either through a Groovy-like scripting language or in a declarative notation. The following examples use the declarative notation.
With a standard GUI build, the project team clicks the corresponding points using the GUI.
Advantage of the GUI:
The GUI is initially easier to understand when creating the processes through visualization with graphics. The syntax and commands of the pipeline definitions need not be known.
Advantage of the pipeline:
During the build, the defined individual steps are nicely graphically displayed. Individual steps of the log can be opened by clicking and the programmer, if configured, can locally edit and view the script without having to access jenkins via a browser.
Set up jenkins pipeline
Defining global tools
We select in the main menu under ‘Manage Jenkins’, ‘Global Tool Configuration’:

The names defined here will be used later by the pipeline.
So we set the name ‘Maven 3.3.9’ under ‘Maven’ and select ‘Maven 3.3.9’:
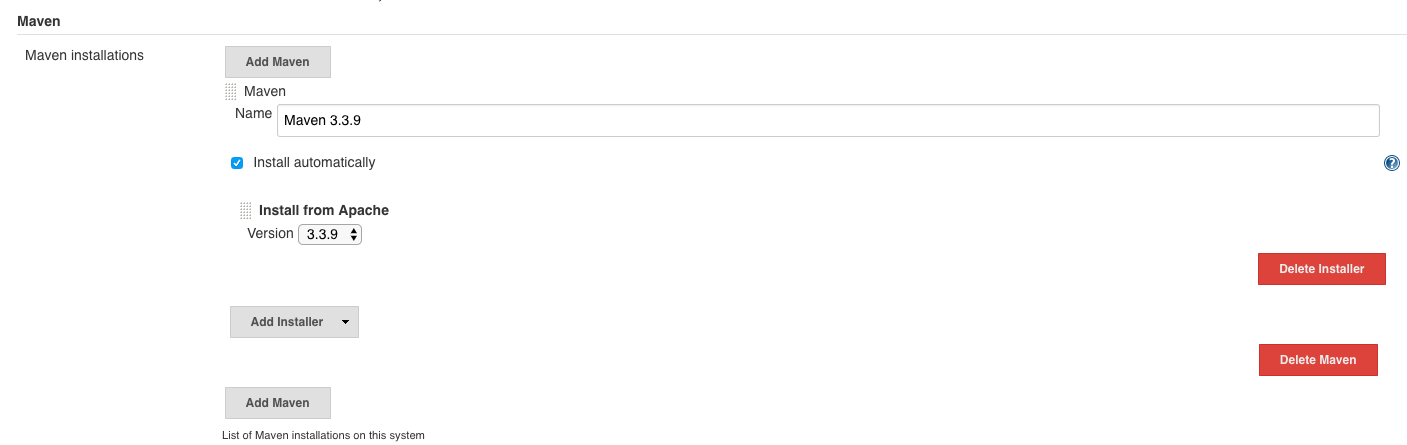
and click on ‘Save’.
NVD Update Pipeline Item
In order not to have to download the NVD database completely every time, you should first define a periodic job that, independent of the actual analysis, updates the database so that it can be used quickly by the exam job.
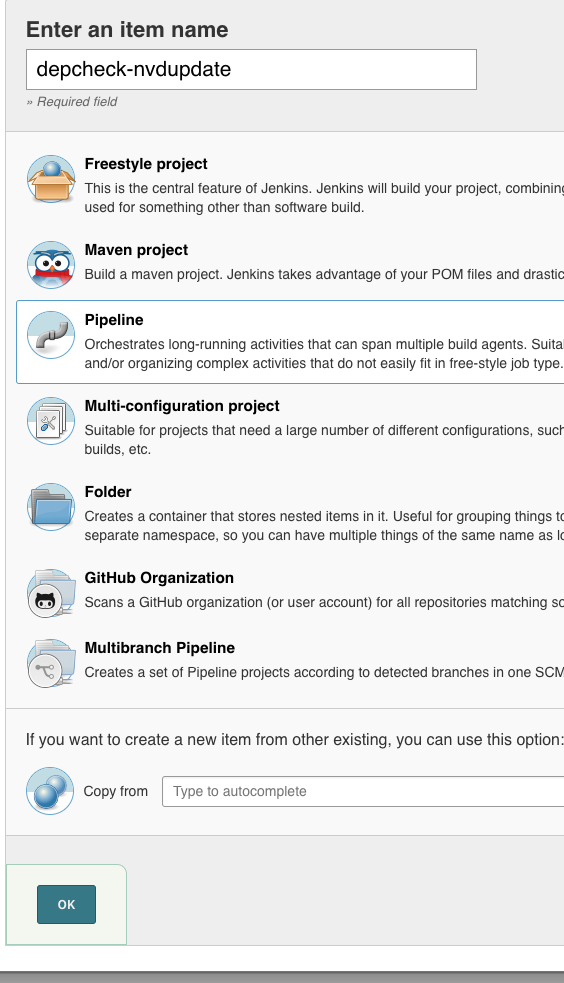
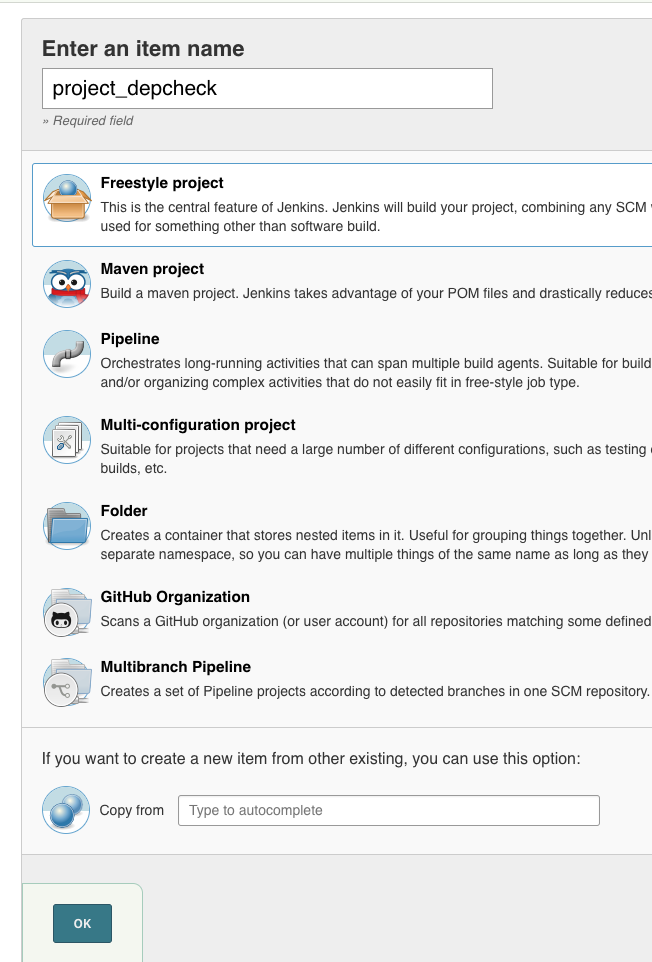
For this we create a pipeline project:
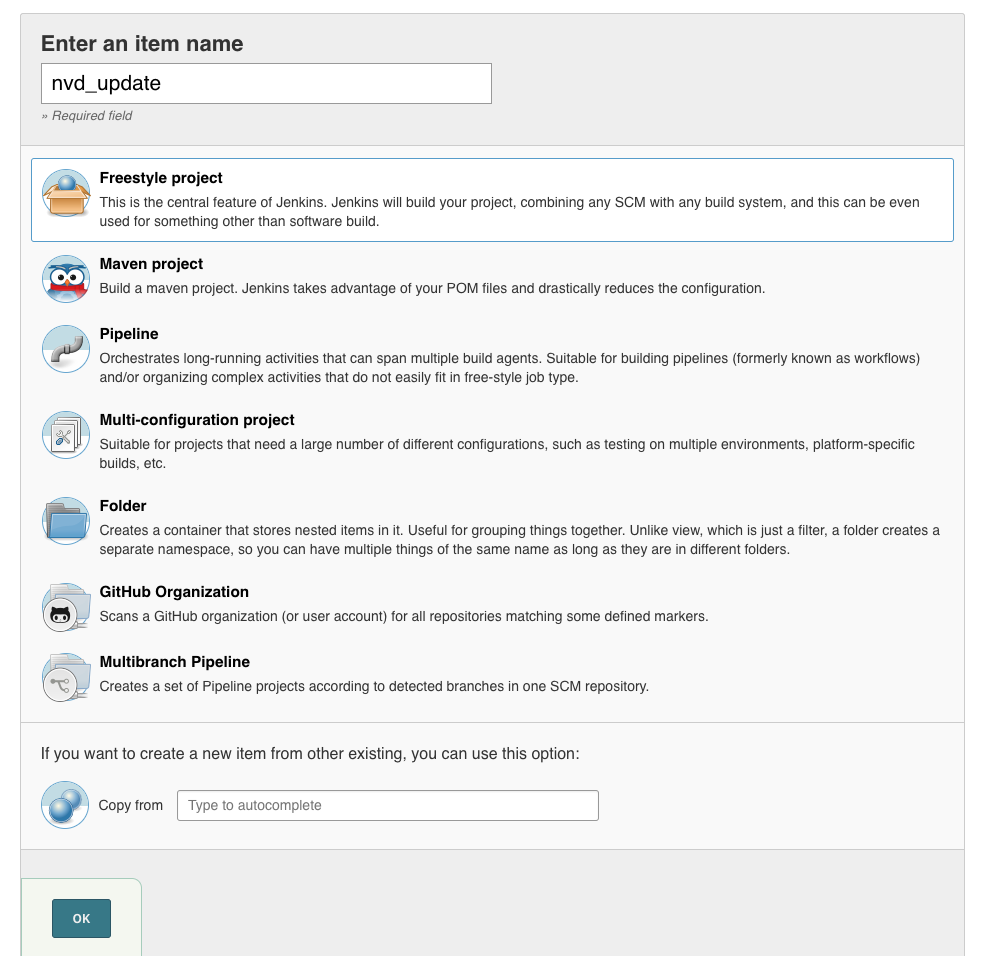
We click on ‘New-Item’:
Select ‘pipeline project’, assign a name (here we use ‘depcheck-nvdupdate’) and click on ‘Ok’:
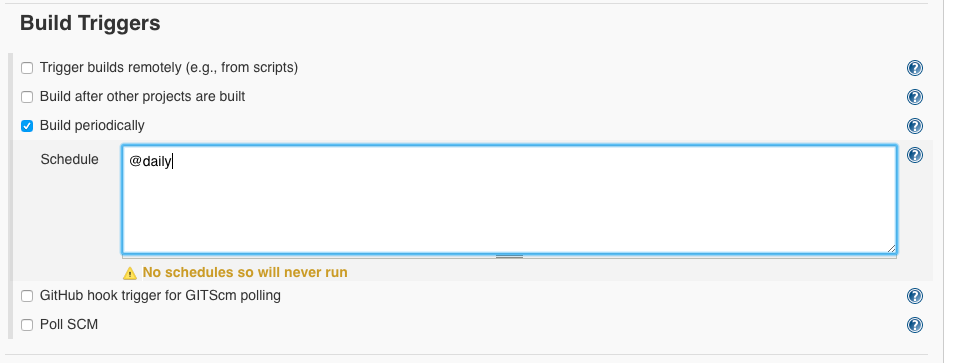
As Build Triggers, we select ‘Build periodically’ and enter ‘@daily’, then the database will be updated daily:

Under Pipeline we enter the following declaration and click on ‘Save’:
pipeline {
    agent any
    stages {
        stage ('Dependency Check Update') {
            steps {
                dependencyCheckUpdateOnly '/var/jenkins_home/depcheck/nvdupdates'
            }
        }
    }
}

This defines that the update will be placed on the Jenkins in the directory /var/jenkins_home/depcheck/nvdupdates.
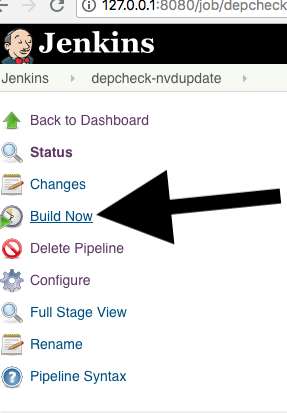
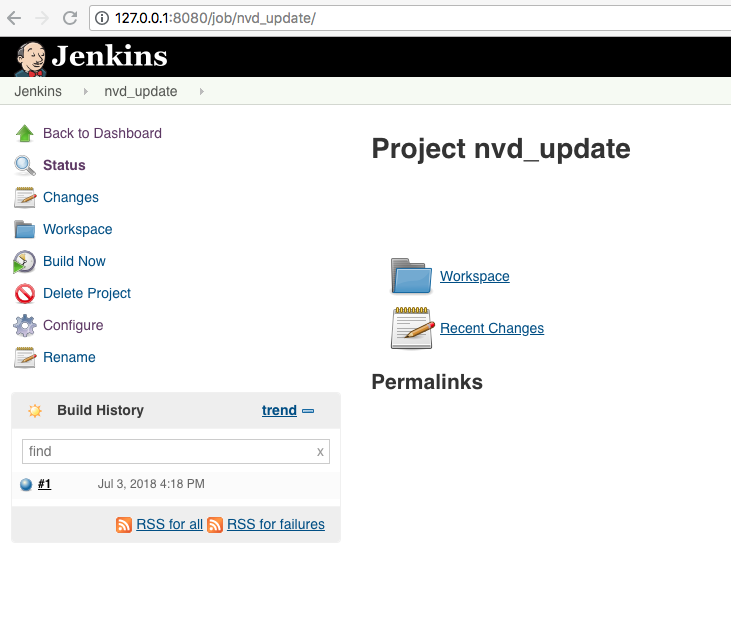
Then we build the database via ‘Build Now’:
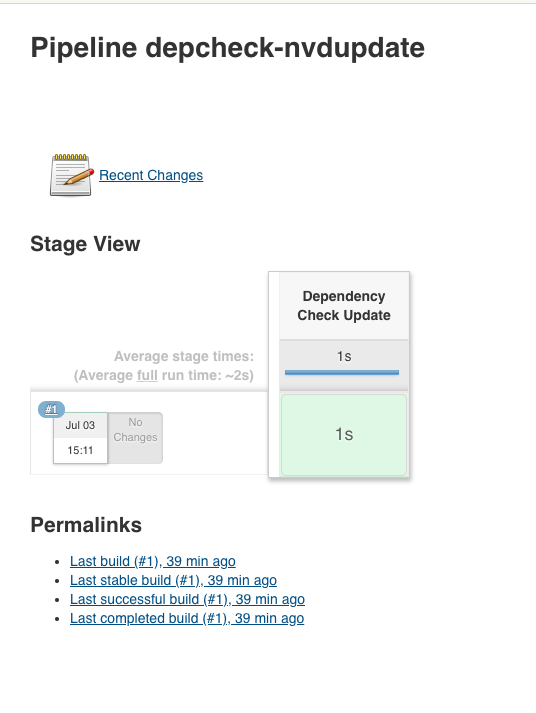
The output should look like this:
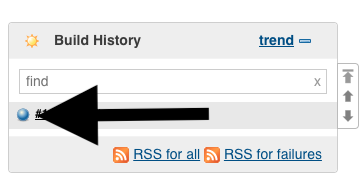
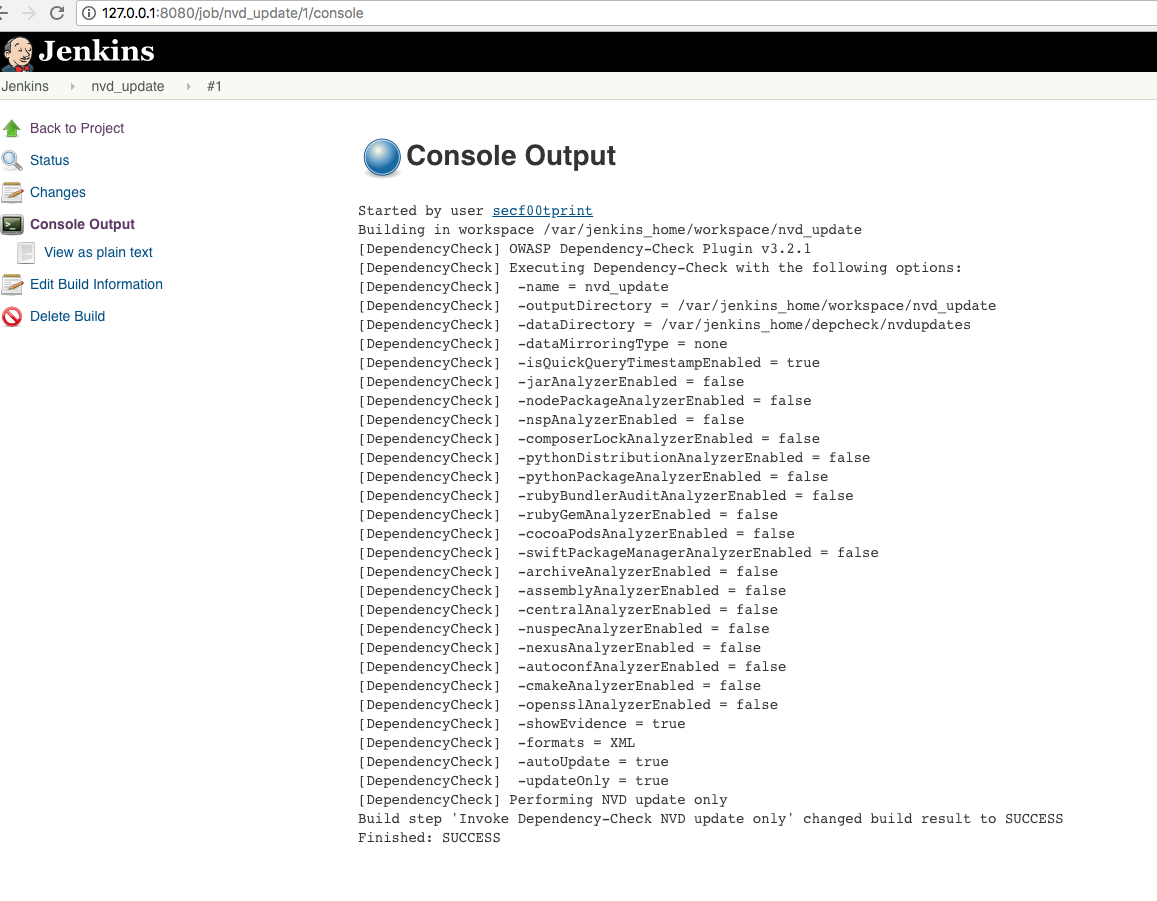
The console output can be displayed by the blue ball:
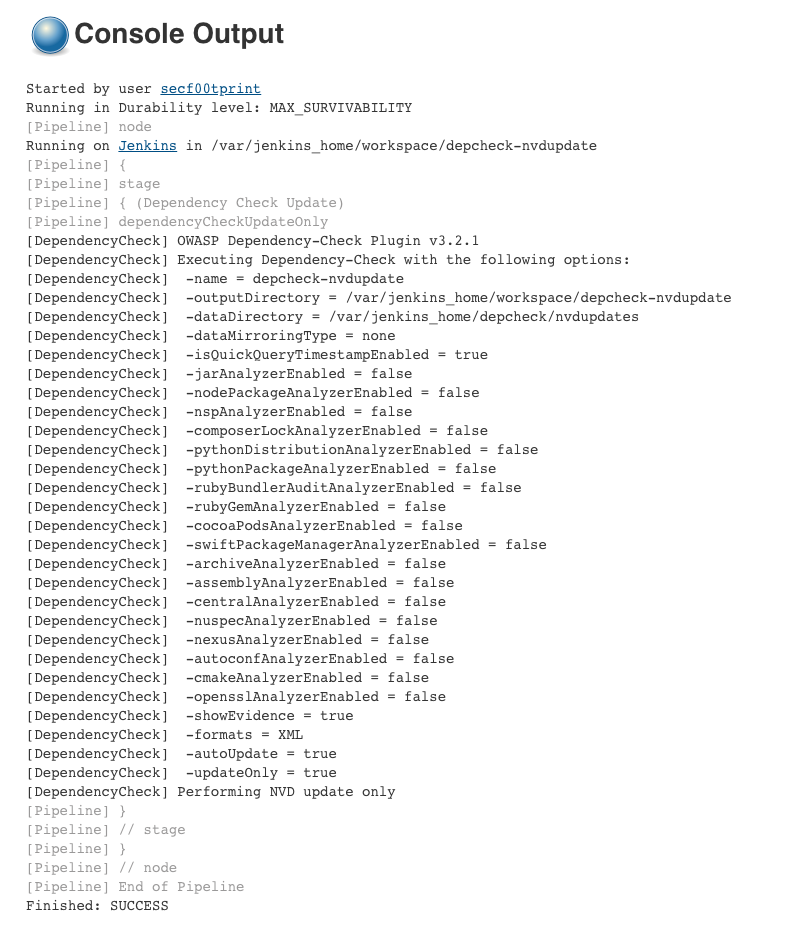
and might look like this:
OWASP Dependency Check Pipeline Item
Now we set up a pipeline project that checks our code:
We click on ‘New Item’ in the main menu as in the previous chapter, select ‘Pipeline’ and name it as e.g. ‘Project pipeline \ _depcheck’.
Now, under ‘Pipeline’, select ‘Pipeline script from SCM’. This means we will pull the pipeline script out of our repository so we can define and change it locally:
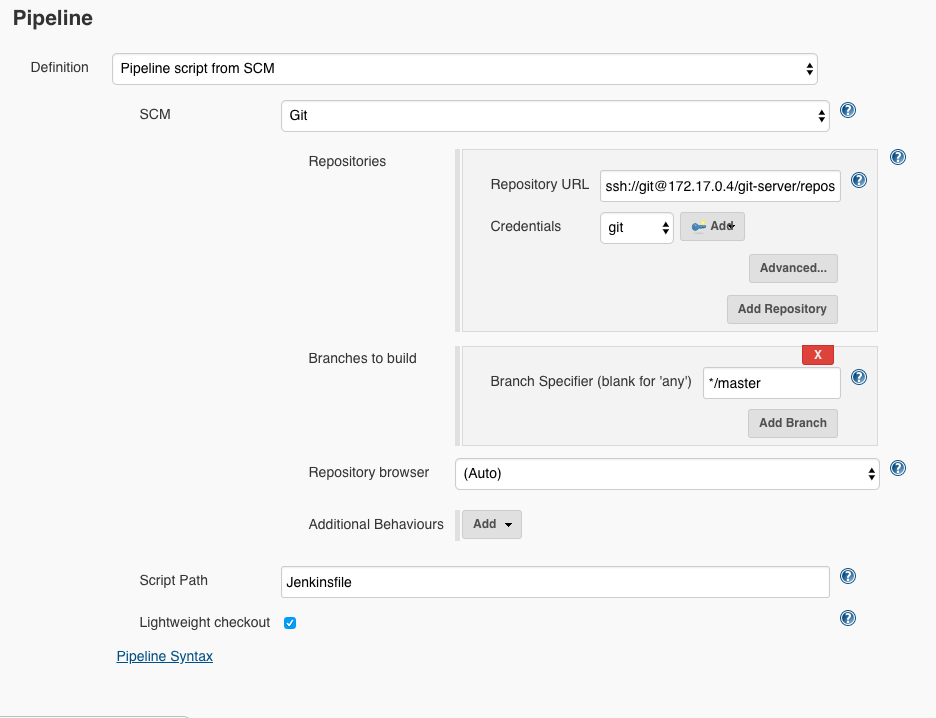
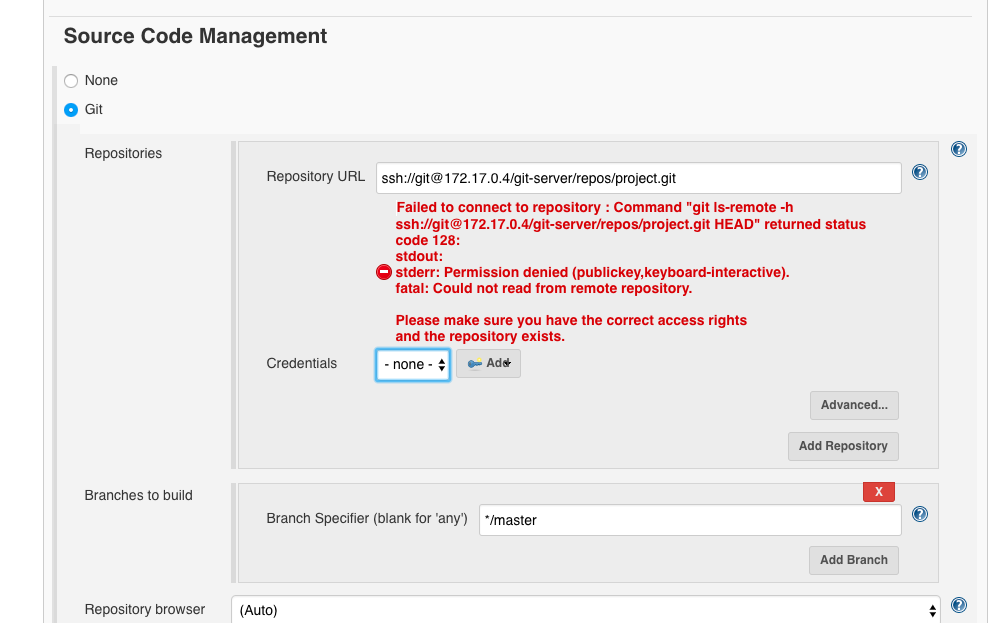
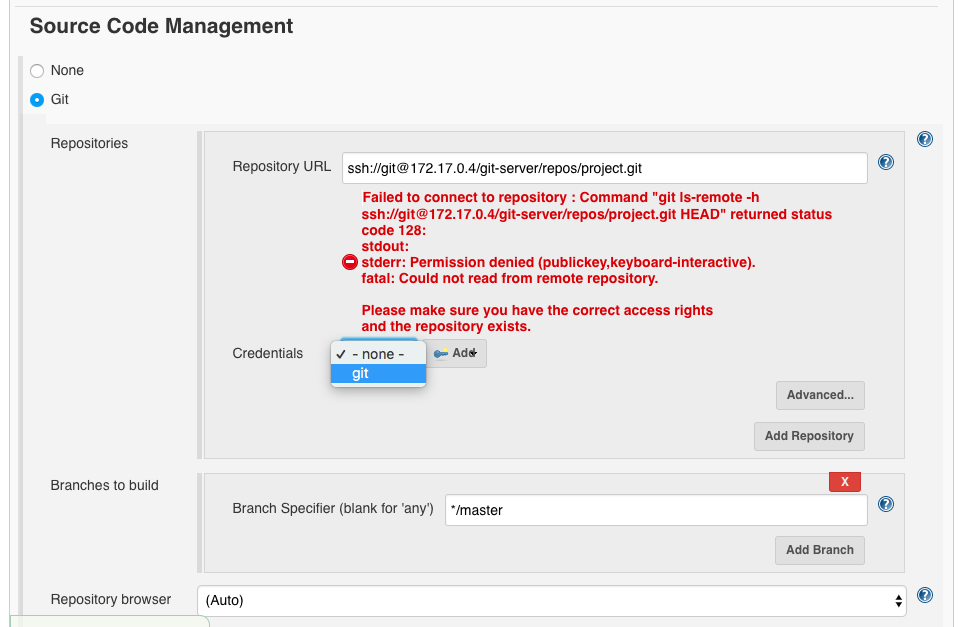
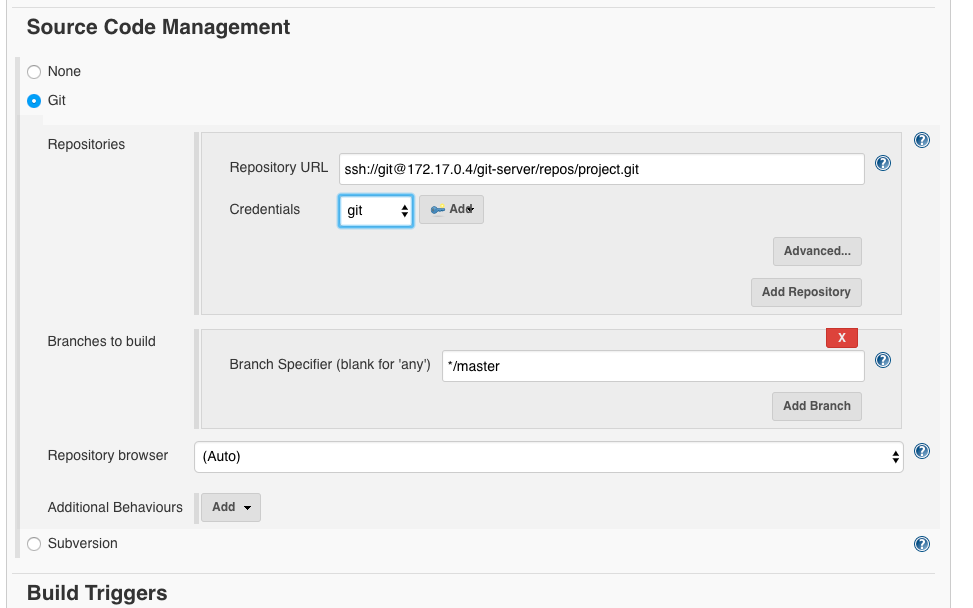
Here we set the repository URL for our docker-git-server.
To determine the internal IP of the Docker server, we enter the following on the host:
docker inspect <containerid_gitserver> |grep -i "\"ipaddress"
We use it and enter as repository URL:
ssh://git@<ip_gitserver_docker>/git-server/repos/project.git
e.g.:
ssh://git@172.17.0.4/git-server/repos/project.git
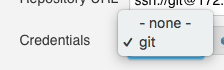
Next, we select the previously defined credentials - in this case the selection marked ‘git’ in the drop-down menu:
After that the repository should be recognized.
Next, we put Jenkinsfile out of our repository as a pipeline script.
Then we click on ‘Save’.
Defining a local Jenkinsfile - Introduction
We go to our local git project:
cd localproject
and create the file Jenkinsfile in the root directory with the following content:
pipeline {
    agent any
    tools {
        maven 'Maven 3.3.9'
    }
    stages {
        /*
        stage ('Initialize') {
            steps {
                sh 'echo === init stage ==='
                // e.g. "M2_HOME = ${M2_HOME}"
            }
        }

        stage ('Build') {
            steps {
                sh 'echo === build stage ==='
                sh 'cd old_depproject; mvn -Dmaven.test.failure.ignore=true install'
            }
        }

        stage ('Test') {
            steps {
                sh 'echo === test stage ==='
            }
        }
        */

        stage ('Dependency Check') {
            steps {
                sh 'echo === security stage ==='
                sh 'echo === OWASP dependency check ==='
                sh 'cd old_depproject; mvn clean dependency:copy-dependencies'
                sh 'cd old_depproject; ./aggregatefordepcheck.sh'
                dependencyCheckAnalyzer scanpath: 'old_depproject', \
                  outdir: 'depcheck/report', \
                  datadir: '/var/jenkins_home/depcheck/nvdupdates', \
                  hintsFile: '', \
                  includeVulnReports: true, \
                  includeCsvReports: true, \
                  includeHtmlReports: true, \
                  includeJsonReports: true, \
                  isAutoupdateDisabled: true, \
                  skipOnScmChange: false, \
                  skipOnUpstreamChange: false, \
                  suppressionFile: '', \
                  zipExtensions: ''

               dependencyCheckPublisher pattern: 'depchec/report/dependency-check-report.xml', \
                  failedTotalAll: '0', \
                  usePreviousBuildAsReference: false
            }
        }
    }
}
Defining a local Jenkinsfile - Possible parameters
The parameters defined here for the OWASP Dependency Check Plugin can also be looked up at:
https://jenkins.io/doc/pipeline/steps/dependency-check-jenkins-plugin/
Essentially you can control:
DependencyCheckAnalyzer:
| Parameter | Description | Type | Example |
|---|---|---|---|
scanpath |
Path for scanning | String |
'old_depproject' |
outdir |
Output folder | String |
'depcheck/report' |
datadir |
Data folder | String |
'/var/jenkins_home/depcheck/nvdupdates' |
suppressionFile |
Suppression File (more on that below) | String |
'suppression.xml' |
hintsFile |
Used to determine false negatives | String |
'hintsfile.xml' |
zipExtensions |
Specifies which file extensions are treated as zip | String |
'jar' |
isAutoupdateDisabled |
Disables the automatic NVD update during a build | Boolean |
'true' |
includeHtmlReports |
Generates an optional HTML report | Boolean |
'false' |
includeVulnReports |
Generates an optional vulnerability report | Boolean |
'true' |
includeJsonReports |
Generates an optional JSON report | Boolean |
'false' |
includeCsvReports |
Generates an optional CSV report | Boolean |
'true' |
skipOnScmChange |
Skip if triggered by SCM changes | Boolean |
'false' |
skipOnUpstreamChange |
Skip if triggered by upstream changes | Boolean |
'true' |
DependencyCheckPublisher:
| Parameter | Description | Typ | Example |
|---|---|---|---|
pattern |
Dependency Check result file(s) | String |
''**/dependency-check-report.xml' |
usePreviousBuildAsReference |
Use the previous build | Boolean |
'false' |
By using certain parameters, you can tell the DependencyCheckPublisher call which feedback it should give with different findings.
Here we take the following parameters:
failedTotalAll: '0'
that is, the build fails or turns red as soon as at least one finding is detected.
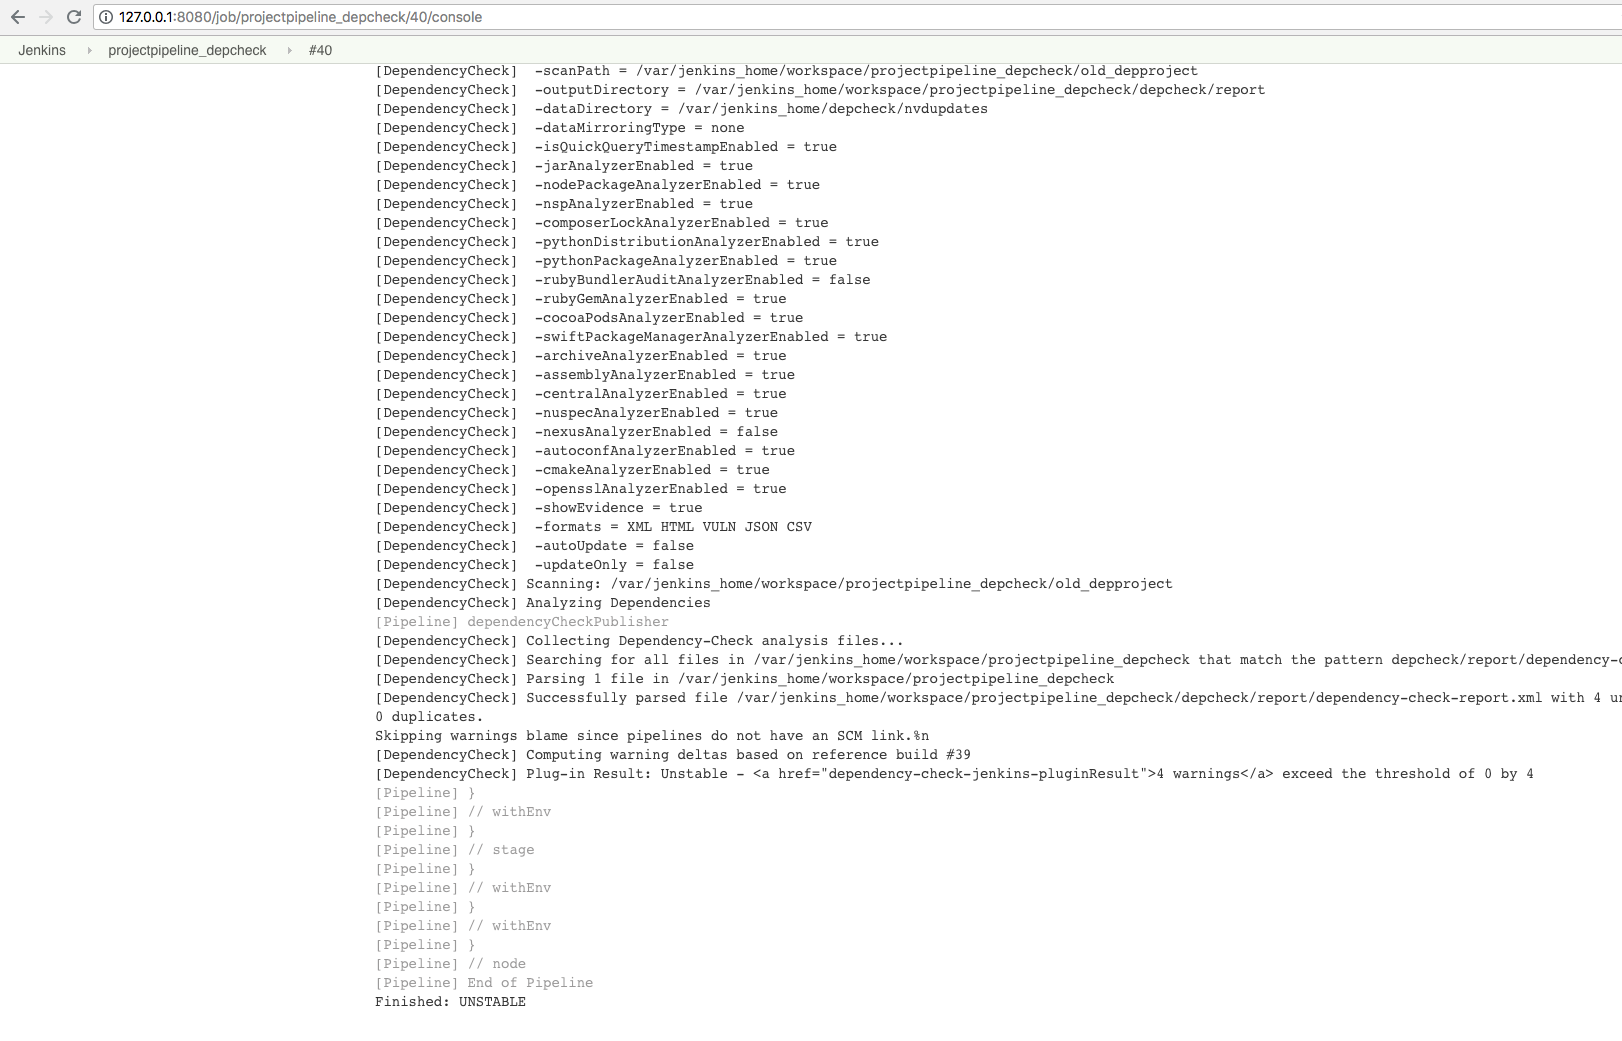
You could also set
unstableTotalAll: '0'
.
Then the build would turn yellow or unstable as soon as at least one finding is recognized.
In addition to these two relatively basic settings, more detailed adjustment can be provided marking a build yellow or red.
The following parameters can be defined as of July 2018:
| Parameter |
|---|
failedNewAll |
failedNewHigh |
failedNewLow |
failedNewNormal |
failedTotalAll |
failedTotalHigh |
failedTotalLow |
failedTotalNormal |
unstableNewAll |
unstableNewHigh |
unstableNewLow |
unstableNewNormal |
unstableTotalAll |
unstableTotalHigh |
unstableTotalLow |
unstableTotalNormal |
Defining a local Jenkinsfile - Aggregate Dependencies
To build the dependencies, we create the following shell script aggregatefordepcheck.sh under localproject / olddeproject:
#! /bin/bash
[[ -d alllibs ]] || mkdir ./alllibs; find . -iname '*.jar' -exec cp {} ./alllibs/ 2>/dev/null \; ; find . -iname '*.class' -exec cp {} ./alllibs/ 2>/dev/null \;
Defining a local Jenkinsfile - Final pipeline script
We push everything together in our Docker repo:
git add .
git commit -m "Jenkinsfile and Maven Aggregate Script"
git push origin master
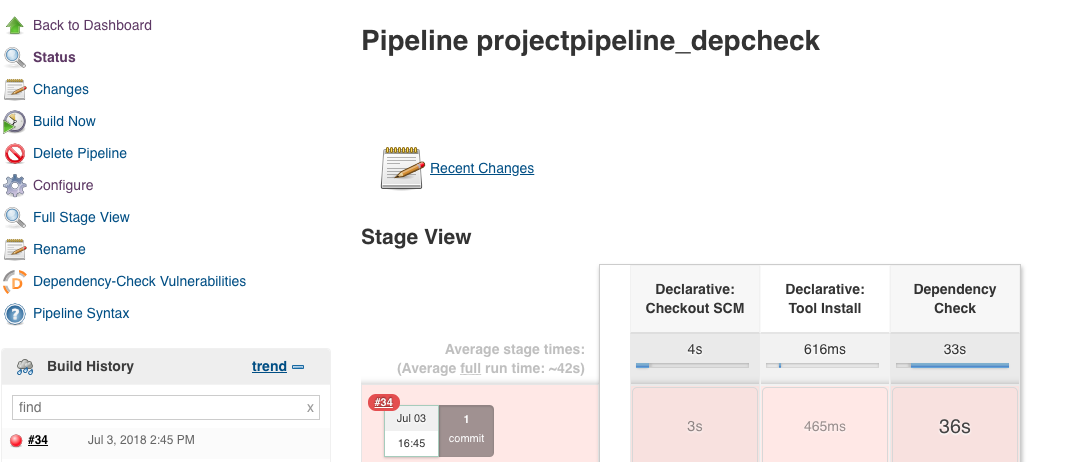
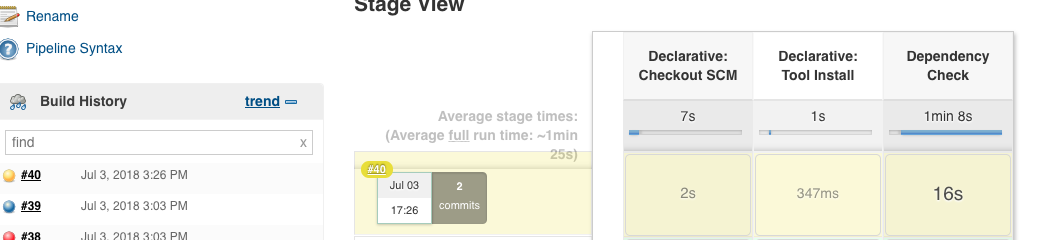
If we now select our item projectpipeline_depcheck in Jenkins and click on ‘Build Now’, the following output should appear:
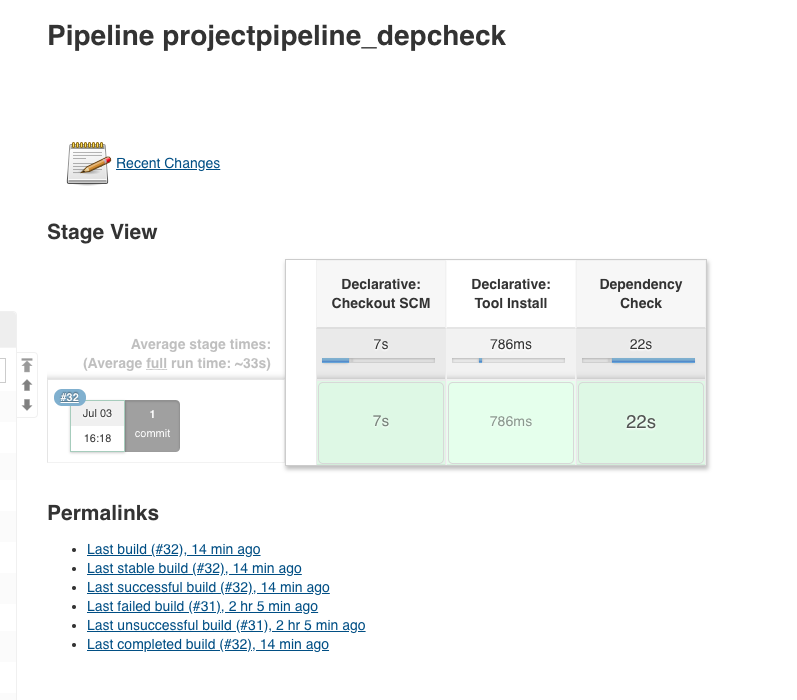
or as console output:
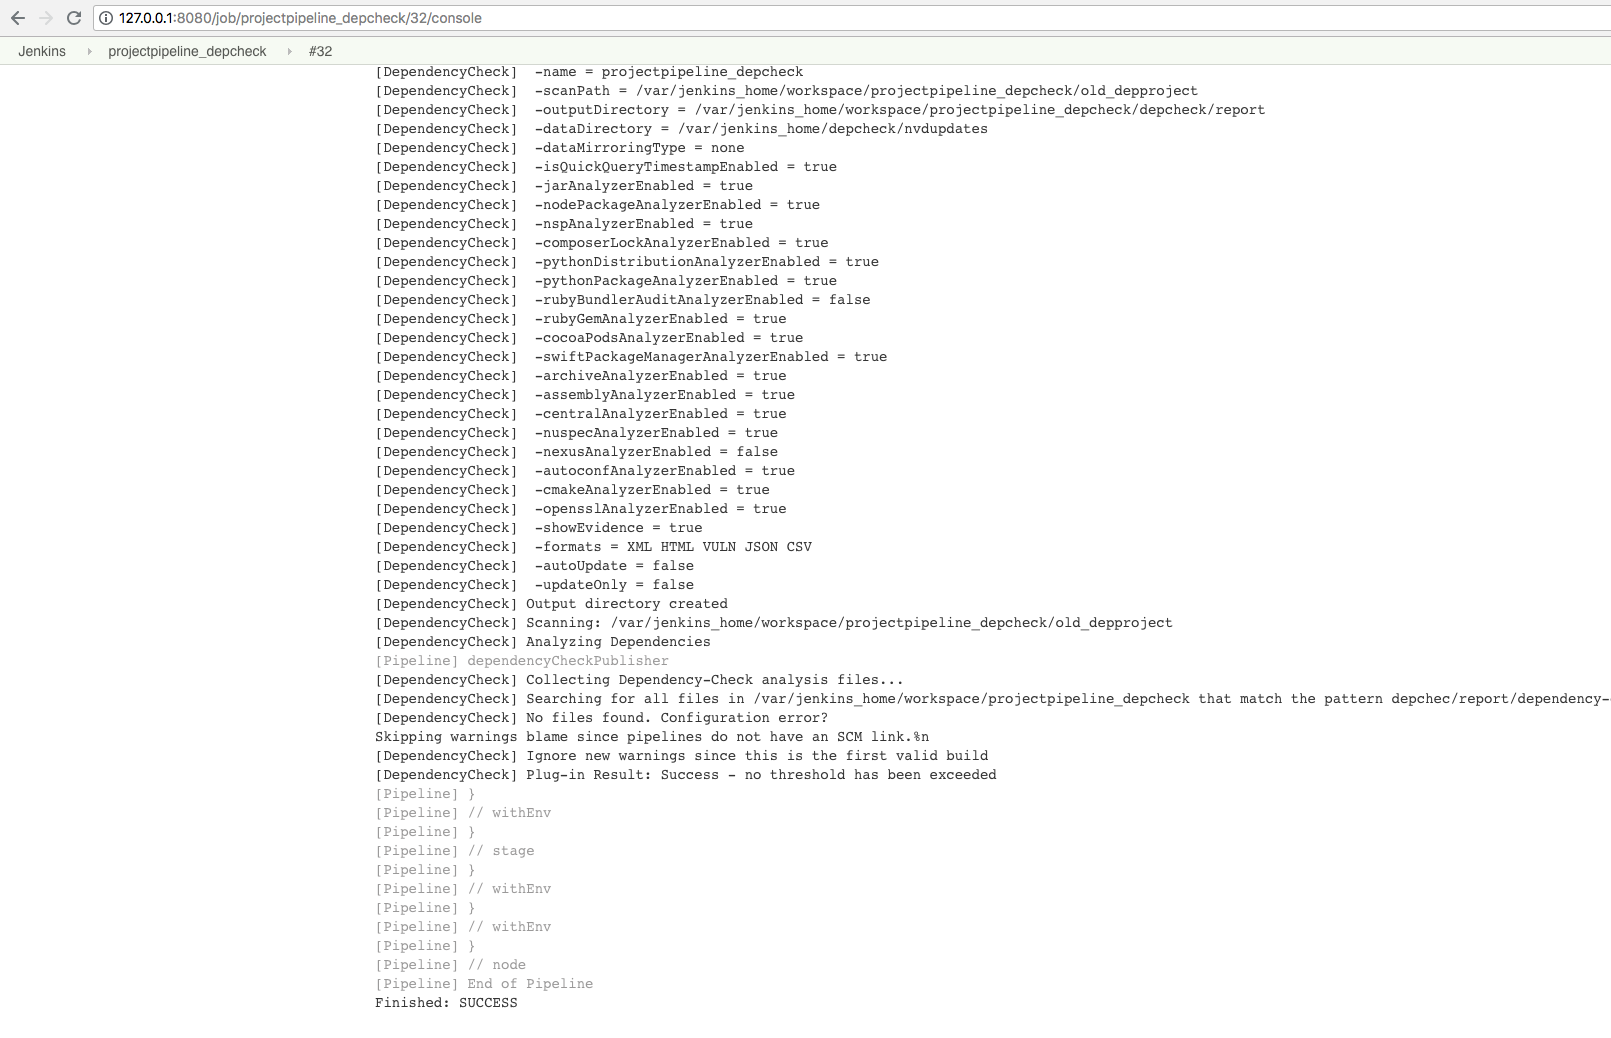
From the logs you can also see the path of the report on the Jenkins server:
open ../mnt/conintserver/jkhome/workspace/projectpipeline_depcheck/depcheck/report/dependency-check-report.html
Test if it works
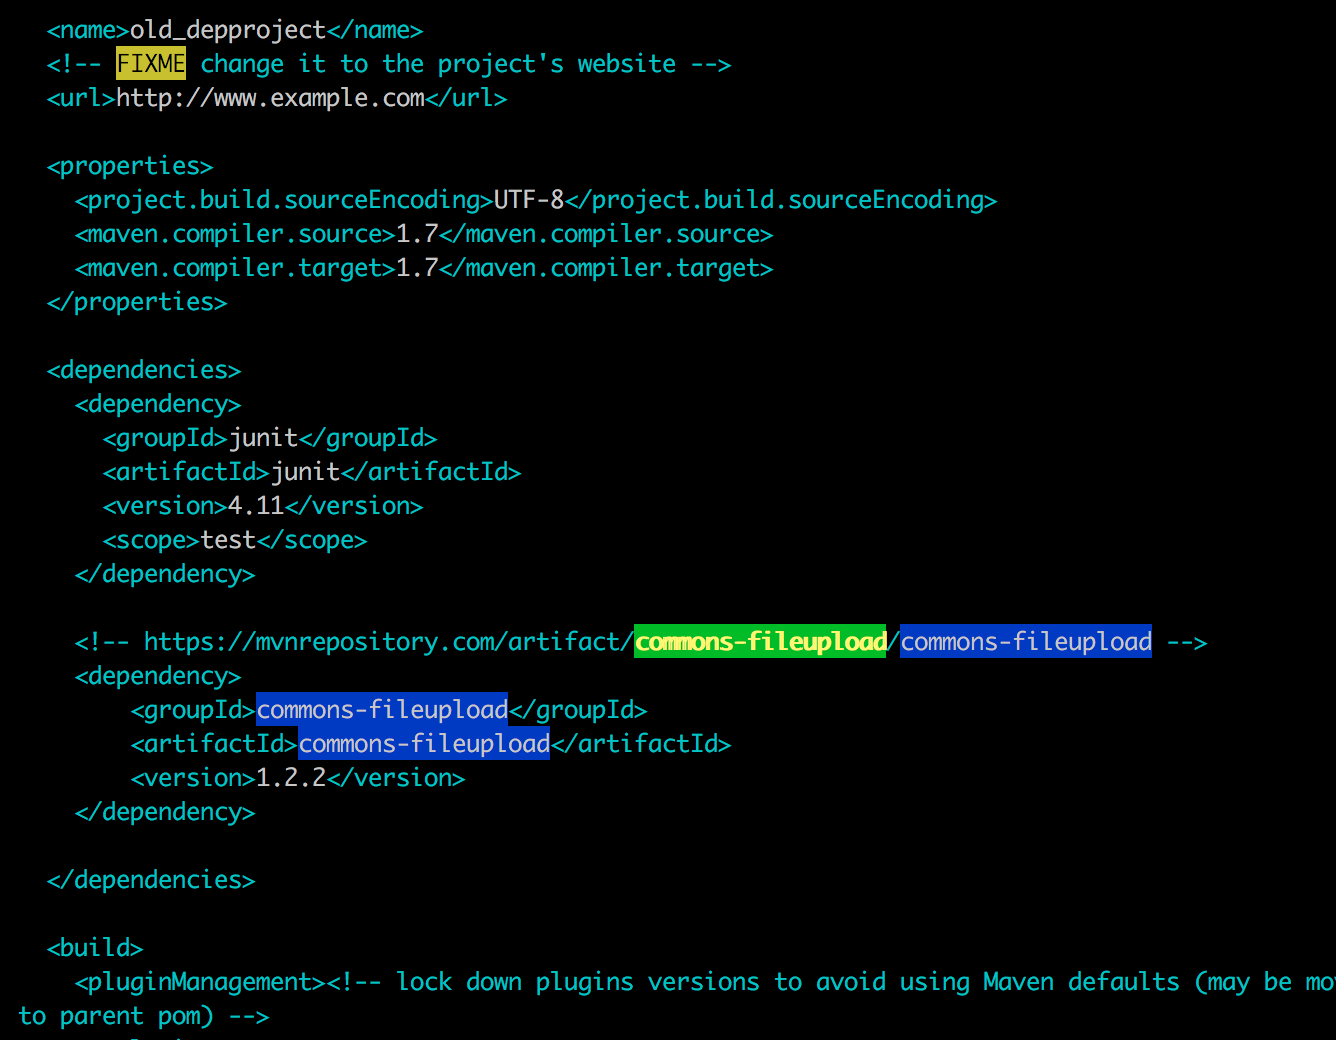
Next we add a dependency which is problematic.
We add to our pom.xml:
<!-- https://mvnrepository.com/artifact/commons-fileupload/commons-fileupload -->
<dependency>
    <groupId>commons-fileupload</groupId>
    <artifactId>commons-fileupload</artifactId>
    <version>1.2.2</version>
</dependency>
we go to localproject/old_depproject and augment the dependencies section:
Then we push the new pom.xml and rebuild the item.
git add pom.xml
git commit -m "add old commons fileupload"
git push origin master
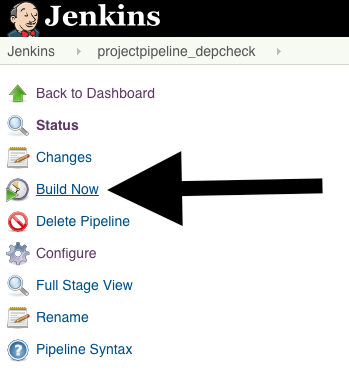
Result - the build should fail:
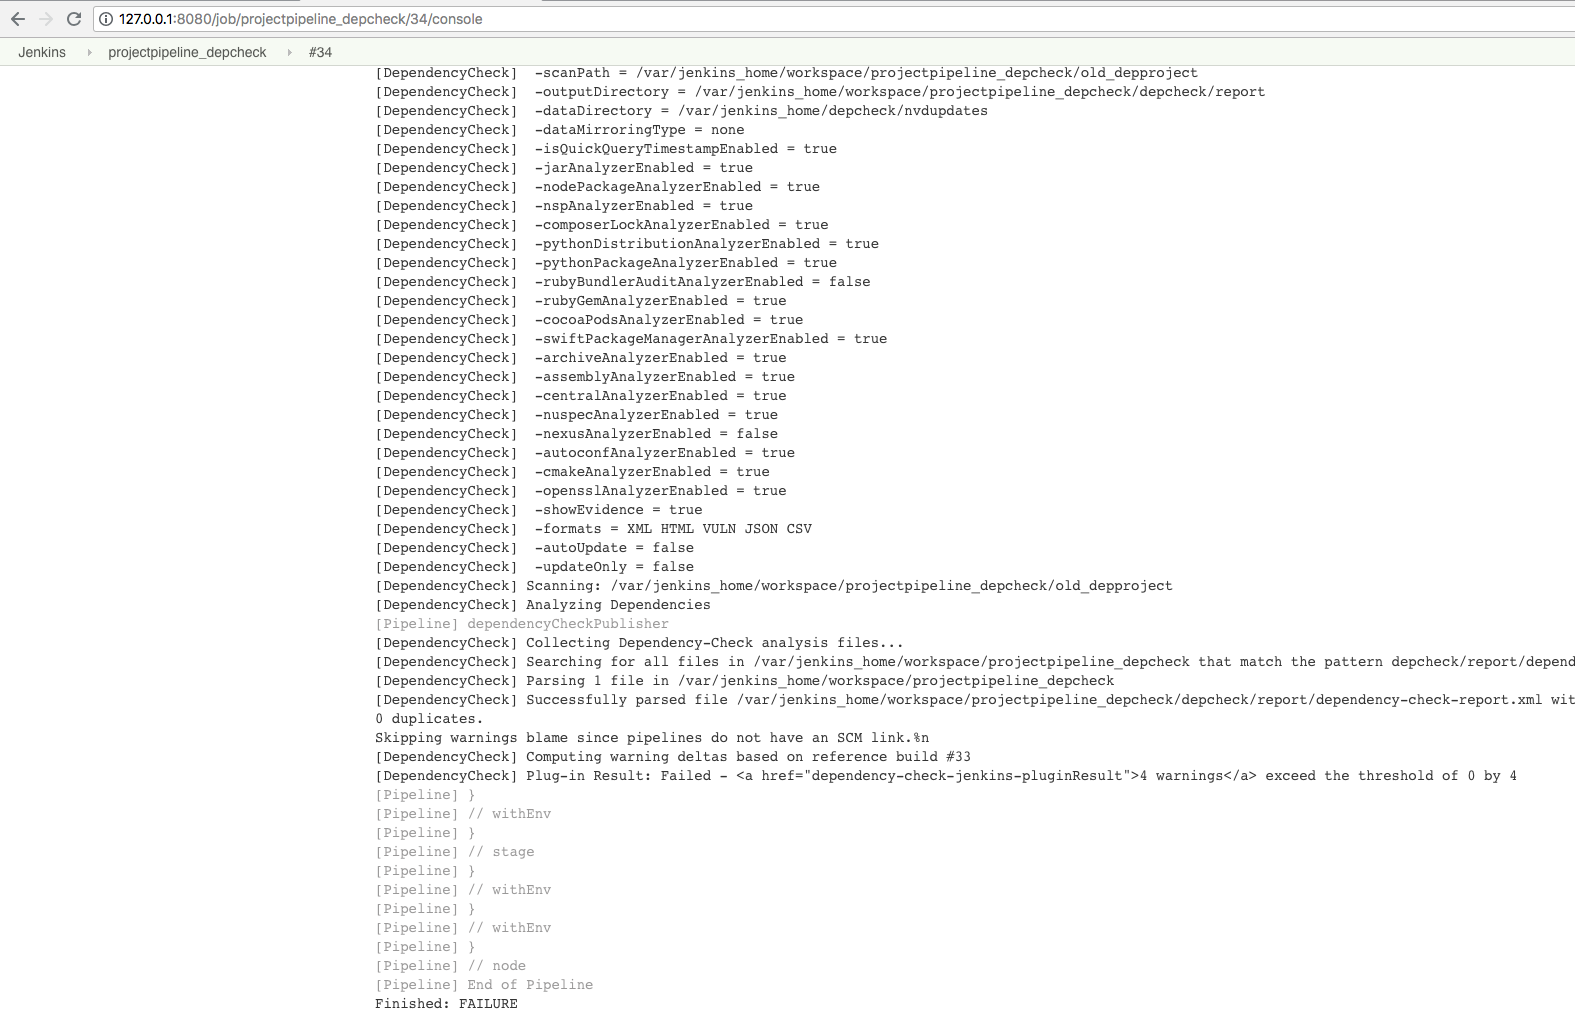
and the corresponding HTML taken from the Jenkins logs also reflects the issue:
open ../mnt/conintserver/jkhome/workspace/projectpipeline_depcheck/depcheck/report/dependency-check-report.html
Modifying the test evaluation
If you do not want to create a red traffic light right away,
you can also use unstableTotalAll instead of failedTotalAll in the Jenkinsfile:
> cat Jenkinsfile
pipeline {
    agent any
    tools {
        maven 'Maven 3.3.9'
    }
    stages {
        /*
        stage ('Initialize') {
            steps {
                sh 'echo === init stage ==='
                // e.g. "M2_HOME = ${M2_HOME}"
            }
        }

        stage ('Build') {
            steps {
                sh 'echo === build stage ==='
                sh 'cd old_depproject; mvn -Dmaven.test.failure.ignore=true install'
            }
        }

        stage ('Test') {
            steps {
                sh 'echo === test stage ==='
            }
        }
        */

        stage ('Dependency Check') {
            steps {
                sh 'echo === security stage ==='
                sh 'echo === OWASP dependency check ==='
                sh 'cd old_depproject; mvn clean dependency:copy-dependencies'
                sh 'cd old_depproject; ./aggregatefordepcheck.sh'
                dependencyCheckAnalyzer scanpath: 'old_depproject', \
                  outdir: 'depcheck/report', \
                  datadir: '/var/jenkins_home/depcheck/nvdupdates', \
                  hintsFile: '', \
                  includeVulnReports: true, \
                  includeCsvReports: true, \
                  includeHtmlReports: true, \
                  includeJsonReports: true, \
                  isAutoupdateDisabled: true, \
                  skipOnScmChange: false, \
                  skipOnUpstreamChange: false, \
                  suppressionFile: '', \
                  zipExtensions: ''

               dependencyCheckPublisher pattern: 'depcheck/report/dependency-check-report.xml', \
                  unstableTotalAll: '0', \
                  usePreviousBuildAsReference: false
            }
        }
    }
}
Jenkins Standard Build
In addition to the definition of pipeline scripts, the OWASP Dependency Check plugin can also be clicked via the GUI. This is the old default way.
In doing so, the configuration is clearer, but the output is not as modular and understandable afterwards.
NVD Update GUI Item
The configuration can be made in these steps:
- ‘New Item’:
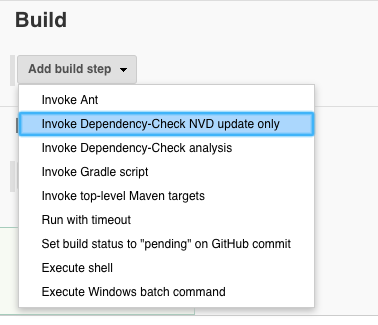
- ‘Build Triggers’ ‘Build periodically’:
- ‘Build’ ‘Add build step’ ‘Invoke Dependency-Check NVD update only’:
- Data directory:
/var/jenkins_home/depcheck/nvdupdates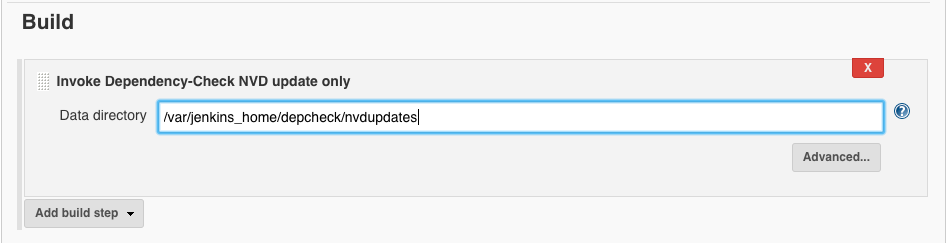
- ‘Save’
Then start the build using ‘Build Now’.
The console output should look like this:
OWASP Dependency Check GUI Item
Based on the NVD database generated by Jenkins pipeline script or GUI config, we can now test the dependencies as follows:
We click on ‘Ok’.
Under ‘Source Code Management’ we enter the Git server contained in the Docker network:
ssh://git@172.17.0.4/git-server/repos/project.git
and select the credentials ‘git’:
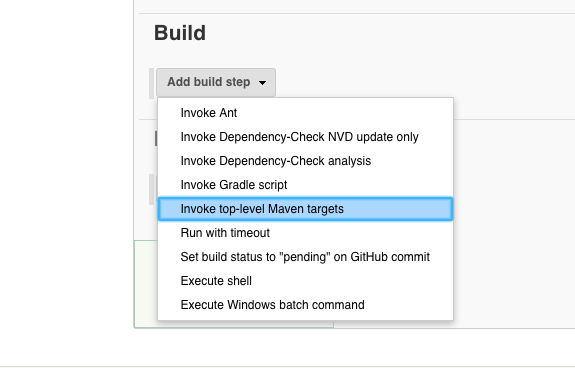
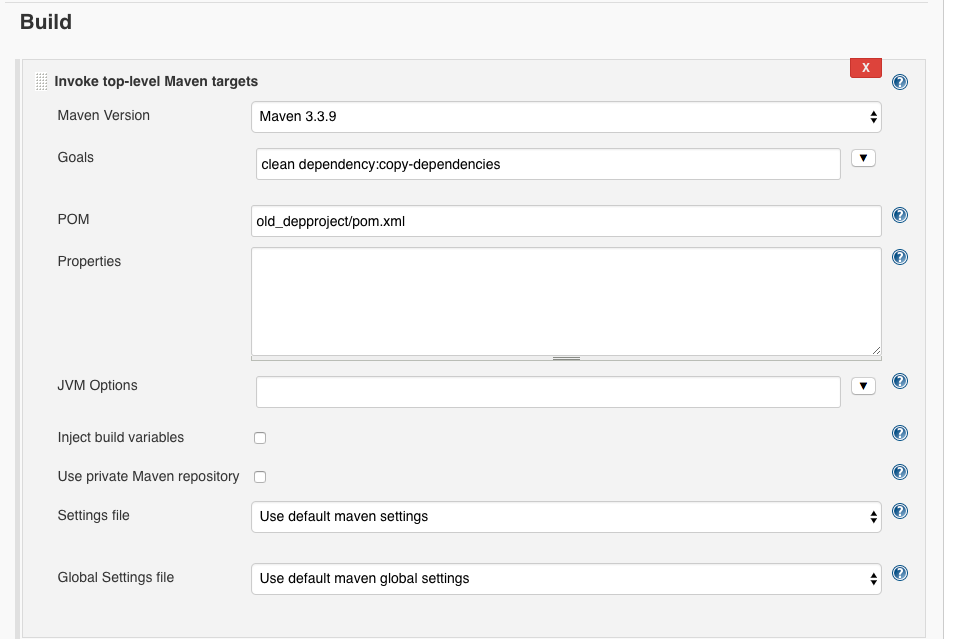
Then under ‘Build’ we go to ‘Invoke top-level Maven targets’:
Now select the installed global tool:
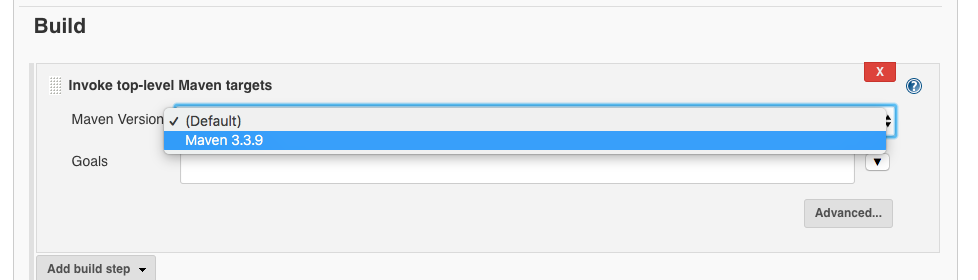
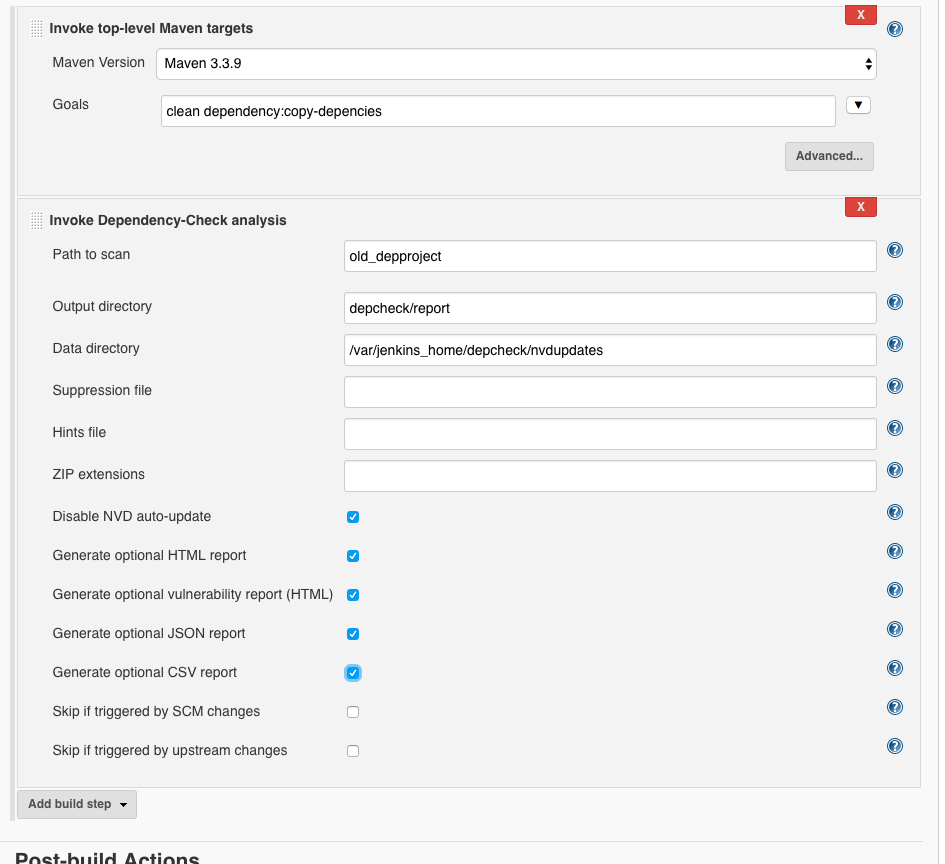
Now we choose ‘Advanced’. As goals we set clean dependency: copy-dependencies and as location we choose pom.xml
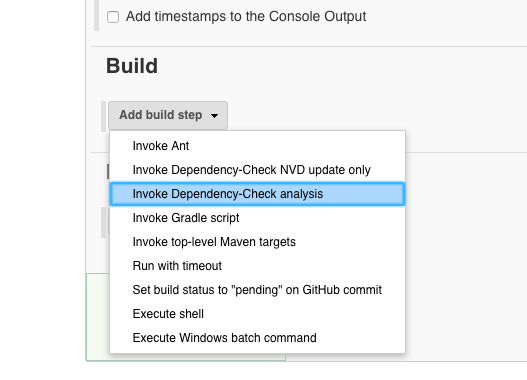
Under ‘Build’ we add another build step using ‘Add build steps’: ‘Invoke Dependency-Check analysis’:
We choose ‘Advanced’ and then:
- Path to scan:
old_depproject - Output directory:
depcheck/report - Data directory:
/var/jenkins_home/depcheck/nvdupdates
Next it is ‘Add post-buid action’:
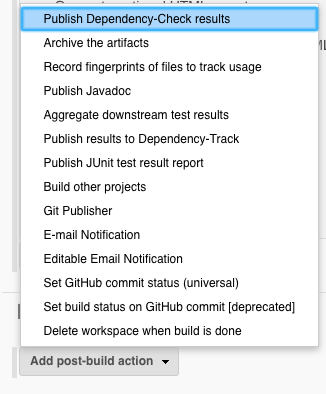
‘Advanced’
- Dependency Check results:
depcheck/report/dependency-check-report.xml - Status Thresholds, e.g.:
- All priorities Warning at:
5, Failure at:10 - Priority high: Warning at:
2, Failure at:10
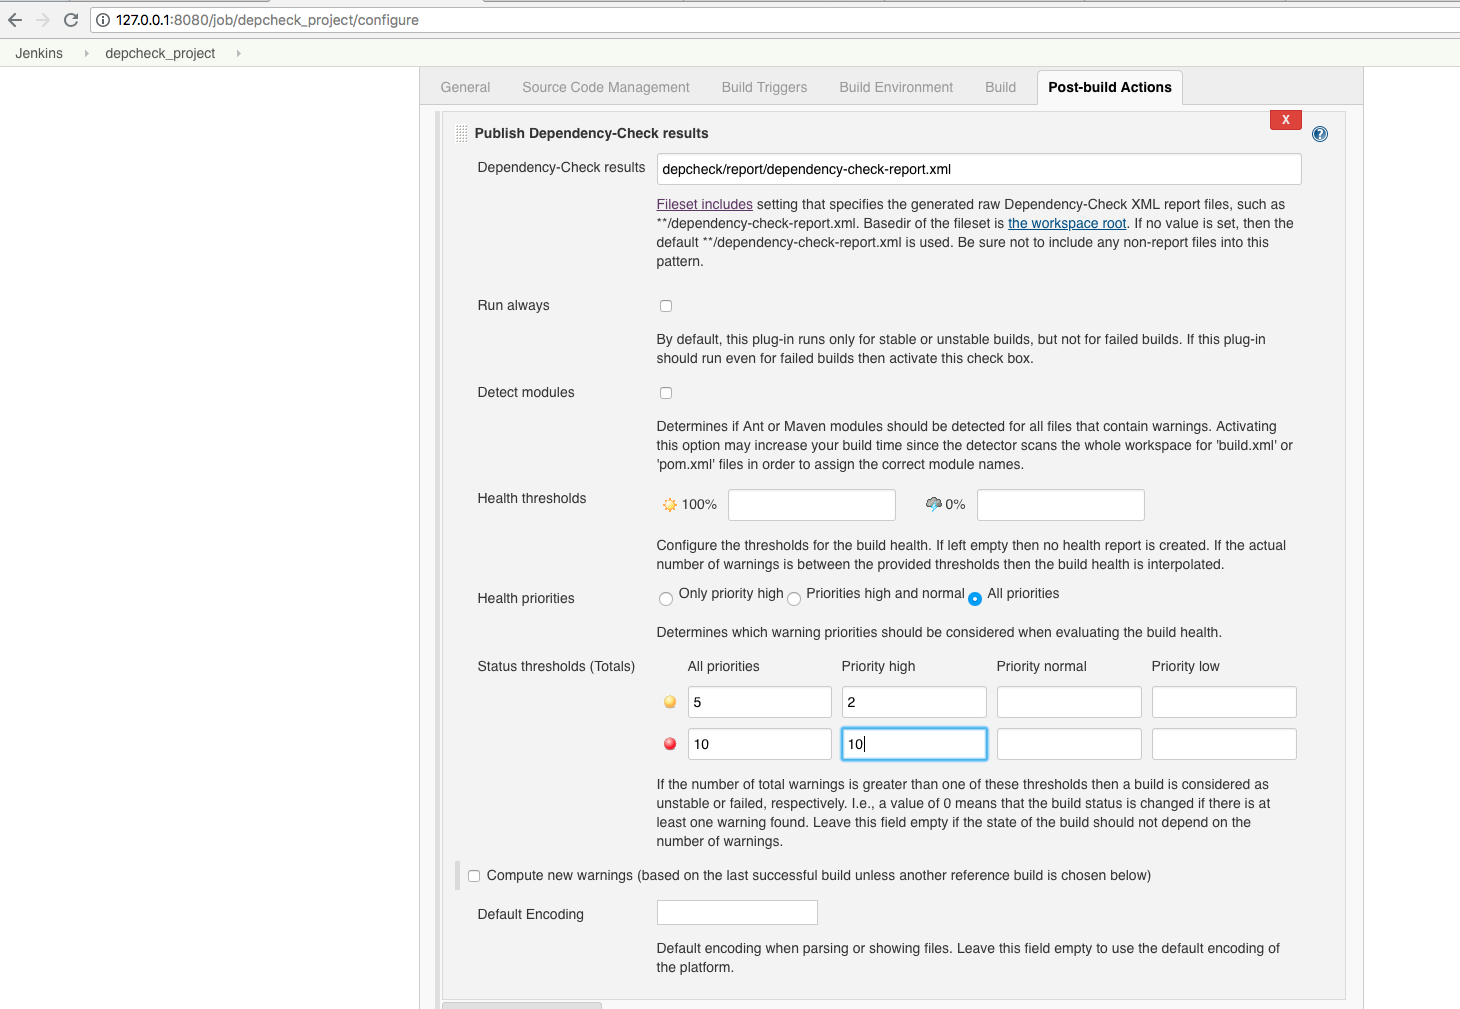
After that we go to ‘Save’.
We initiate the build process by using ‘Build now’.
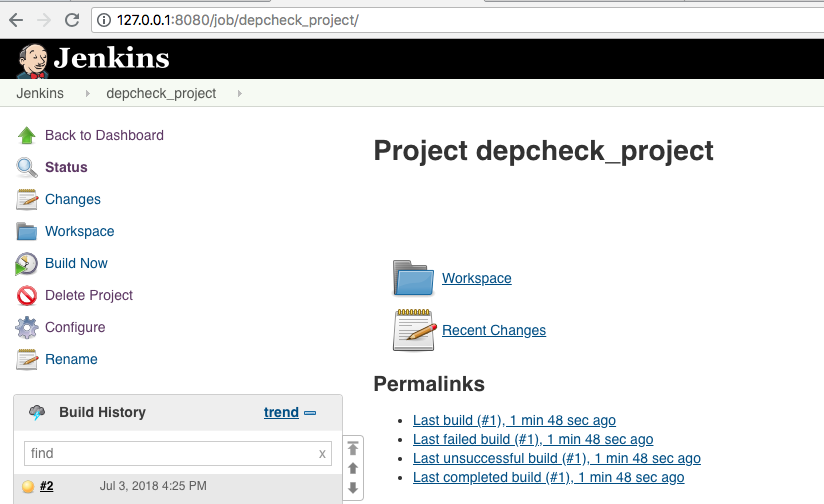
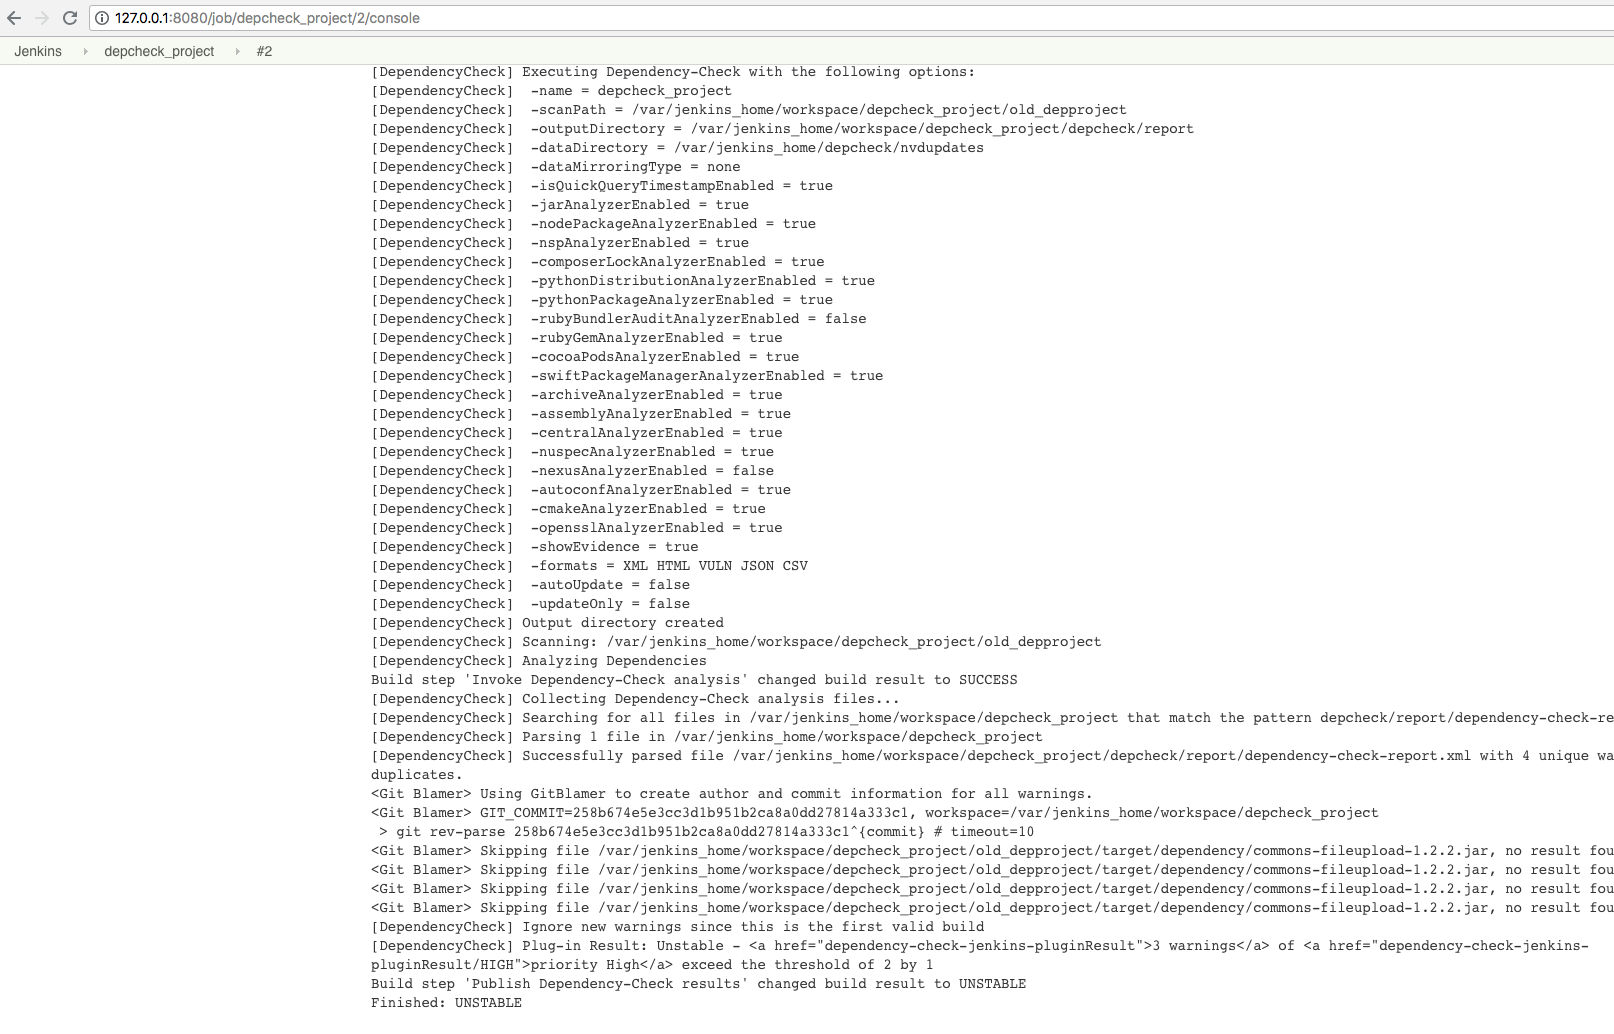
The result is yellow if we populated pom.xml with the dependency commons-fileupload - otherwise it is blue.
Likewise, if the commons-fileupload is the old vulnerable one, the console output will show unstable:
Suppressing Findings
Sometimes certain findings have to be turned off. This can have different reasons:
- It is a false positive
- You can not change the library for some reason
The so-called Suppression File serves this purpose.
A suppression file is an XML file with the following structure:
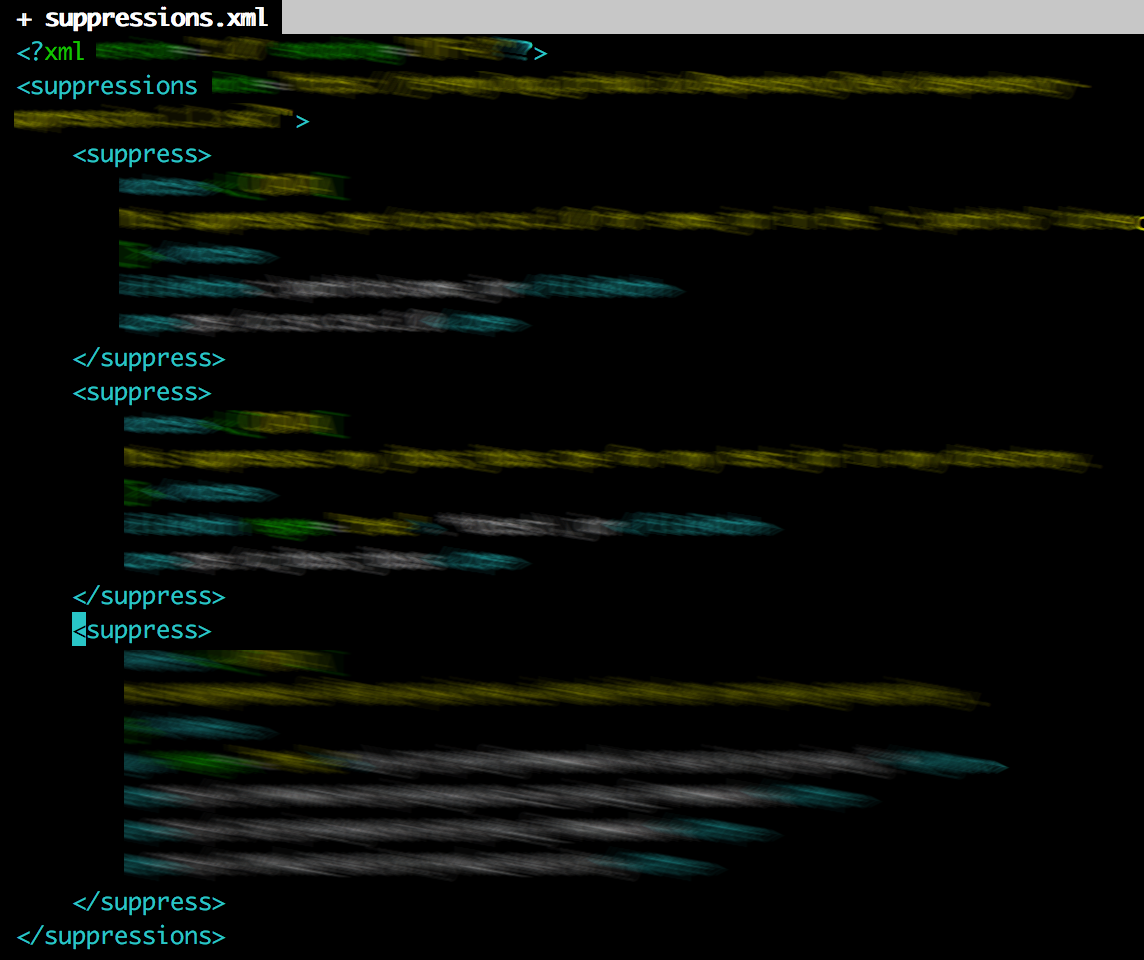
You can list in the suppress sections the things which should not be considered.
On the one hand, it can be specified which dependencies should be ignored, for example on specific jar files. On the other hand, it defines which vulnerability should be excluded.
Example:
<suppress>
        <notes><![CDATA[
        This suppresses cpe:/a:csv:csv:1.0 for some.jar in the "c:\path\to" directory.
        ]]></notes>
        <filePath>c:\path\to\some.jar</filePath>
        <cpe>cpe:/a:csv:csv:1.0</cpe>
</suppress>
suppresses the finding cpe:/a:csv:csv:1.0 in the dependency c:\path\to\some.jar.
Creating suppressive sections
After an HTML dependency check report has been generated, you can directly generate the associated suppress section from a finding in the report:
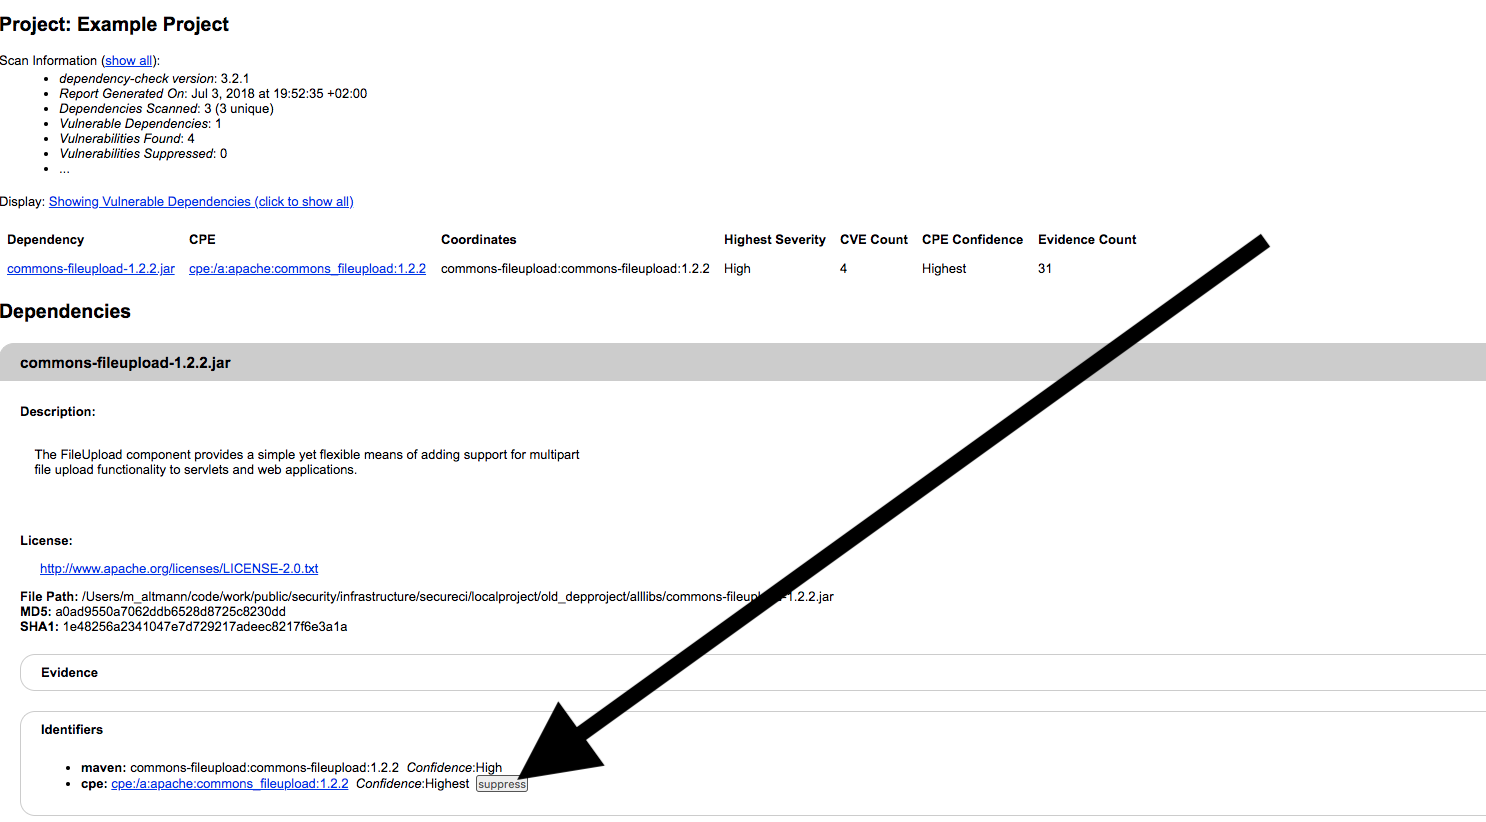
Click on the Suppress button to get the snippet directly:
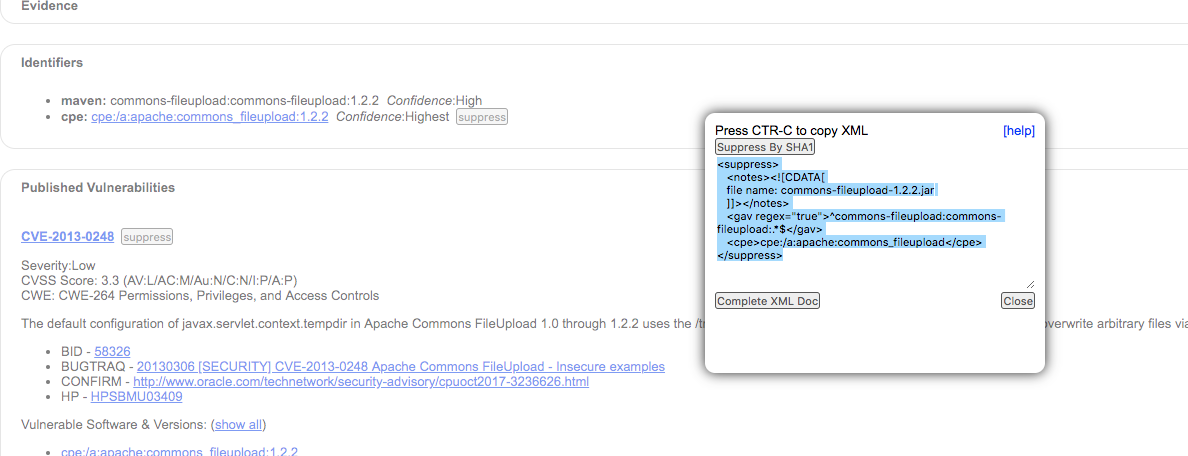
This can now be copied into the XML.
Suppression file in pipeline projects
As mentioned above, we can define the suppression file using a parameter called ‘suppressionFile’.
An excerpt from a Jenkinsfile might look like this:
pipeline {
    agent any
    ...
    stages {
    ...
        stage ('Dependency Check') {
            steps {
                ...
                dependencyCheckAnalyzer scanpath: 'old_depproject', \
                  outdir: 'depcheck/report', \
                  ...
                  suppressionFile: 'suppression.xml', \
                  zipExtensions: ''

               dependencyCheckPublisher pattern: 'depcheck/report/dependency-check-report.xml', \
                  unstableTotalAll: '0', \
                  usePreviousBuildAsReference: false
            }
        }
    }
}
Suppression file in the GUI
If you use the standard GUI, the suppression file can be found under ‘Build’ ‘Invoke Dependency-Check analysis’ ‘Suppression File’:

Sonarqube
In addition to the integration of Dependency Check in the continuous integration system Jenkins, the analysis tool can also be enabled in other connected systems.
One example is the continuous inspection tool Sonarqube, which allows developers to check the checked-in code for specific metrics, such as test coverage.
This chapter describes how to augment Sonarqube with OWASP Dependency Check.
Again, we will work with a sample docker so that the steps can be tested before being introduced to your own project.
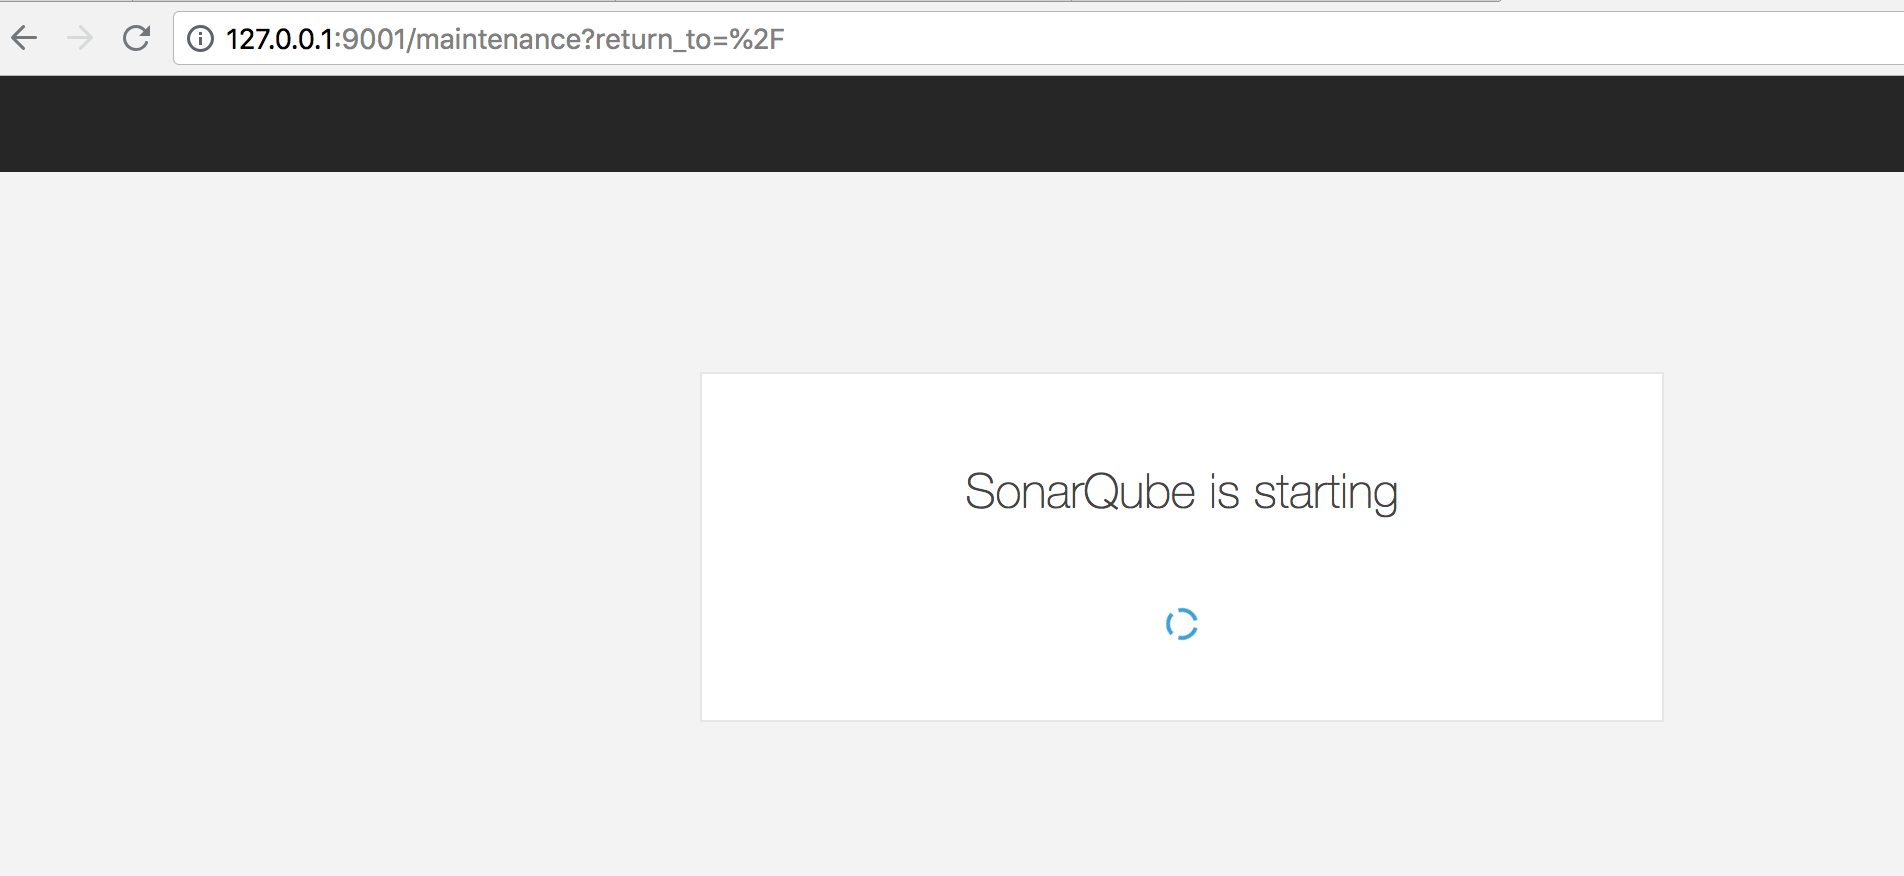
To start Sonarqube via Docker we enter the following command in the root directory:
docker run -d --name sonarqube -p 127.0.0.1:9001:9000 -p 127.0.0.1:9092:9092 -v `pwd`/mnt/coninsserver/sonarqube_home/data:/opt/sonarqube/data -v `pwd`/mnt/coninsserver/sonarqube_home/extensions:/opt/sonarqube/extensions sonarqube:7.1
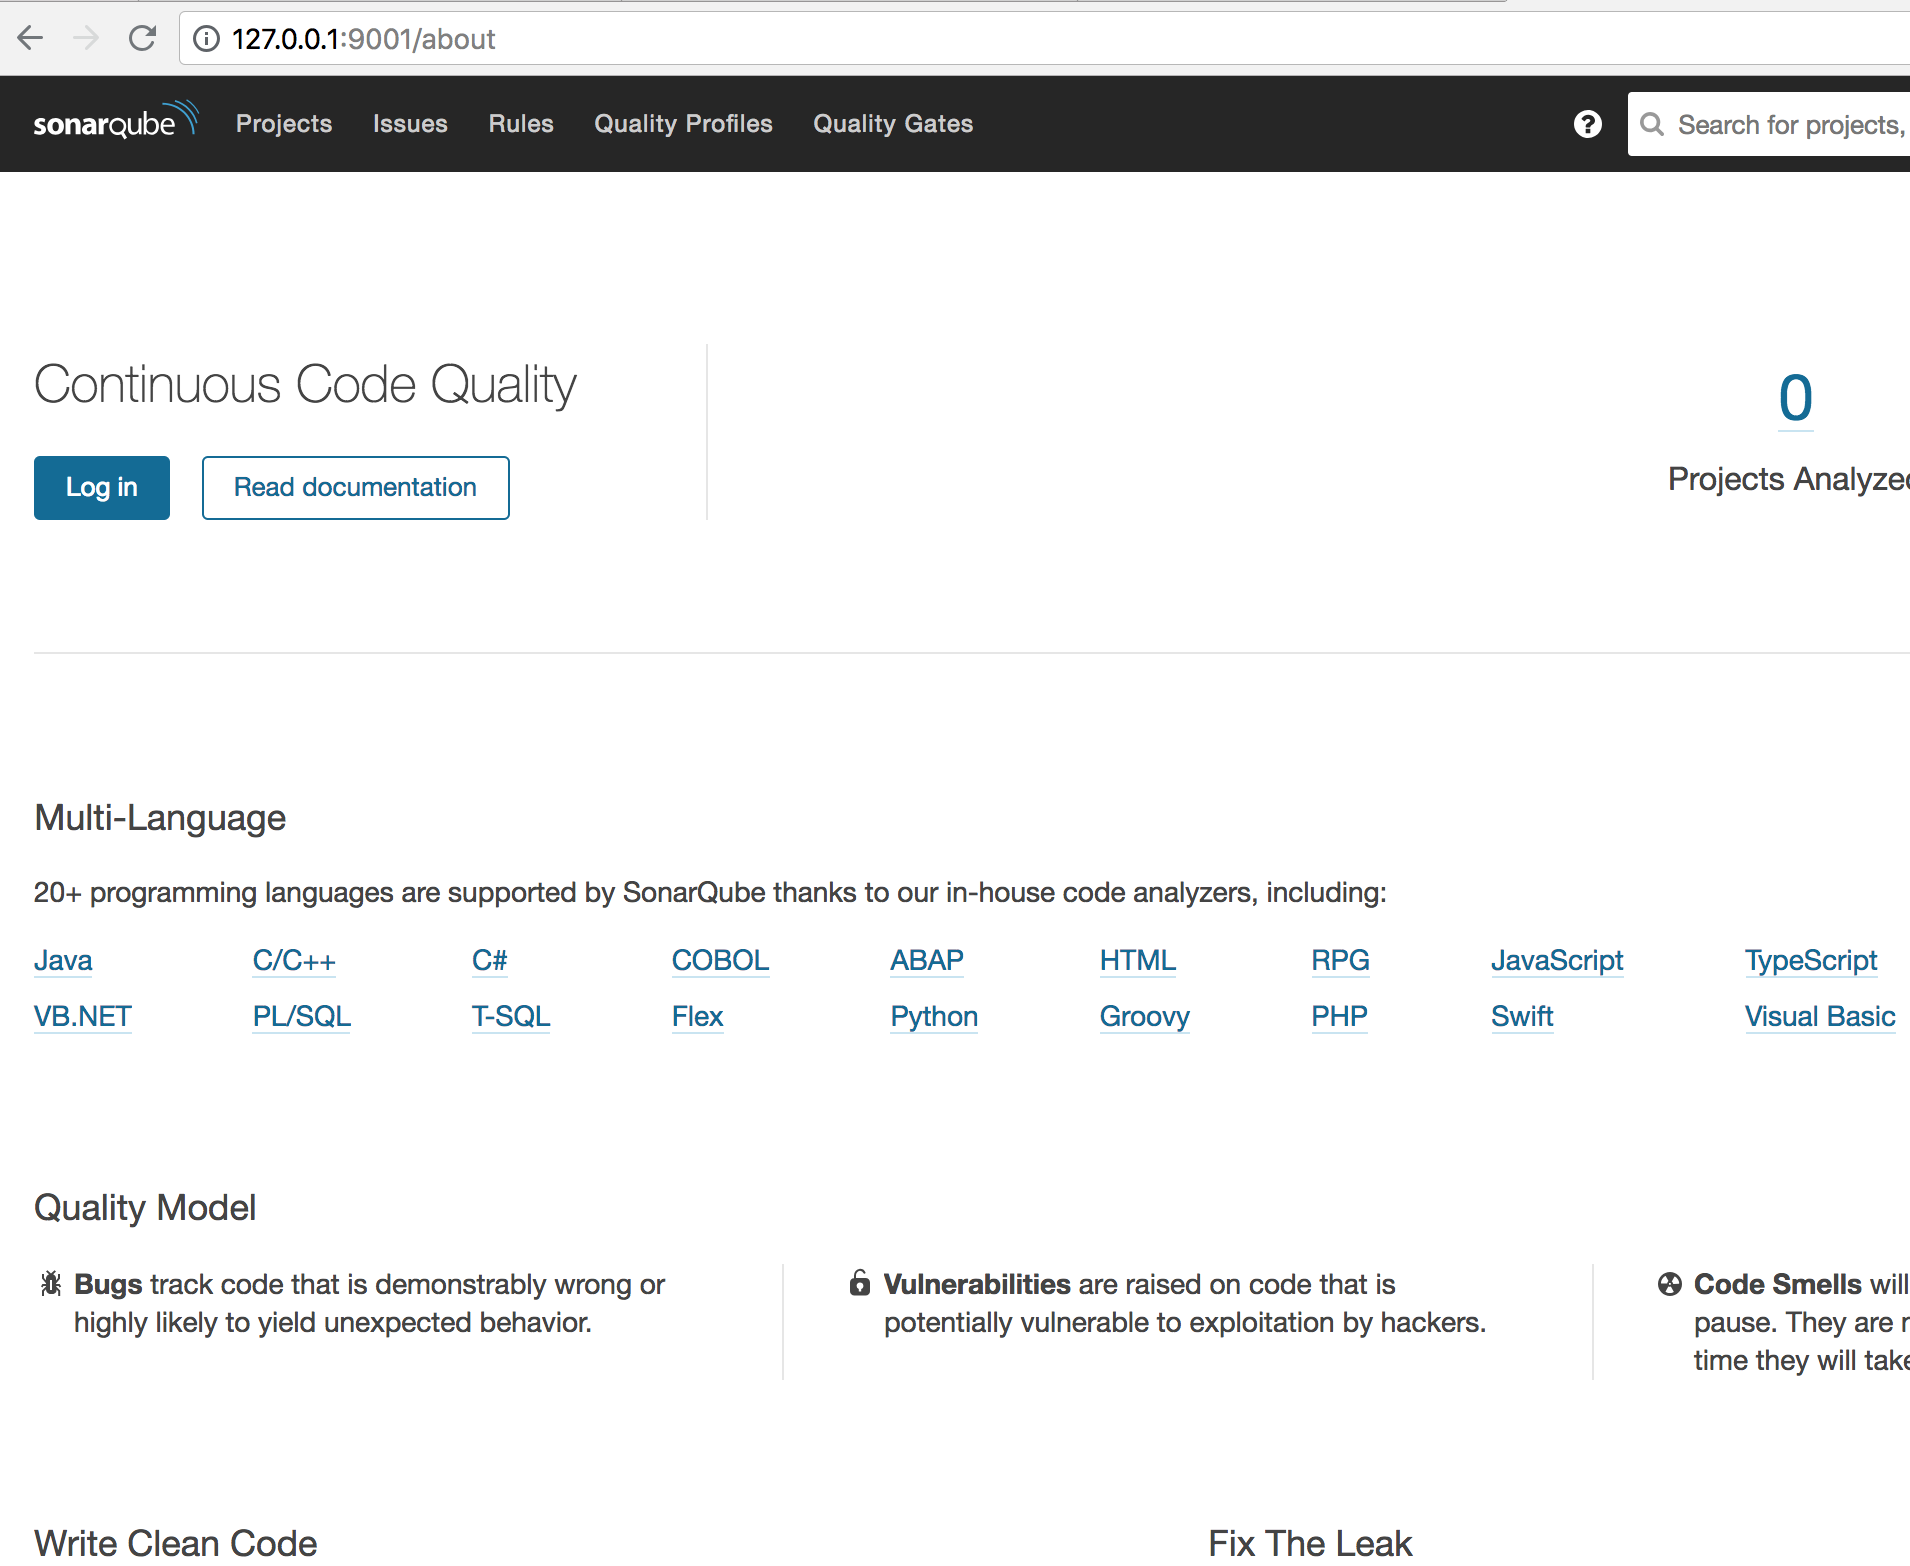
After a certain amount of time and if the port is not reserved, the browser will show at http: //127.0.0.1:9001/:
and finally:
Installing Sonarqube
Starting from [the GitHub Page of the Dependency Check Sonar Plugin] (https://github.com/stevespringett/dependency-check-sonar-plugin) we first clone the plugin and build it locally:
git clone https://github.com/stevespringett/dependency-check-sonar-plugin.git
cd dependency-check-sonar-plugin
mvn clean package
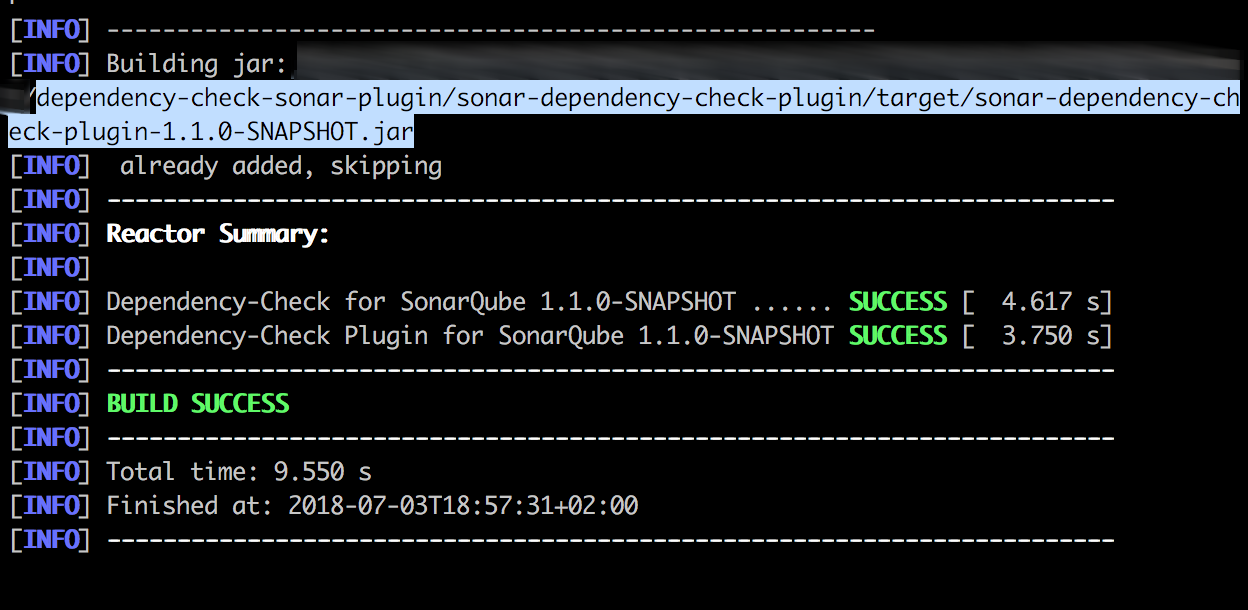
The output of Maven shows us where it was created:
Now we copy the created jar into the docker container in the subdirectory /extensions/plugins in the Sonarqube home folder.
The home folder can be found in the environment variable SONARQUBE_HOME:
docker exec <containerid_sonarqube> env
...
LANG=C.UTF-8
JAVA_HOME=/docker-java-home
JAVA_VERSION=8u171
JAVA_DEBIAN_VERSION=8u171-b11-1~deb9u1
CA_CERTIFICATES_JAVA_VERSION=20170531+nmu1
SONAR_VERSION=7.1
SONARQUBE_HOME=/opt/sonarqube
SONARQUBE_JDBC_USERNAME=sonar
SONARQUBE_JDBC_PASSWORD=sonar
SONARQUBE_JDBC_URL=
...
docker cp <path to created Jar> <containerid_sonarqube>:/opt/sonarqube/extensions/plugins/
eg if we have a container ID xyz:
docker cp sonar-dependency-check-plugin/target/sonar-dependency-check-plugin-1.1.0-SNAPSHOT.jar xyz:/opt/sonarqube/extensions/plugins/
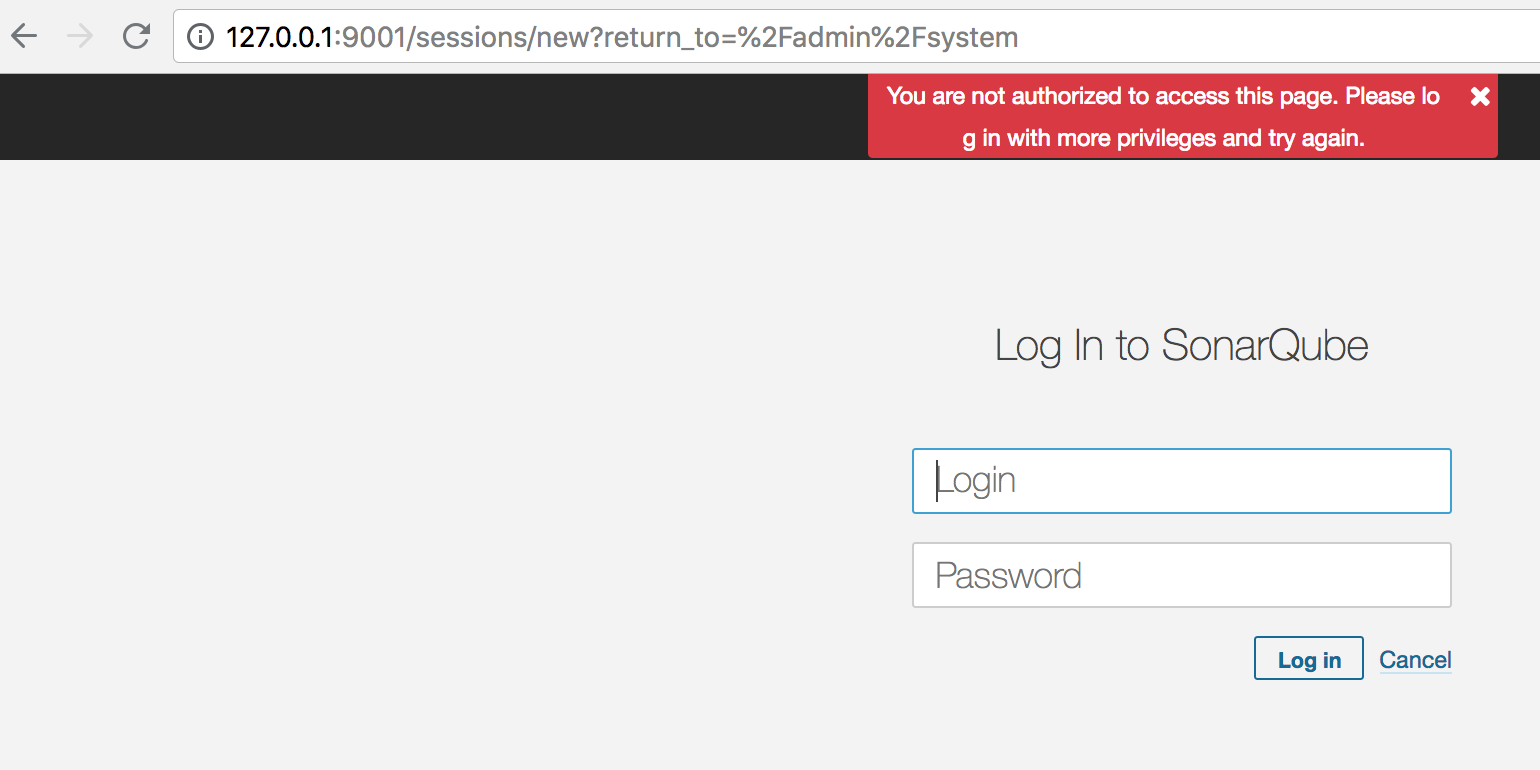
To equip Sonarqube with the new plugin we need to reboot the system.
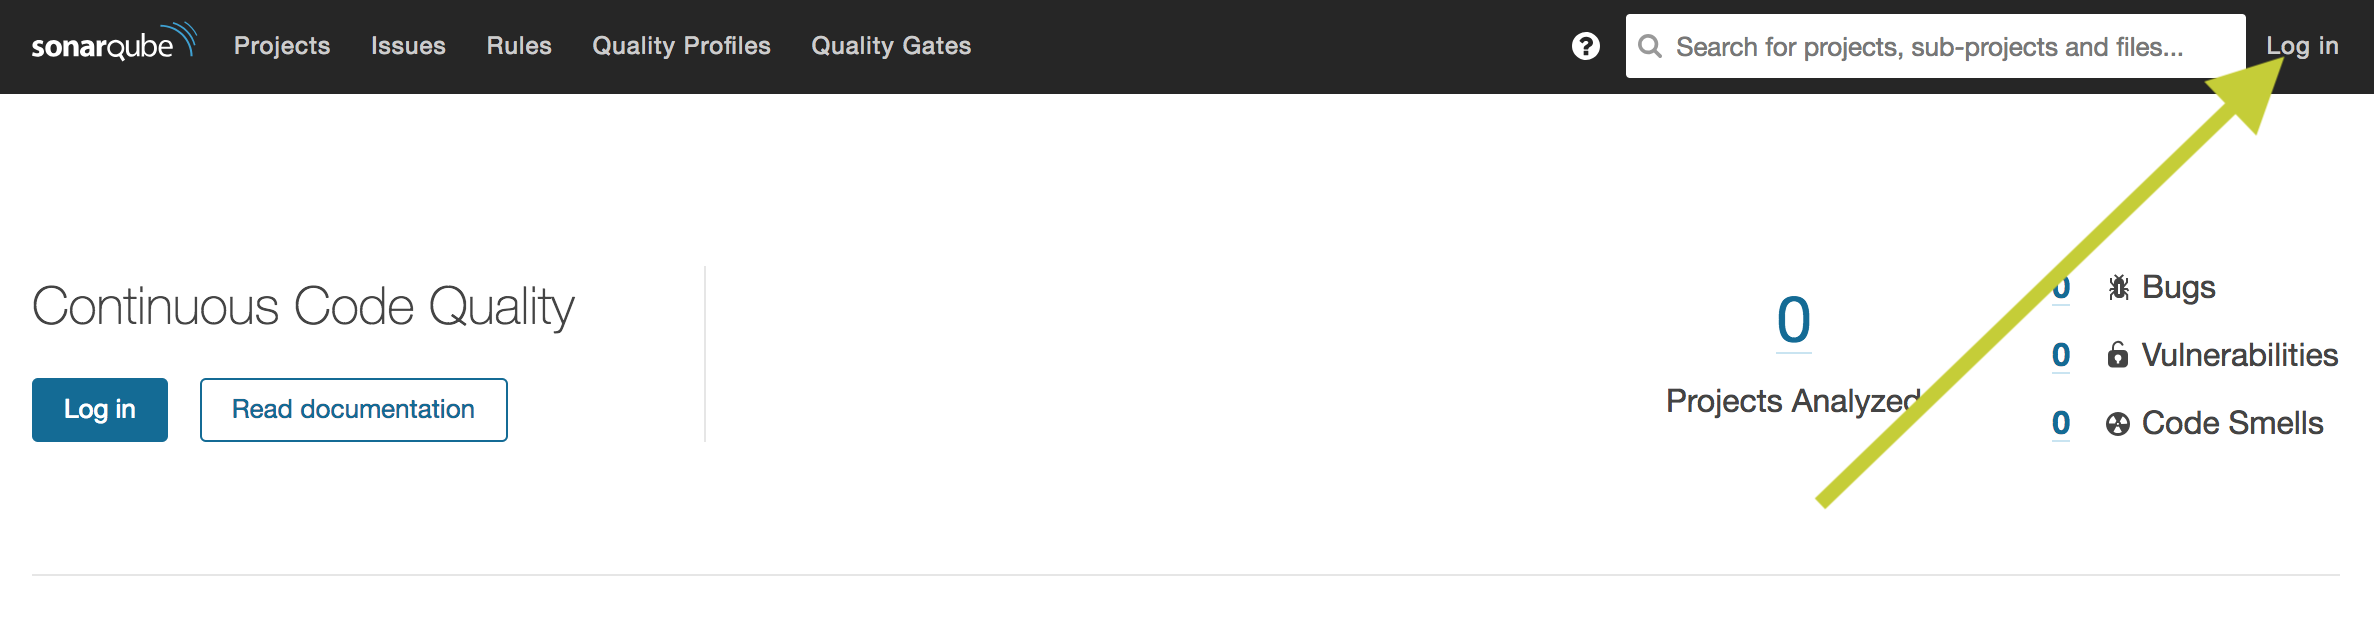
For this we click on ‘Login’ in the top right corner:
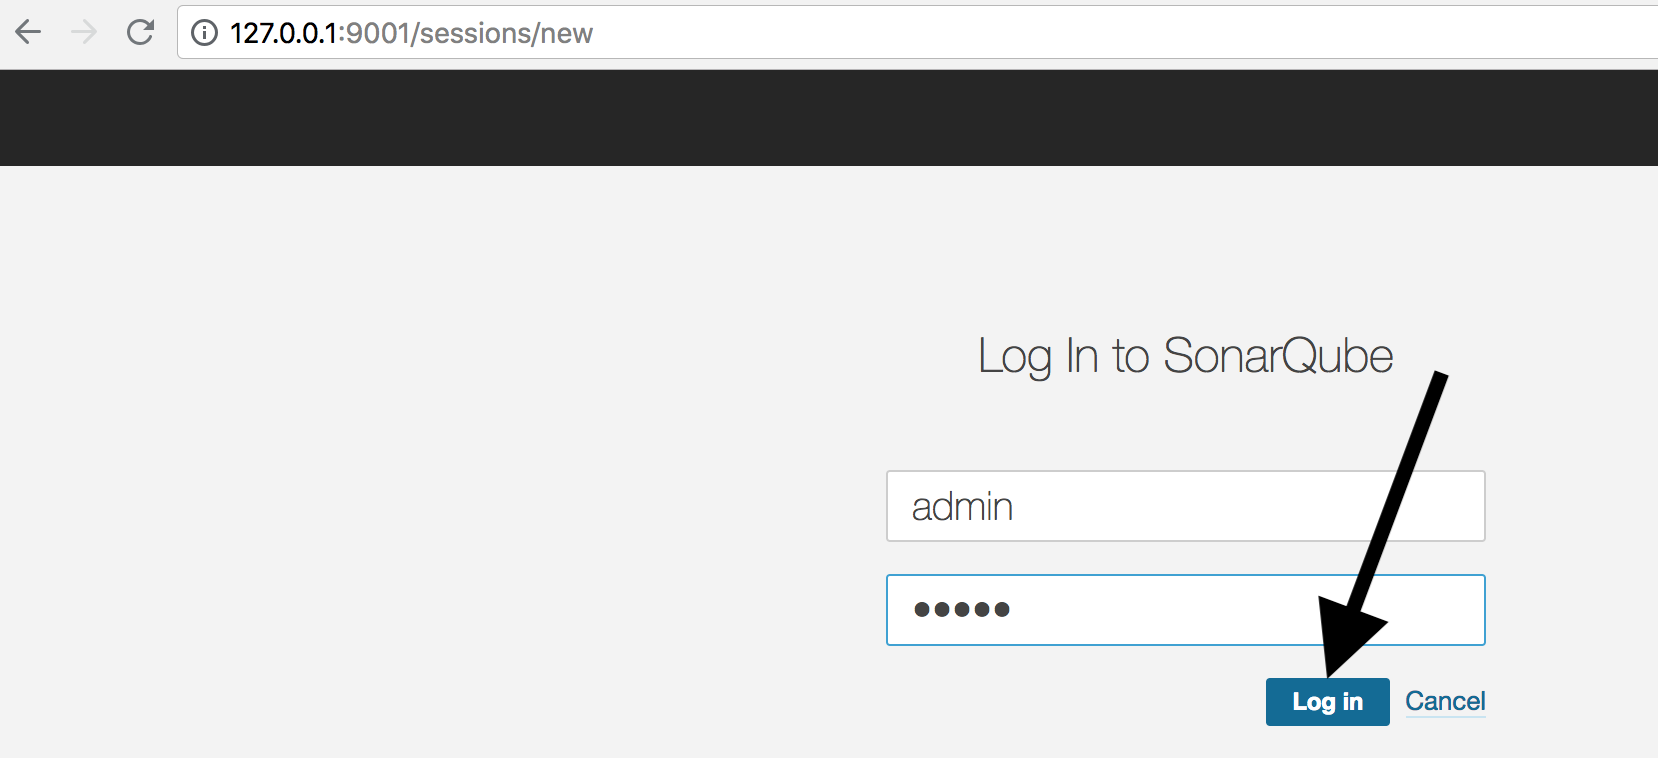
The standard credentials are:
‘admin’ ‘admin’
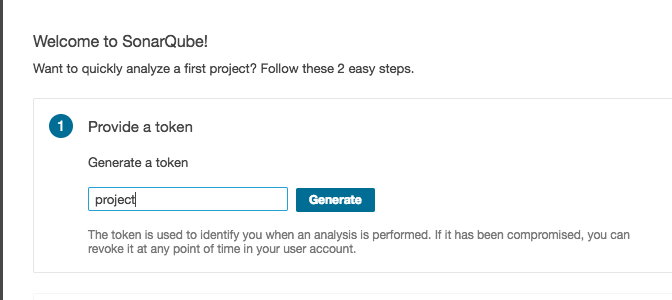
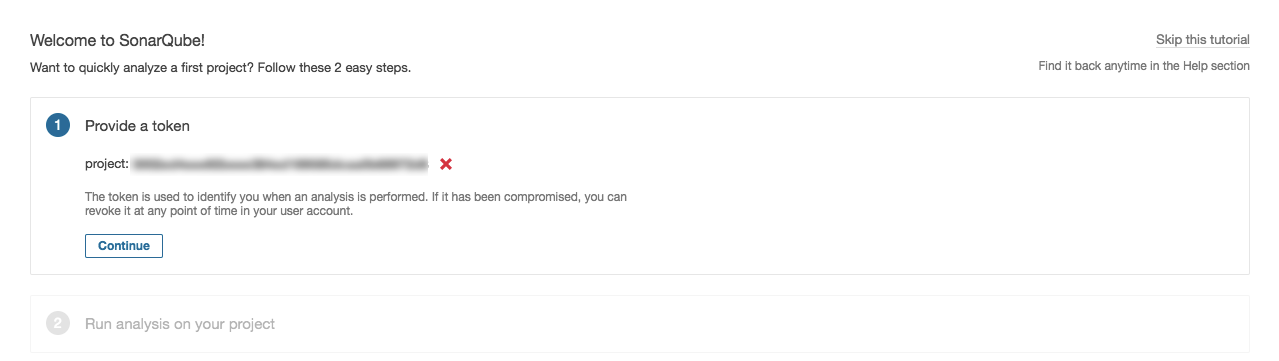
First, we are asked to create a token.
As a name we choose project for our example project and click on ‘Generate’:
Next on ‘Continue’:
As programming language we choose ‘Java’ and as build technology ‘Maven’. We copy the command line command via the ‘Copy’ button and note it for later.
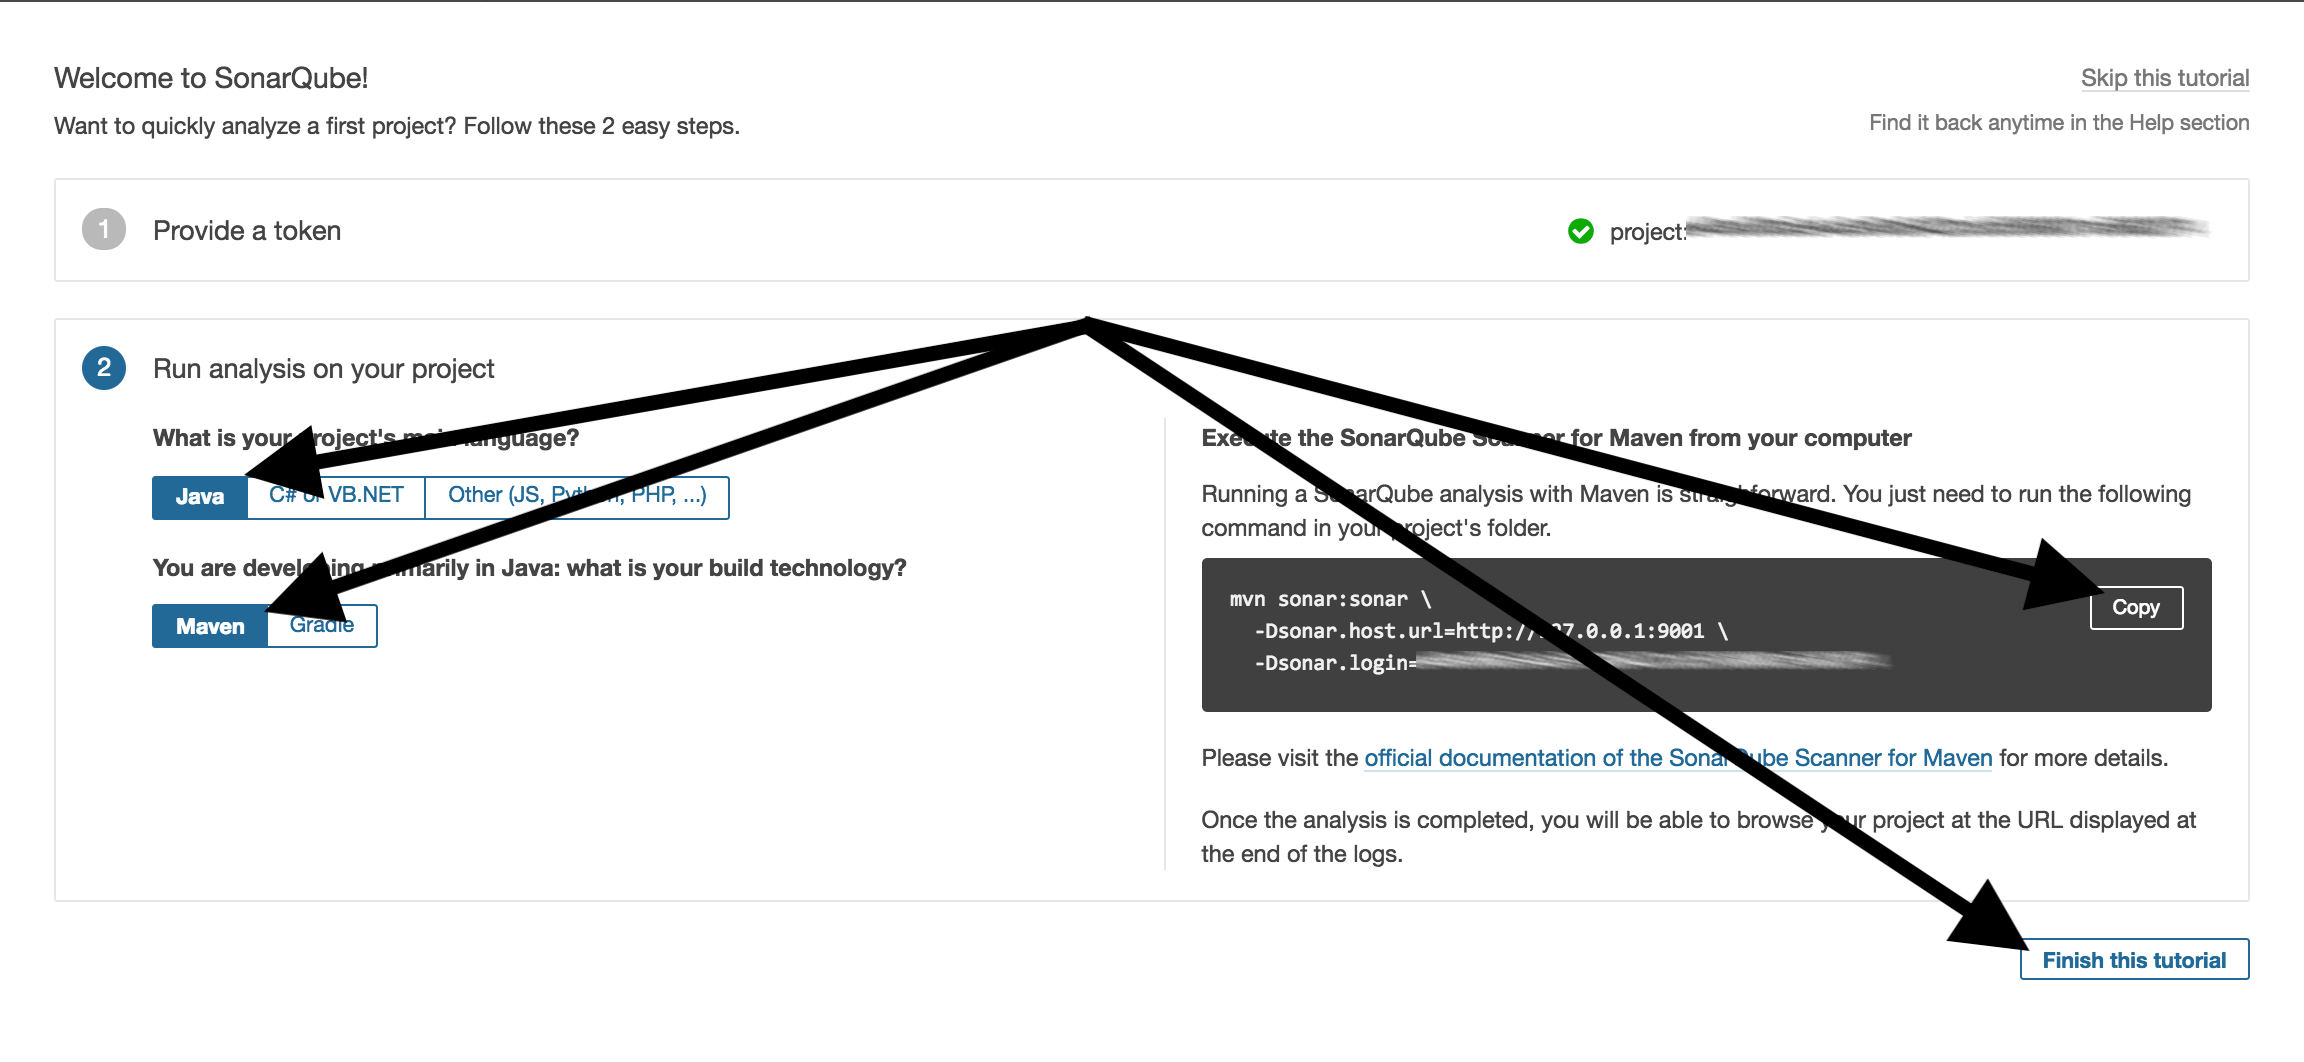
Then we finish the tutorial at the bottom right on ‘Finish this tutorial’,
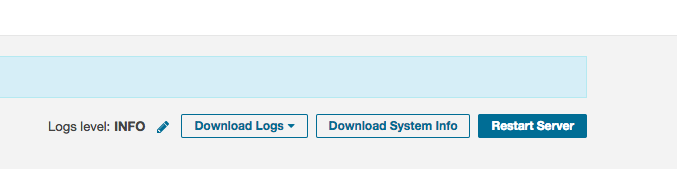
and go to ‘Administration’:

Select ‘System’

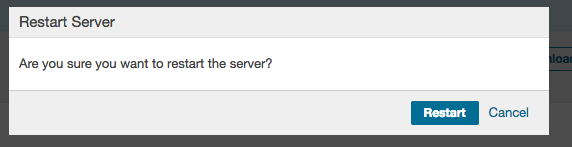
and ‘Restart server’
‘Restart’
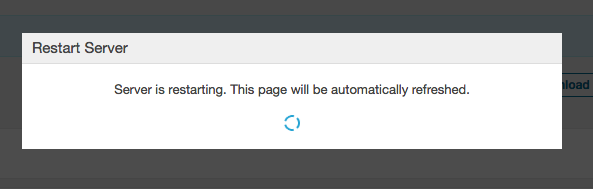
After a short time the following page should be displayed:
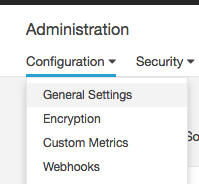
If we now click on ‘Configuration’ ‘General Settings’ ‘Dependency Check’ should be displayed:

At this point, we have the plugin installed and have a token for our sample project.
Checking the code
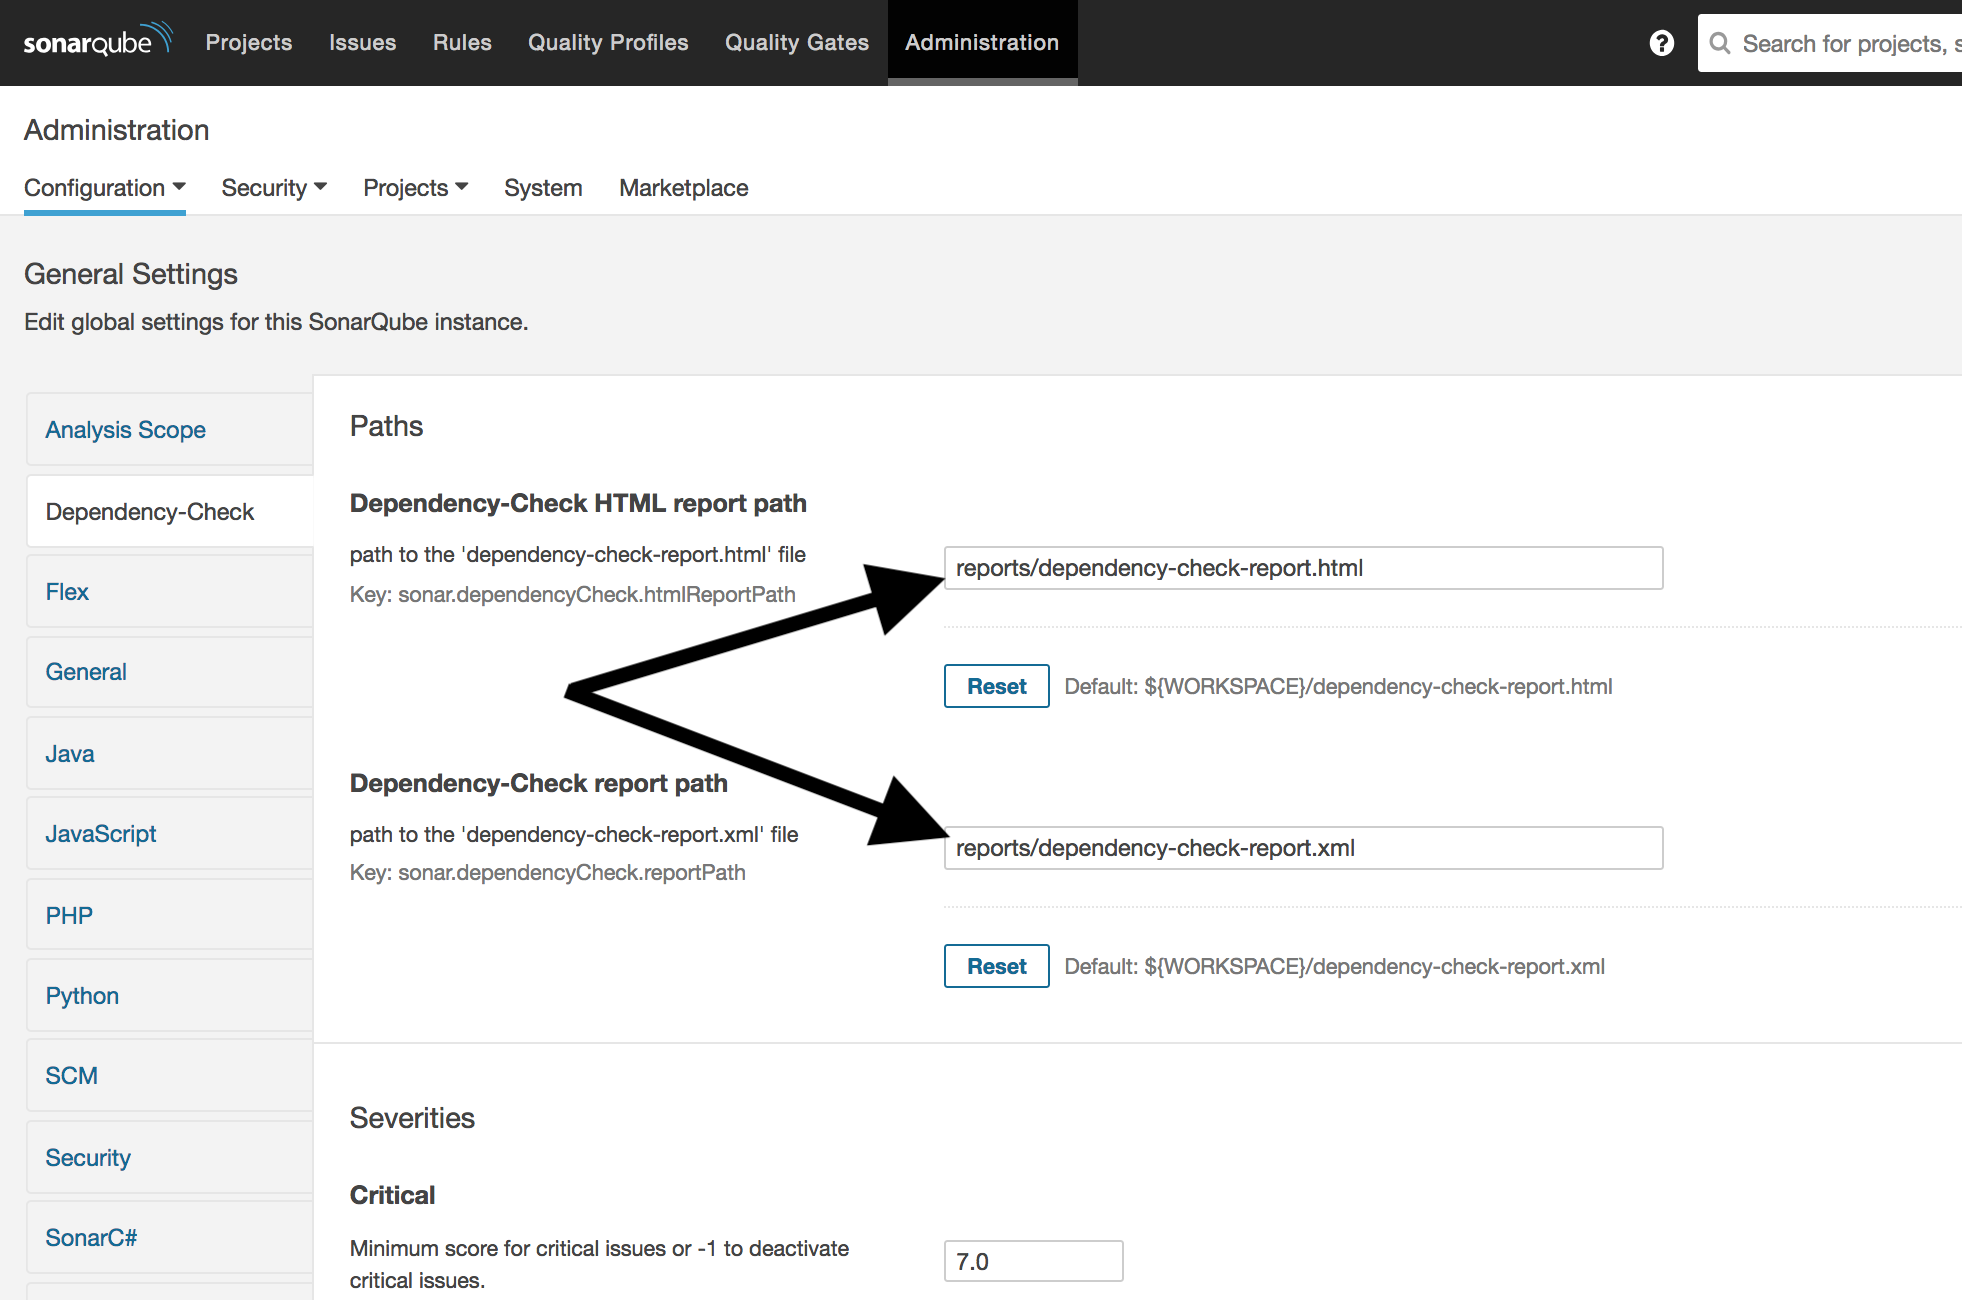
Under ‘Administration’ ‘Configuration’ we set the following paths:
- Dependency-Check HTML report path :
reports/dependency-check-report.html - Dependency-Check report path:
reports/dependency-check-report.xml
Now we go into our local project.
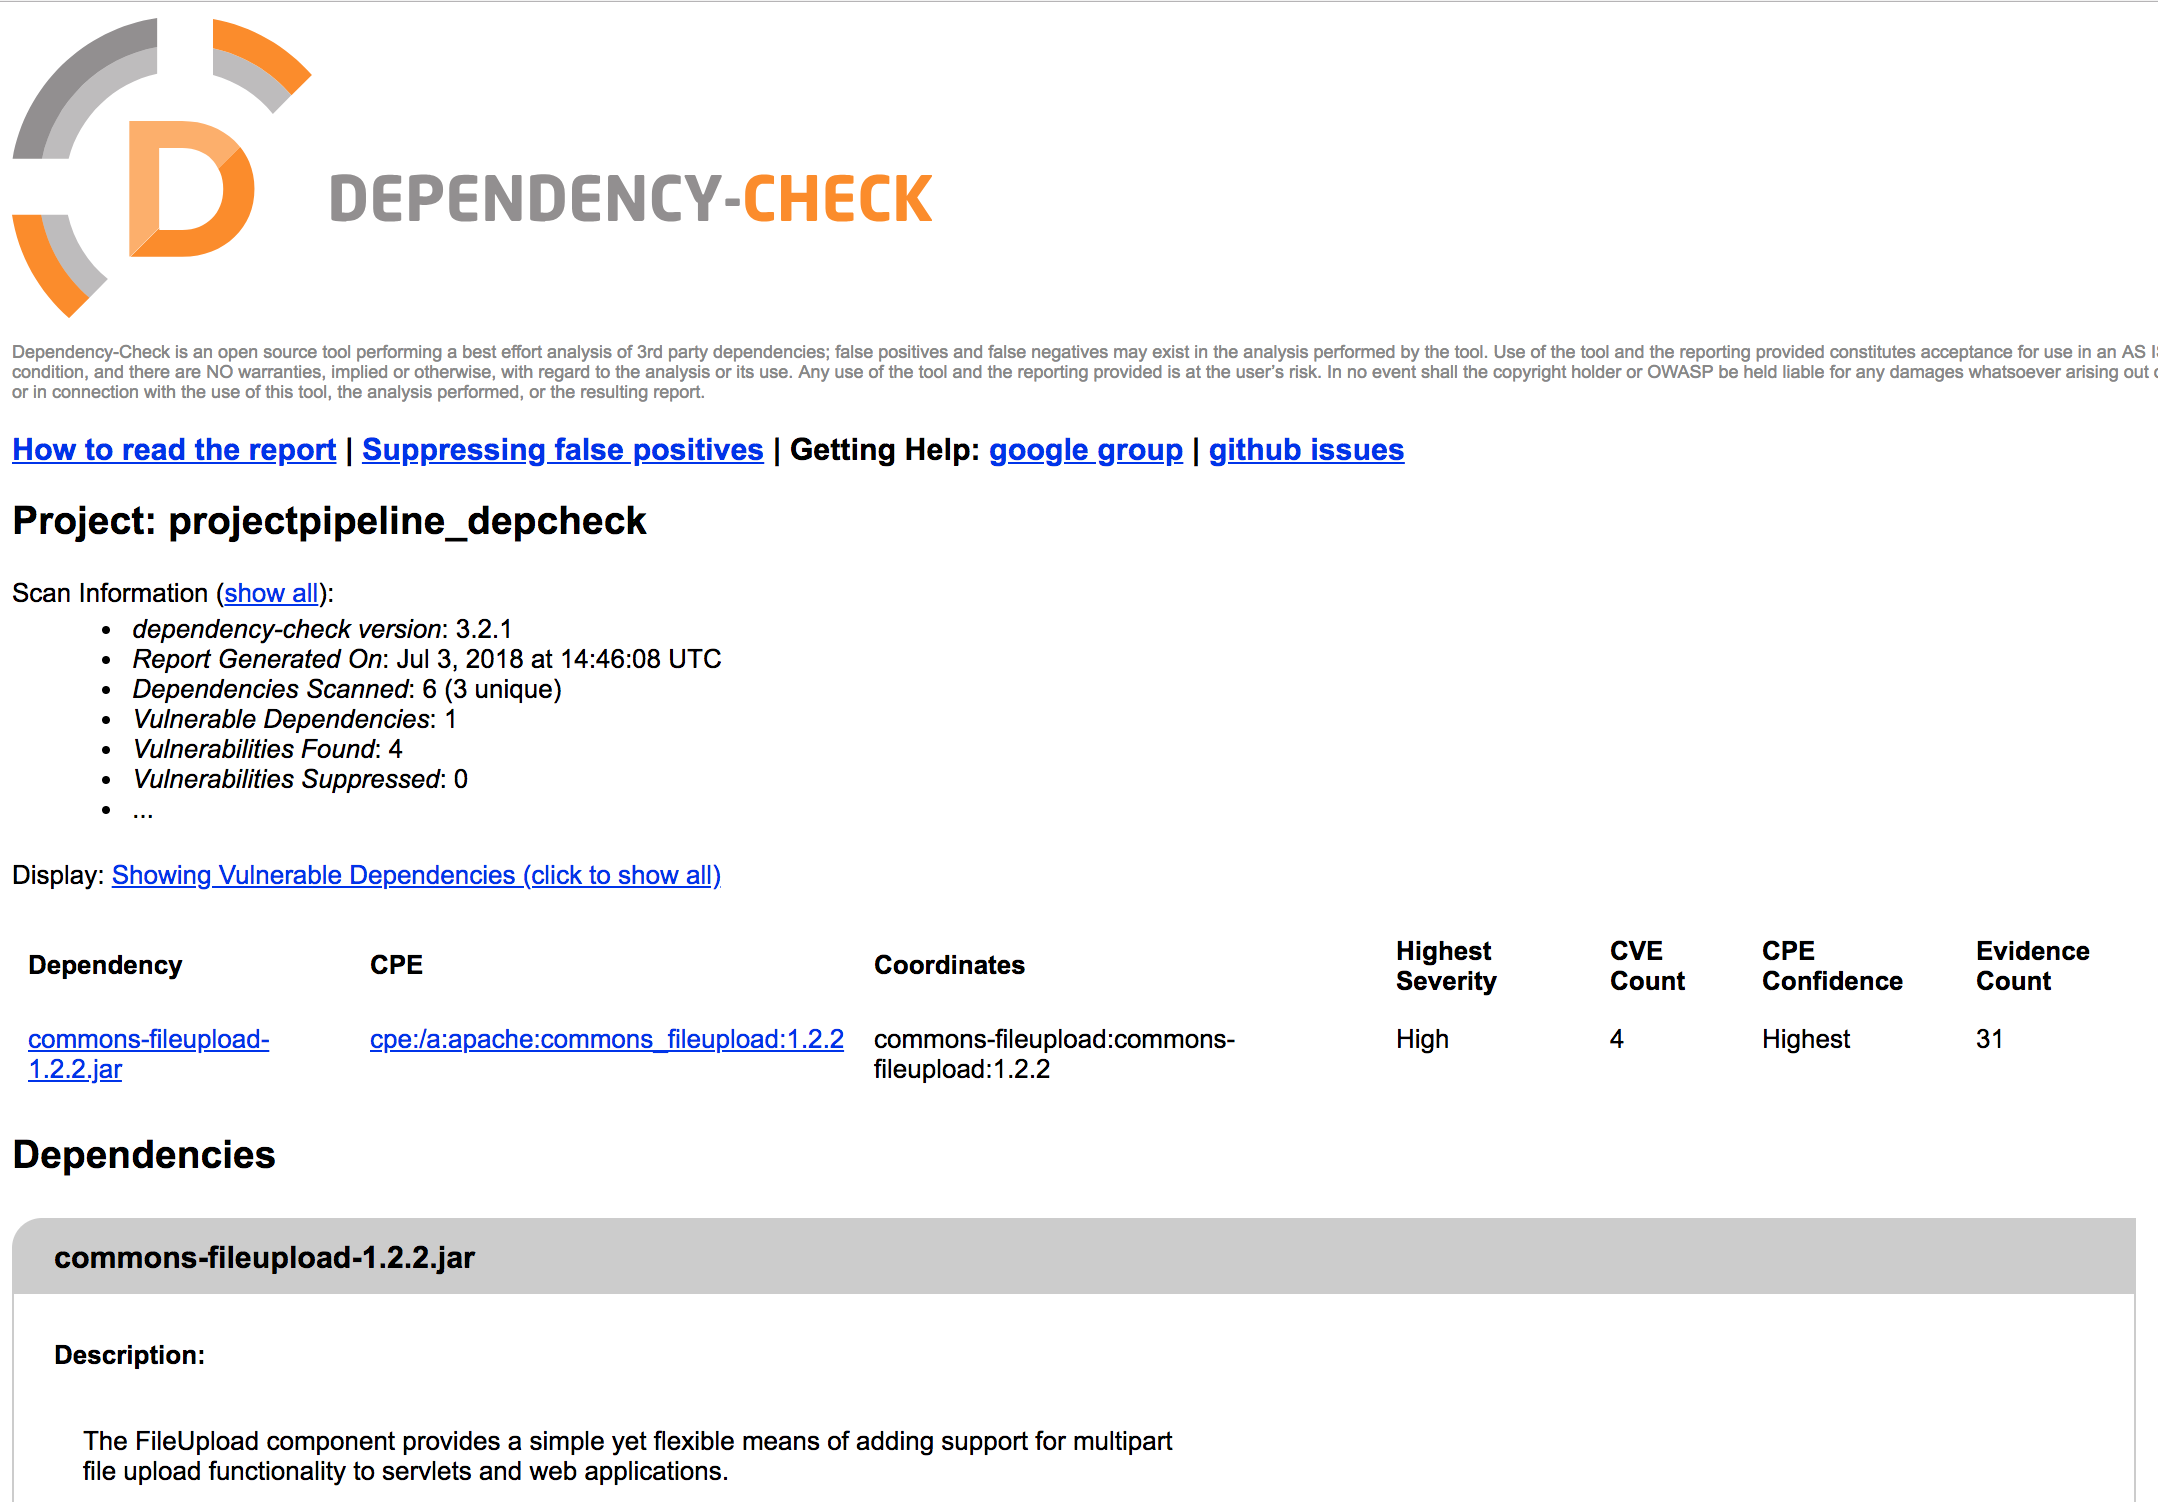
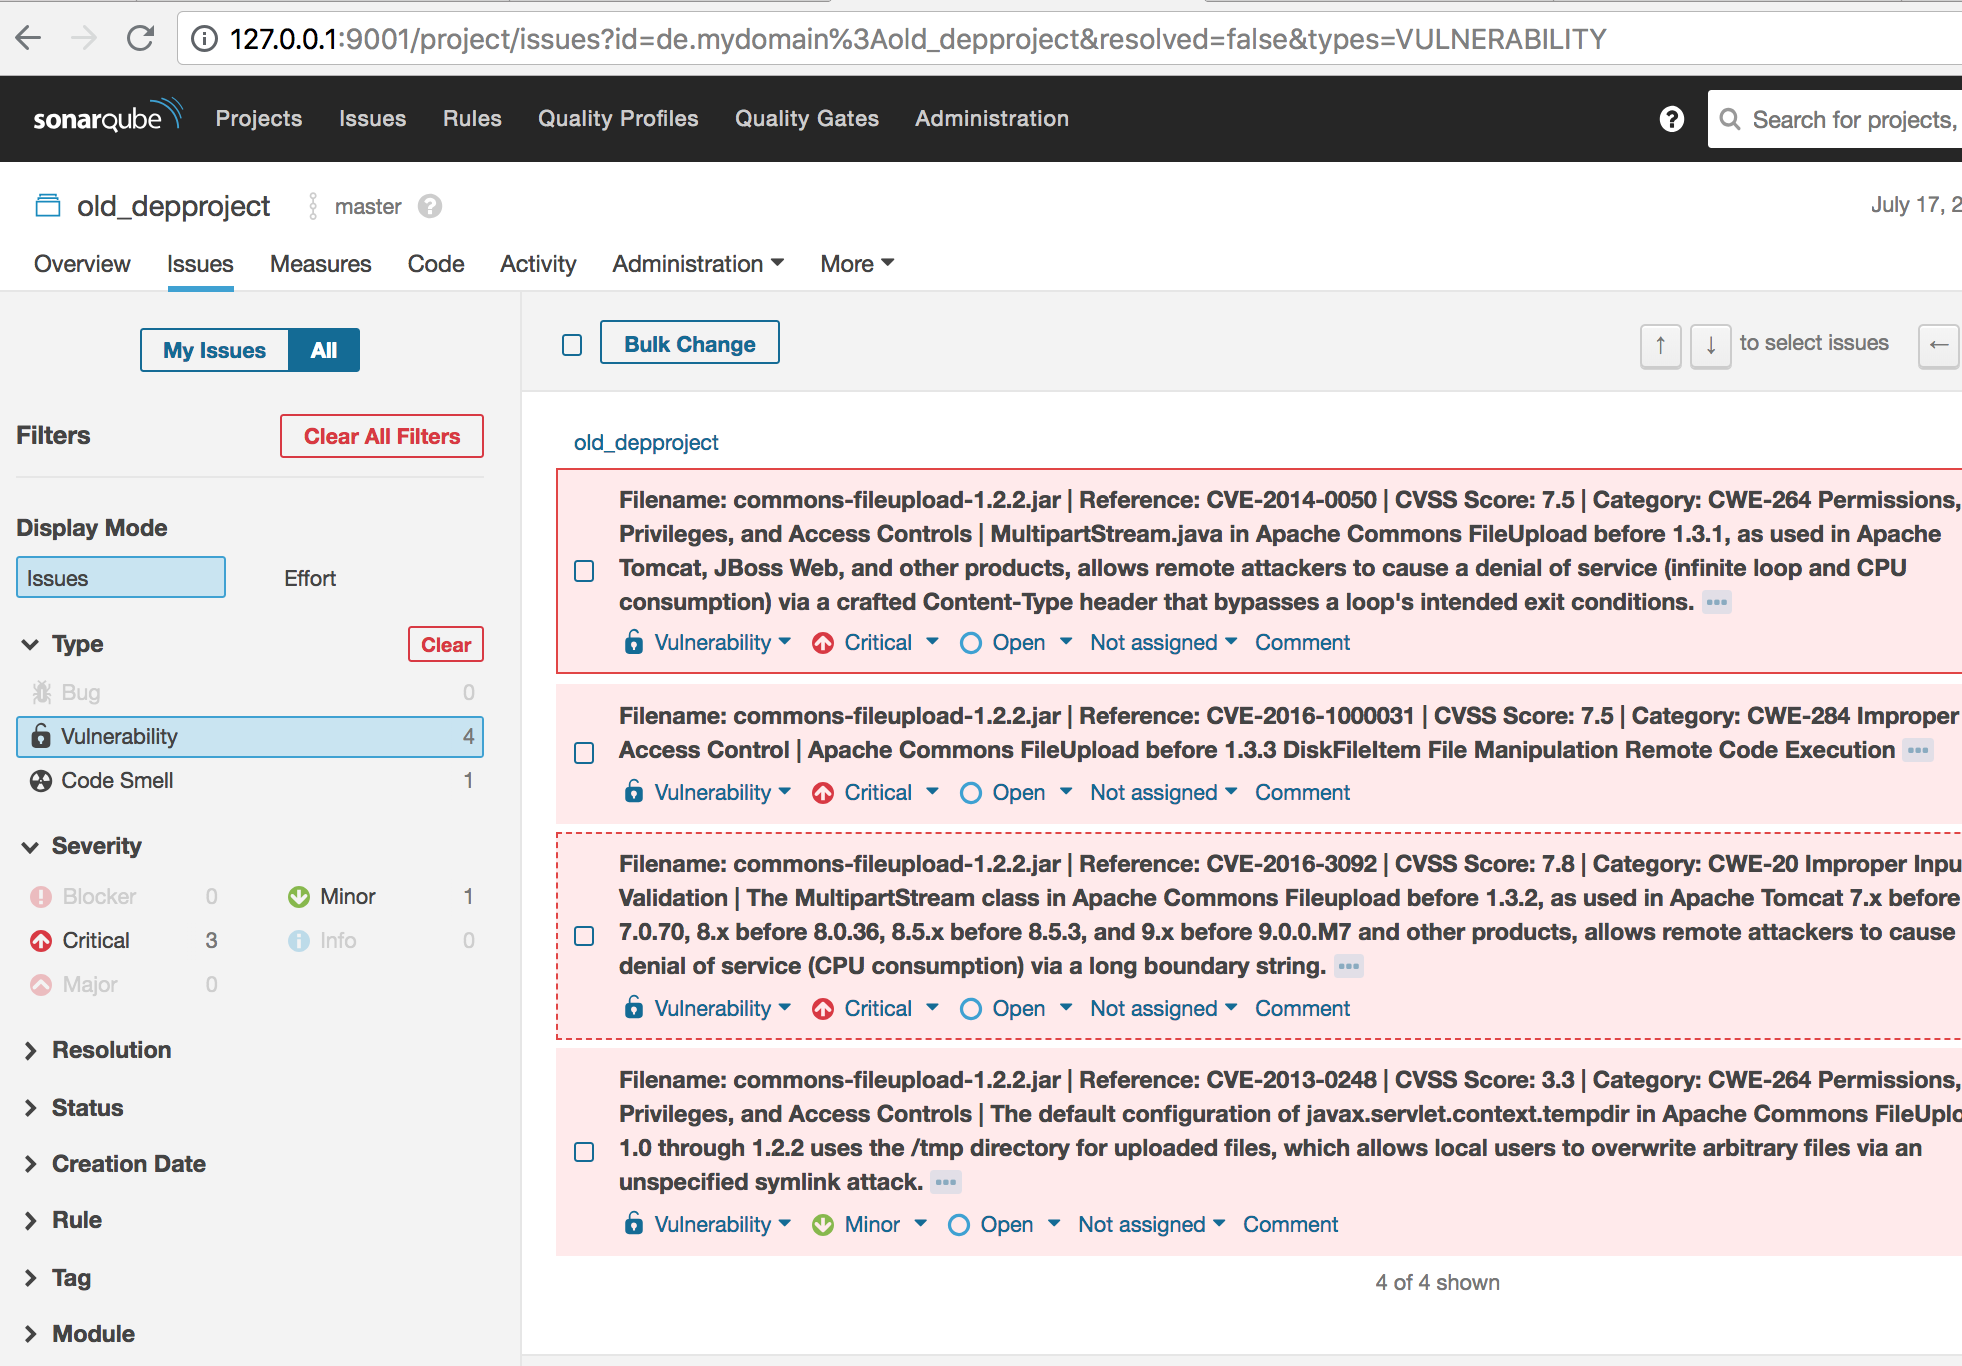
The project should have an vulnerable dependency named commons-fileupload in the Maven configuration file pom.xml as described earlier.
To generate the report for Sonarqube we enter the following in the root directory on the command line:
cd localproject/old_depproject
mvn clean dependency:copy-dependencies
./aggregatefordepcheck.sh
[[ -d reports ]] ||mkdir reports
dependency-check --project "Example Project" -s ./alllibs -l dependency.log -f ALL -o reports
mvn sonar:sonar -Dsonar.host.url=http://127.0.0.1:9001 \
  -Dsonar.login="<token>" \
  -Dsonar.dependencyCheck.reportPath="reports/dependency-check-report.xml" \
  -Dsonar.dependencyCheck.htmlReportPath="reports/dependency-check-report.html"
Now when we go to ‘Projects’ we see the following:
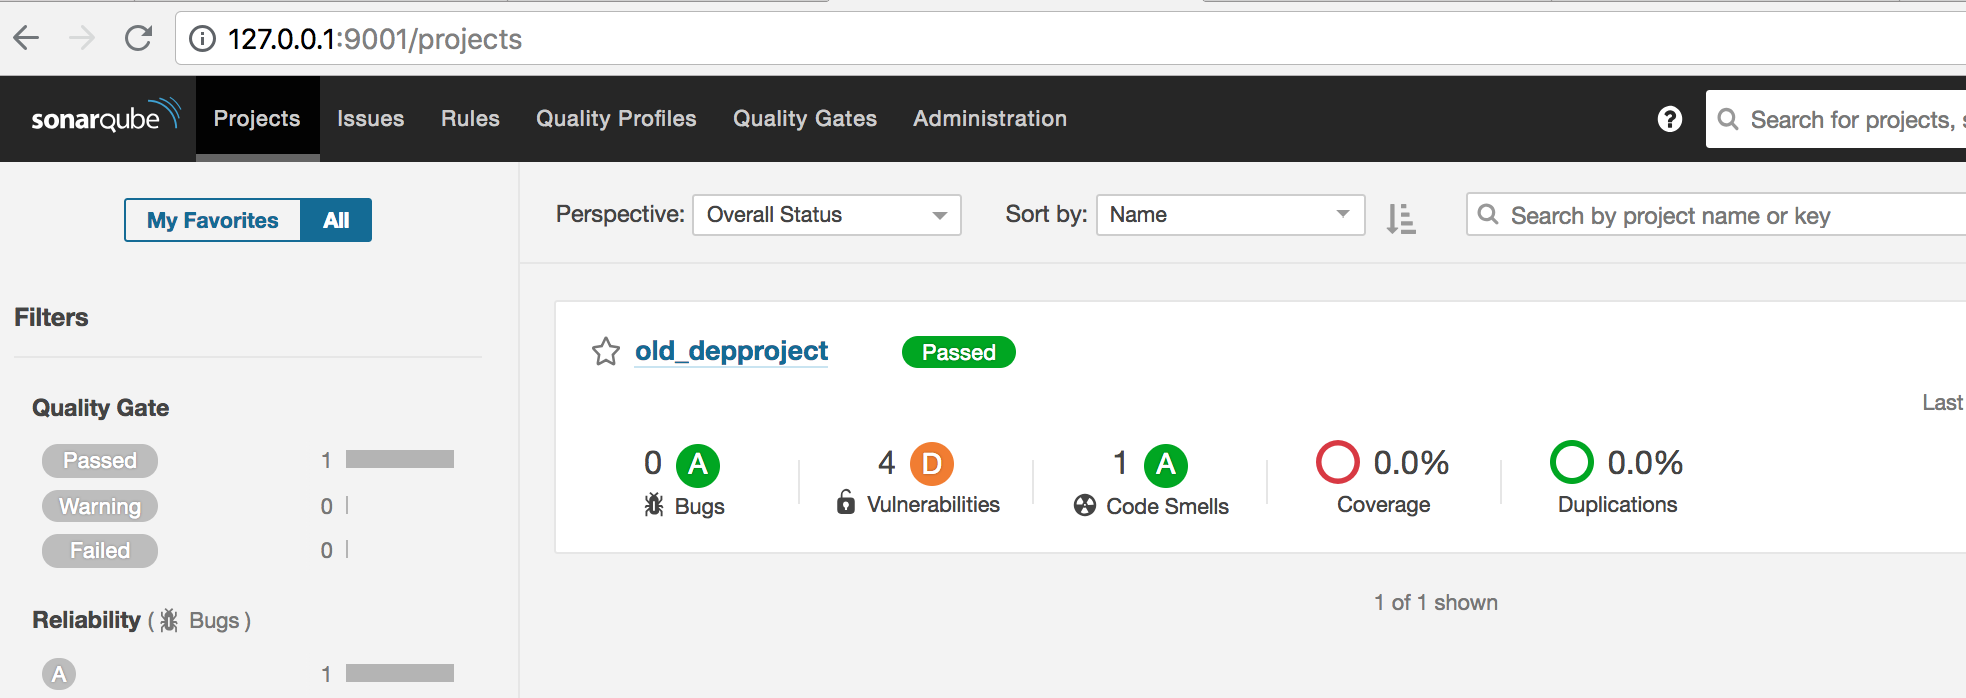
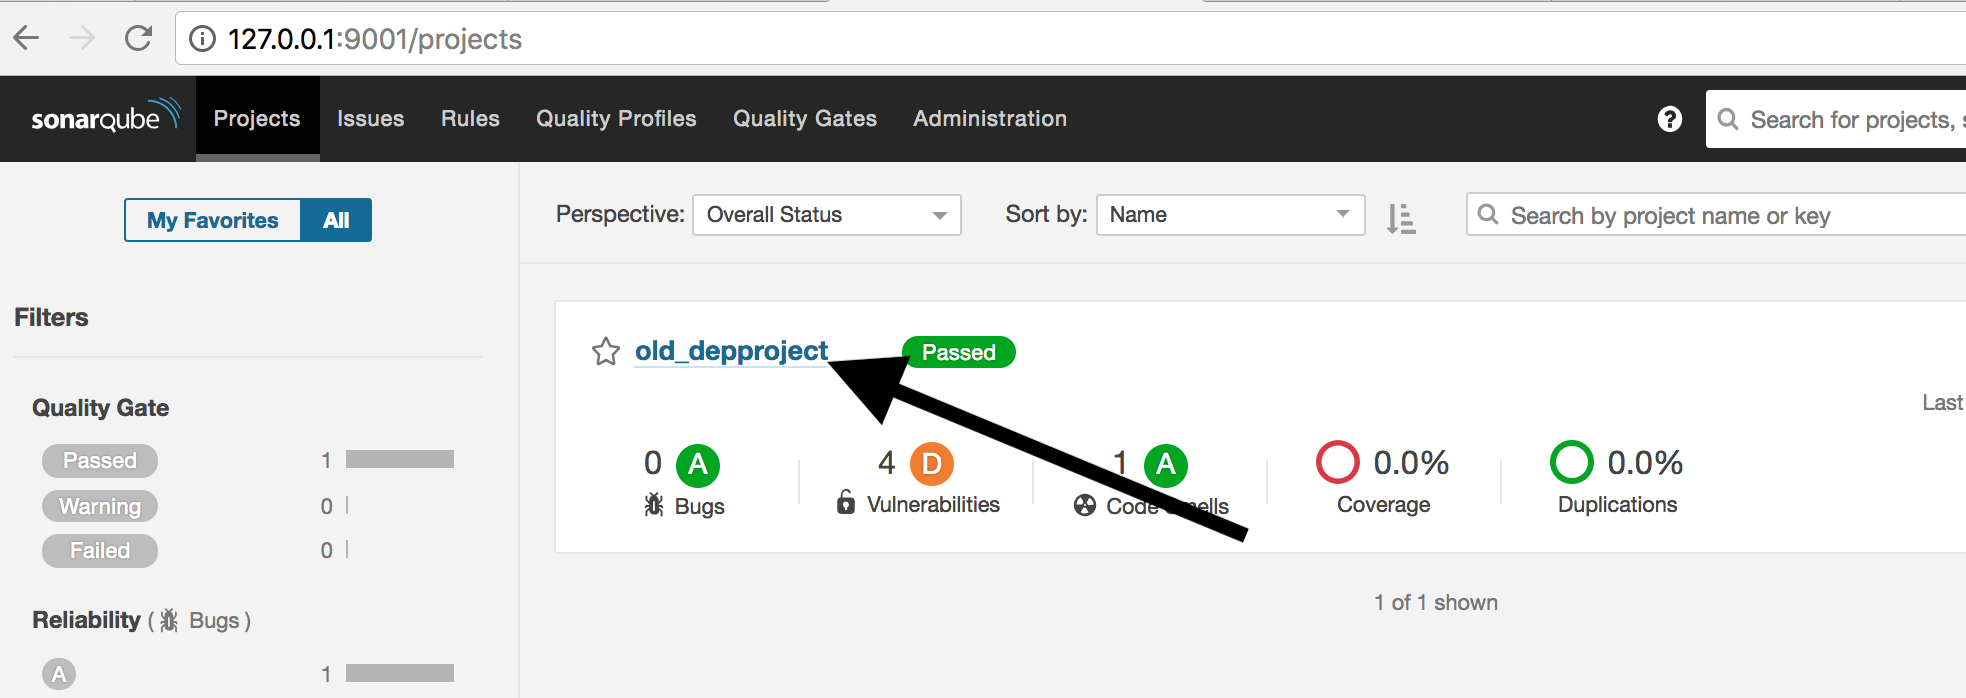
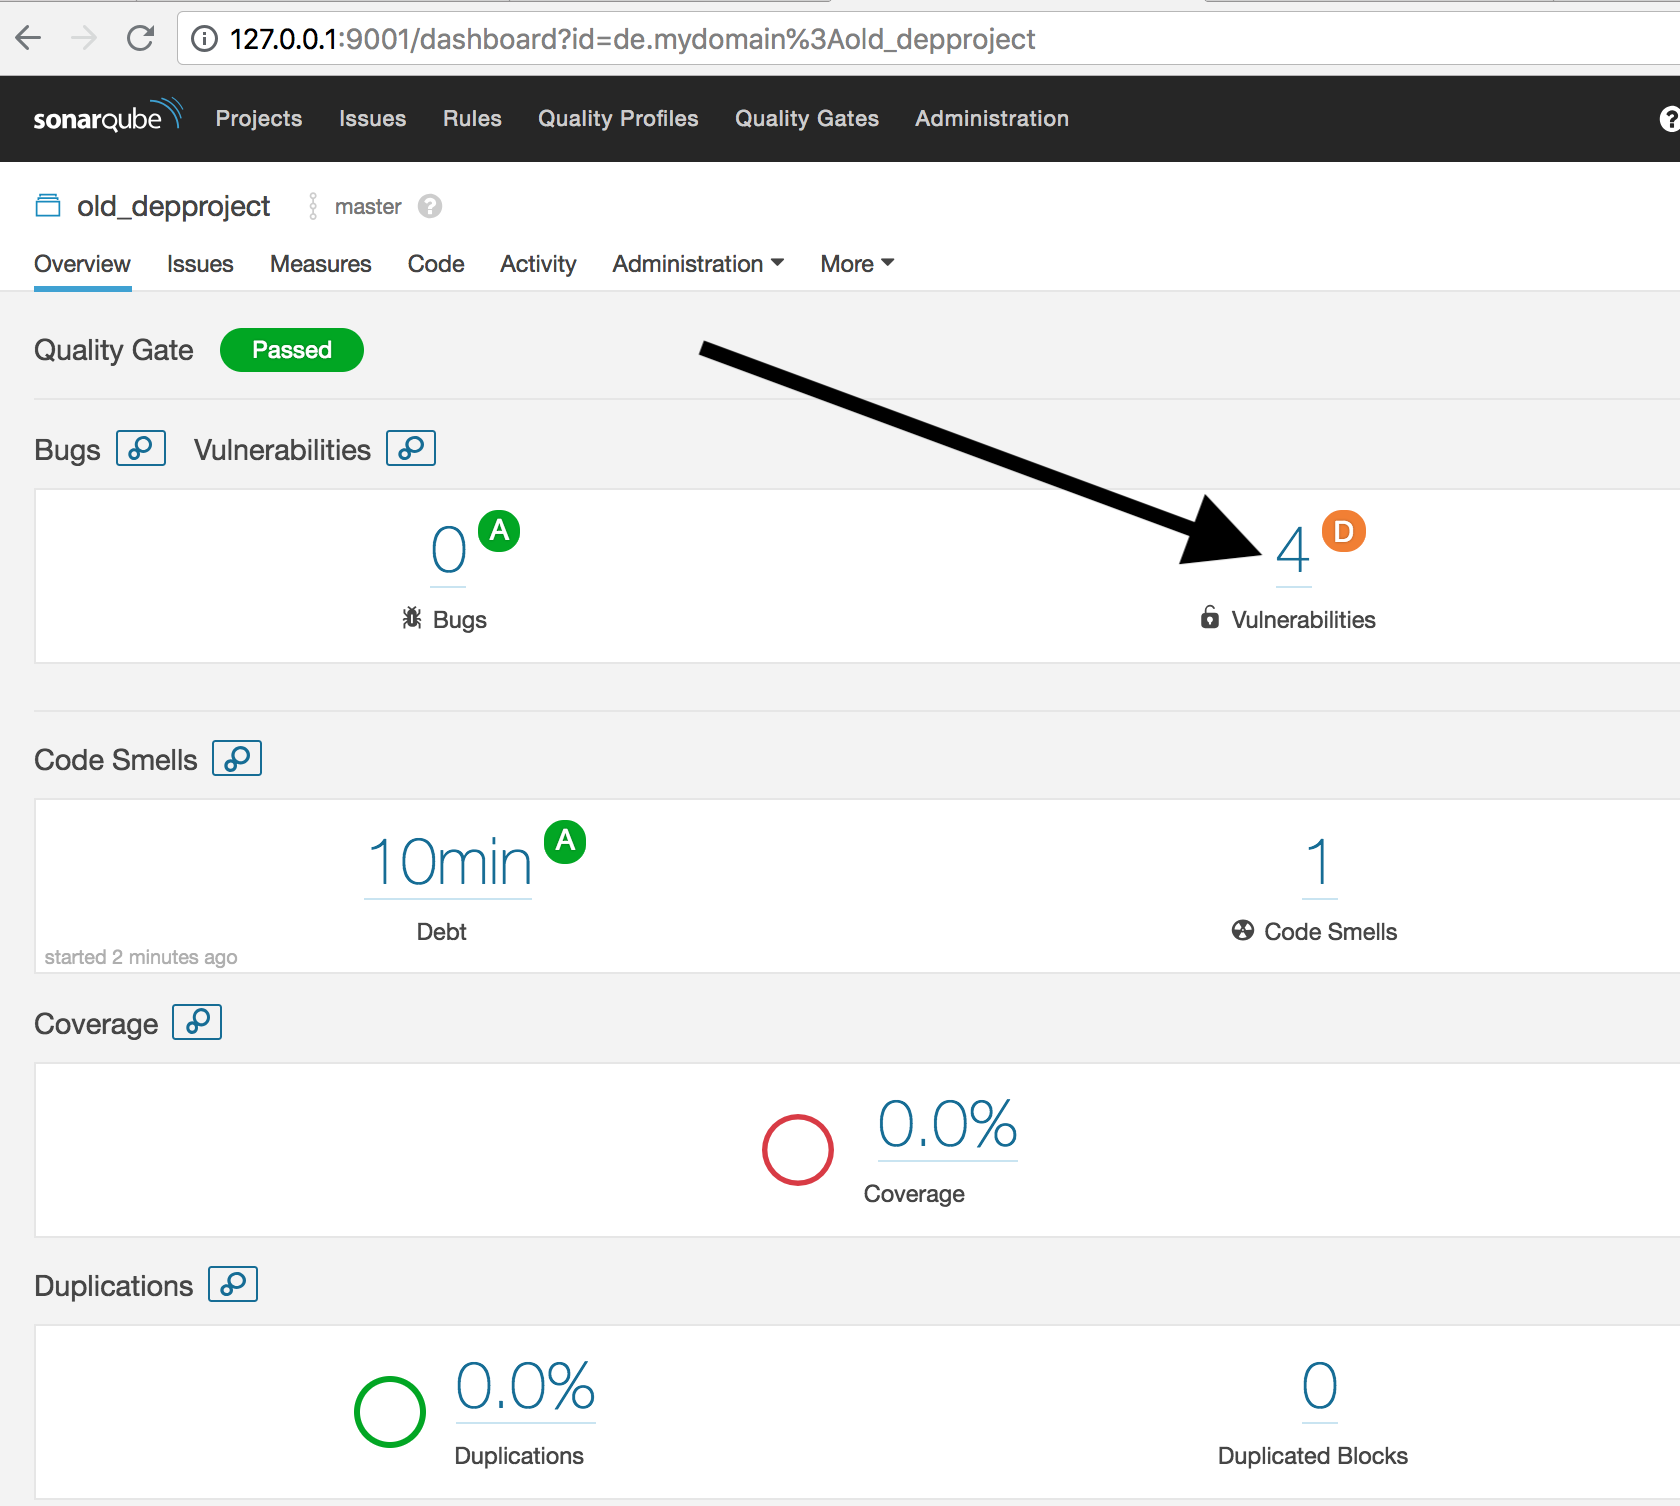
And if we go to ‘old_depproject’ we get an exact breakdown:
Summary
We now have an infrastructure in which we can check dependencies in our projects on both Jenkins and Sonarqube. If new security gaps occur, these are recognized by the systems and can be reported. In the next blog post we discuss how we can run active vulnerability scans on our project via Jenkins in addition to the dependency analysis in our projects, and so are be able to find further gaps.