Introduction
The [last post] (/blog/securecode/deps/en) showed how we can find and fix insecure dependencies in a project. In addition to the problem of dependencies issues to fix, which can be present in a large amount in a project, there is another way to harden your own code.
In a running application on the Internet, there is a “noise floor”. That means, any application that presents itself in public is exposed to certain attacks after some time. This can come from botnets, but also people who want to “test”, whether you can get something from the page through hacking.
In order to arm your own application against such attacks before the release, there are DAST systems, short for ‘Dynamic Application Security Testing’. Here, a tool tries to execute different attack patterns from the outside with different inputs and then evaluates the results for potential vulnerabilities. In principle, this is exactly what the later malicious attacker or botnet is trying to use against the application. This article differs from the last one in that it does not analyze code, but unleashes a “real” attacker and possible attack requests on the own application.
A popular DAST system for doing this is the open source tool OWASP ZAP.
The following describes how to integrate OWASP ZAP into Jenkins. Many descriptions are based on the great documentation Jenkins at your Service! Integrating ZAP in Continuous Delivery:
The individual sections are divided into:
The steps described here have been performed on a Mac OS X. This applies in particular to the chapter where OWASP ZAP is installed as a desktop application. You can also perform the steps on another operating system. However, for this you have to look up the corresponding command line equivalents in another OS.
Installing OWASP ZAP in Jenkins
Stopping old docker container
Those who follow from the old chapter: For the following explanations, we do not need the git server anymore. We can stop it with:
docker stop <containerid_gitserver>
Installation
Next we install OWASP ZAP in Jenkins.
Installation of necessary plugins
For installation, we use the Docker infrastructure, which we described in the last chapter.
Next we need:
- the official ‘OWASP ZAP Plugin’, which we will use for the scans against our application
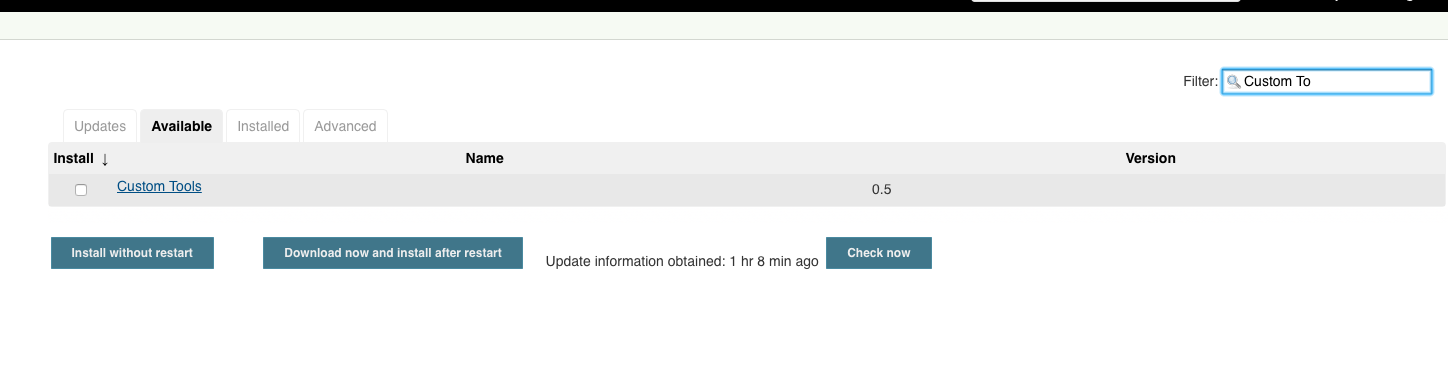
- the ‘Custom Tool Plugin’ - for easy installation and
- the ‘HTML Publisher Plugin’, to view the results in the builds.
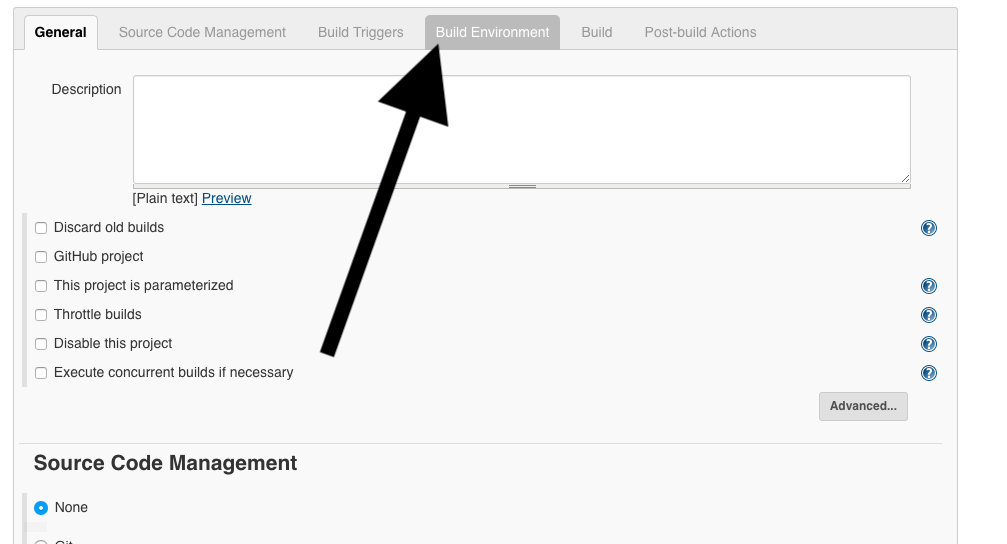
To do this, follow these steps:
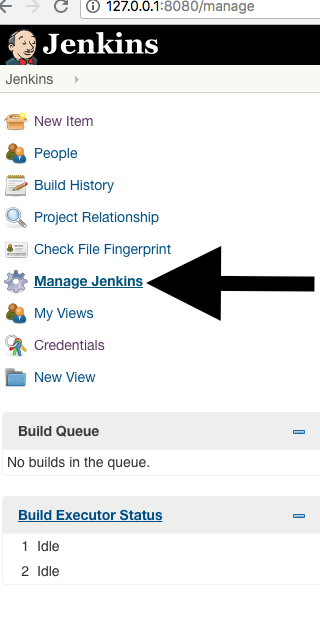
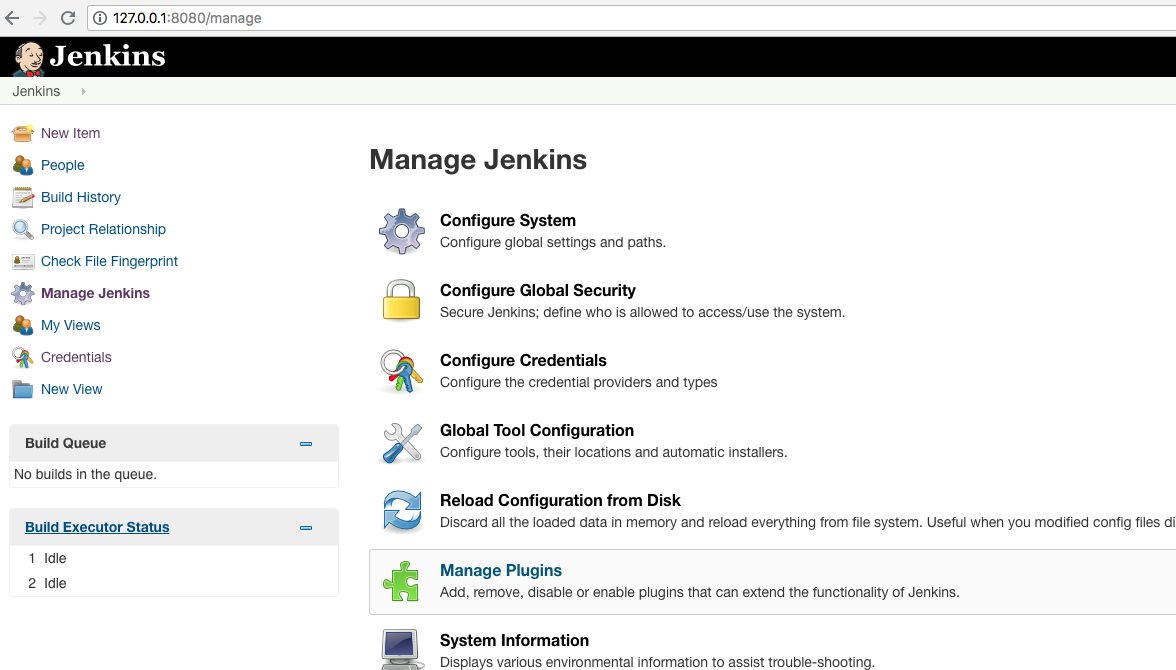
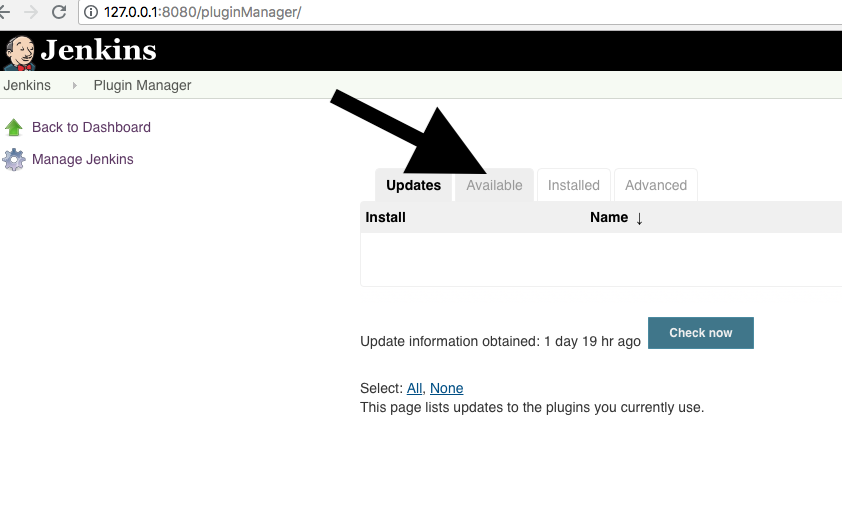
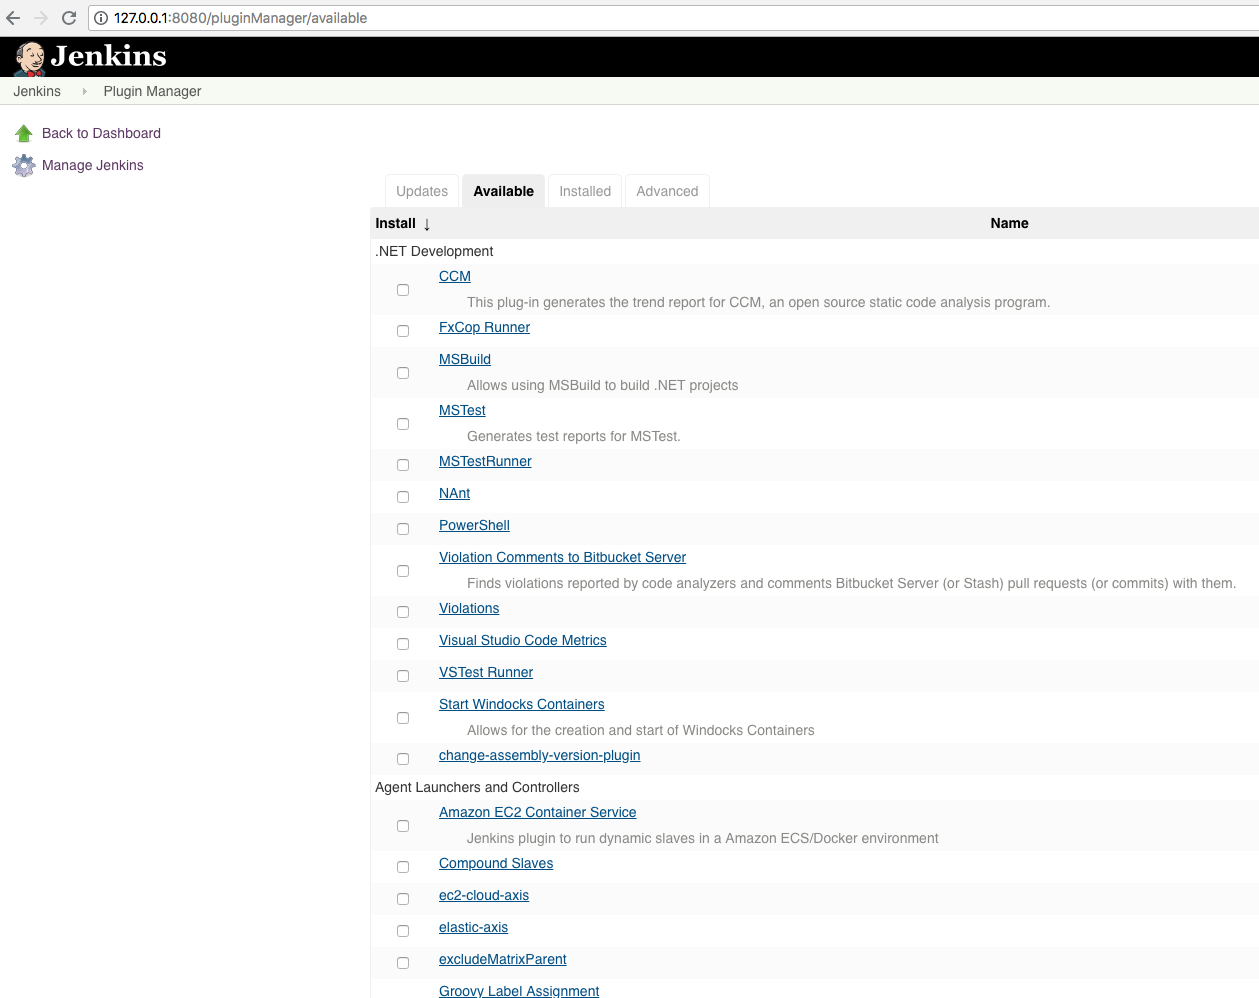
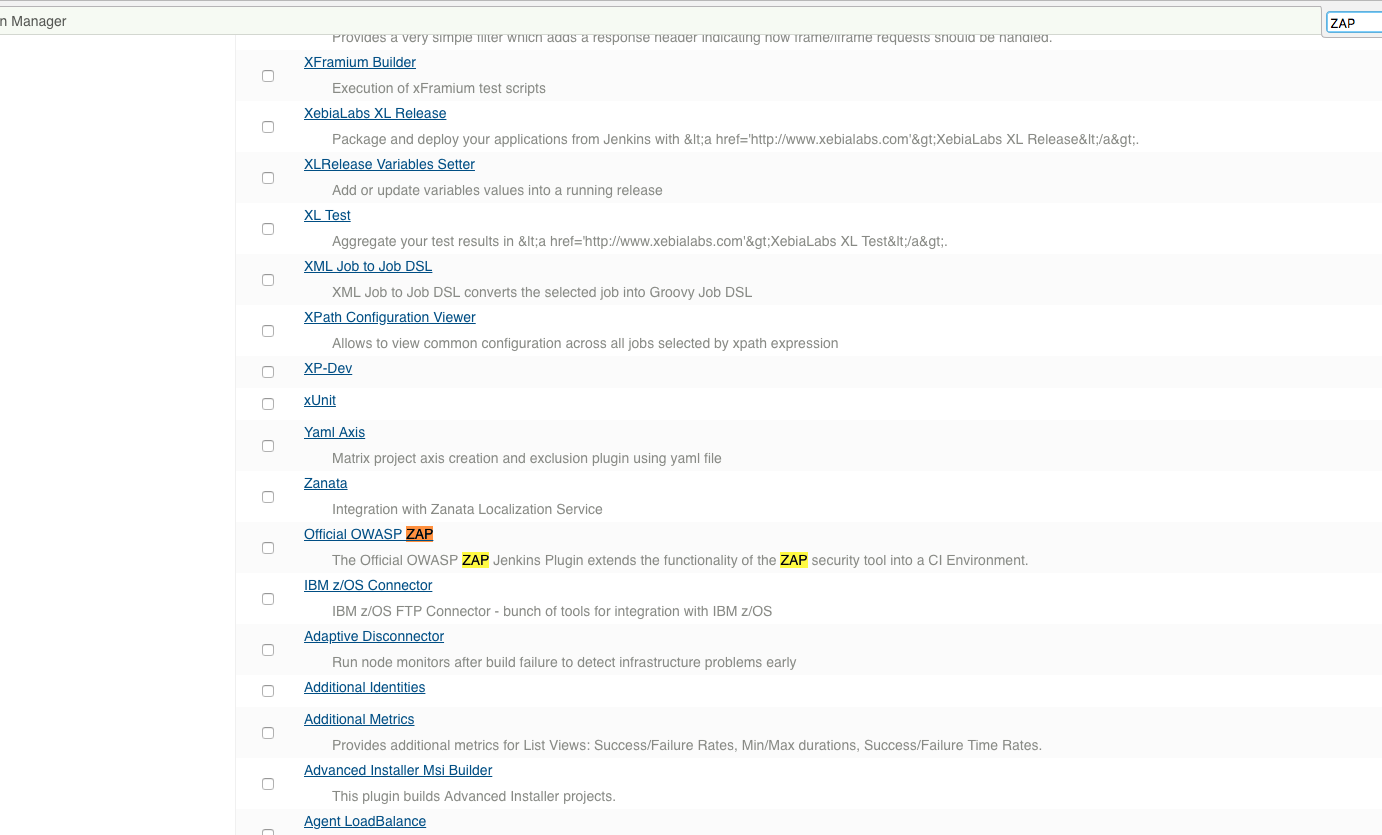
Click on ‘Official OWASP ZAP’:

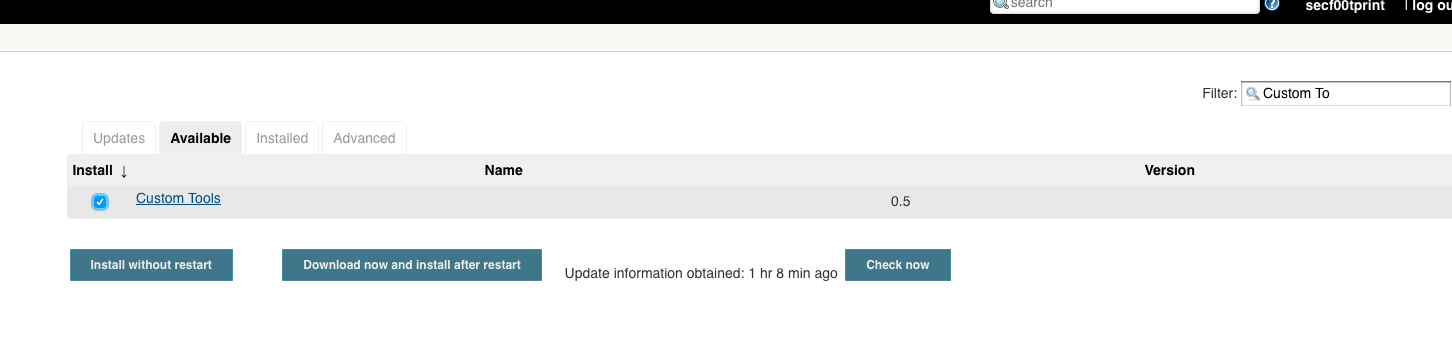
Also choose ‘Custom Tool’. We can do that via the filter field in the top right corner. Afterwards we click on ‘Download now and install after restart’ and ‘Restart Jenkins when installation is complete and no jobs are running’:
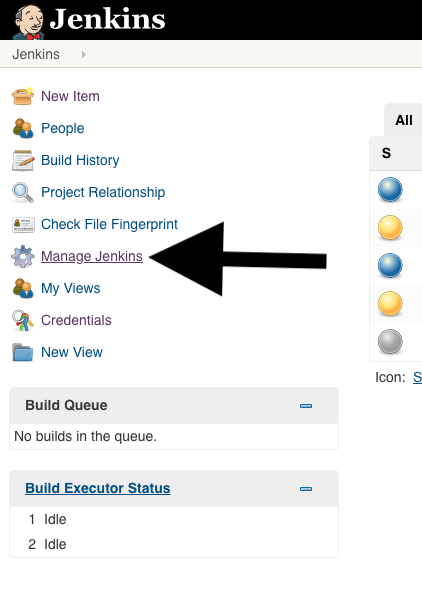
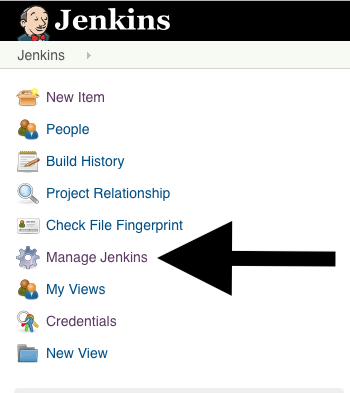
We now go to the standard Jenkins page:
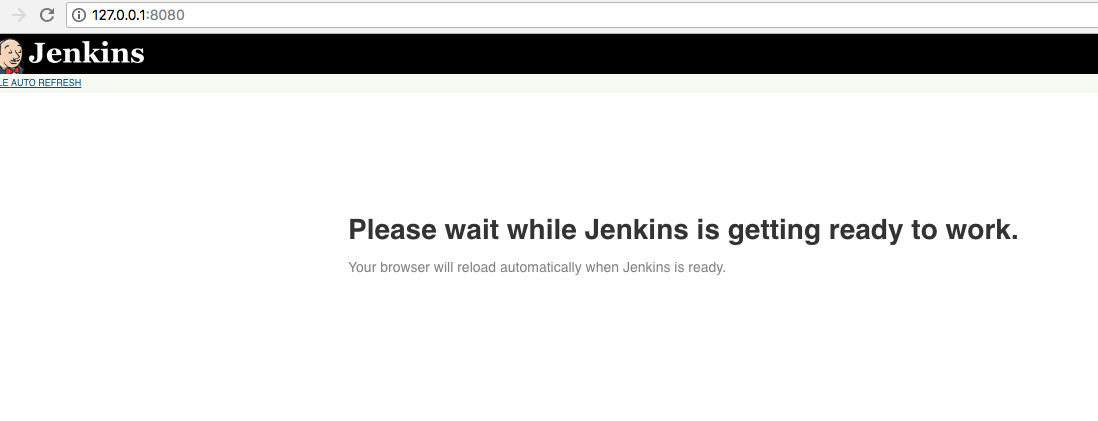
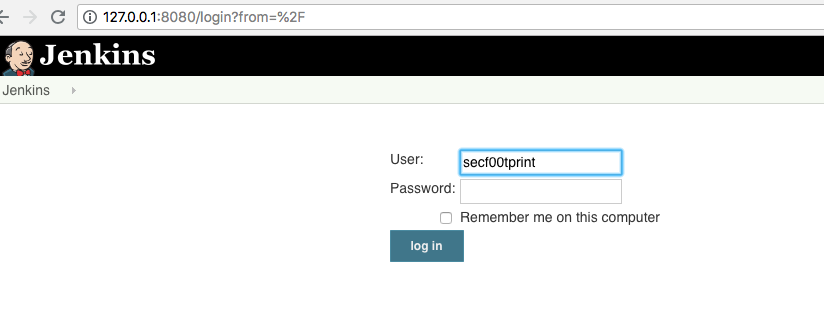
After some time, the login screen of Jenkins should reappear and you can log in.
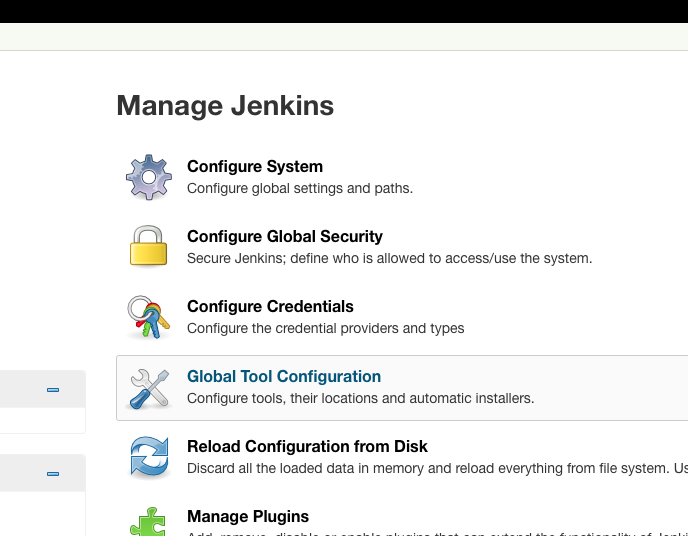
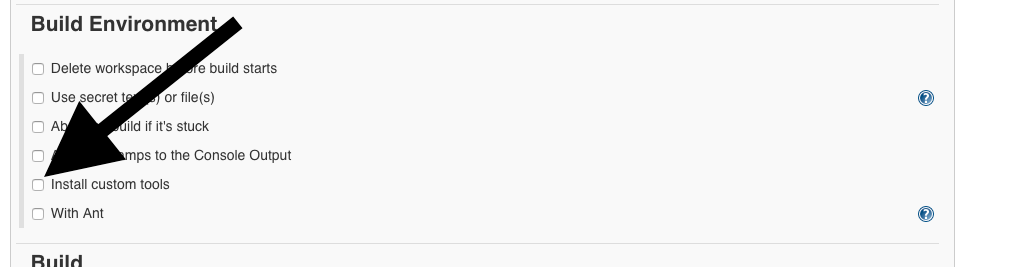
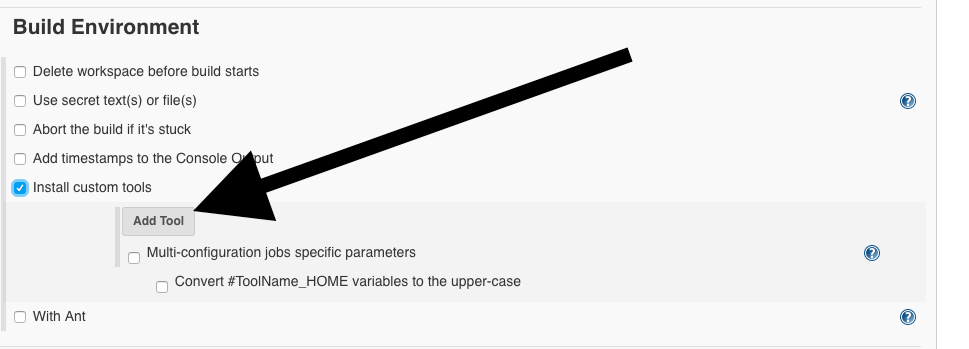
Configuring Custom Tools
We are looking for the installation package ‘OWASP ZAP 2.7.0’ for Linux:
On the GitHub release 2.7.0 page you can find the link to the linux release: https://github.com/zaproxy/zaproxy/releases/download/2.7.0/ZAP_2.7.0_Linux.tar.gz
And set it as an installation source:
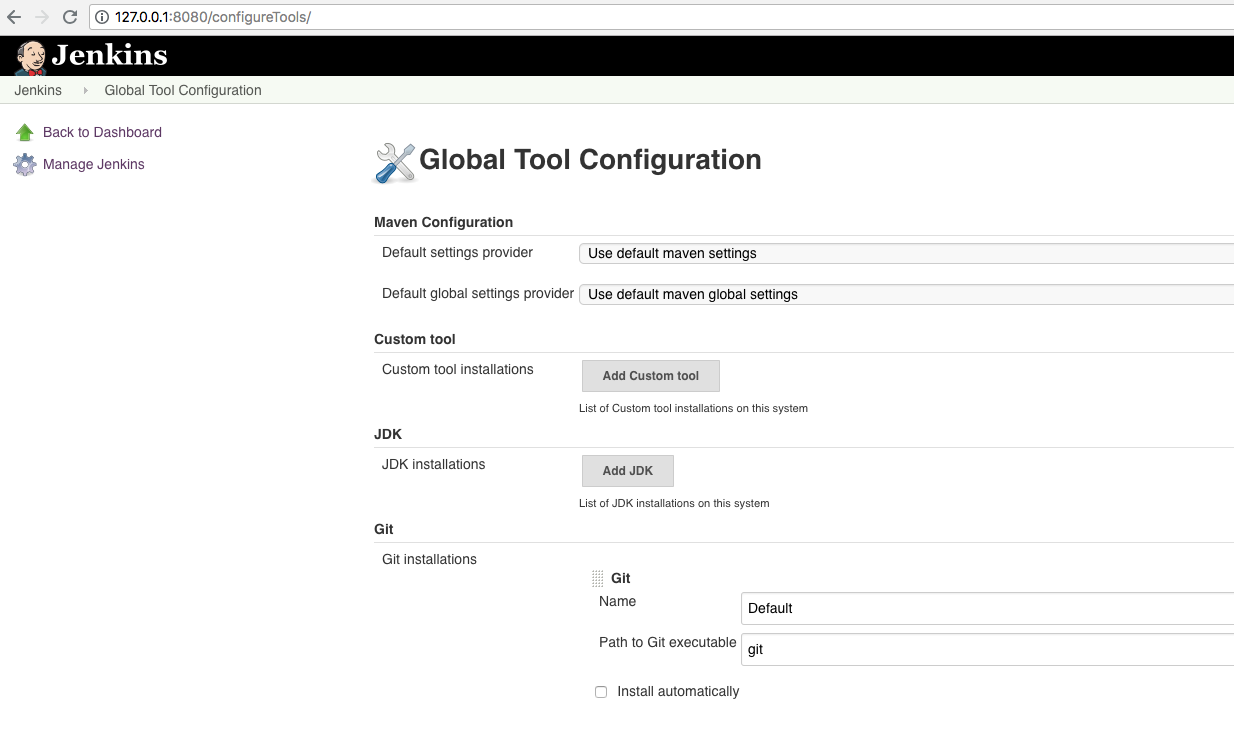
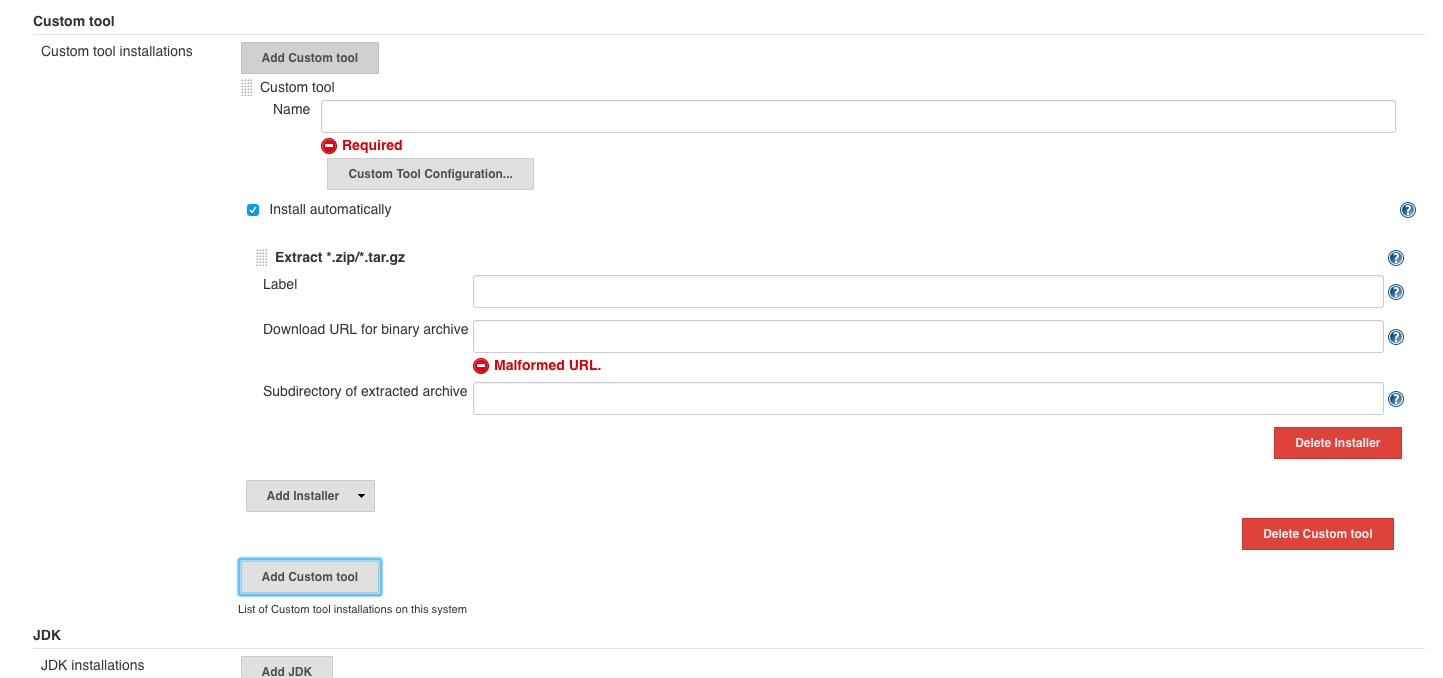
As input under ‘custom tool’ we use:
- ‘custom tool’
- name :
ZAP_2.7.0 - install automatically
- download URL for binary archive:
https://github.com/zaproxy/zaproxy/releases/download/2.7.0/ZAP_2.7.0_Linux.tar.gz - subdirectory of extracted archive:
ZAP_2.7.0
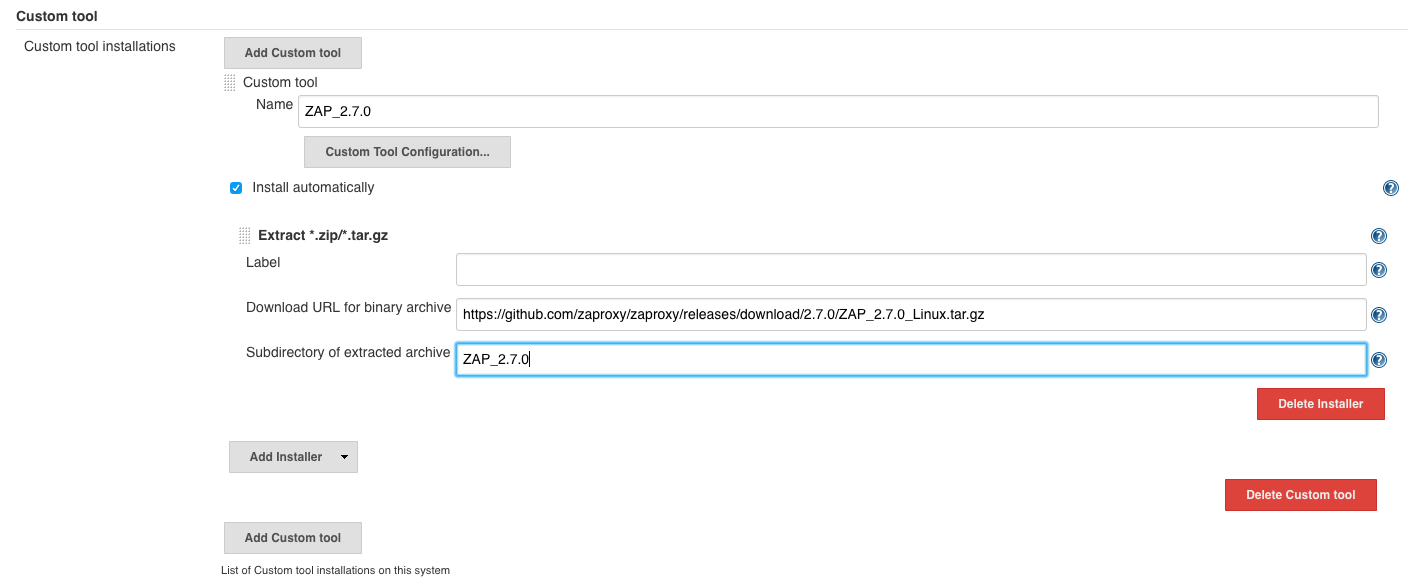
and finally click on ‘Save’.
Configuring the port for ZAP
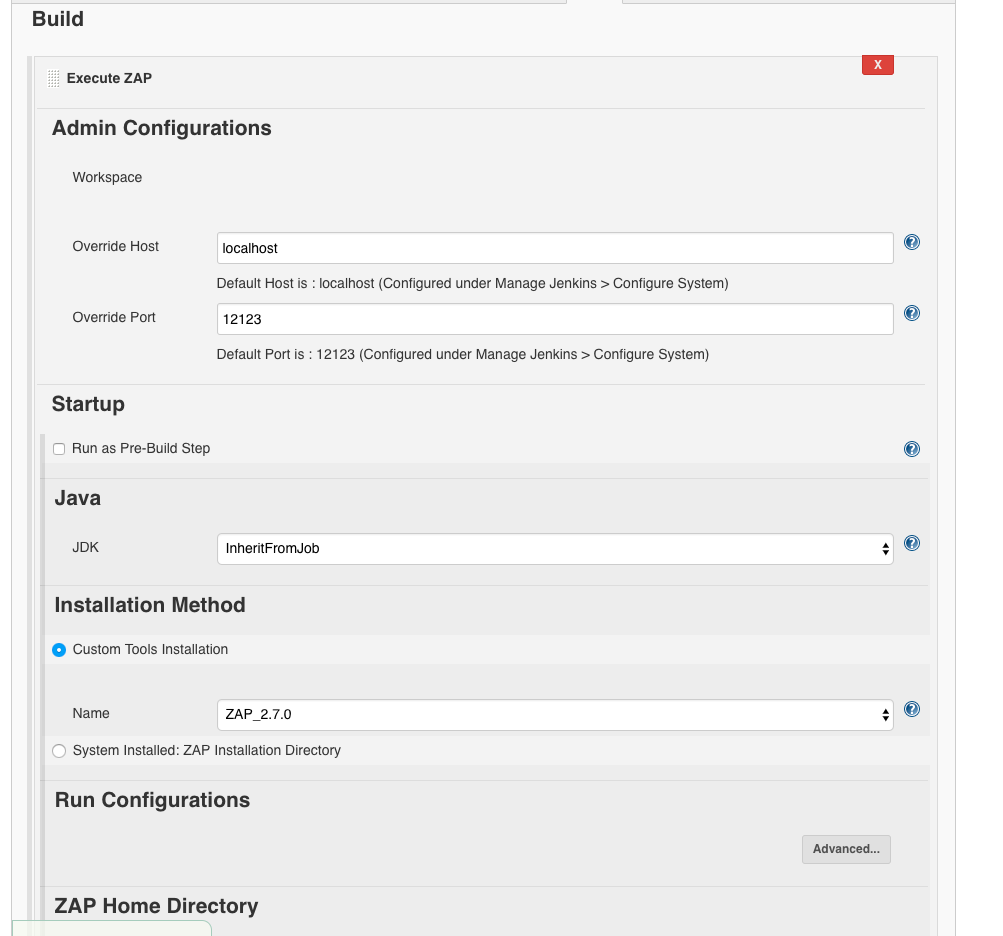
Under ‘ZAP’:
We set the port to something rare, like 12123:
- default host:
localhost - default port:
12123
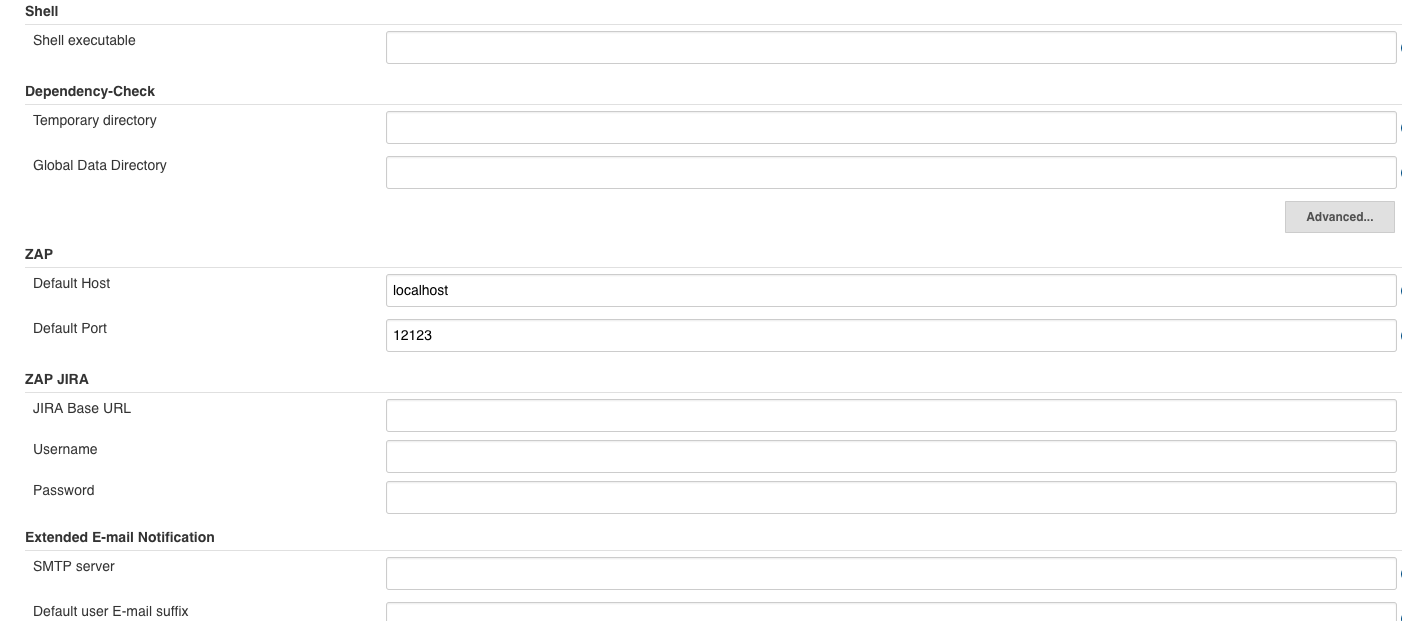
‘Save’
Configuring a ZAP job
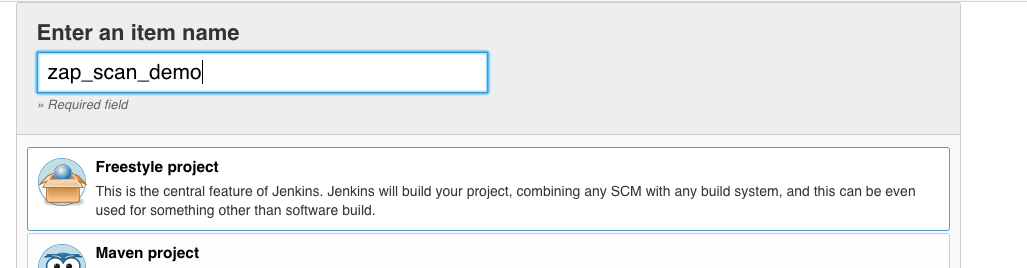
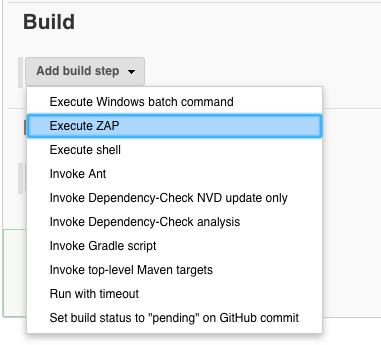
Now we create our first ‘OWASP ZAP scan job’:
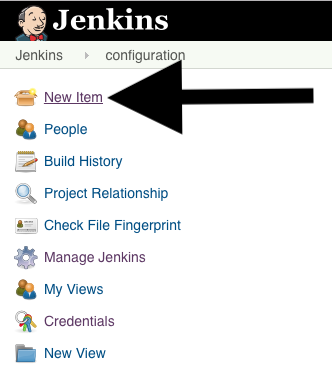
Enter ‘zap_scan_demo’ and click ‘Ok’.
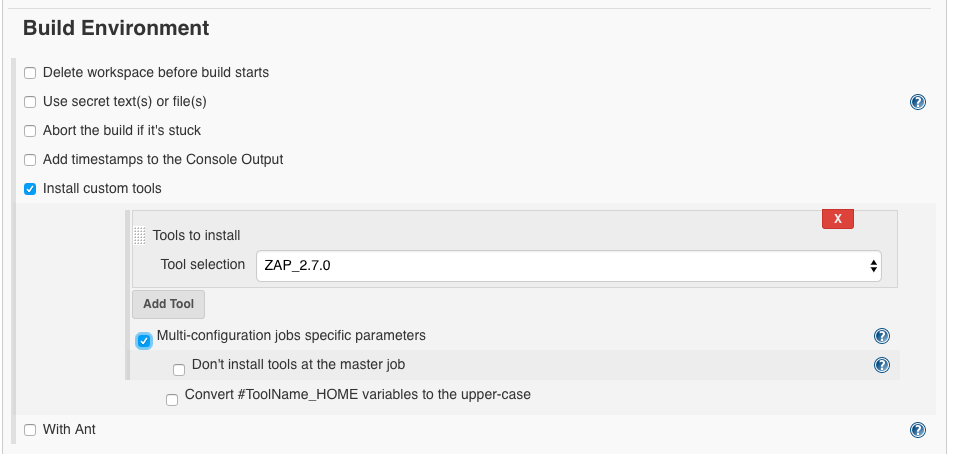
Now for ‘Tool Selection’: ZAP_2.7.0.

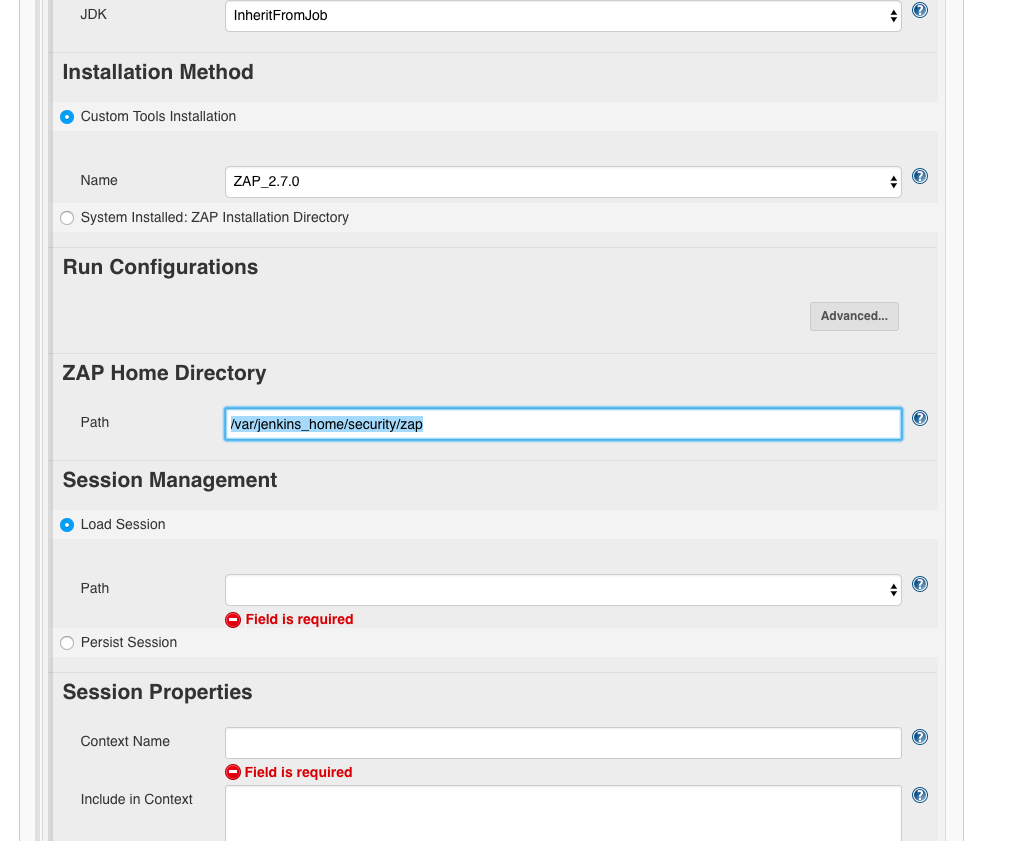
We deliver where we want OWASP ZAP to be installed:
- path:
/var/jenkins_home/owaspzap - persist session:
owasp_webgoat_zap_session
Configuring the target URL
Next, we need to specify the target URL, the URL we want to attack.
For this we need the following information:
- session properties
- include in context: which URLs are in the test frame? We do not want to scan URLs outside this and which may be liable to prosecution.
- authentification: Here you can set how the scanner can log in to the application and how it notices this. Any application with a login that you want to test inside needs this setting.
- attack mode
- starting point: The address from which we want to start the scan.
- spider scan: Here we can choose if the scanner tries to find further pages using existing links in the root page. This makes sense, as we don’t want to test just one page.
- active scan: Here we can select the scan policy. As long as we haven’t created one yet, the default policy of OWASP ZAP will be taken.
- finalize run: Here you can define how the report should be generated.
Using a small sample application that is vulnerable to XSS, I’ll first explain how we can configure each item. Then I’ll go into the topic of authentication in applications and how to set them in the scanner. With the shown it should be possible to configure a larger project at the end.
Configuring OWASP ZAP
Installation
To make the settings easier, we install the original application of OWASP ZAP locally.
To be able to understand everything better we use a fixed version : 2.7.0. Therefore we use a specific git hash in the URL to install specifically version 2.7.0:
brew cask install https://raw.githubusercontent.com/caskroom/homebrew-cask/645dbb8228ec2f1f217ed1431e188687aac13ca5/Casks/owasp-zap.rb

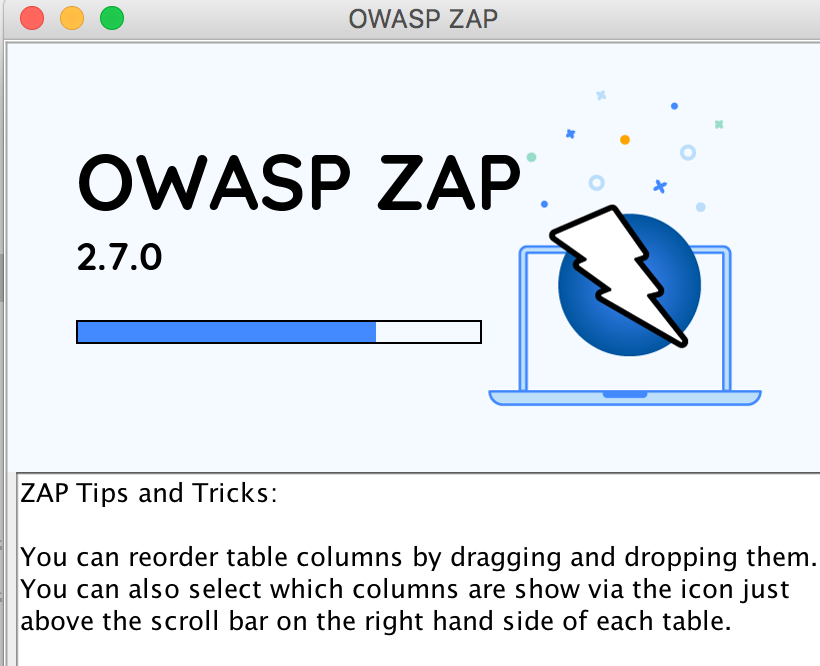
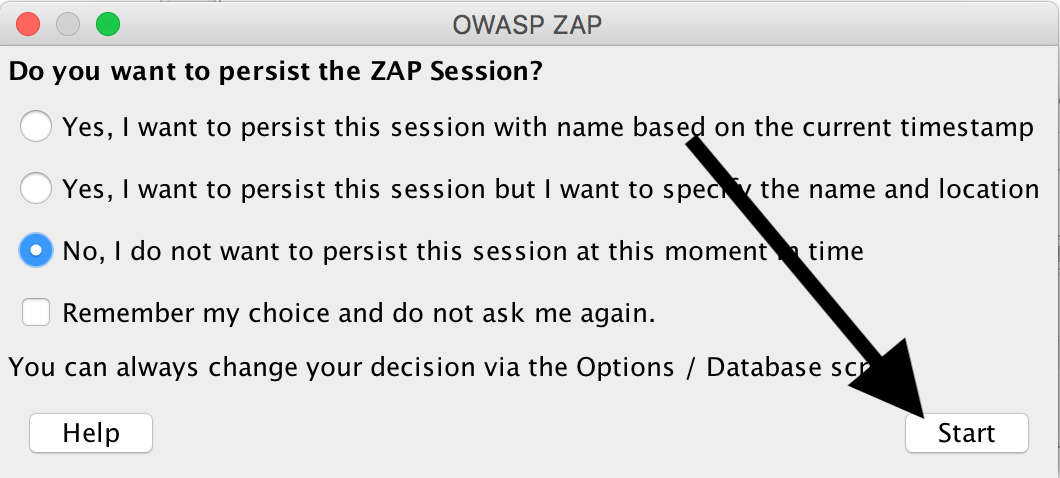
You can now launch the application from your Mac by typing OWASP ZAP into Spotlight:
Now click ‘No, I do not want to persist this session at this moment in time’:
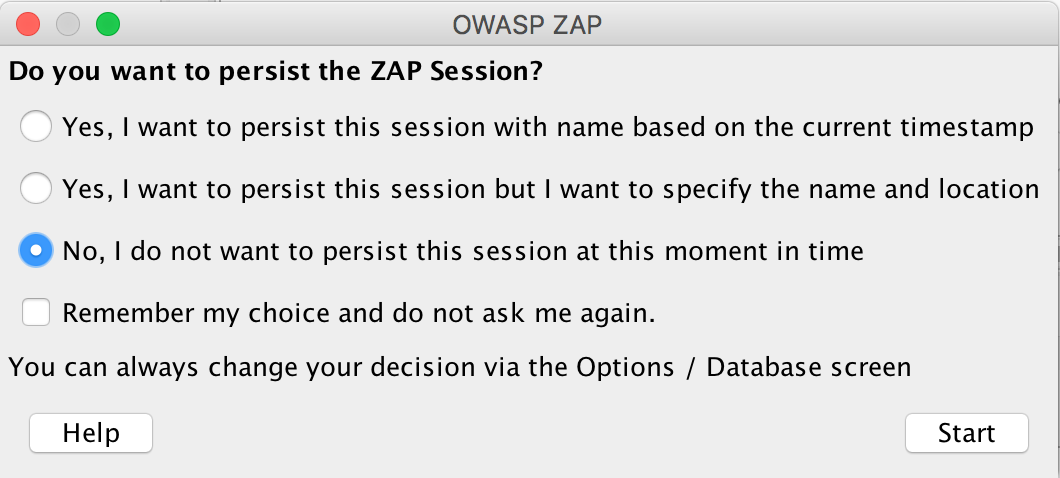
Then select ‘Start’:
Configuring Proxy ZAP
We click on the little wheel:
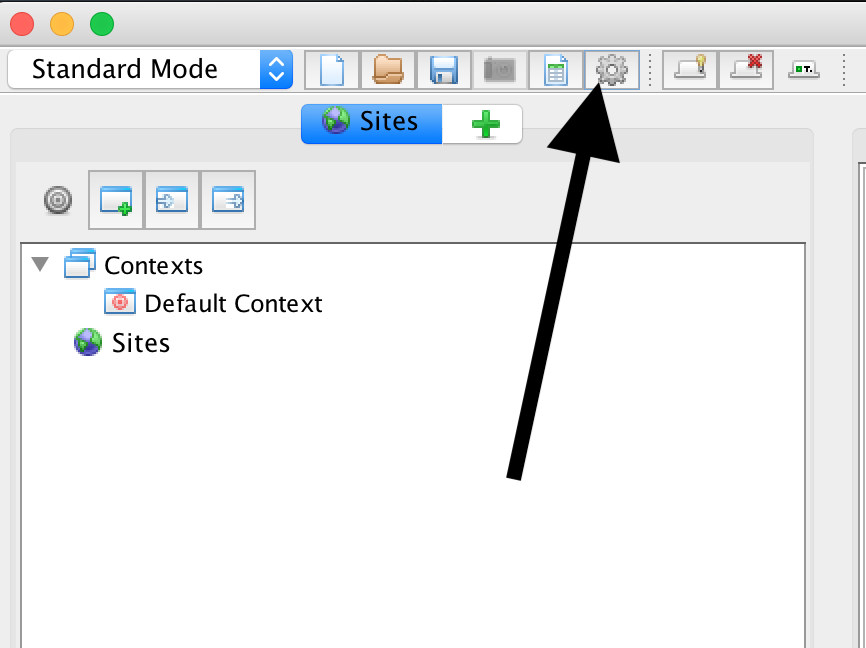
and set the following data for ‘Local Proxies’:
- address:
127.0.0.1 - port:
9000
and save with Ok.
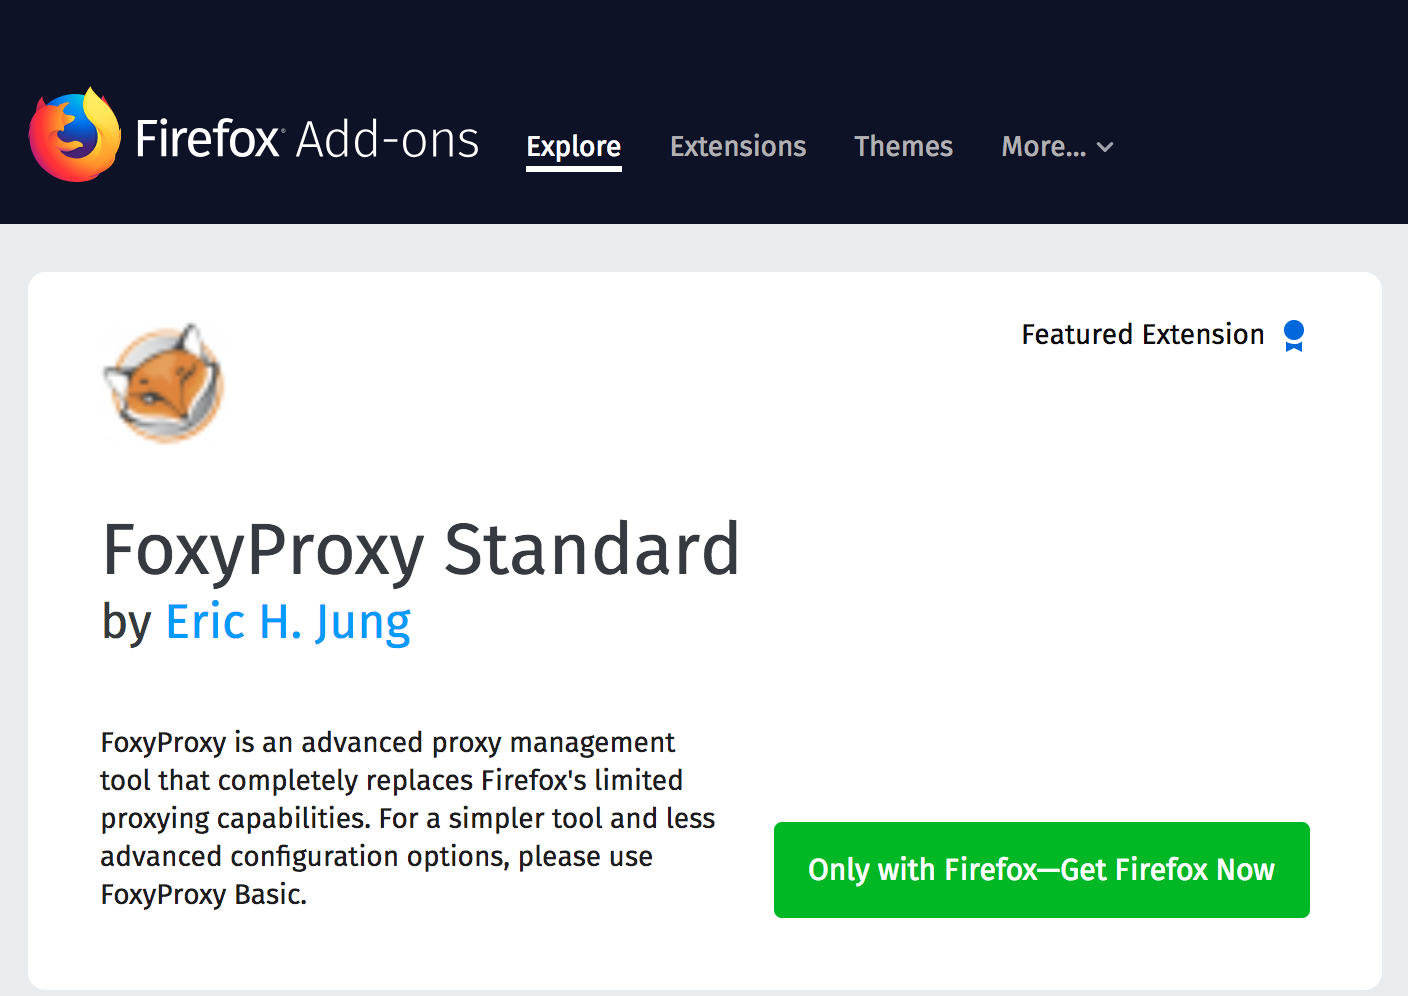
Configuring FoxyProxy
In the browser we configure a proxy for localhost:9000.
For that, you can use the extension FoxyProxy in Firefox (under Add-ons) as well as in Chrome (under Extensions).
First we install the extension.
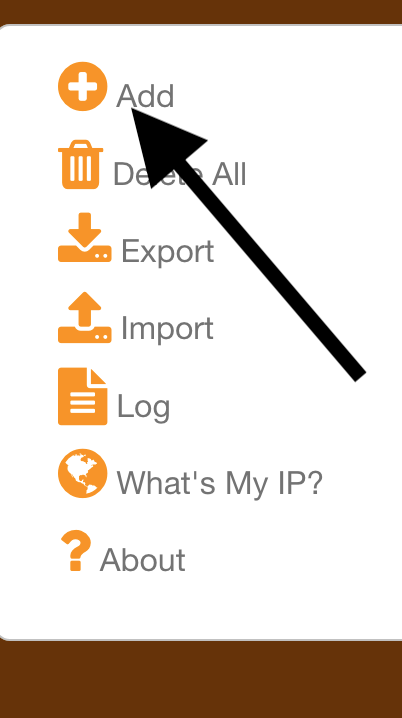
Then we open it by clicking on the icon at the top right of the browser:

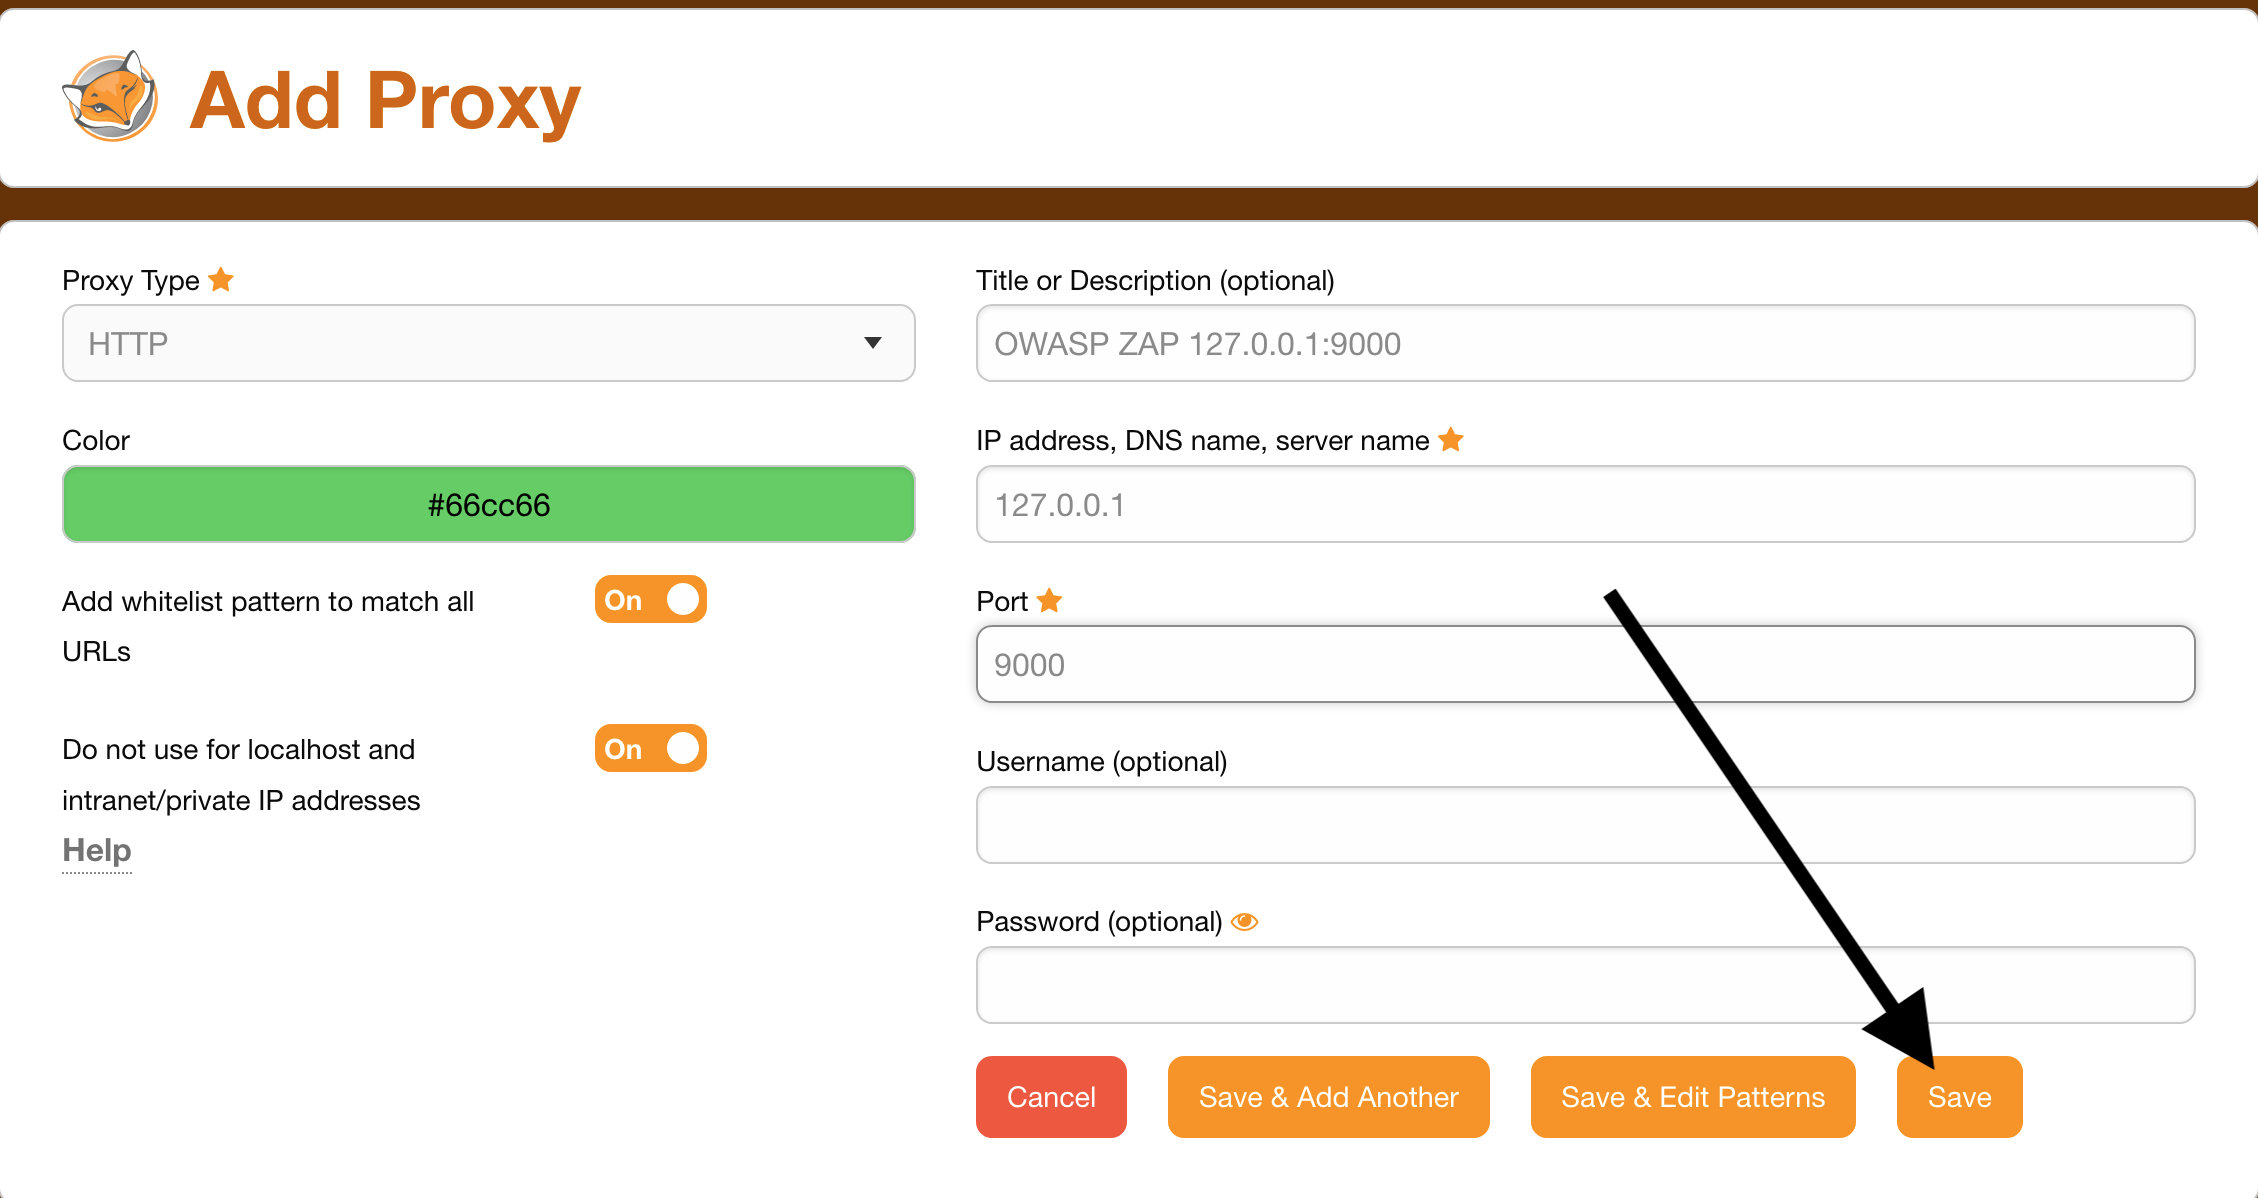
And set this:

- Proxy Type:
HTTP - Title or Description (optional):
OWASP ZAP 127.0.0.1:9000 - IP address, DNS name, server name:
127.0.0.1 - Port:
9000
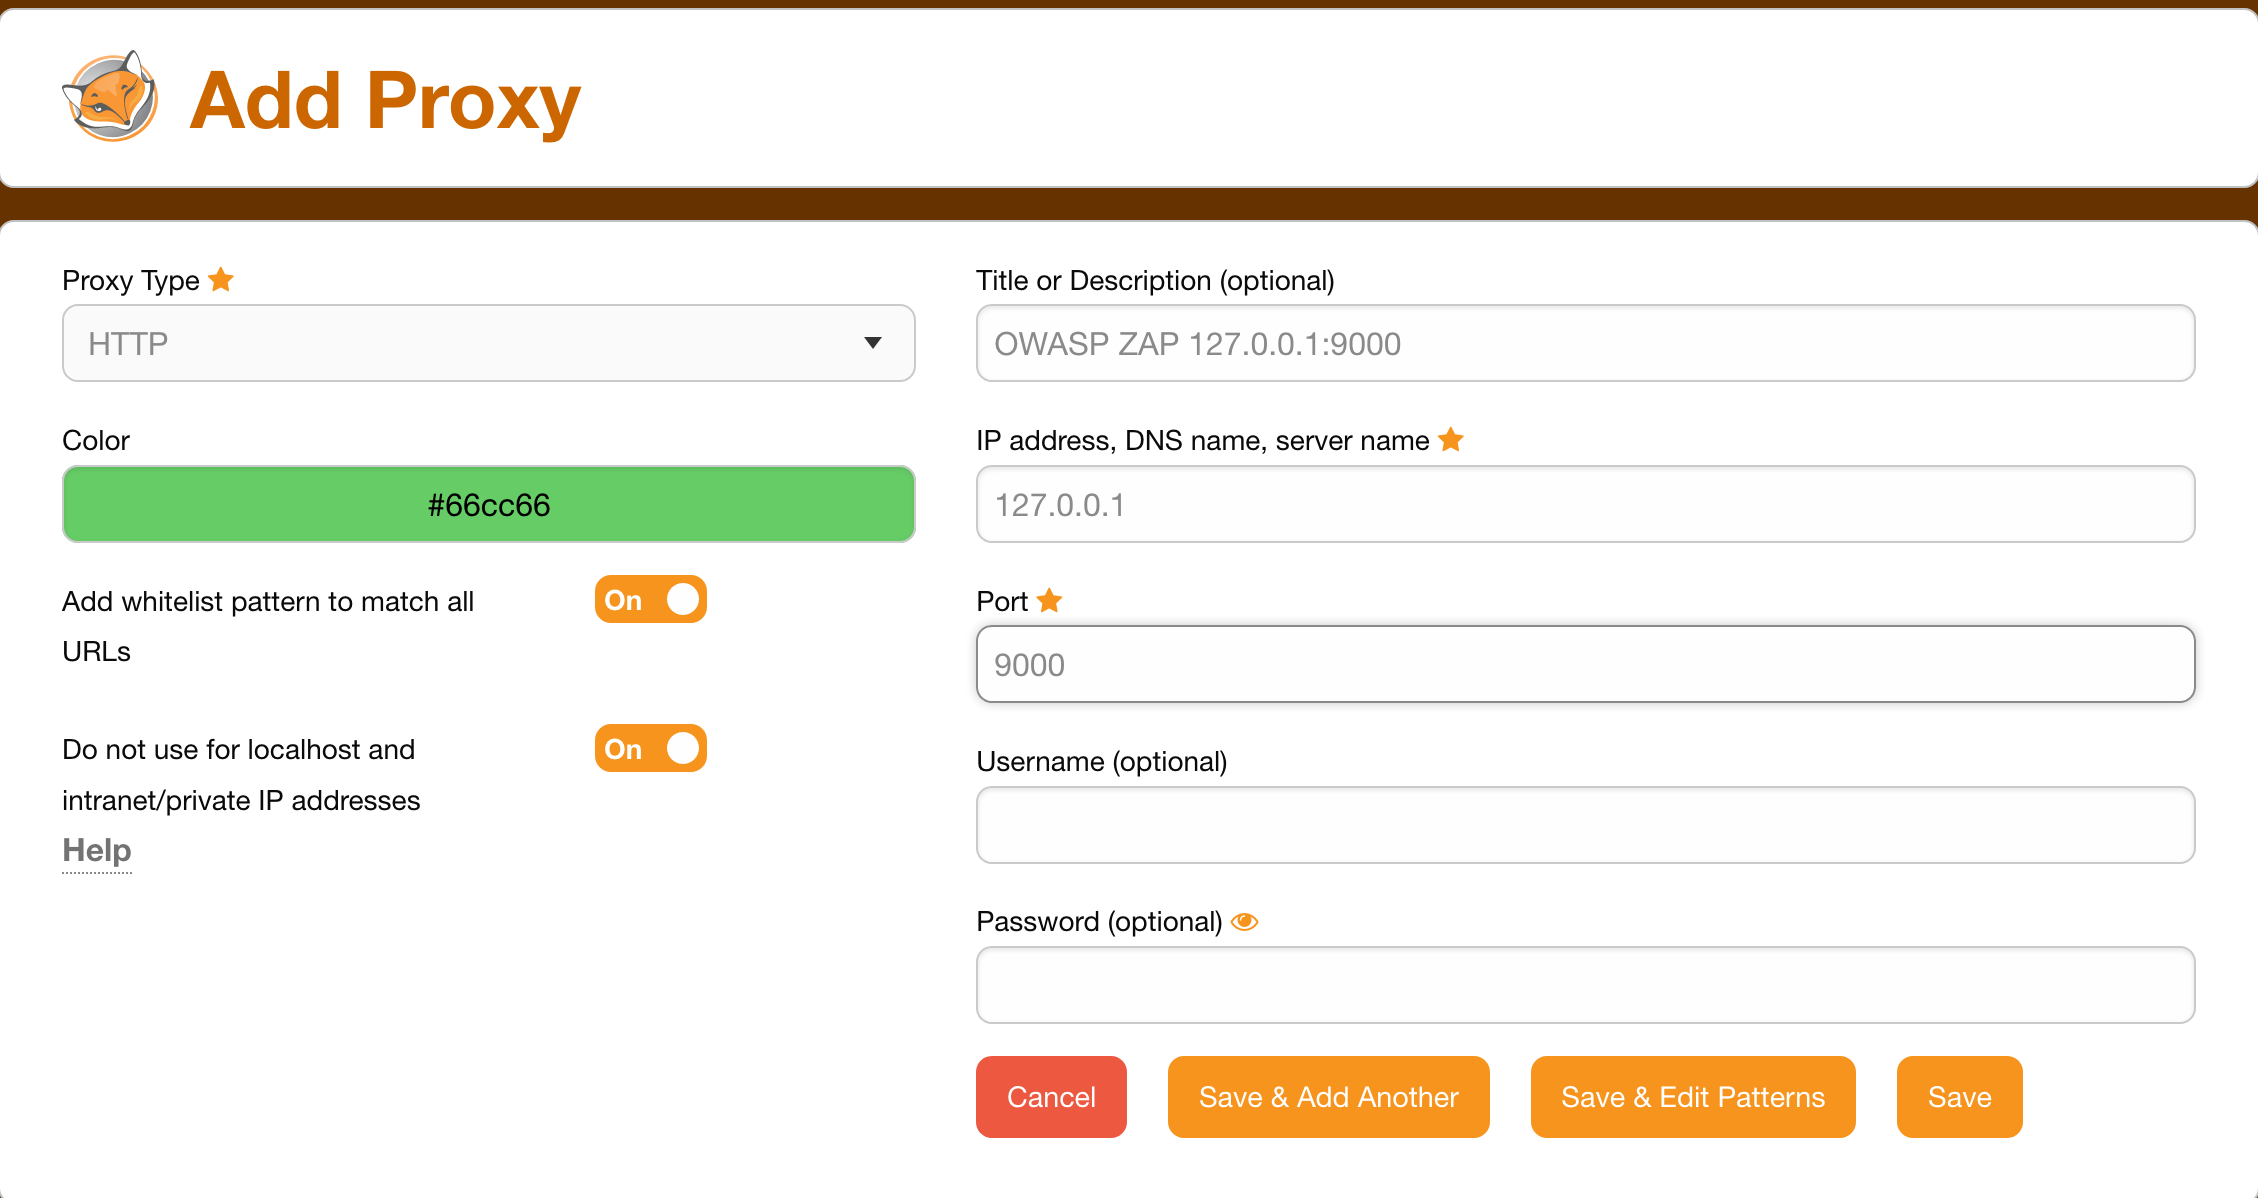
Save
Now we can select the proxy:
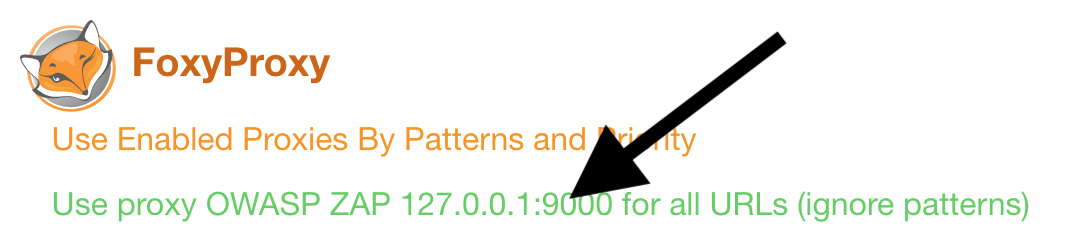
The icon changes to:

Now the traffic runs through the proxy.
Example application XSS
We launch an application that is vulnerable to XSS:
docker run -ti --rm -p 127.0.0.1:1185:1185 \
-d secf00tprint/victim_easy_xss_server
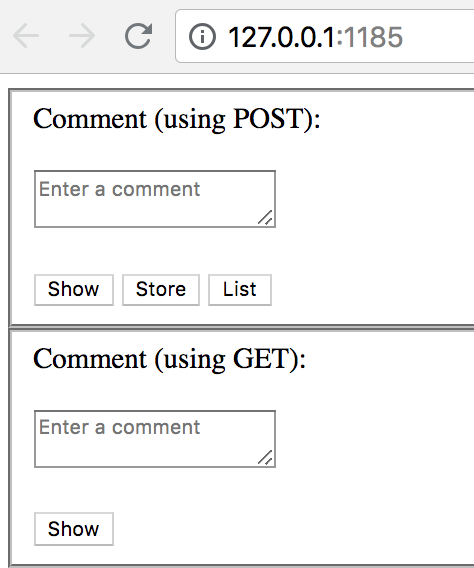
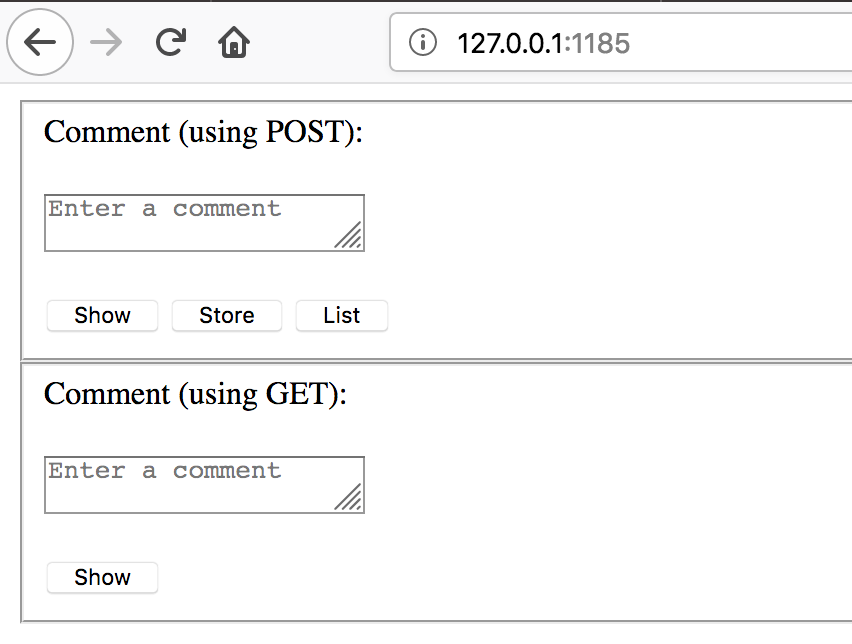
When we open the application we see text input fields for comments. Here you can inject code:
open http://127.0.0.1:1185
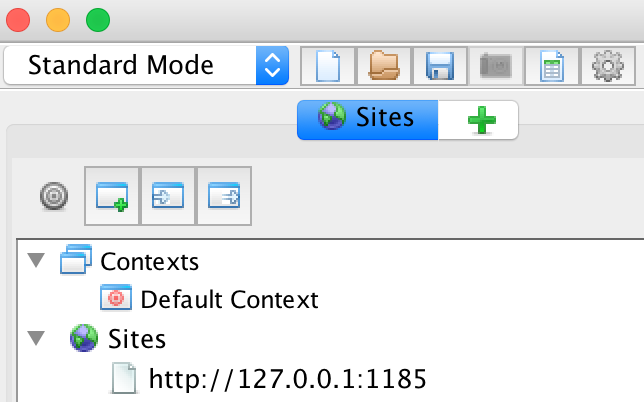
We determine the IP on the docker network:
docker inspect <containerid_victim_easy_xss_server>|grep "IPA"
Jenkins Session Properties
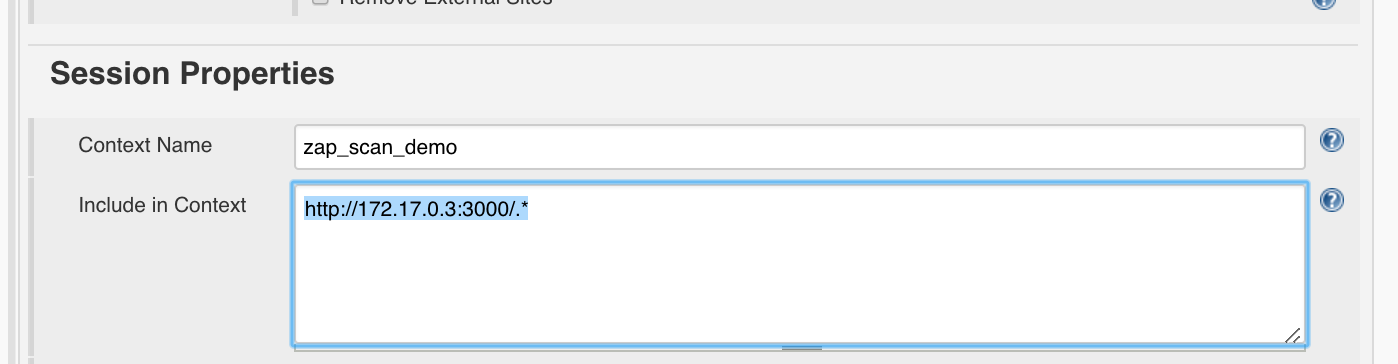
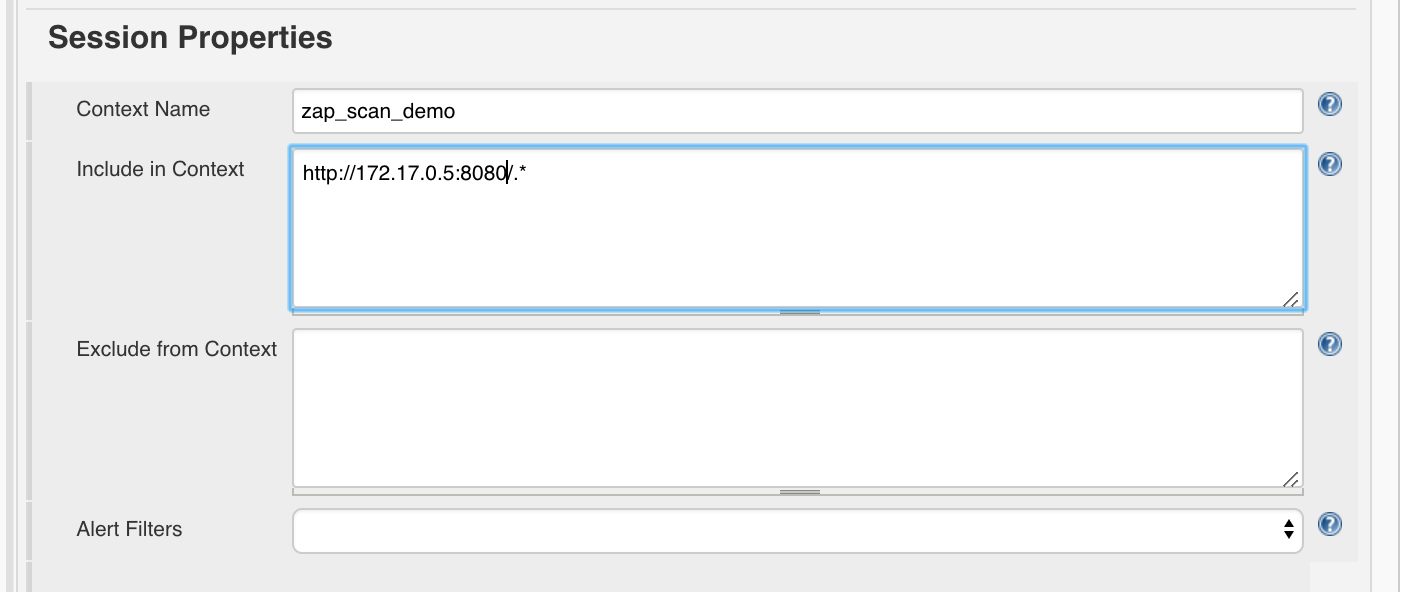
Then we enter under ‘Session Properties’:
- Context Name:
zap_scan_demo - Include in Context:
http://<determined_IP>:1185/.*, e.g.http://172.17.0.4:1185/.*
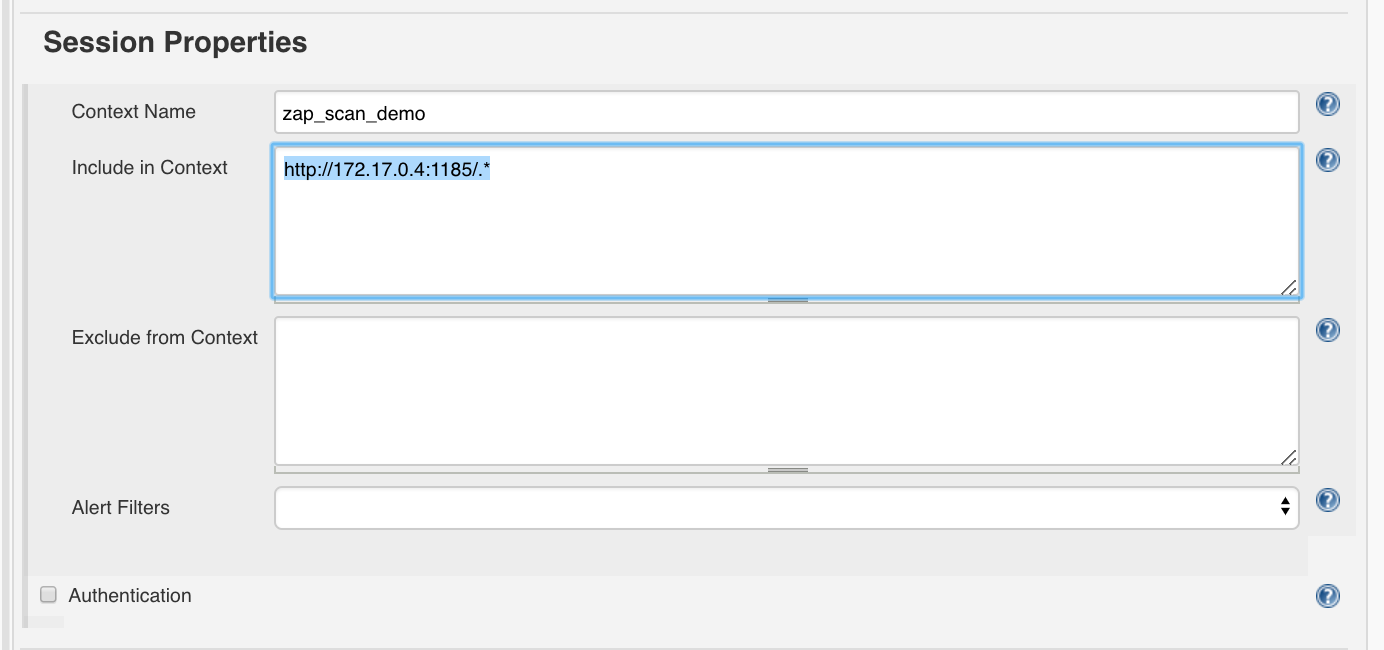
Under ‘Attack Mode’ we enter the root URL:
http://<determined_IP>:1185/
e.g.
http://172.17.0.4:1185/
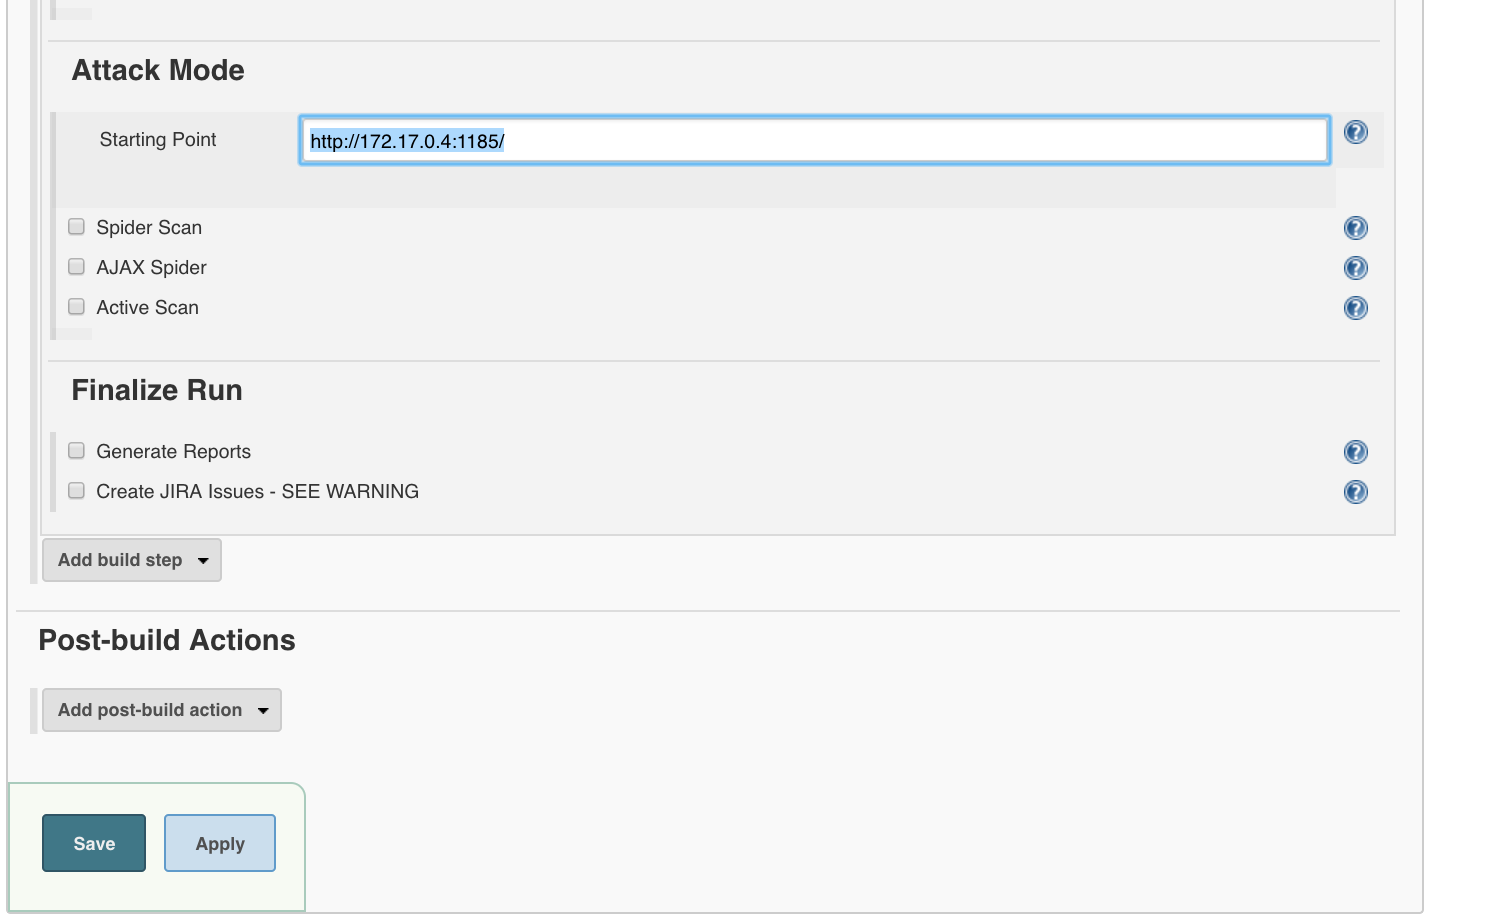
‘Save’
Then we build the item for the first time.
‘Build Now’
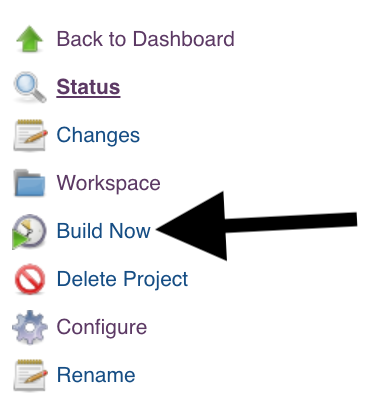
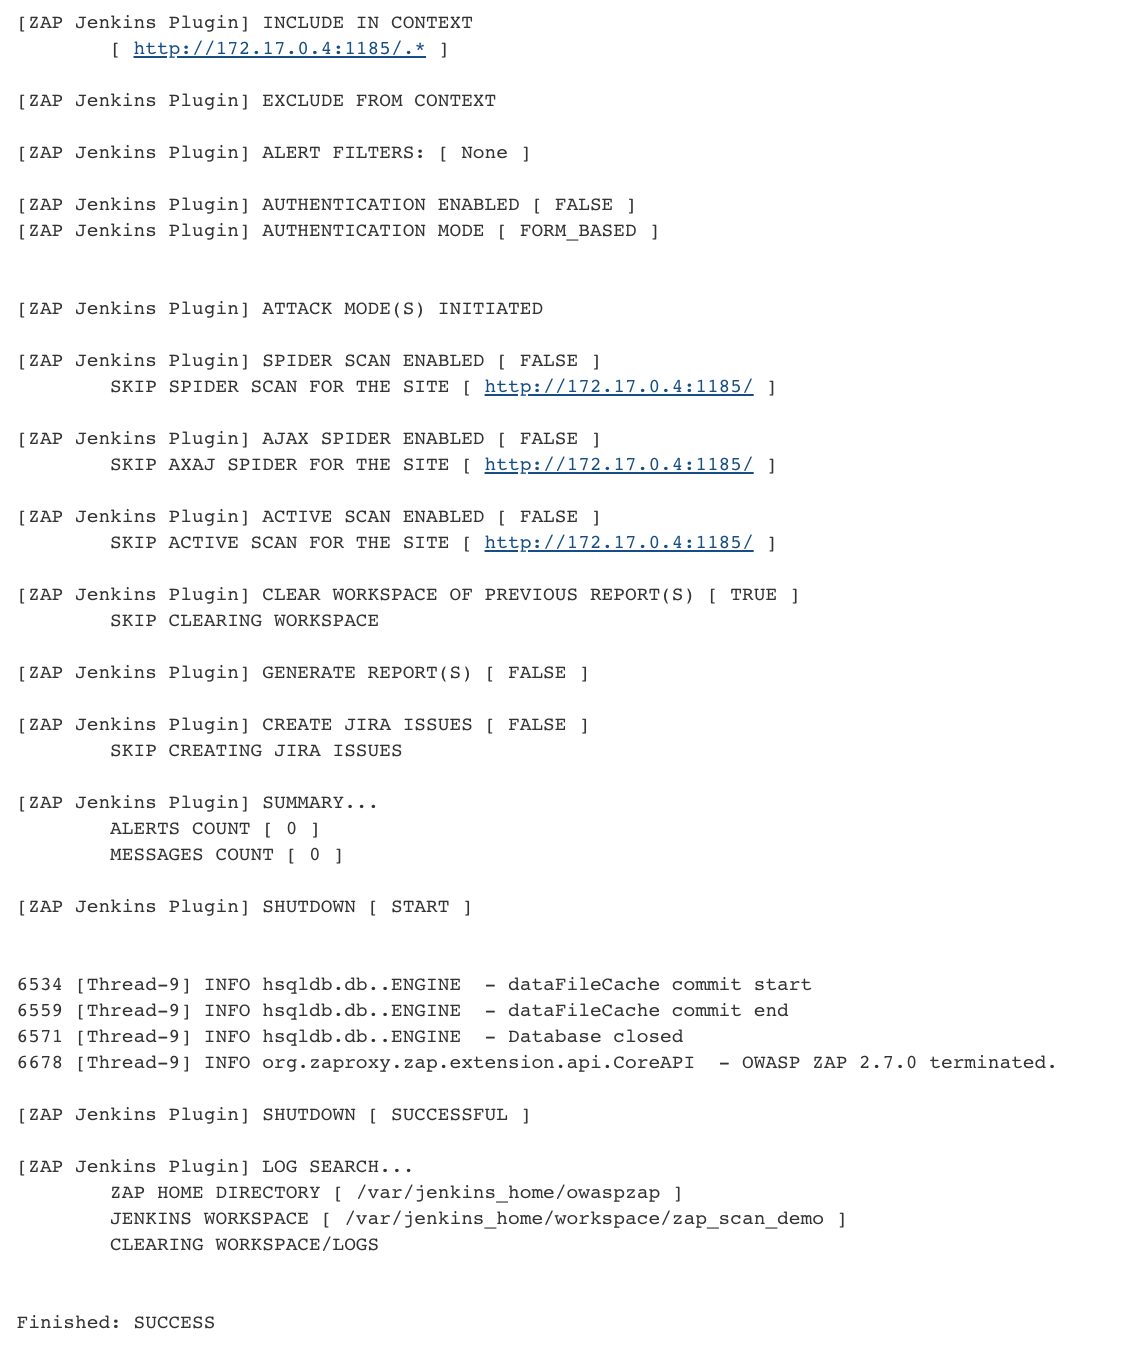
Then ZAP should be installed in the folder /var/jenkins_home/owaspzap.
Checking the vulnerability in the Example Application
If we start our proxy and call http://127.0.0.1:1185 in the browser,
this should appear in OWASP ZAP:

We now go back to the browser and enter the following in the GET-field:
- Comment (using GET):
Test
‘Show’
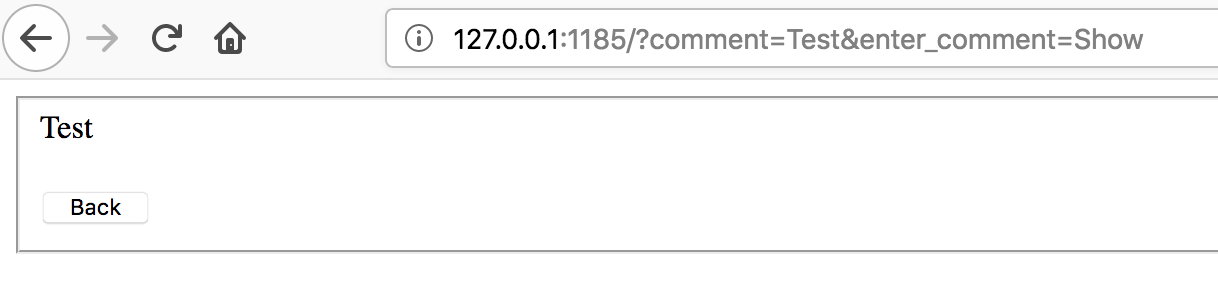
Result:
The URL shows http://127.0.0.1:1185/?comment=Test&enter_comment=Show and the comment appears:
If we click on ‘Back’, enter
<script>alert(1)</script>
x and click on ‘Save’, we see a pop-up:

This means the application is vulnerable to XSS.
OWASP ZAP should find this. Let’s take a closer look now:
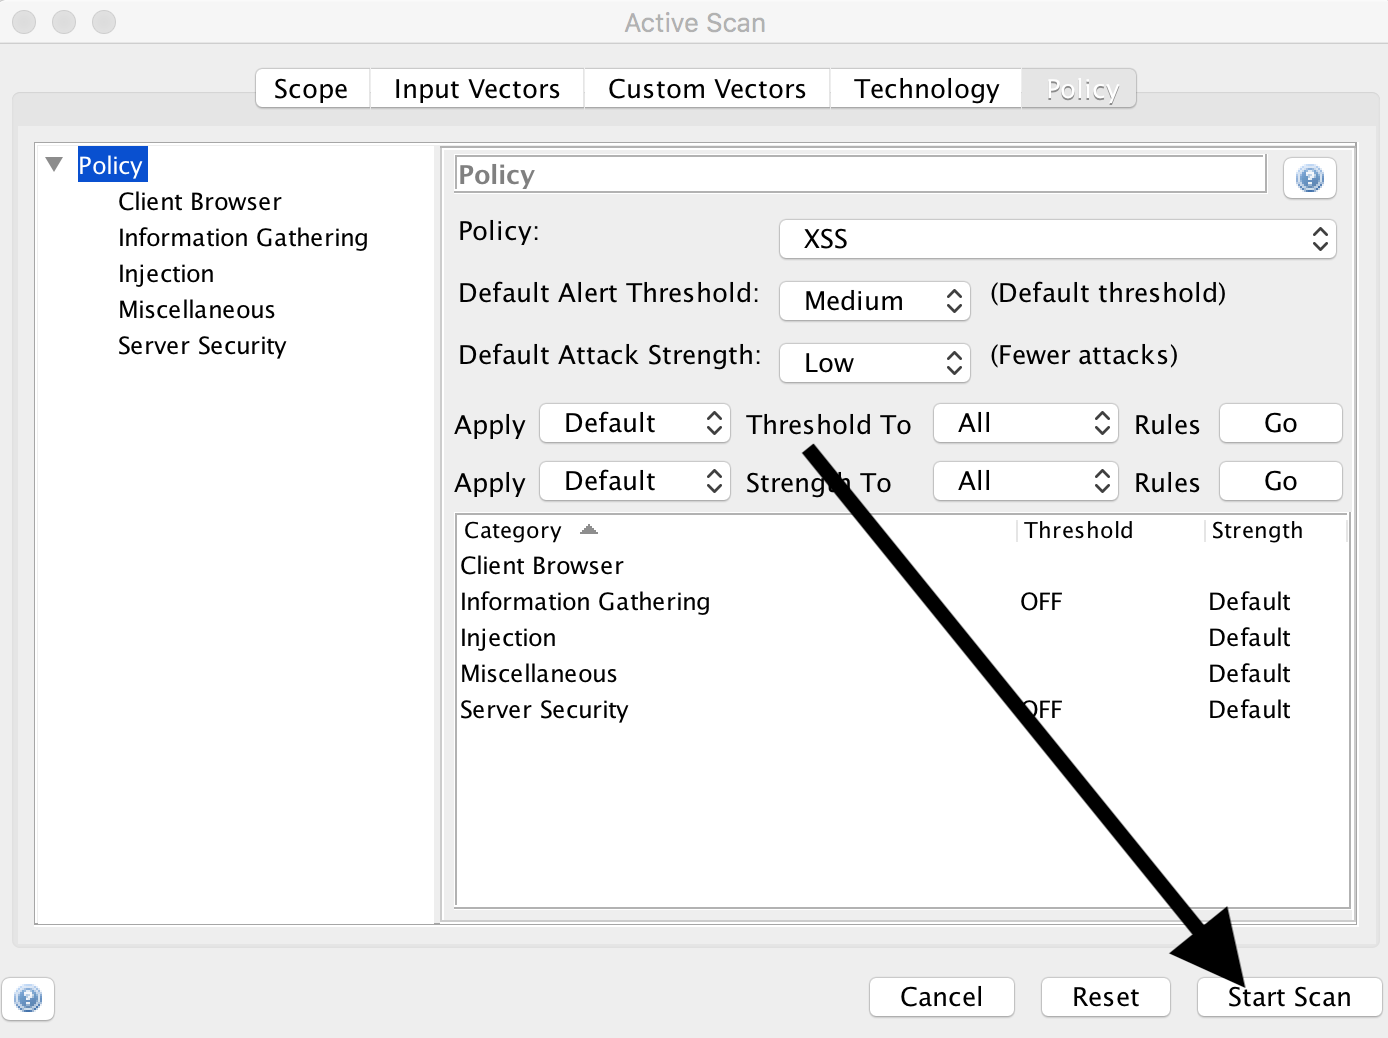
Configuring Scan Policy
We can use the icon with the mixer to set how we want to scan:

First we click on ‘Add’
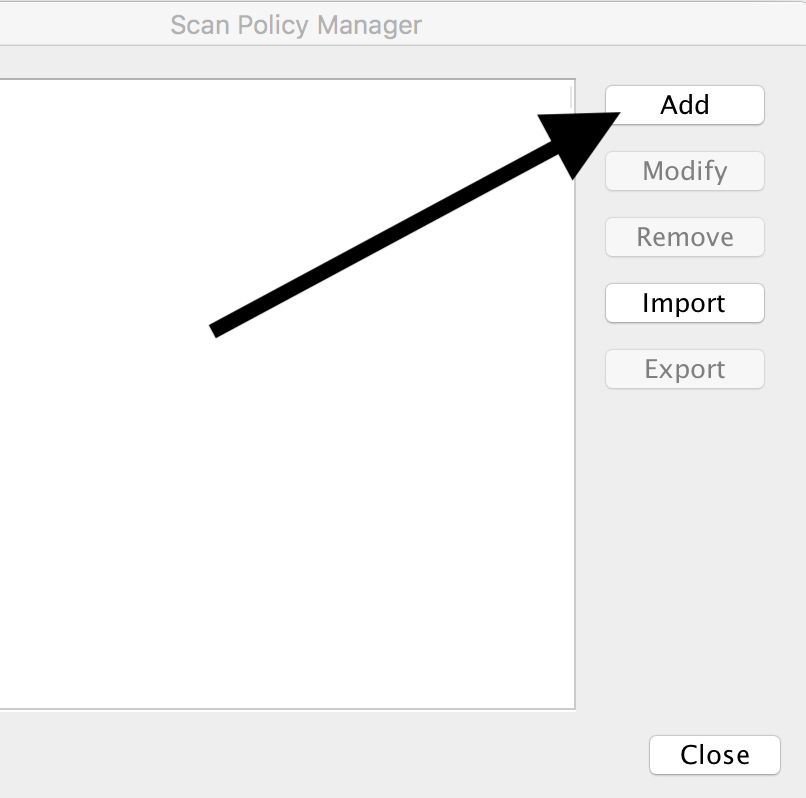
and select the following values:
- Scan policy
- Policy:
XSS - Default alert threshold:
Medium - Default attack strength:
Low - Information gathering: Threshold:
OFF, Strength:Default - Server security: Threshold:
OFF, Strength:Default

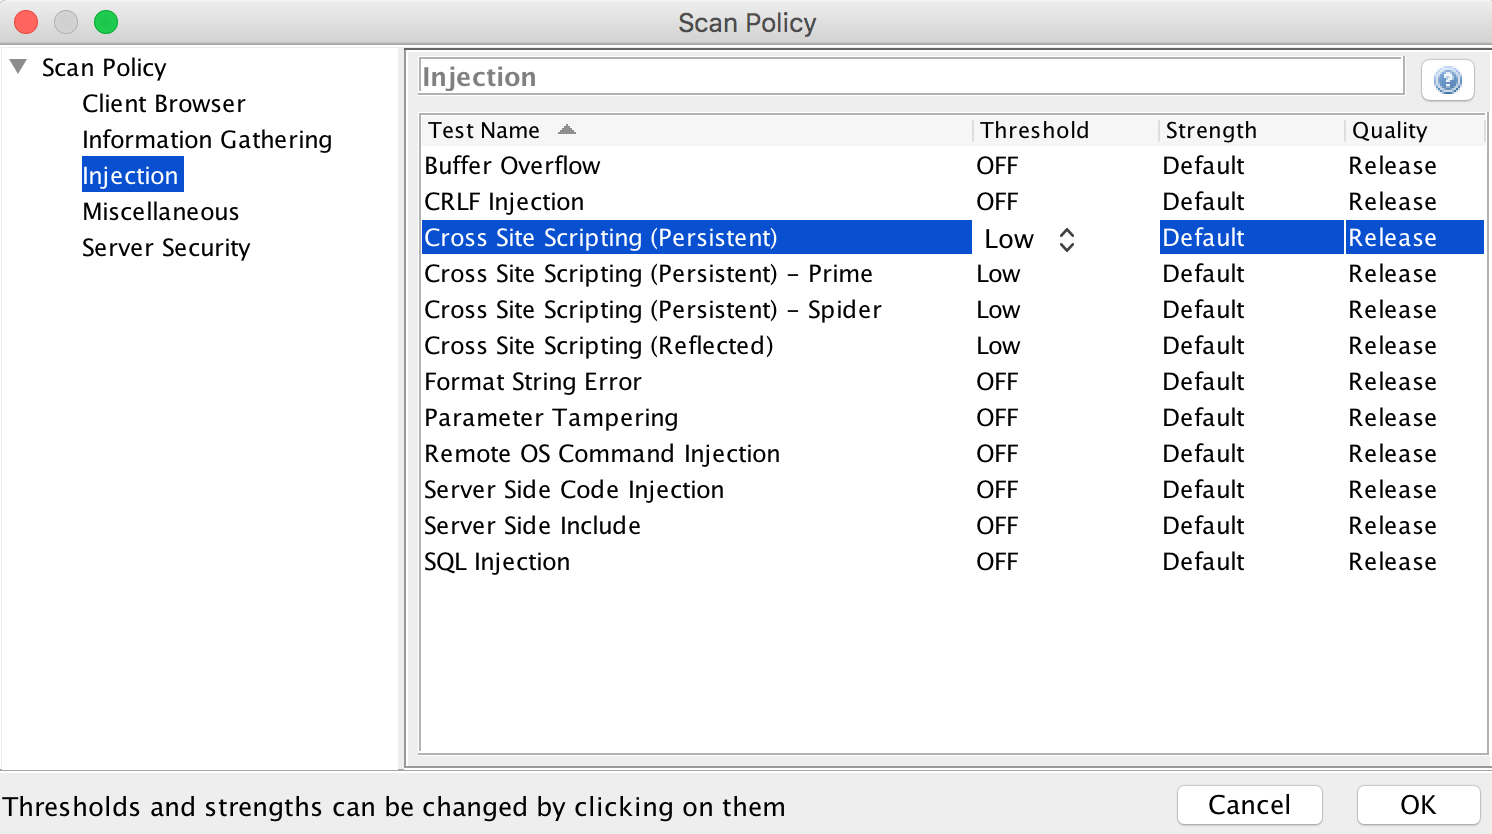
Under ‘Injection’ we set everything to ‘Threshold’: OFF and Strength: Default, except entries with cross-site scripting. These we set to Low:
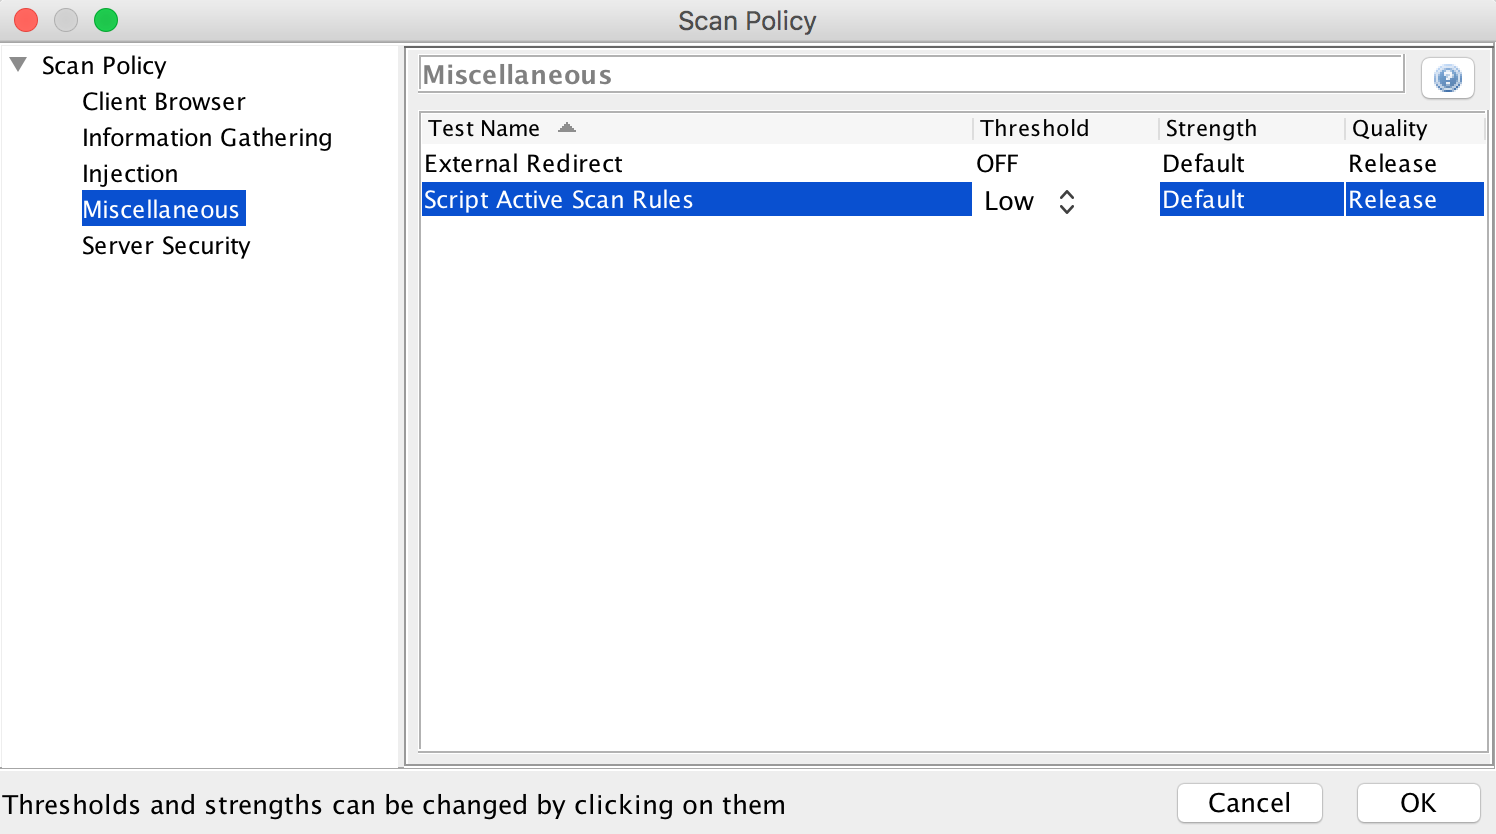
‘Miscellaneous’, ‘External Redirect’, ‘Threshold’ we switch to OFF, Strength to Default and ‘Script Active Scan Rules’ to Low, Default:
‘Ok’
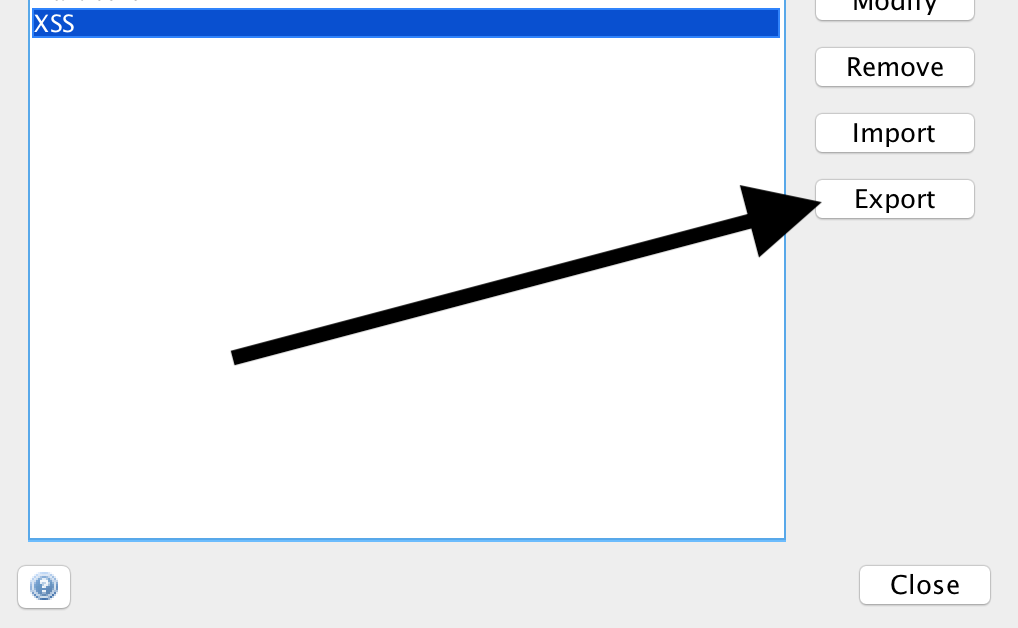
Then ‘XSS’ and ‘Export’ and save the file as ‘XSS.policy’:


‘Save’
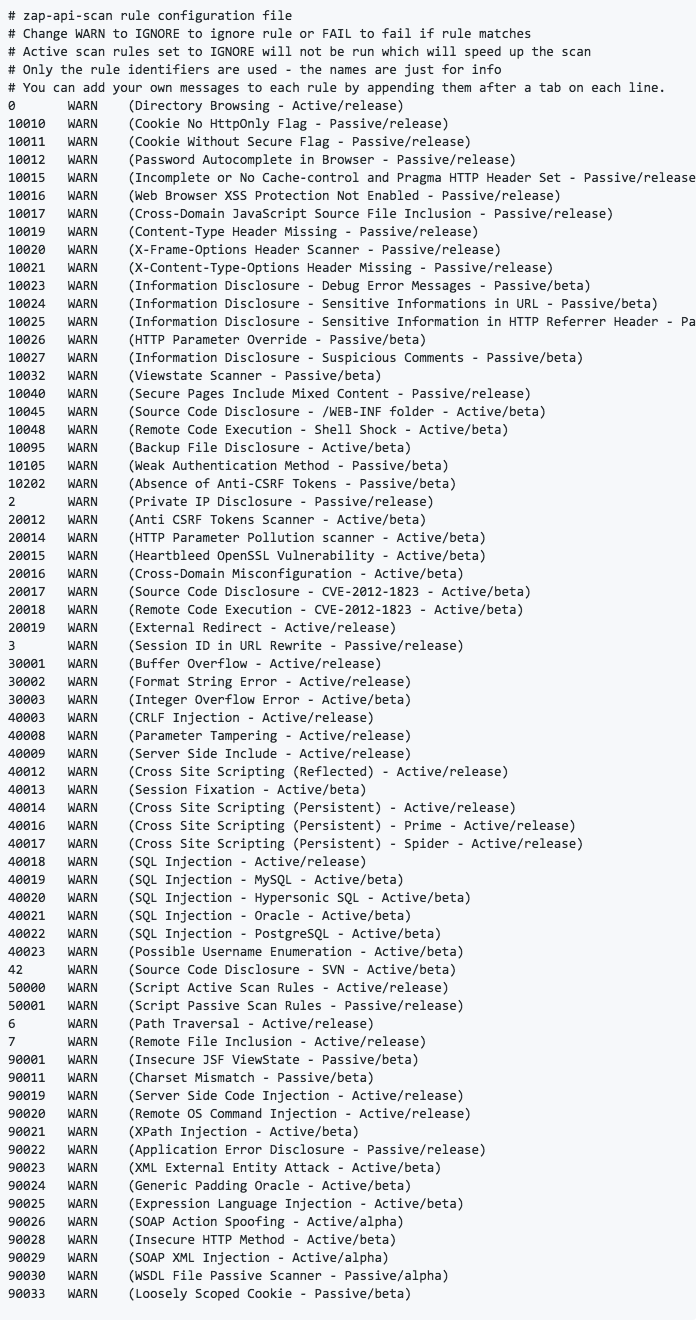
If we look at the file, we see that it is an XML file that adheres to a certain format.
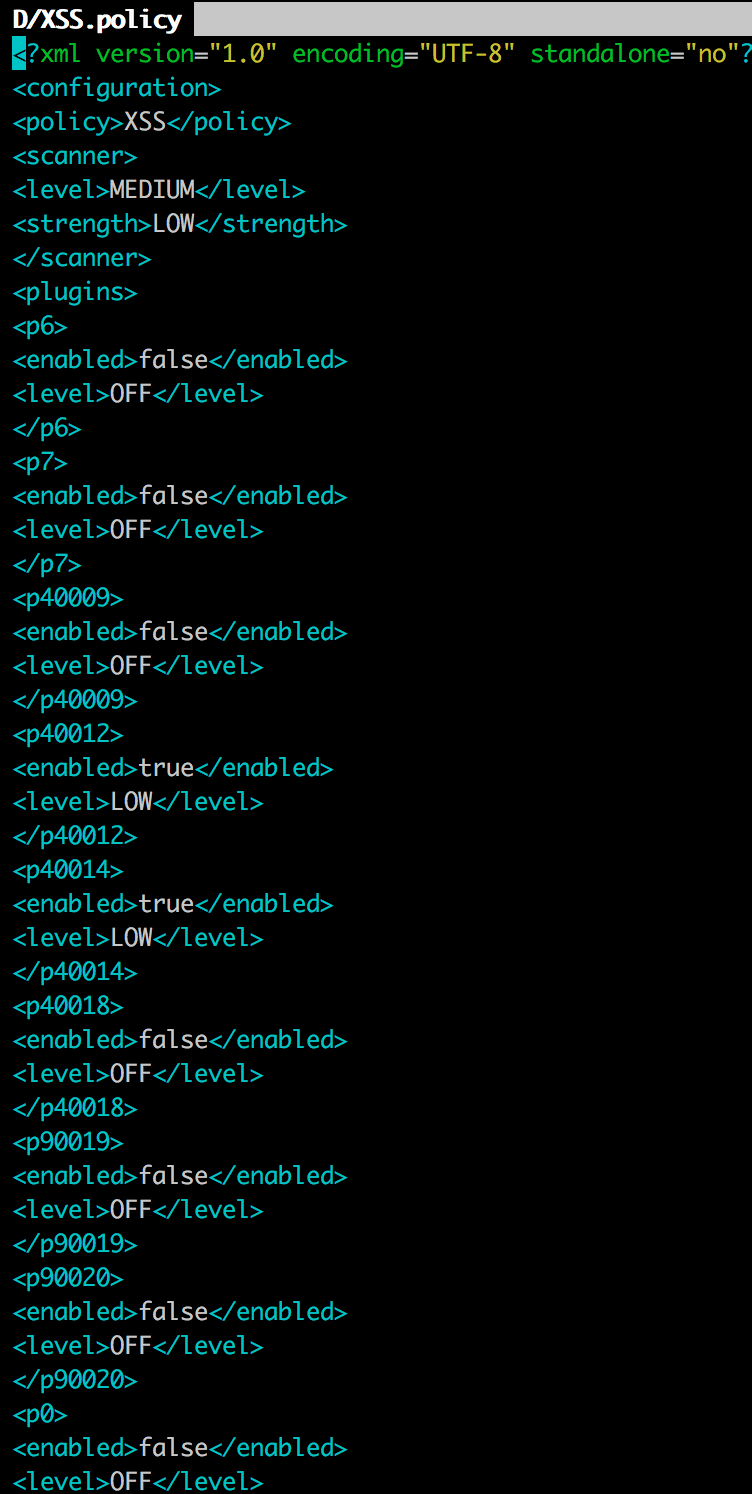
The individual entries can be looked up:
Policy abbreviations for active and passive scans
We remember the location of the file where we put it, because we need it afterwards for Jenkins.
XSS Scan
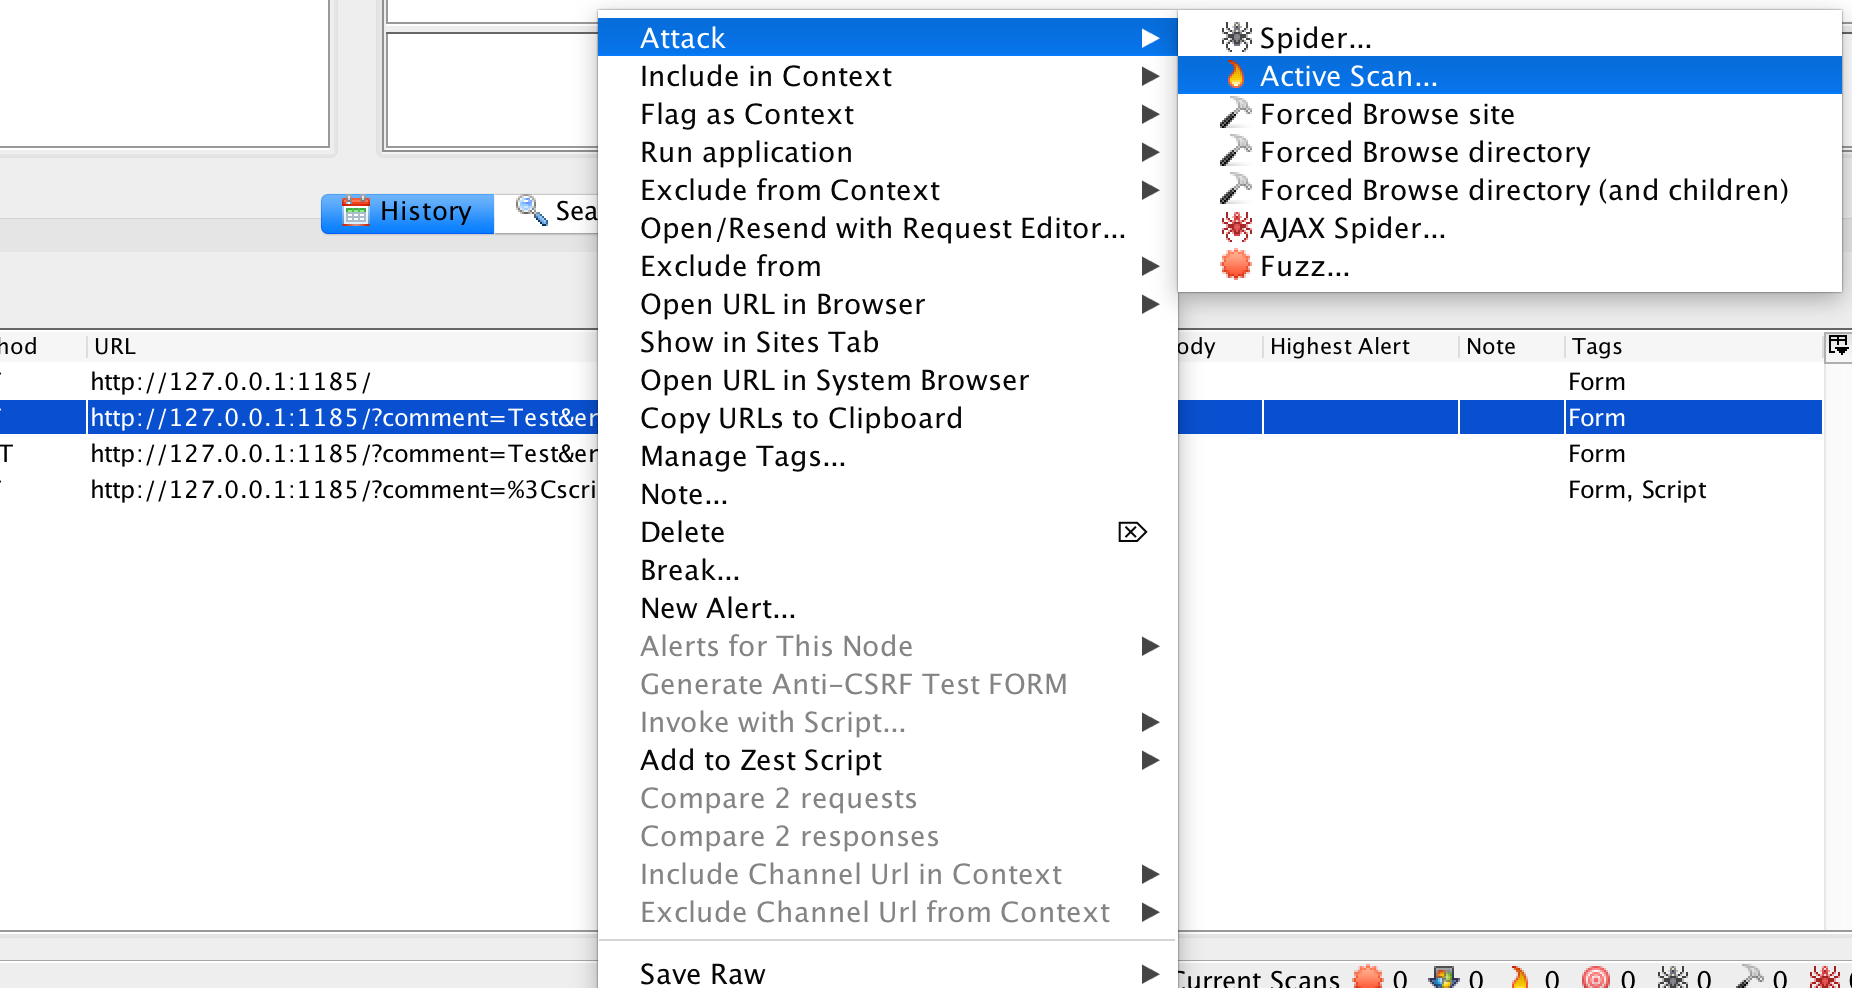
We now look in the ‘History’ of OWASP ZAP for the request in which we entered ‘Test’:
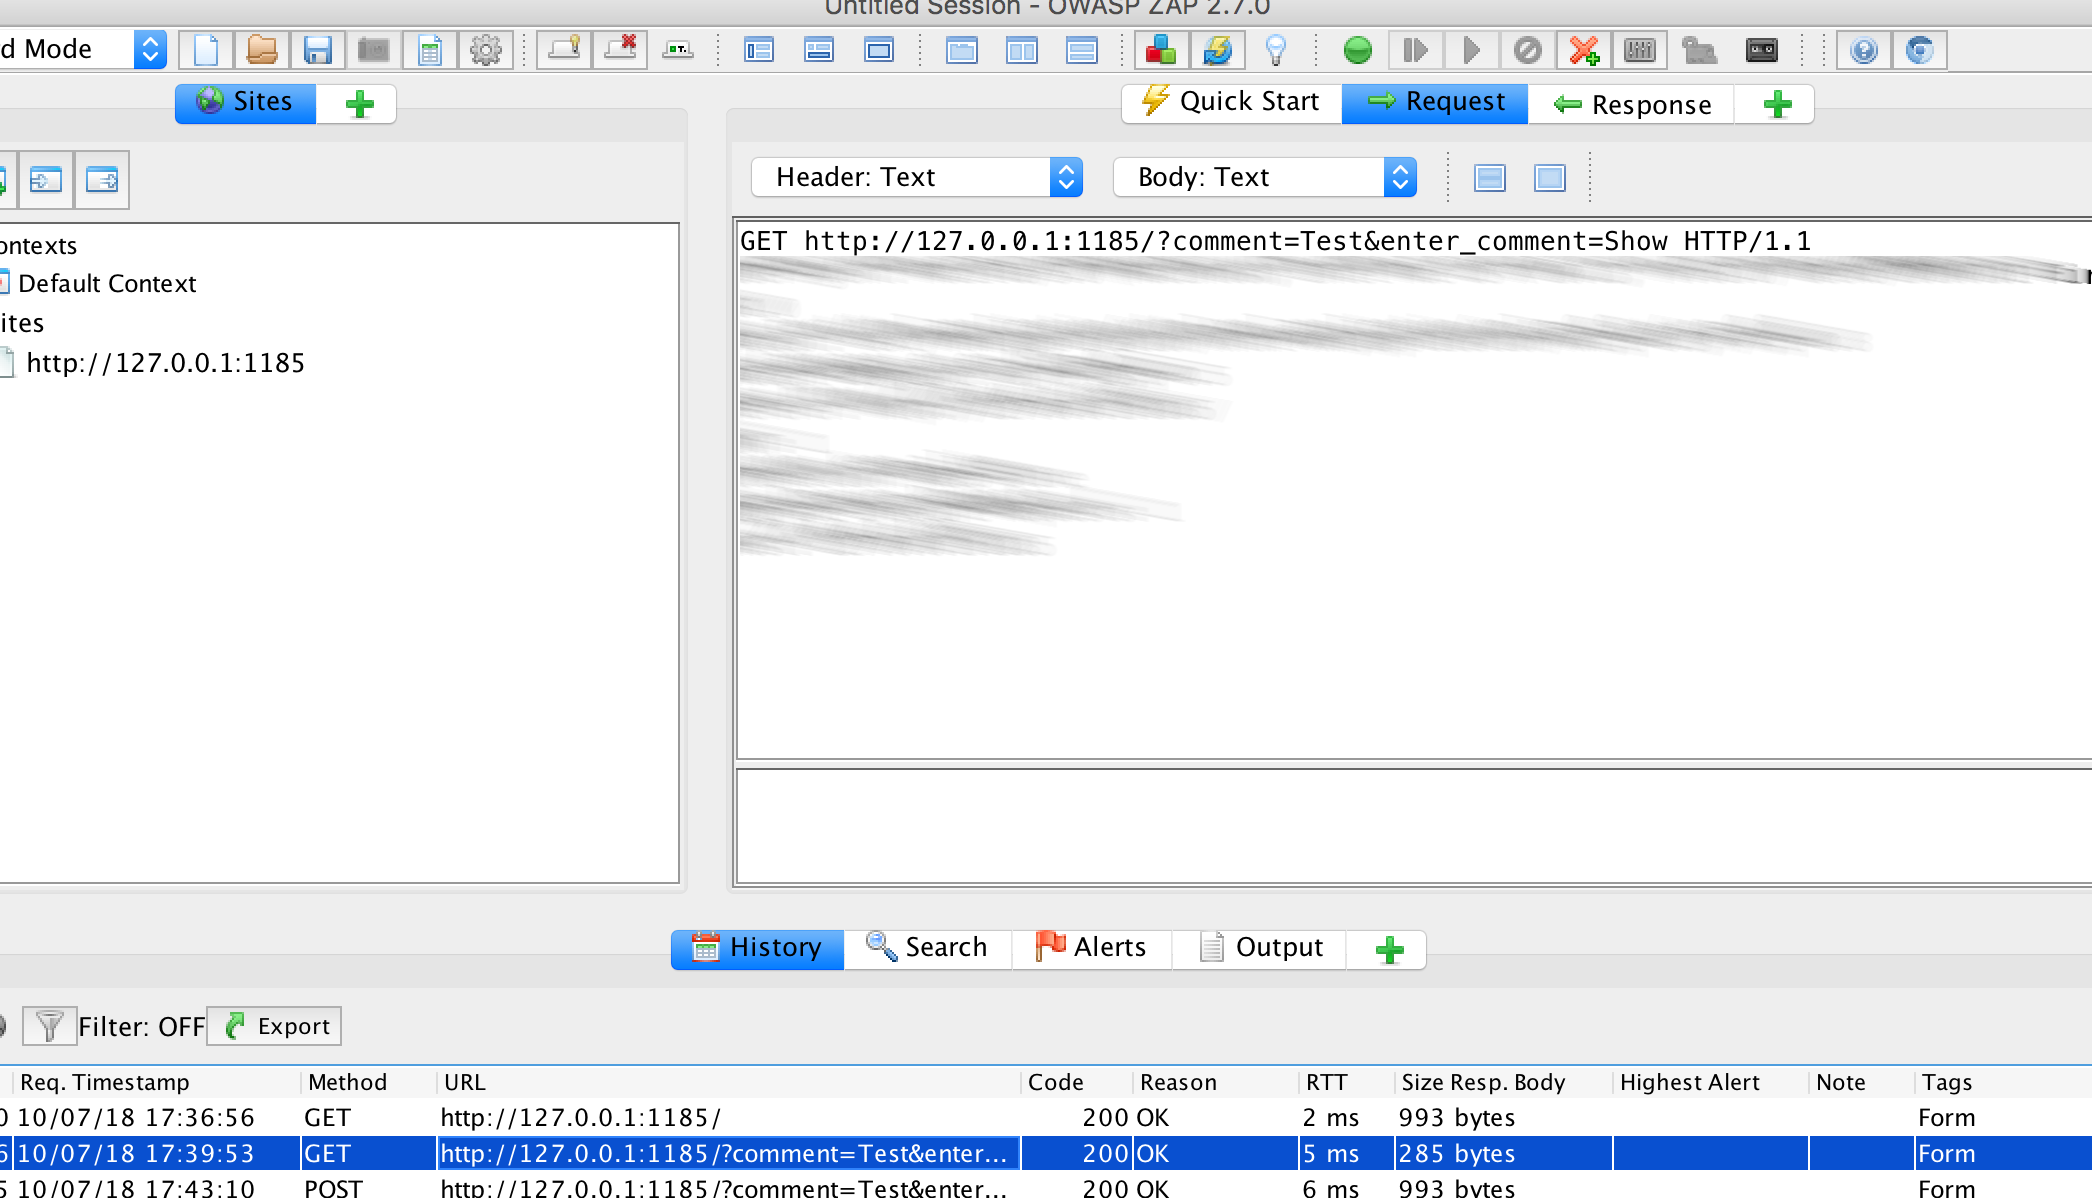
and select ‘Attack’, ‘Active Scan’:
Under ‘Policy’ we select ‘XSS’:
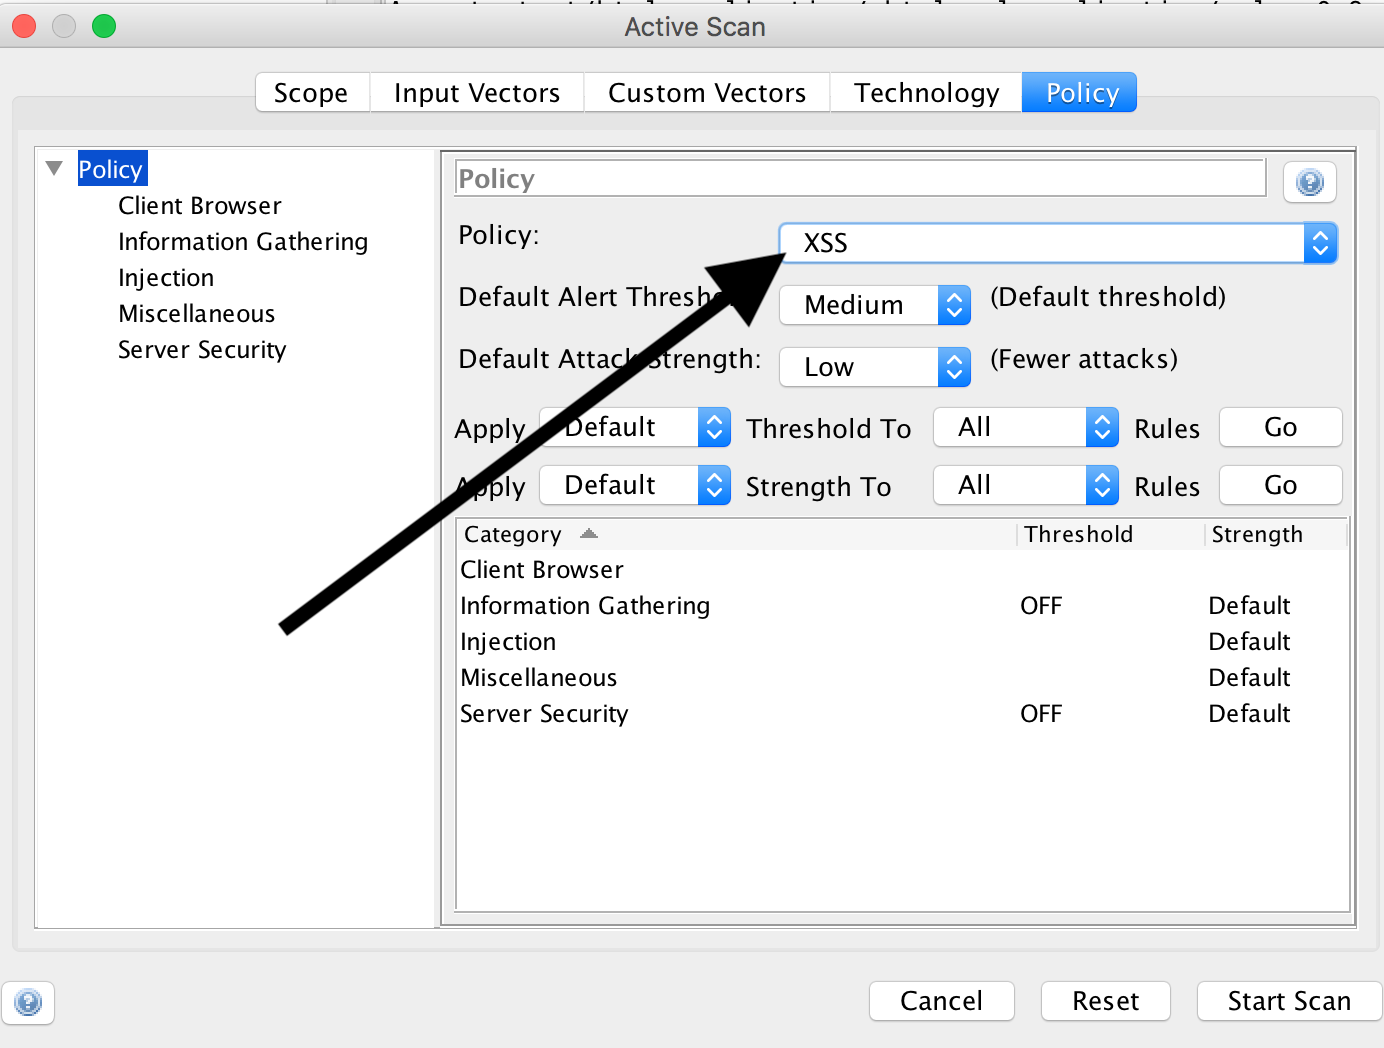
and click on ‘Start Scan’.
If we now click on ‘Alerts’
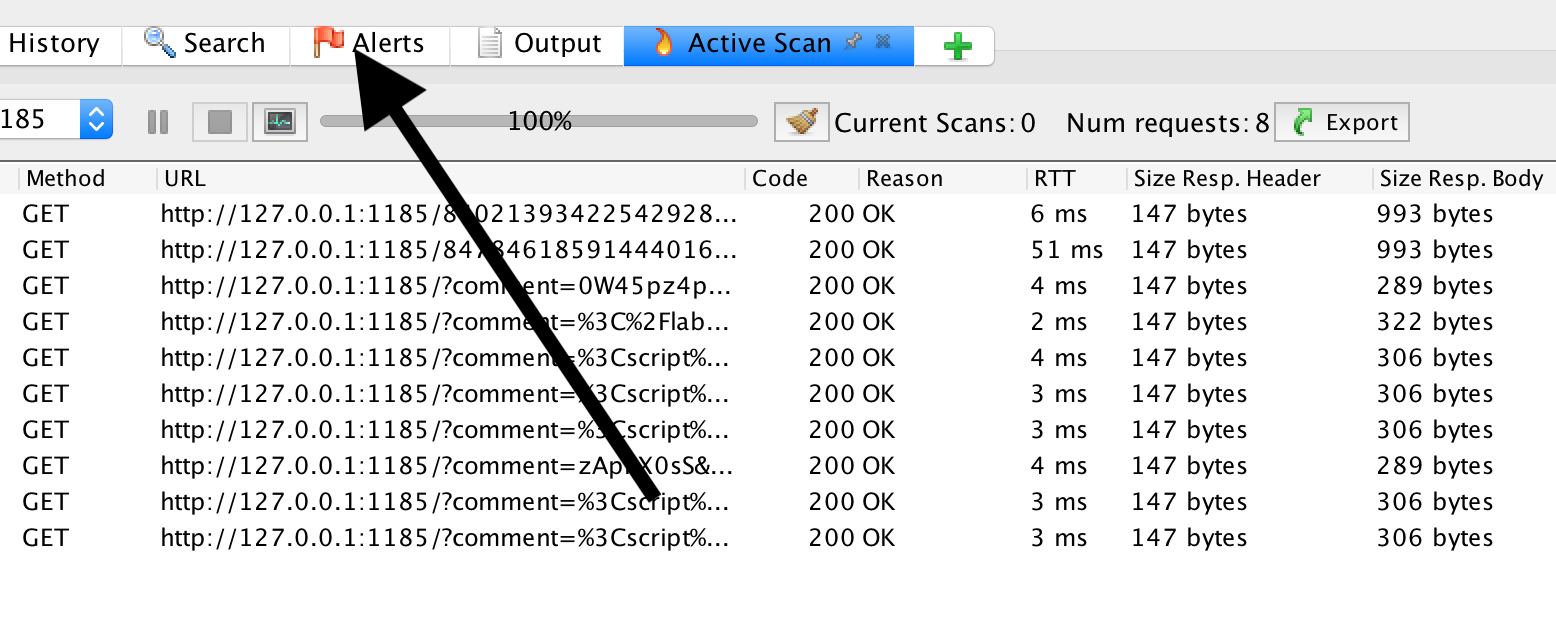
we can see that an XSS has been found:
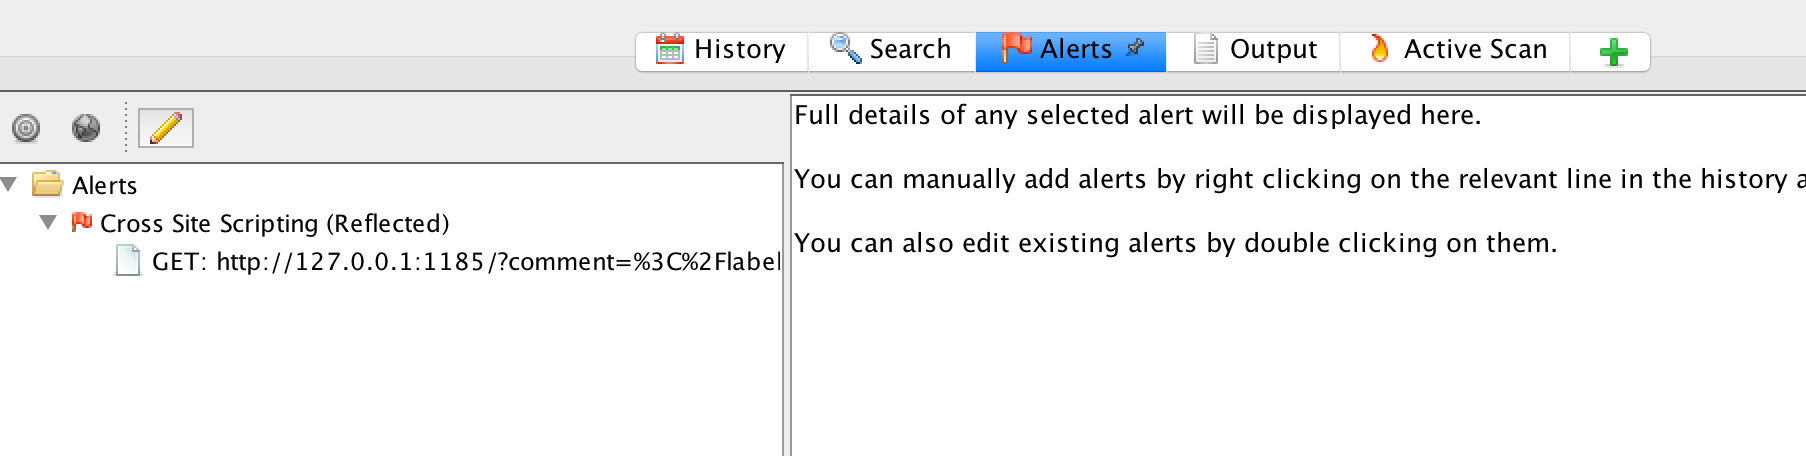
We also want to reproduce this finding in Jenkins.
Jenkins Attack Mode
First, we need to copy the policy in Jenkins. To do this, type the following command on the command line in the directory where XSS.policy was placed:
docker cp XSS.policy <containerid_jenkins>:/var/jenkins_home/owaspzap/policies/
If we now open the configuration page OWASP ZAP in Jenkins we can select the policy.
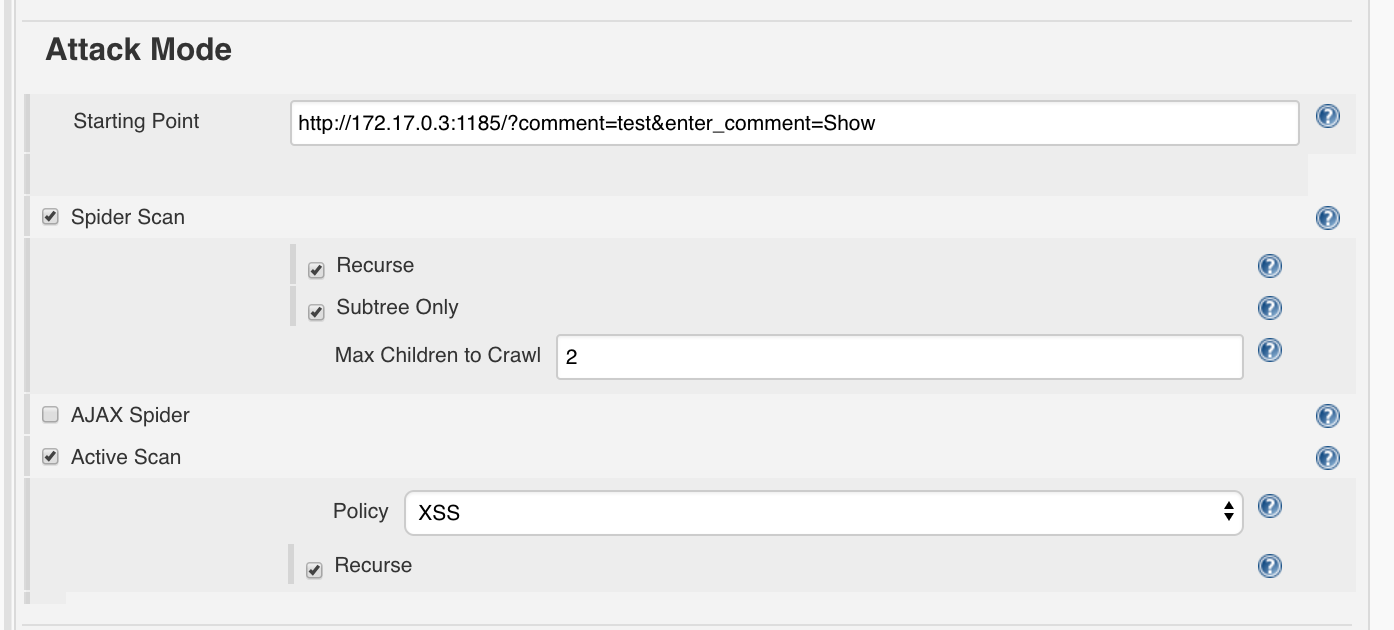
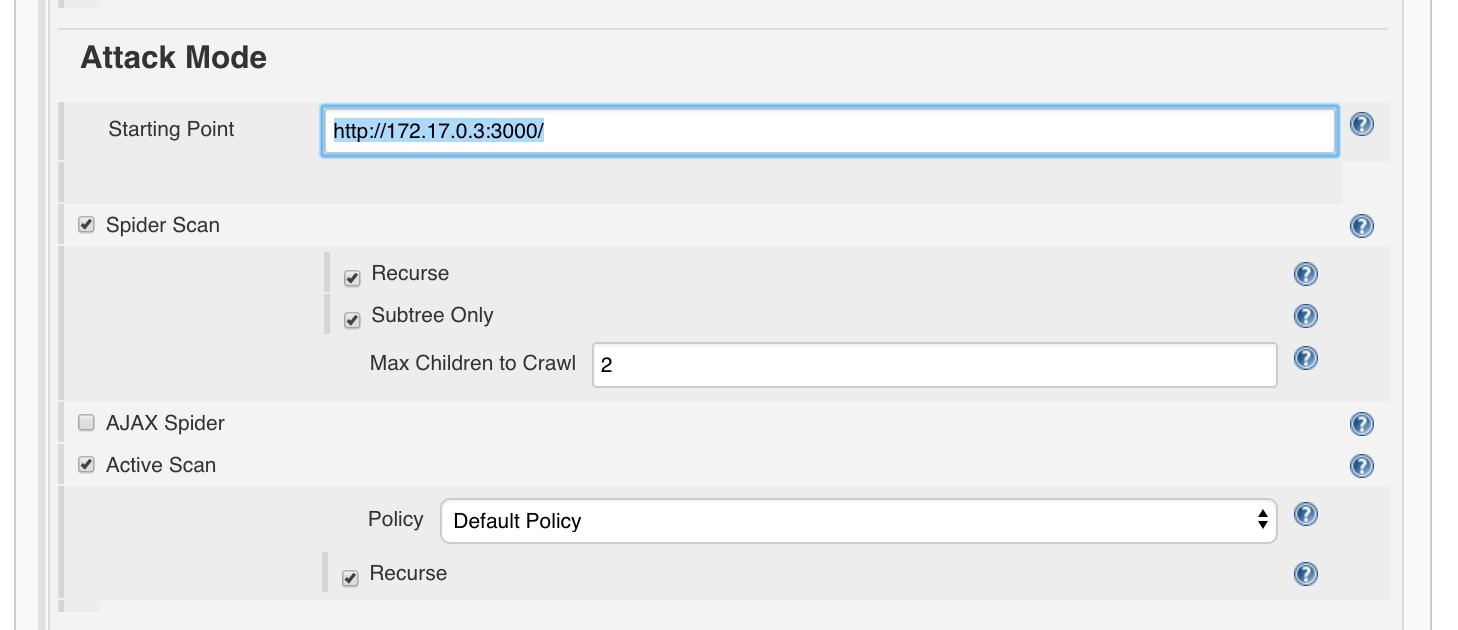
Attack Mode:
- Starting point:
http://<determined_IP>:1185/?comment=test&enter_comment=Showe.g.http://172.17.0.3:1185/?comment=test&enter_comment=Show - Spider Scan: True
- Recurse: True
- Subtree Only: Max Children to Crawl:
2 - Active Scan
- Policy:
XSSwählen
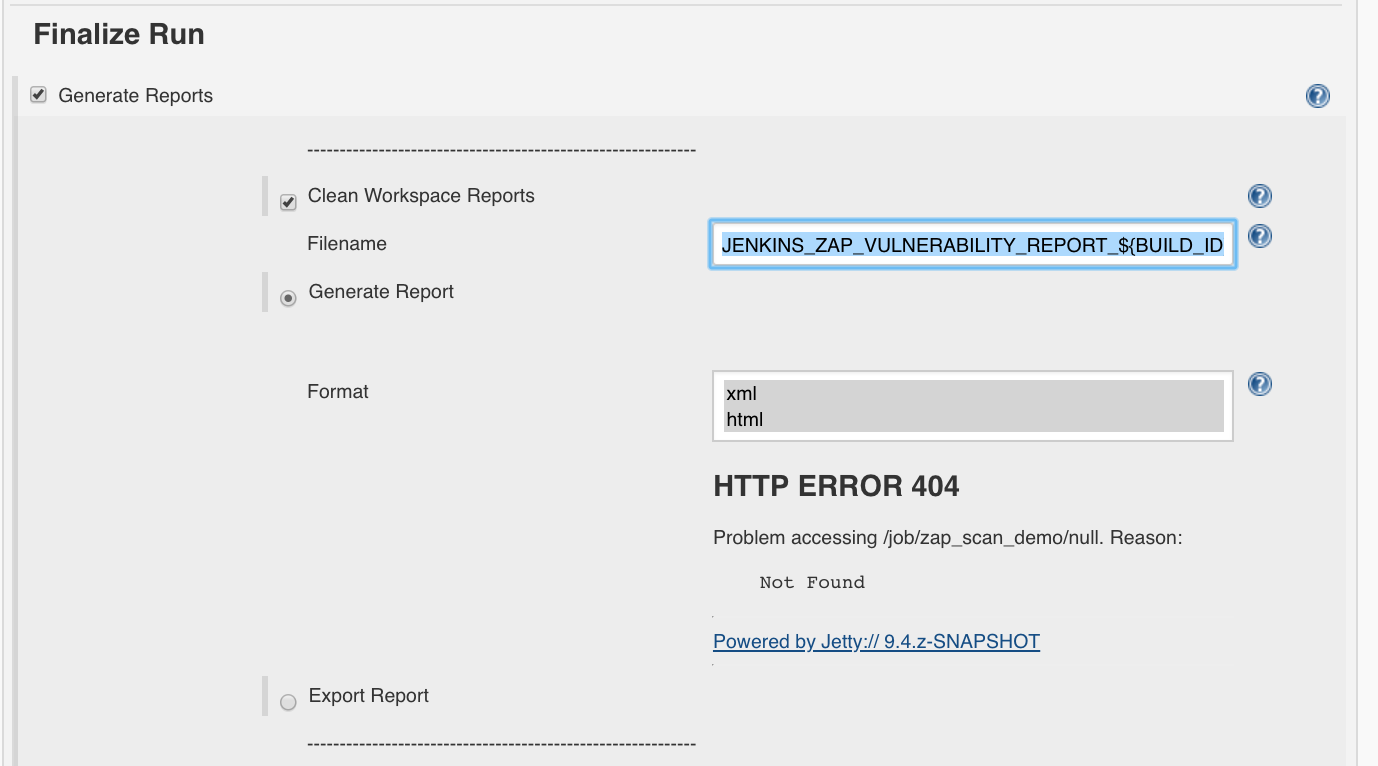
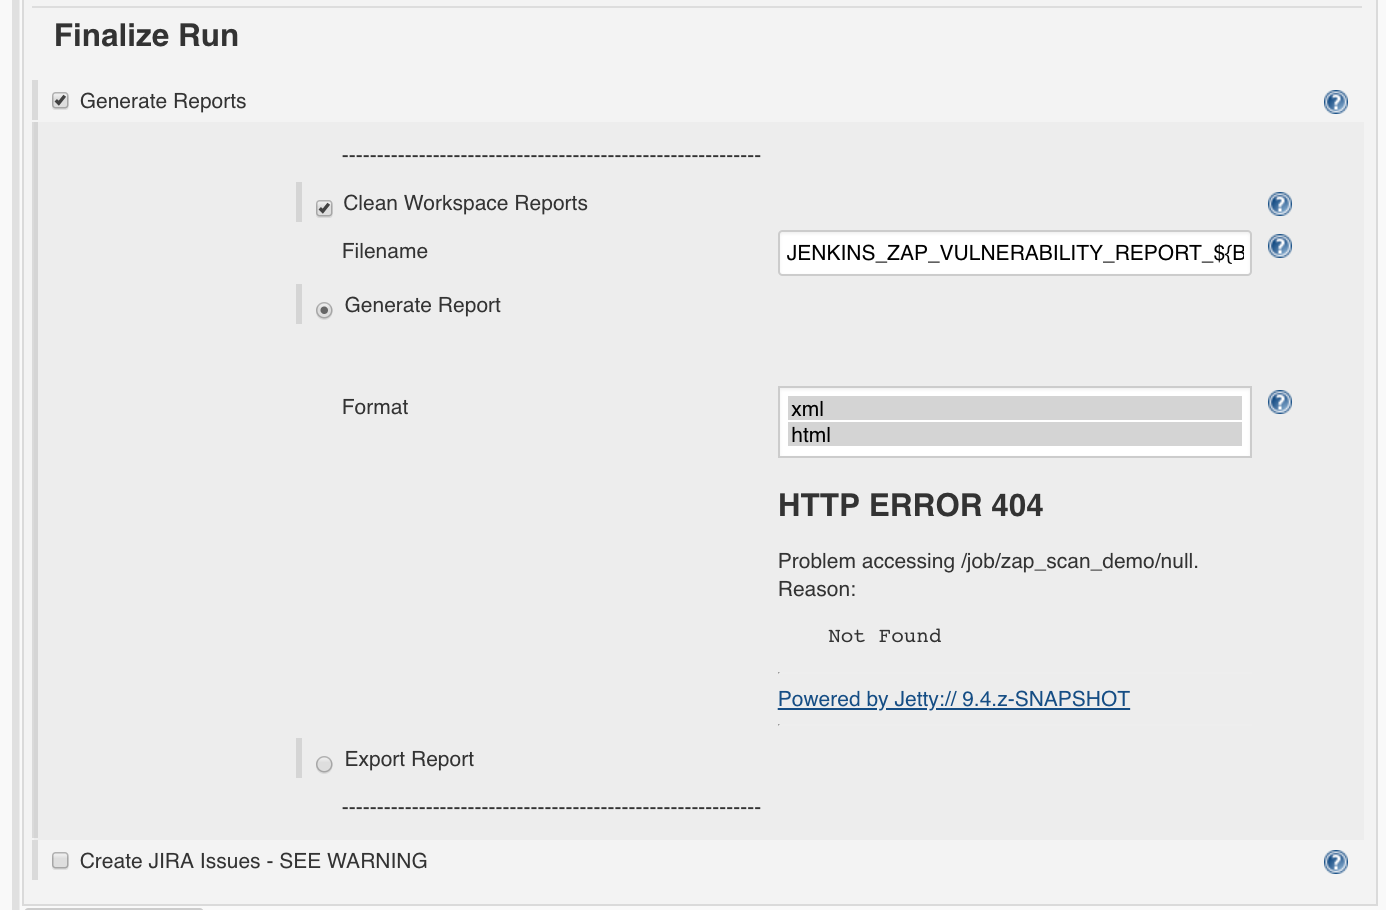
Jenkins Report
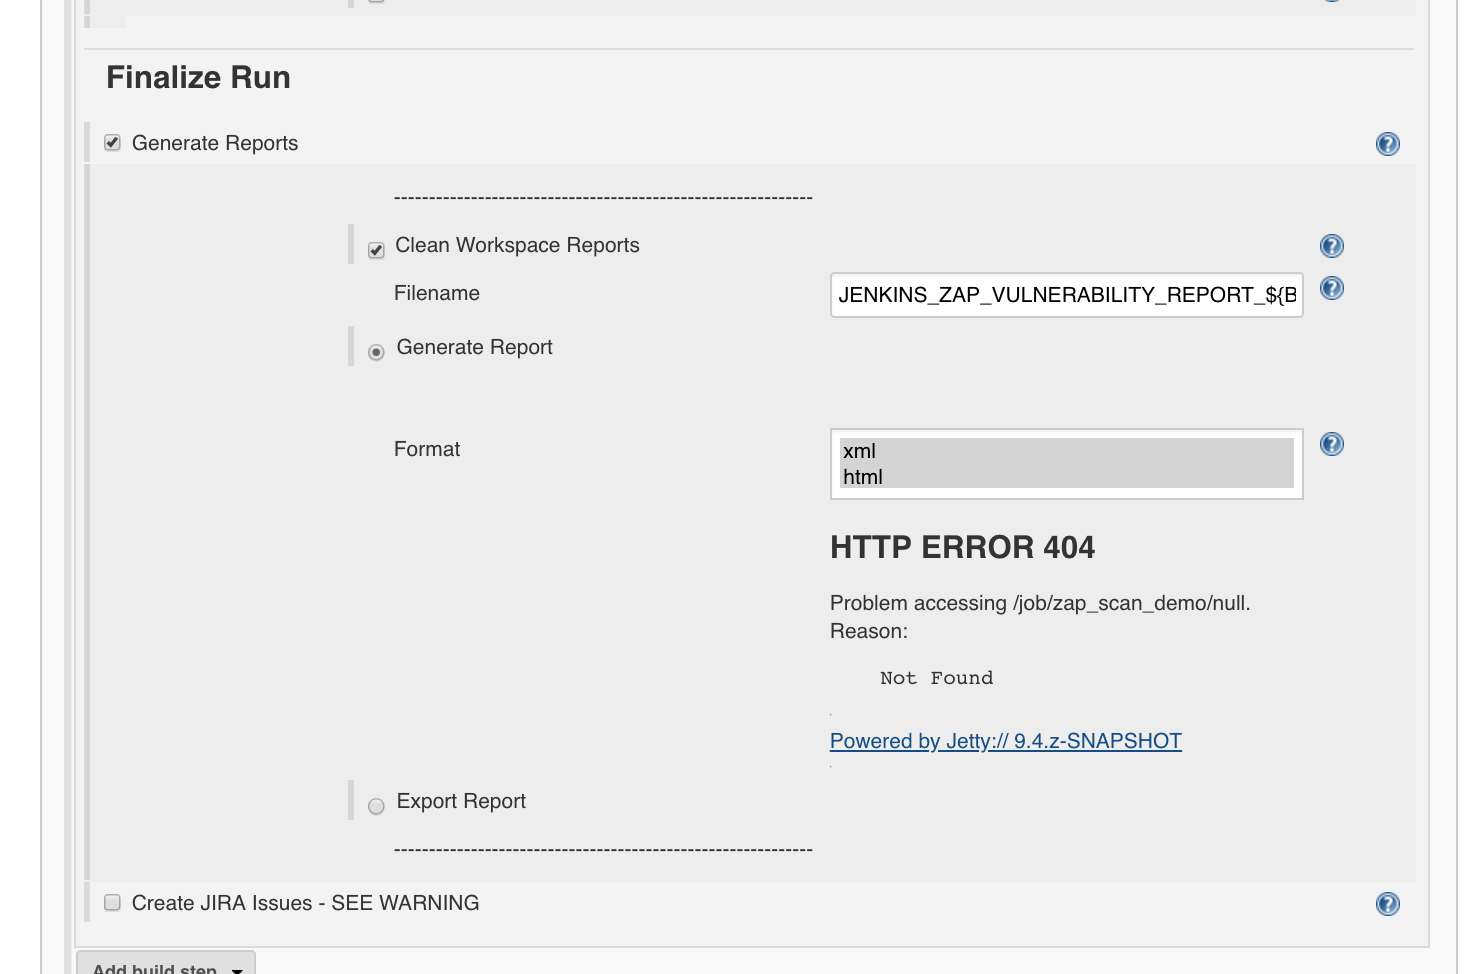
To generate a corresponding report,
we set ‘Finalize Run’:
- Generate Reports: True
- Clean Workspace Reports: True
- Filename:
JENKINS_ZAP_VULNERABILITY_REPORT_${BUILD_ID} - Generate Report: True
- Format: choose xml and html
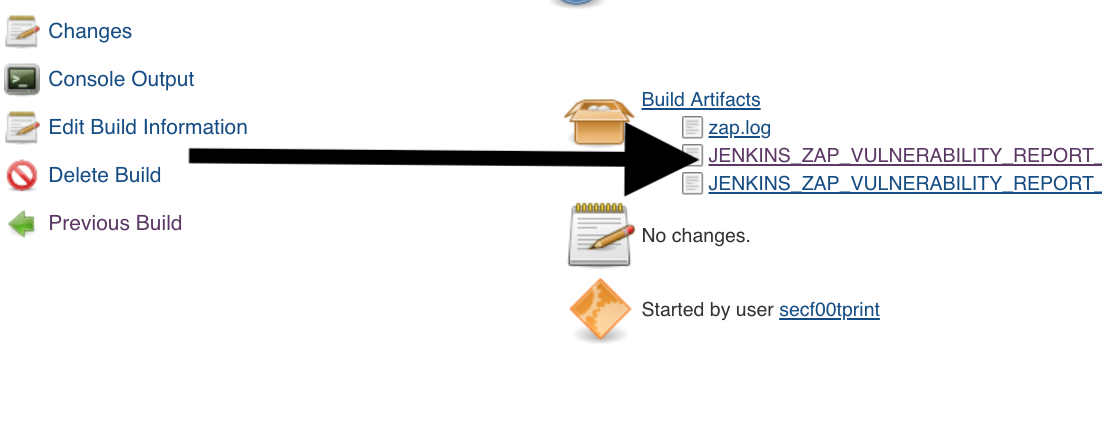
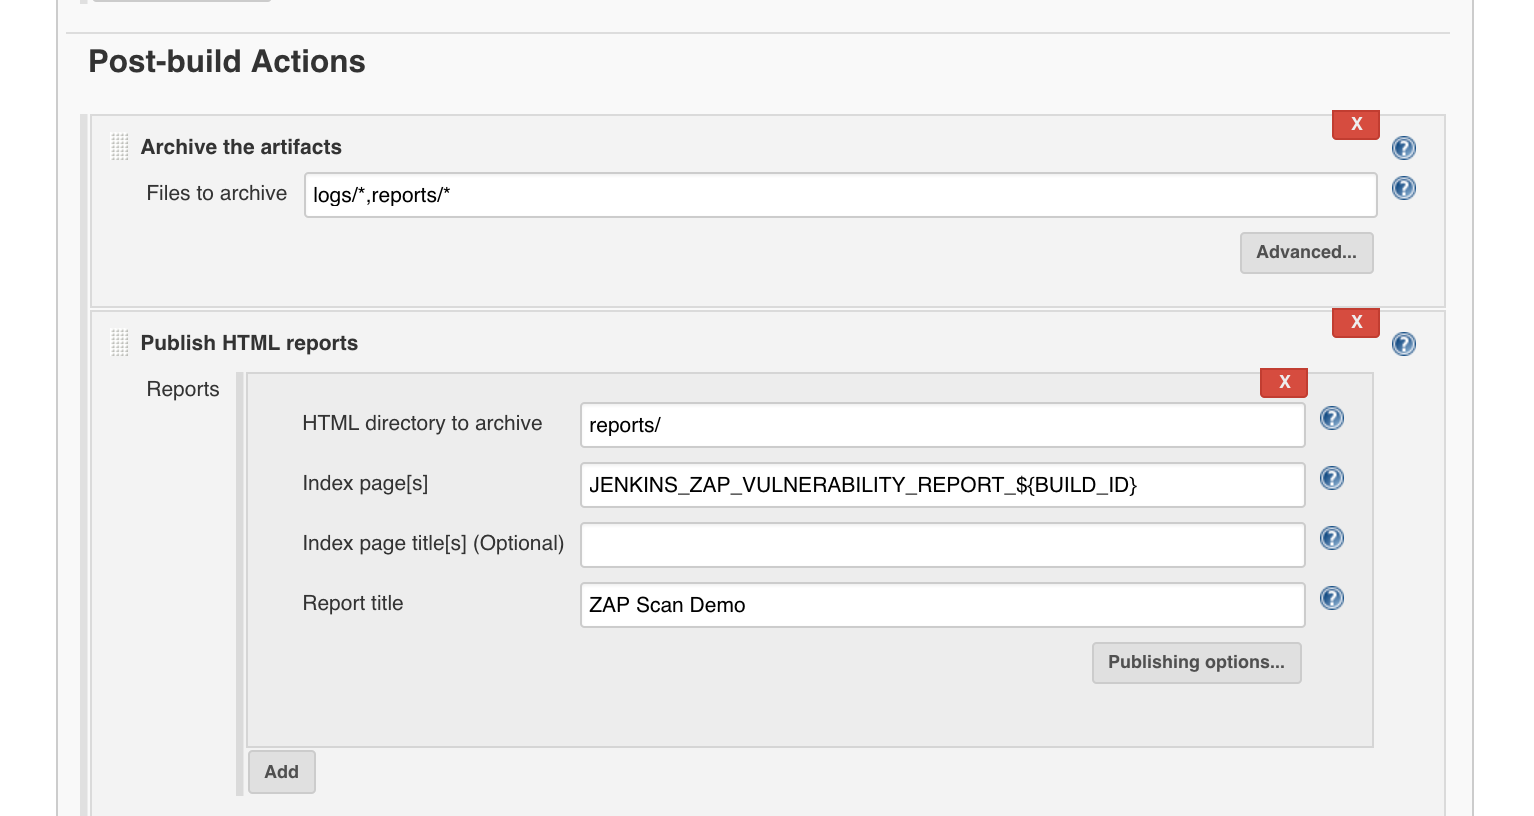
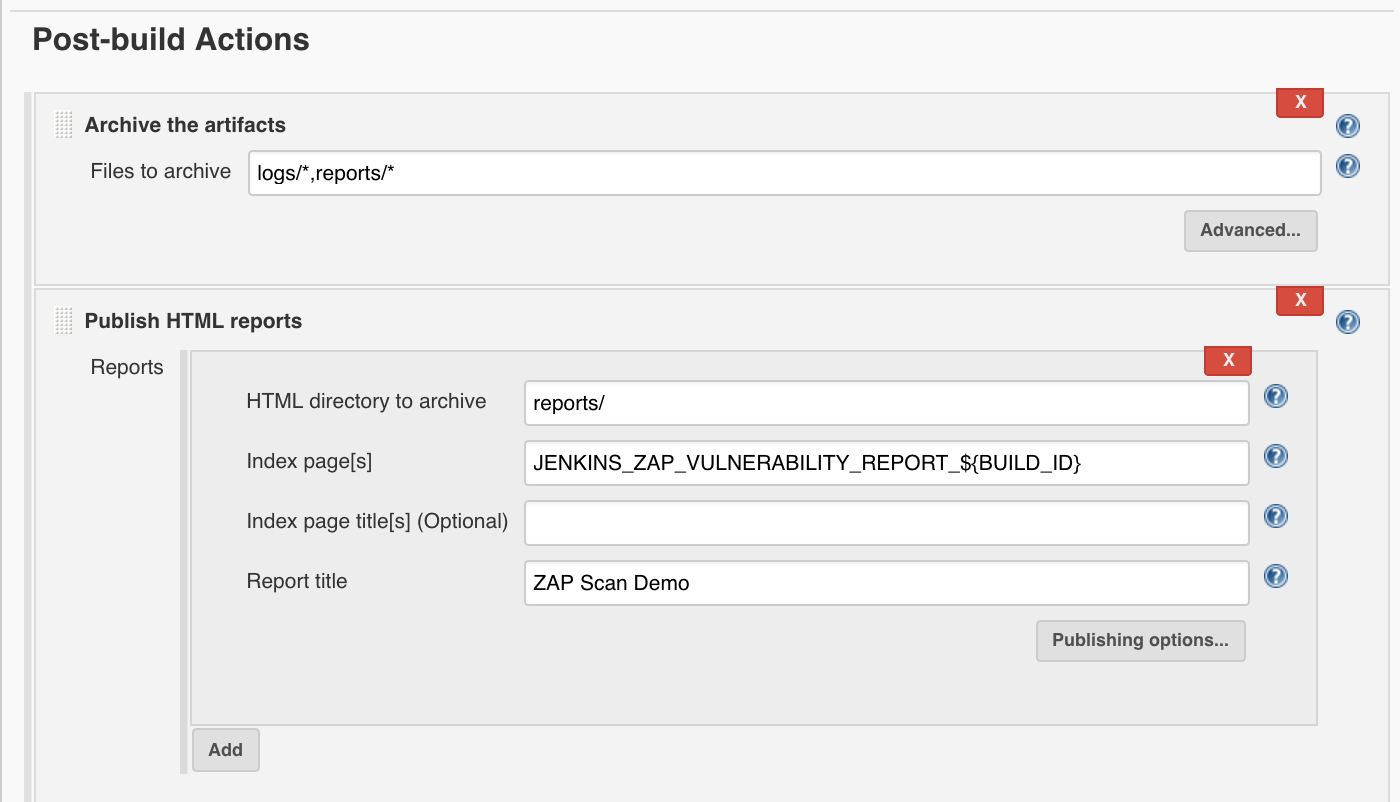
Under ‘Add post-build action’, ‘Archive the artifacts’:
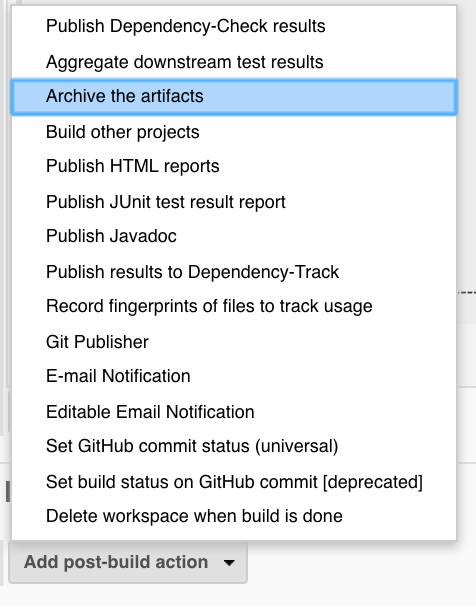
- Archive the artifacts
- Files to archive:
logs/*,reports/*

and ‘Add post-build action’, ‘Publish HTML Reports’:
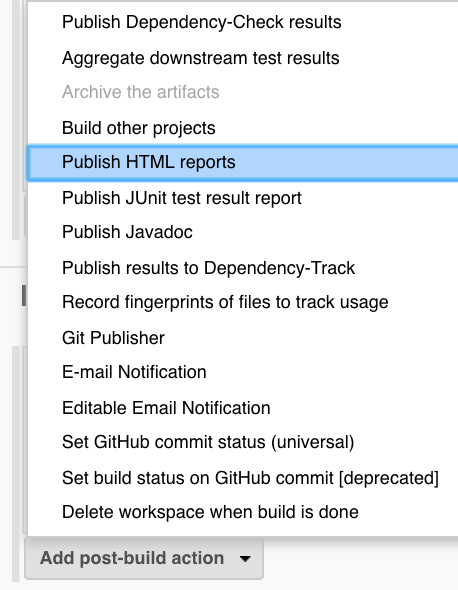
‘Add’

- Publish HTML reports: Reports
- HTML directory to archive:
reports/ - Index page[s]:
JENKINS_ZAP_VULNERABILITY_REPORT_${BUILD_ID} - Report title:
ZAP Scan Demo

and finally we click on ‘Save’.
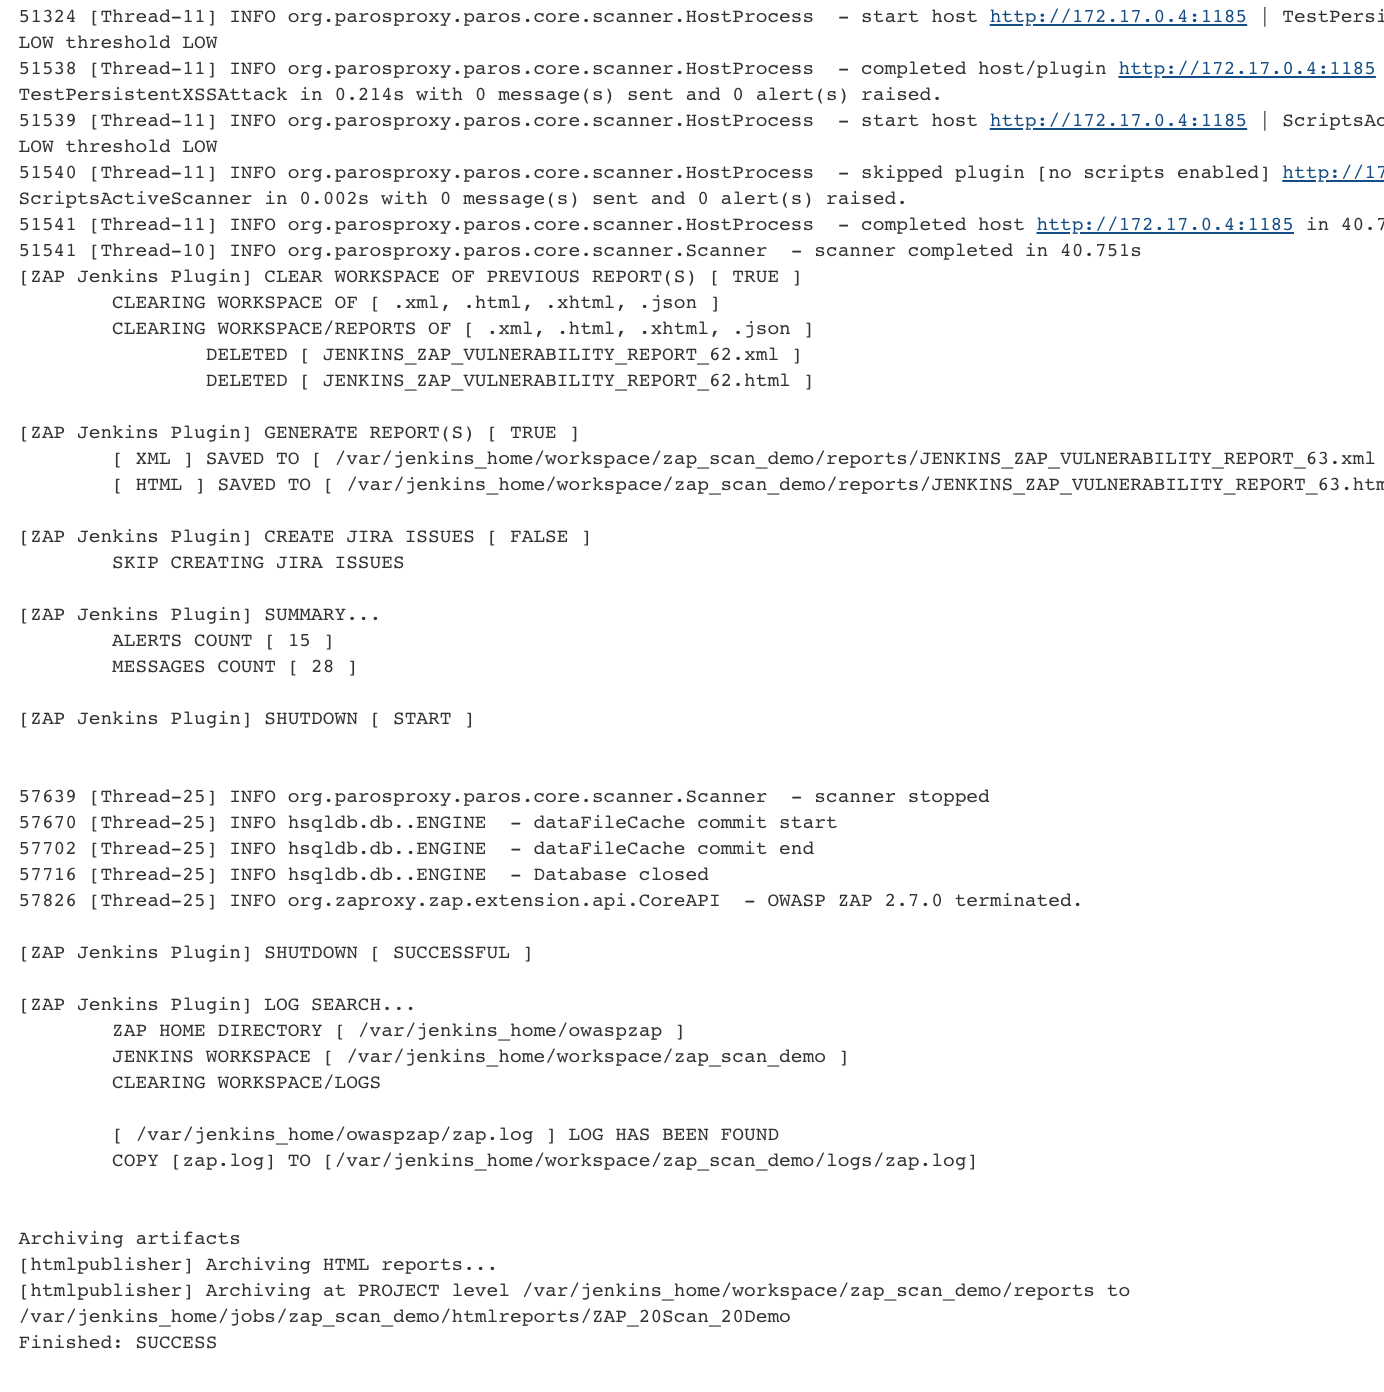
Final Scan
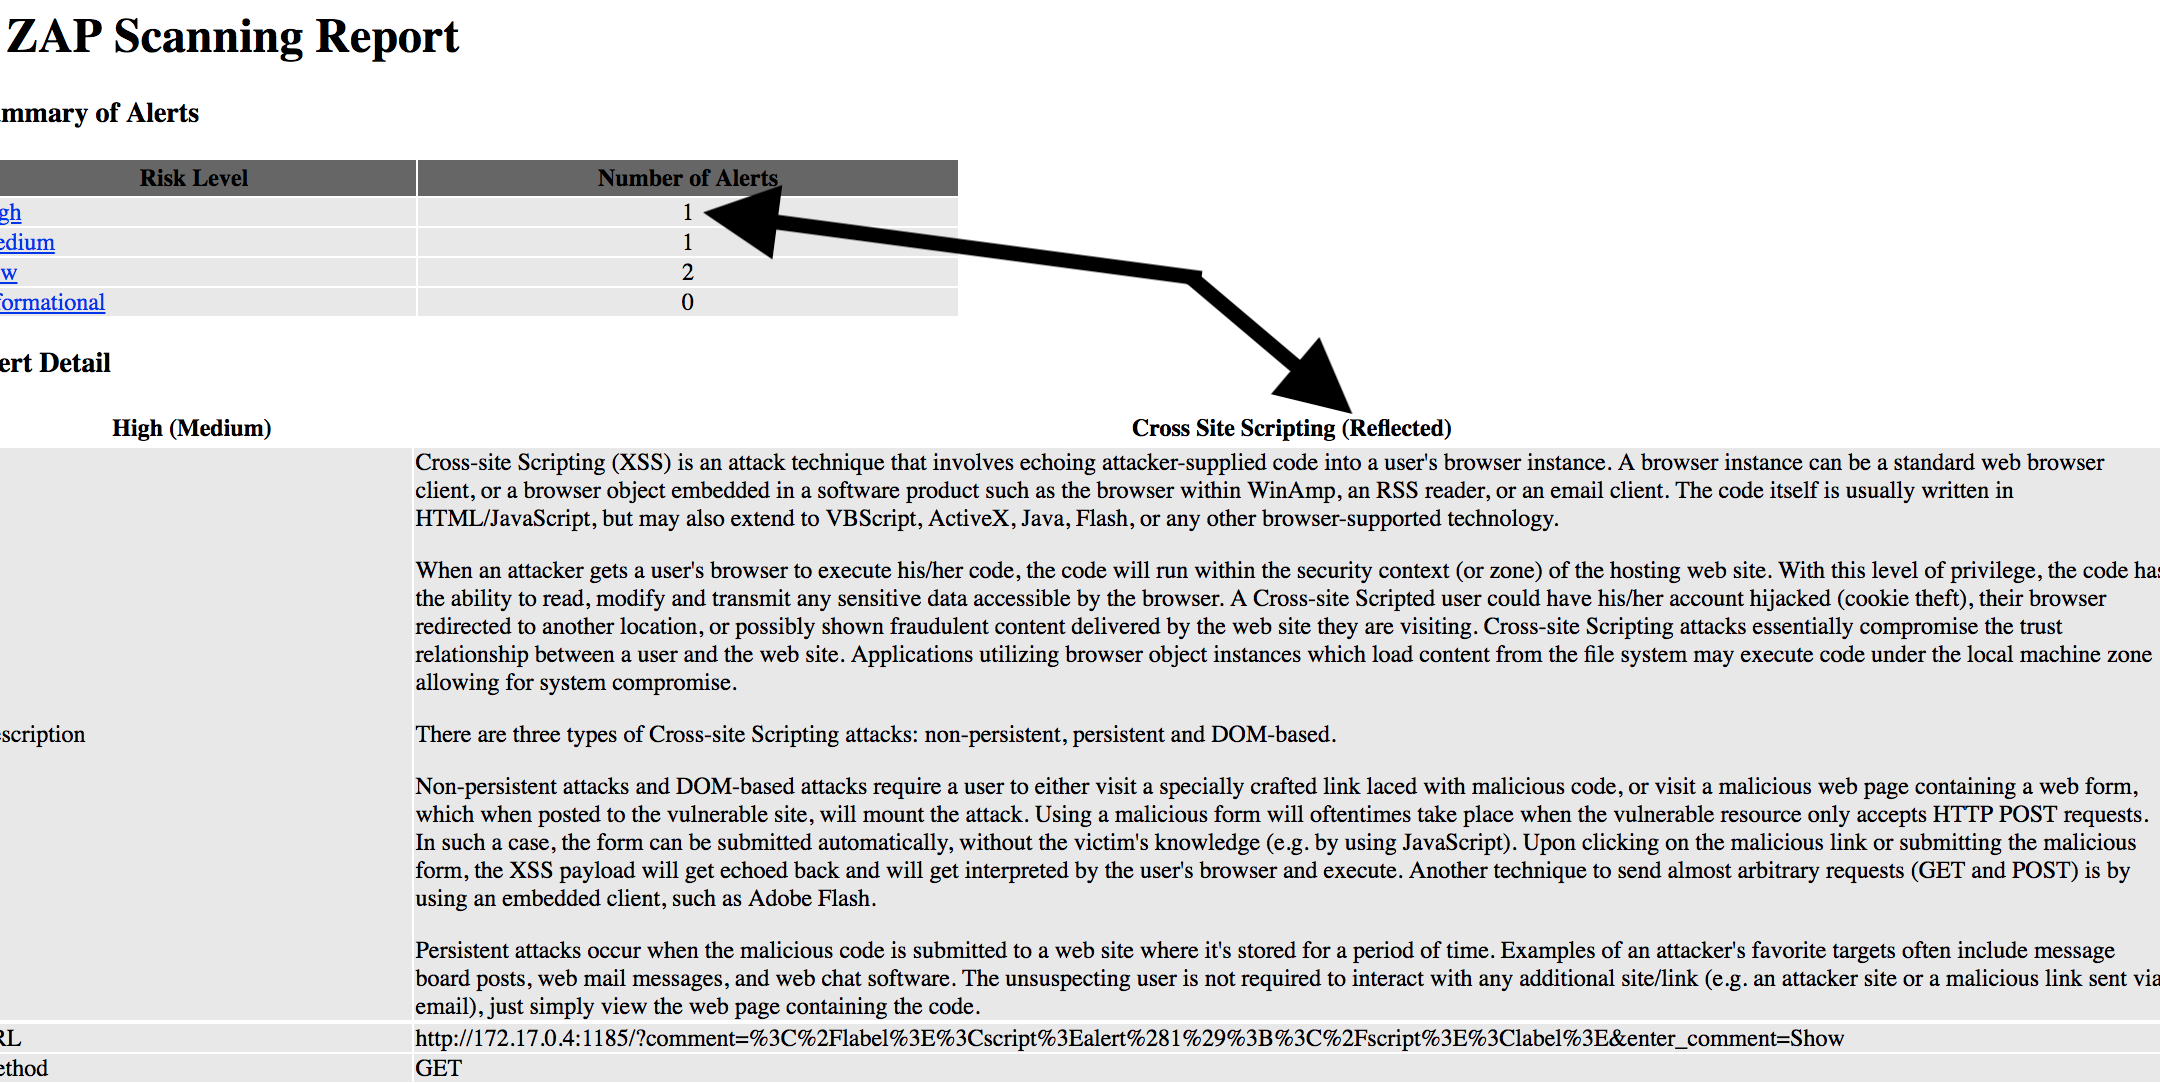
To start the final scan we select ‘Build now’:
The performed scan should find the XSS:
Authentication
In the following section I will explain how to set up authentication. To make it clearer I take 2 applications: OWASP WebGoat and OWASP Juice Shop:
OWASP Juice Shop
To start this application we type in the following command on the command line
docker run --rm -p 127.0.0.1:3000:3000 -d bkimminich/juice-shop
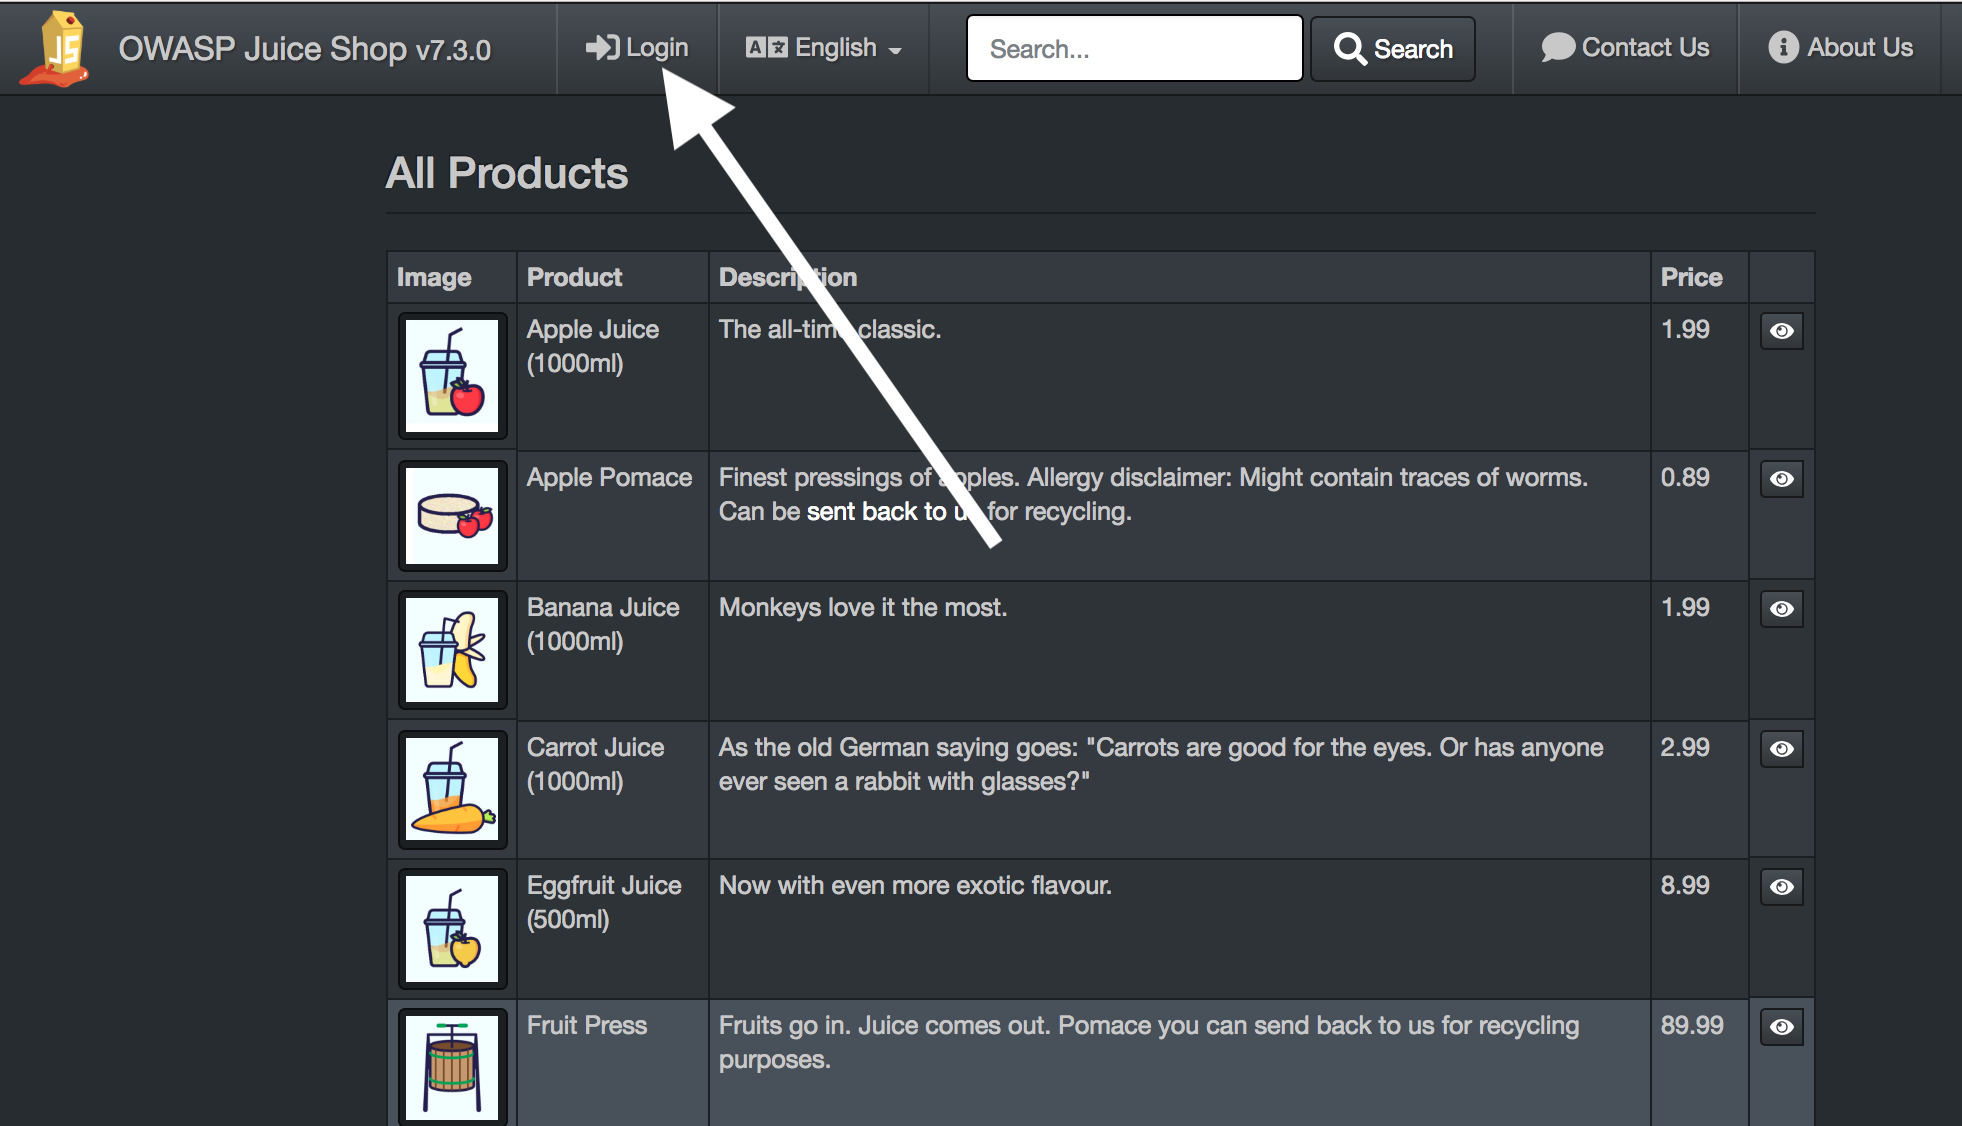
and open the started application in the browser:
open http://127.0.0.1:3000
The proxy for OWASP ZAP should be set in the browser (cf. chapter Configuring FoxyProxy).
Now we go to the login mask:
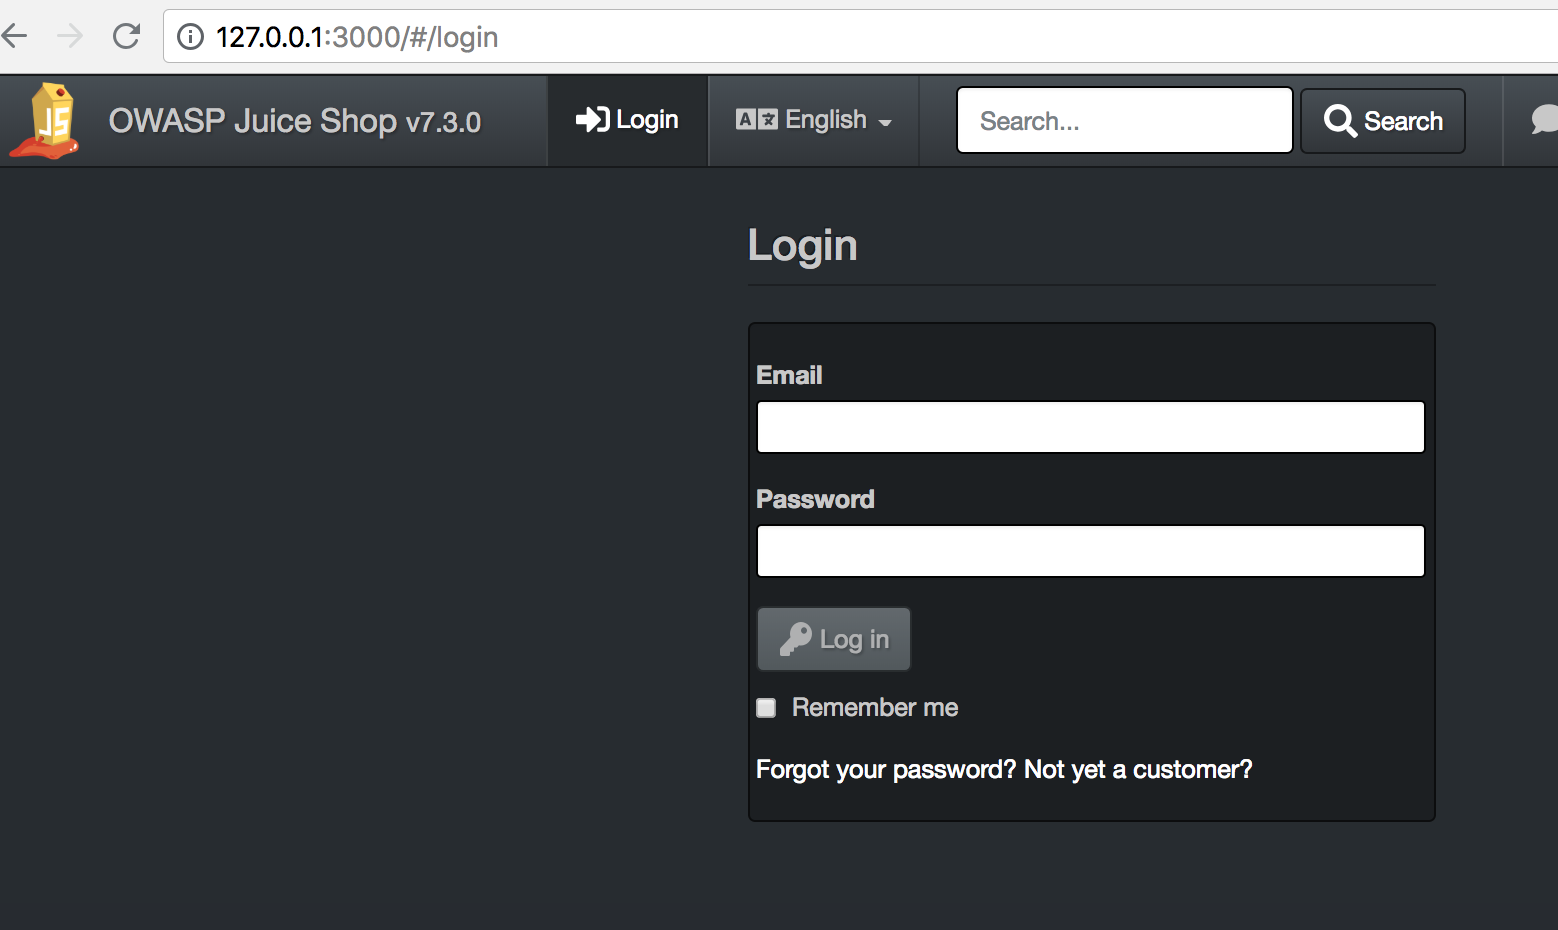
We’ll sign up with:
- User:
' or 1=1;-- - Password: anything
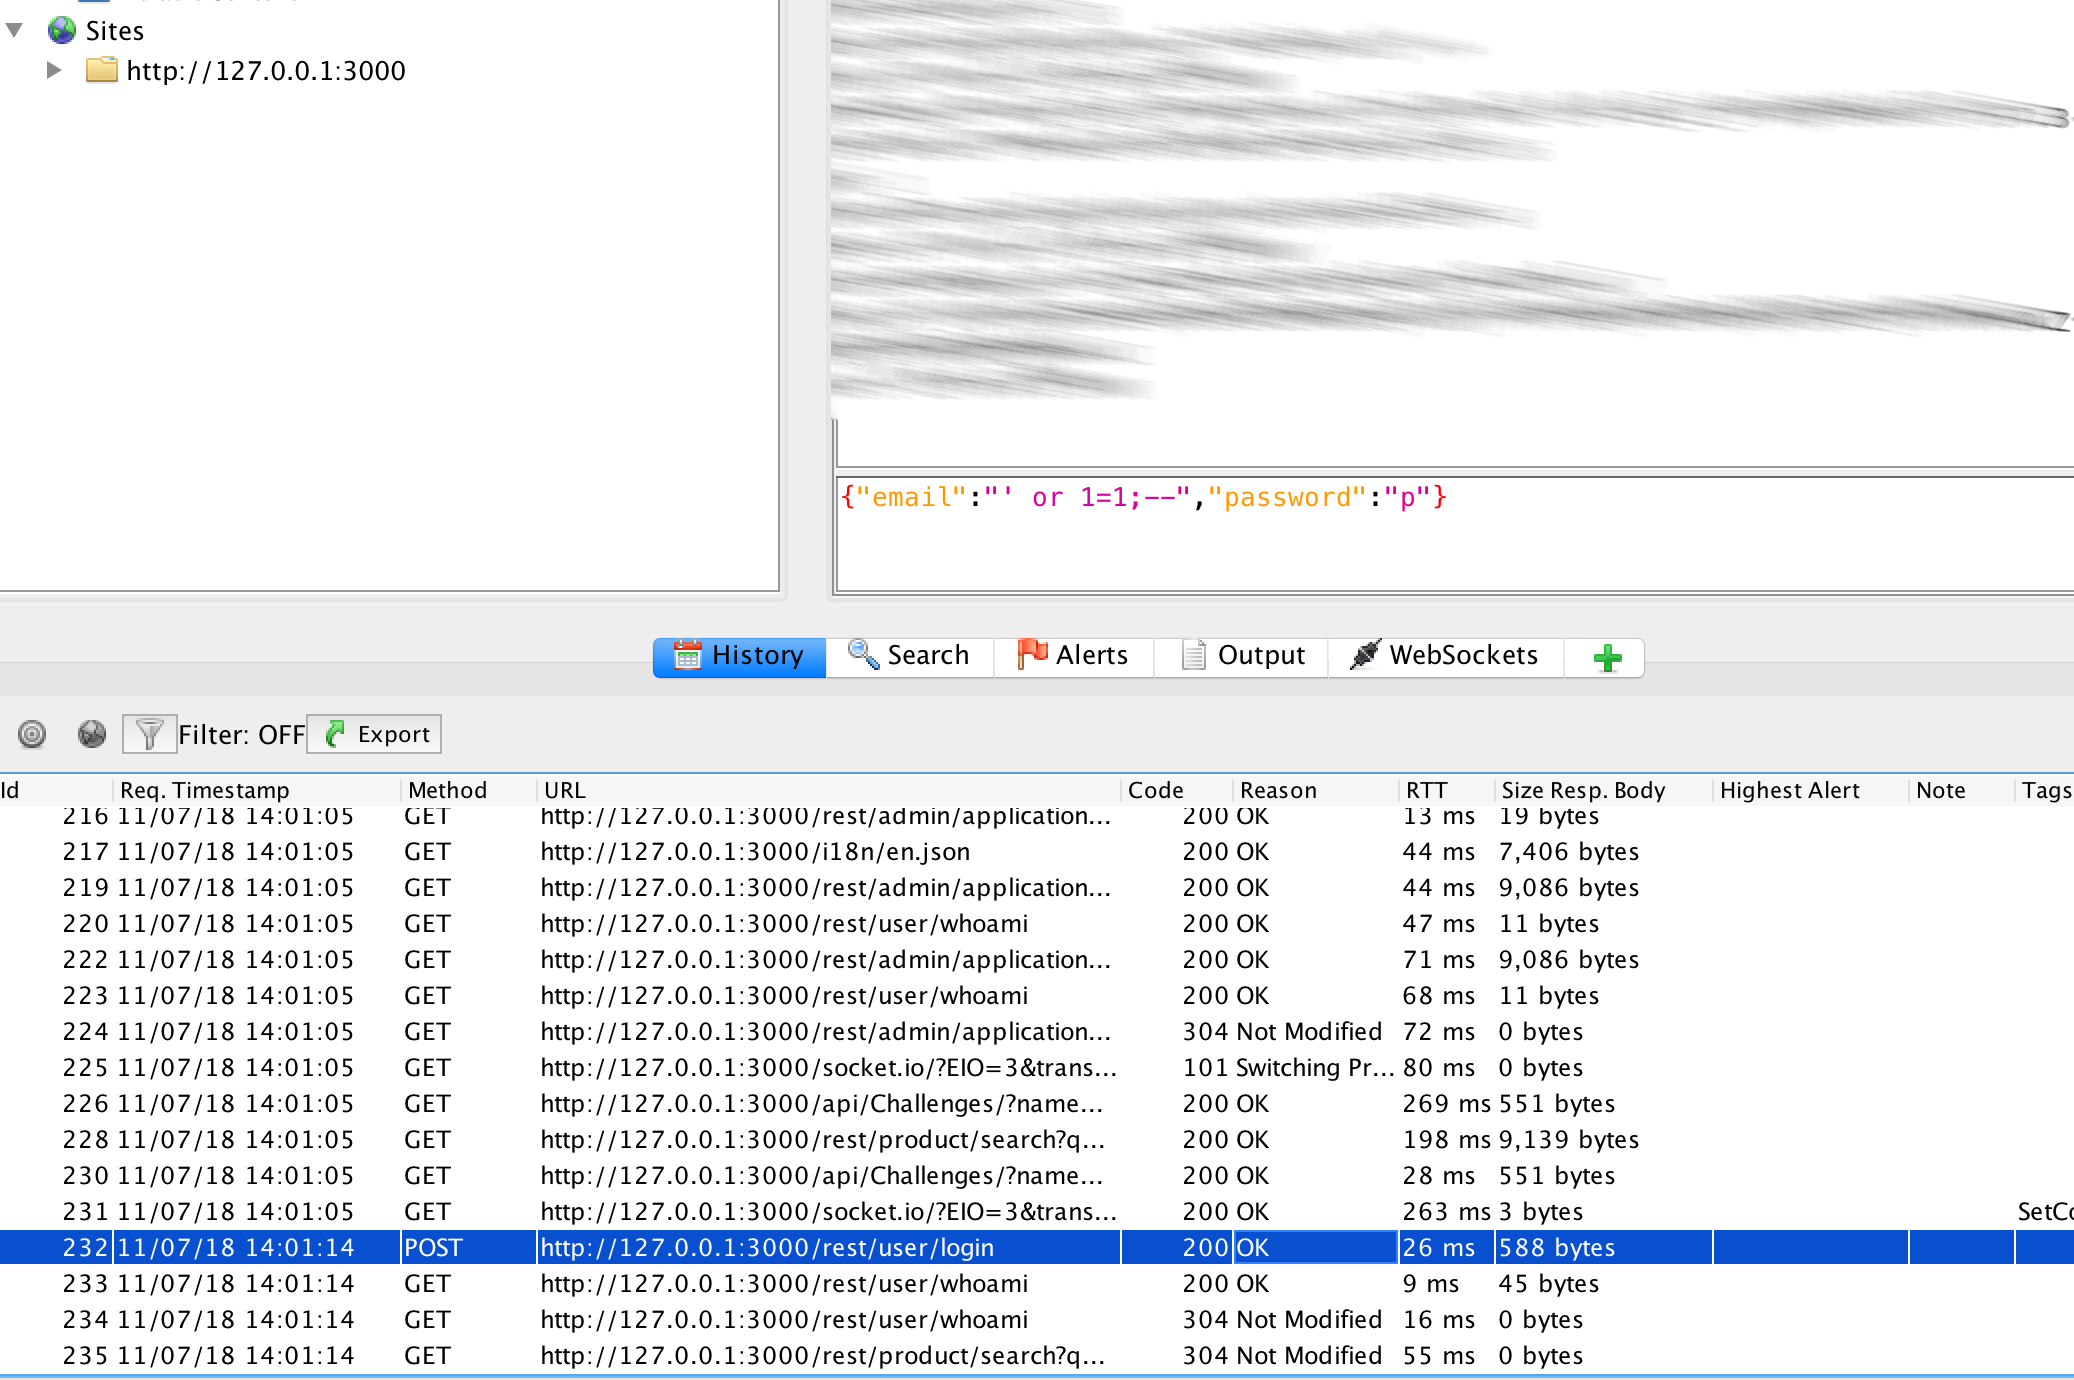
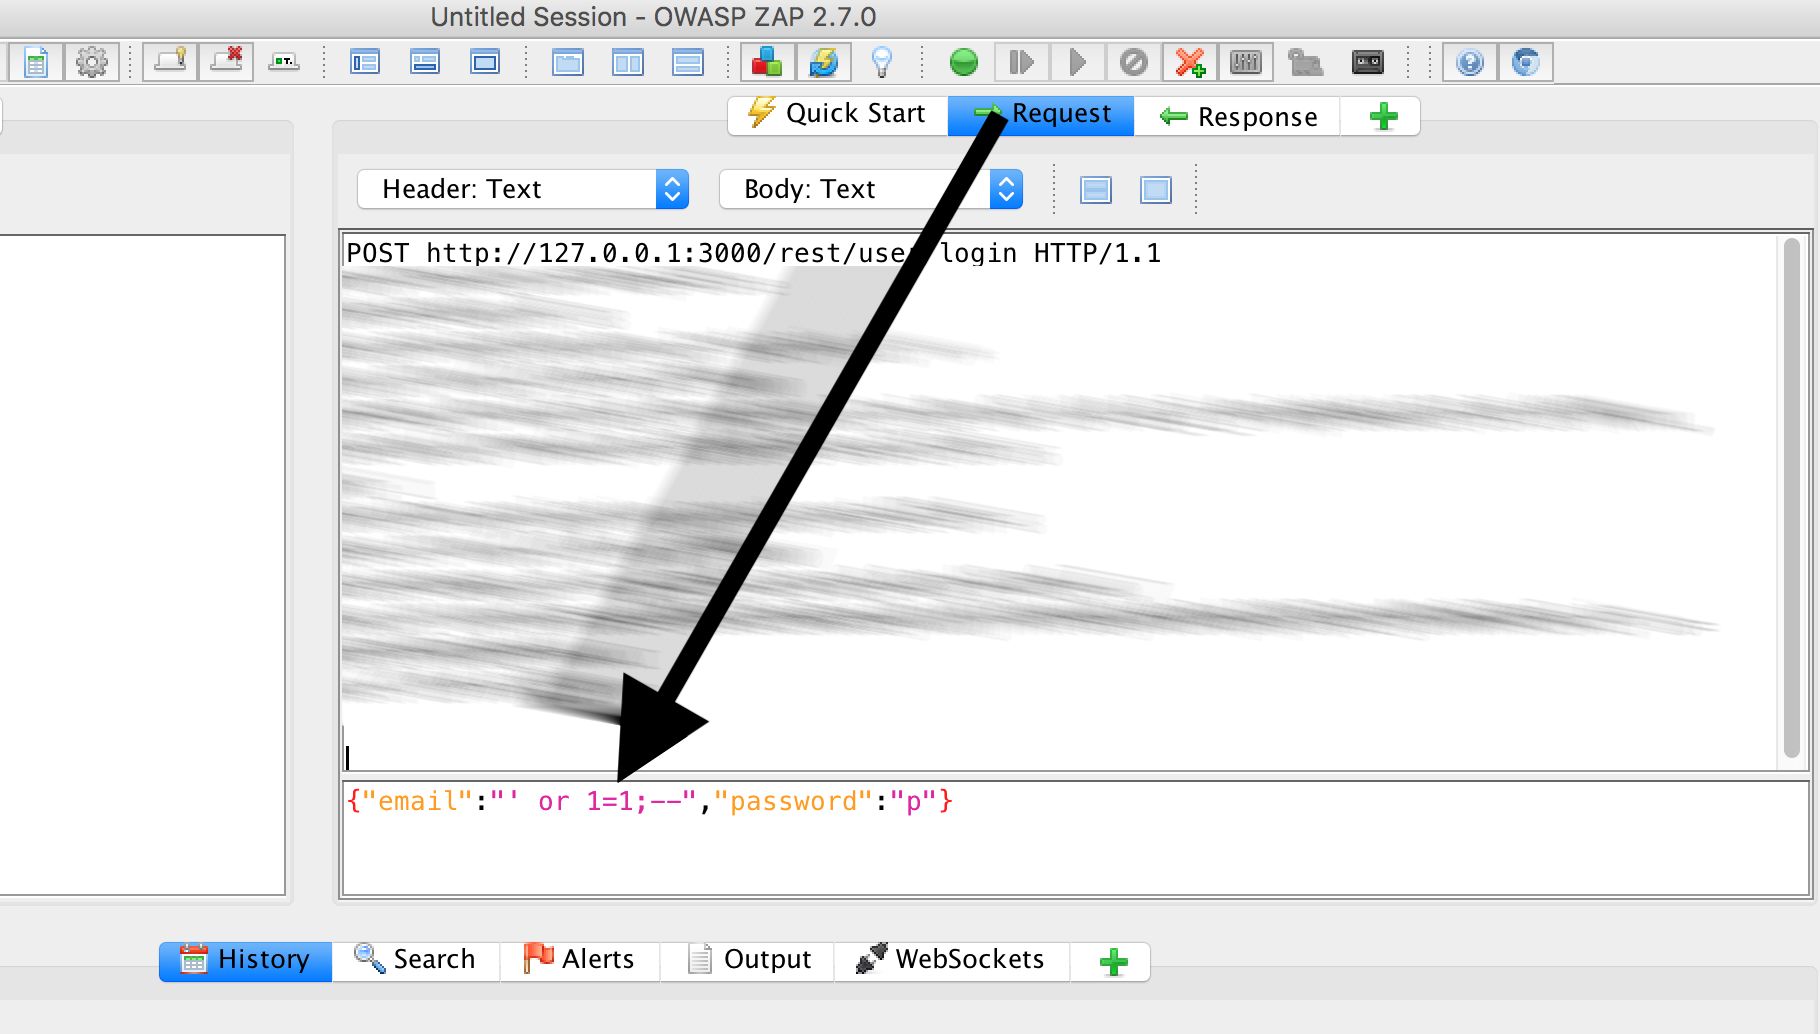
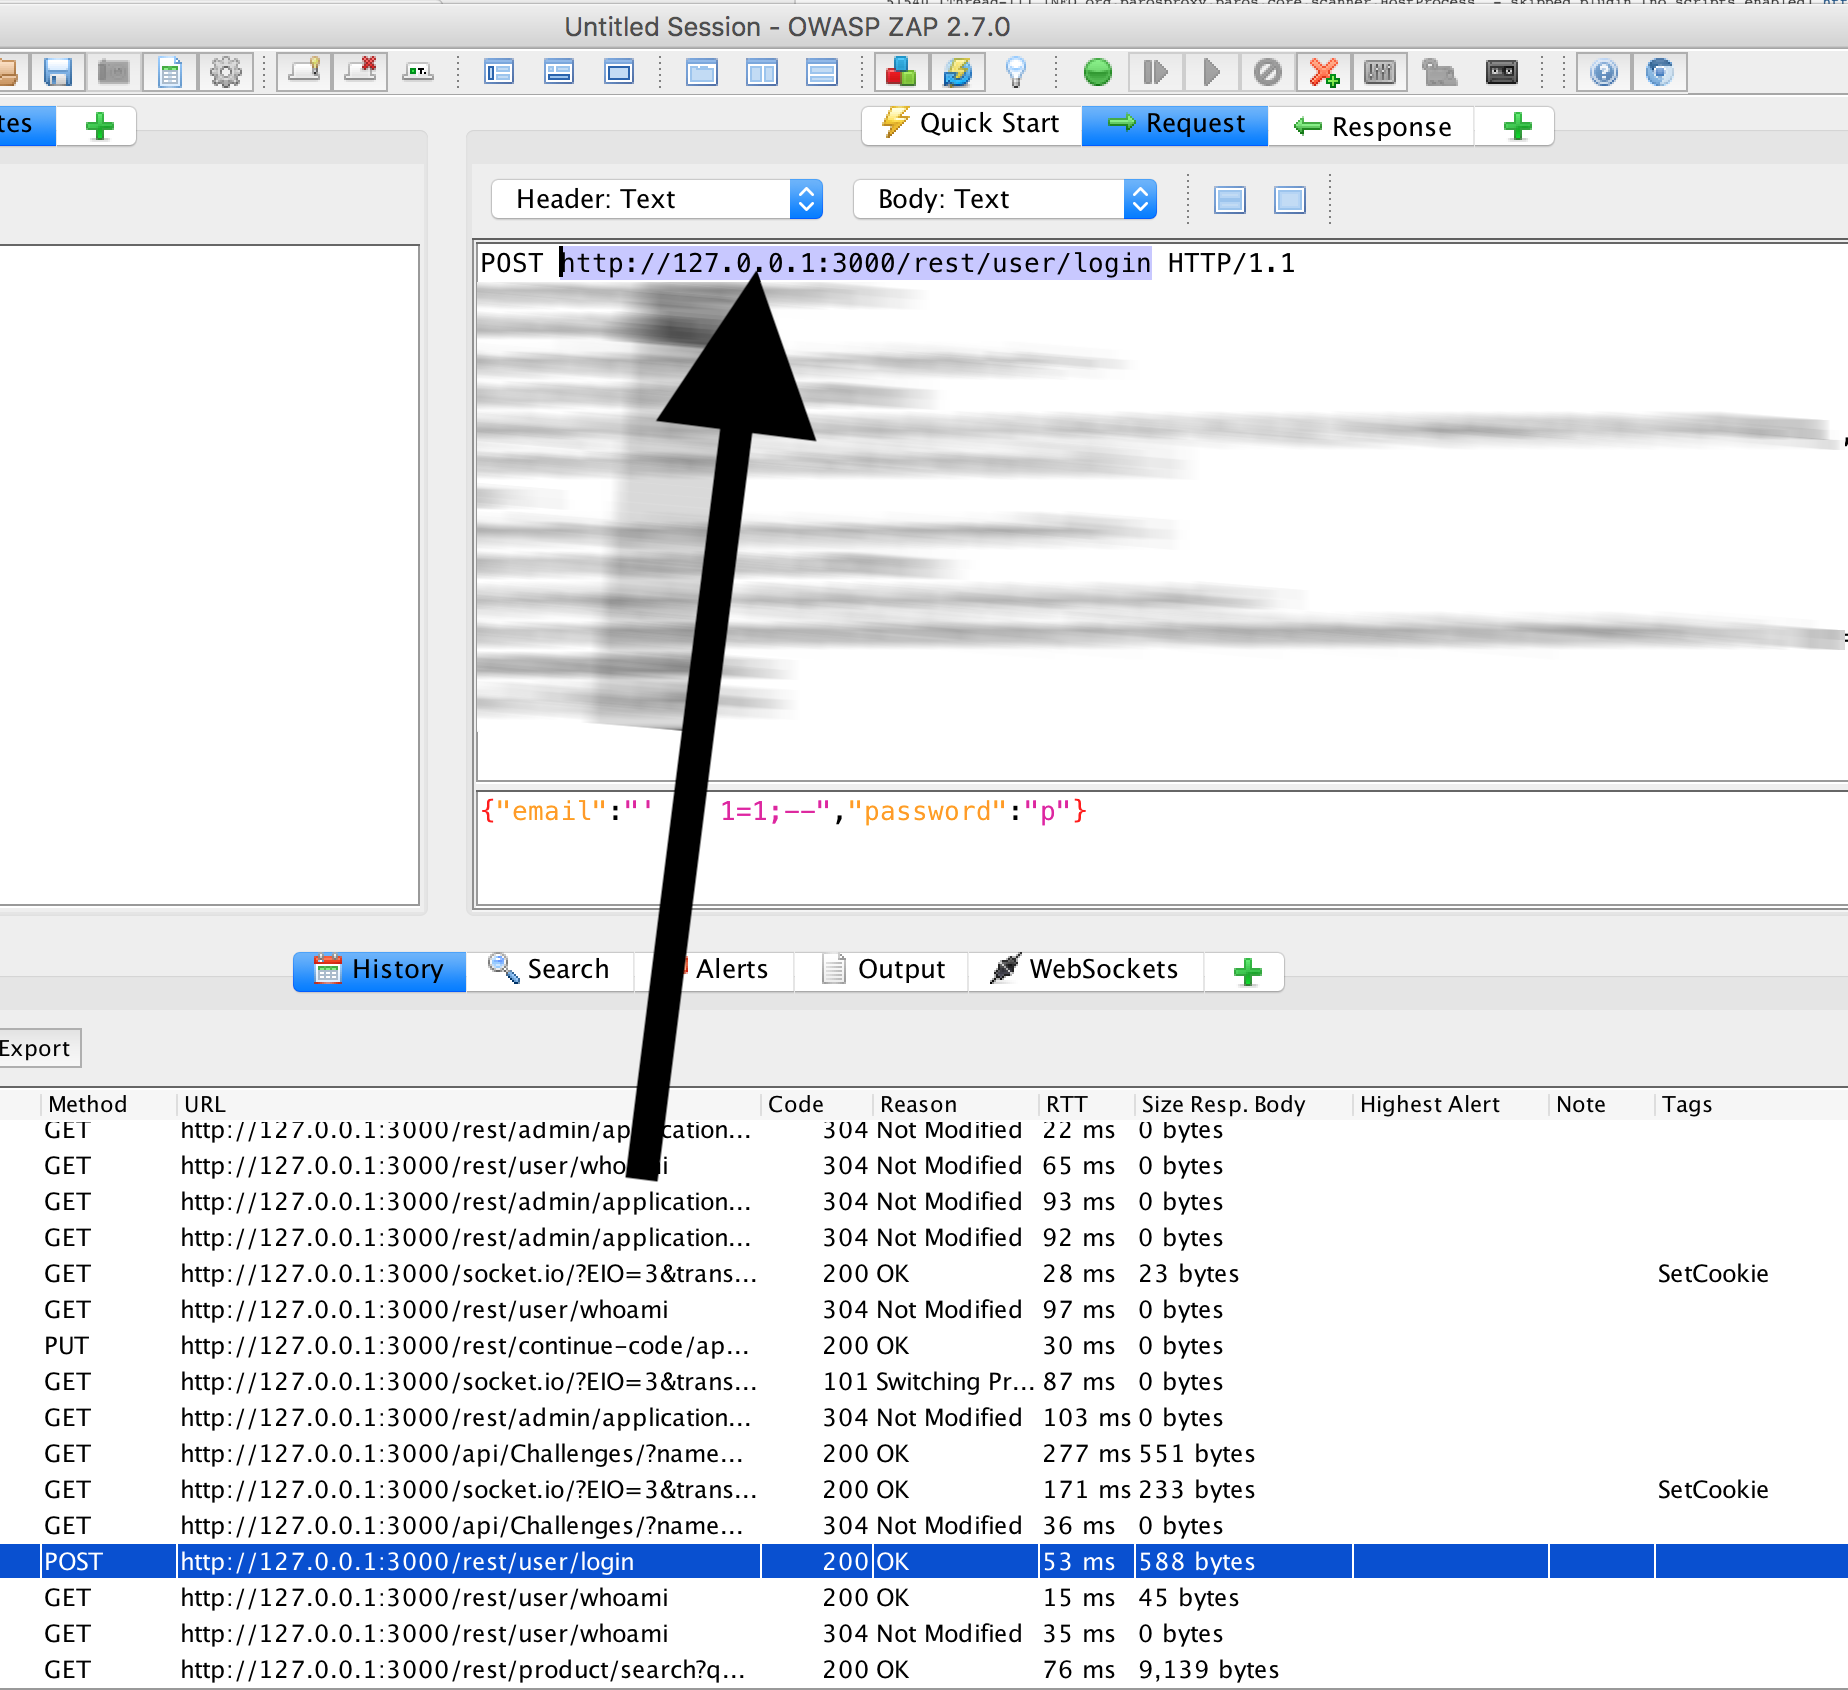
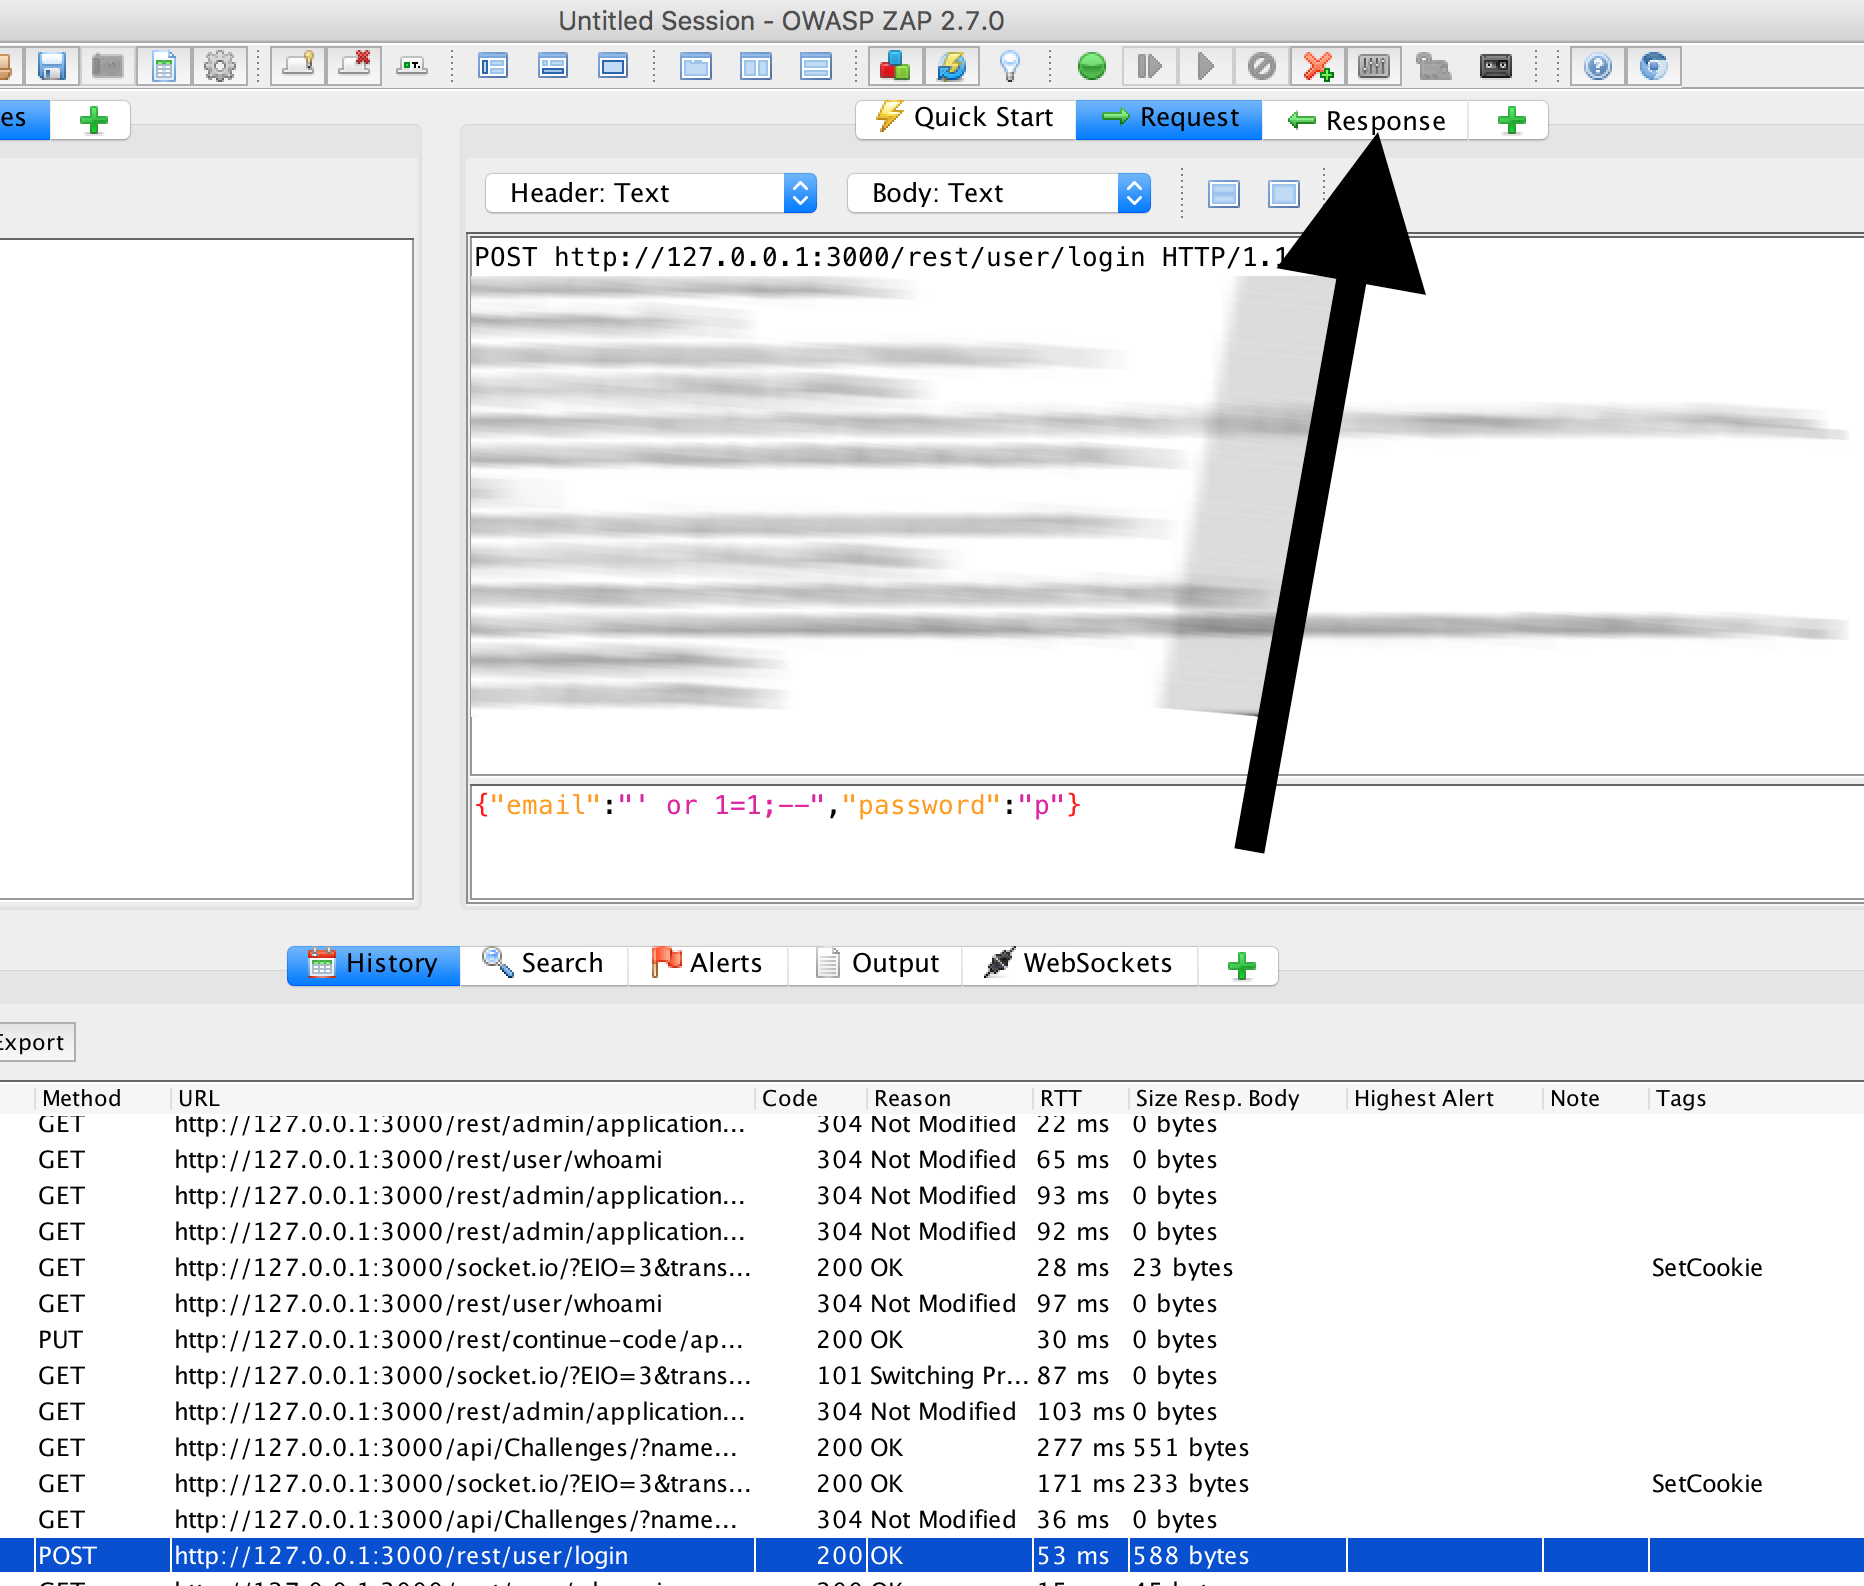
In the ‘History’ in OWASP ZAP we should see a POST:
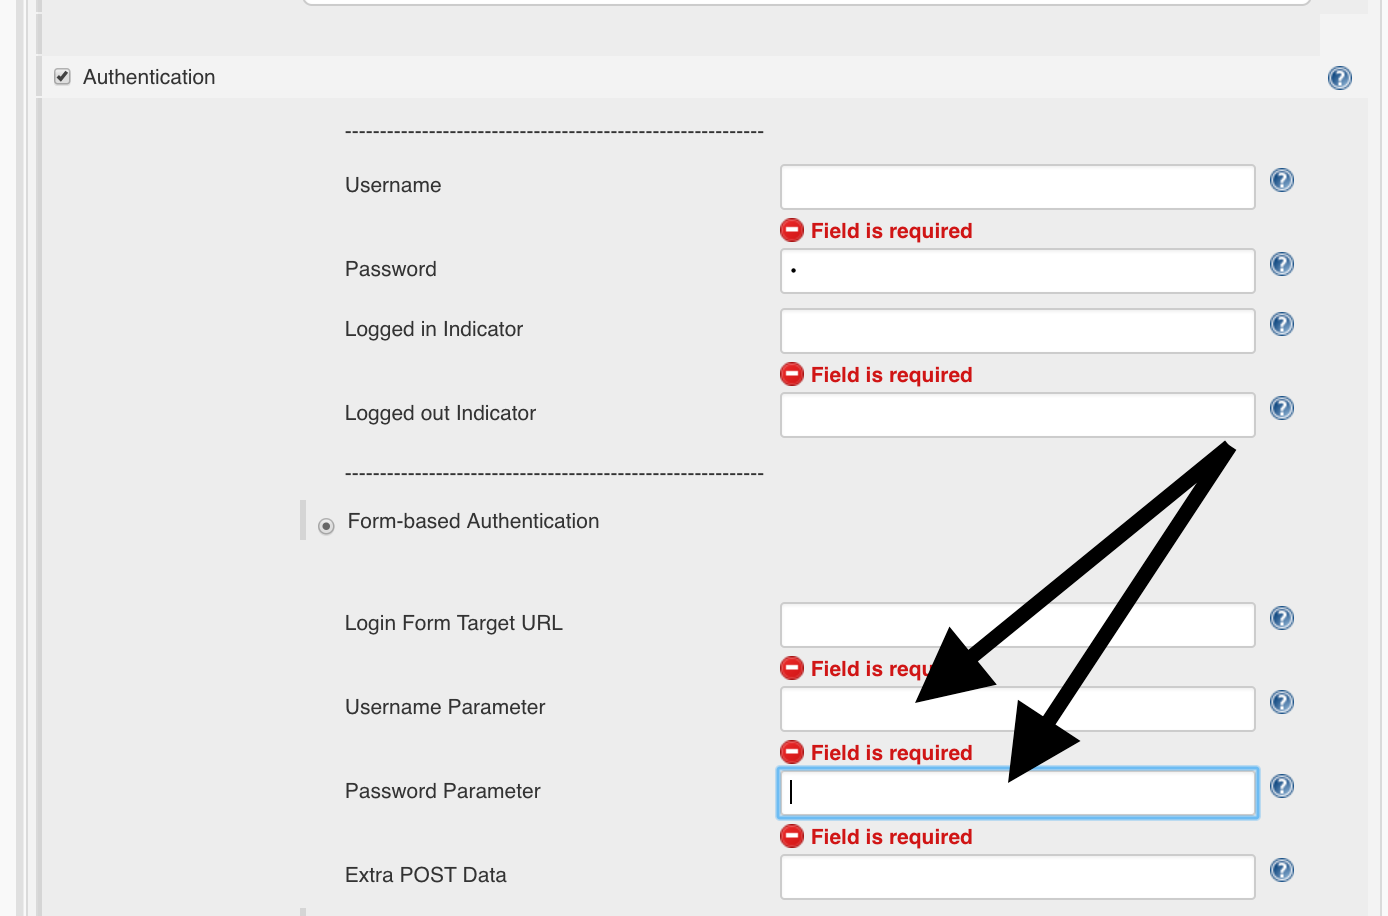
Username / Password Parameter
The OWASP-ZAP plugin in Jenkins needs for a successful authentication which parameters are used for the login:
In this case, you can determine them from the POST request:
{"email":"' or 1=1;--","password":"p"}
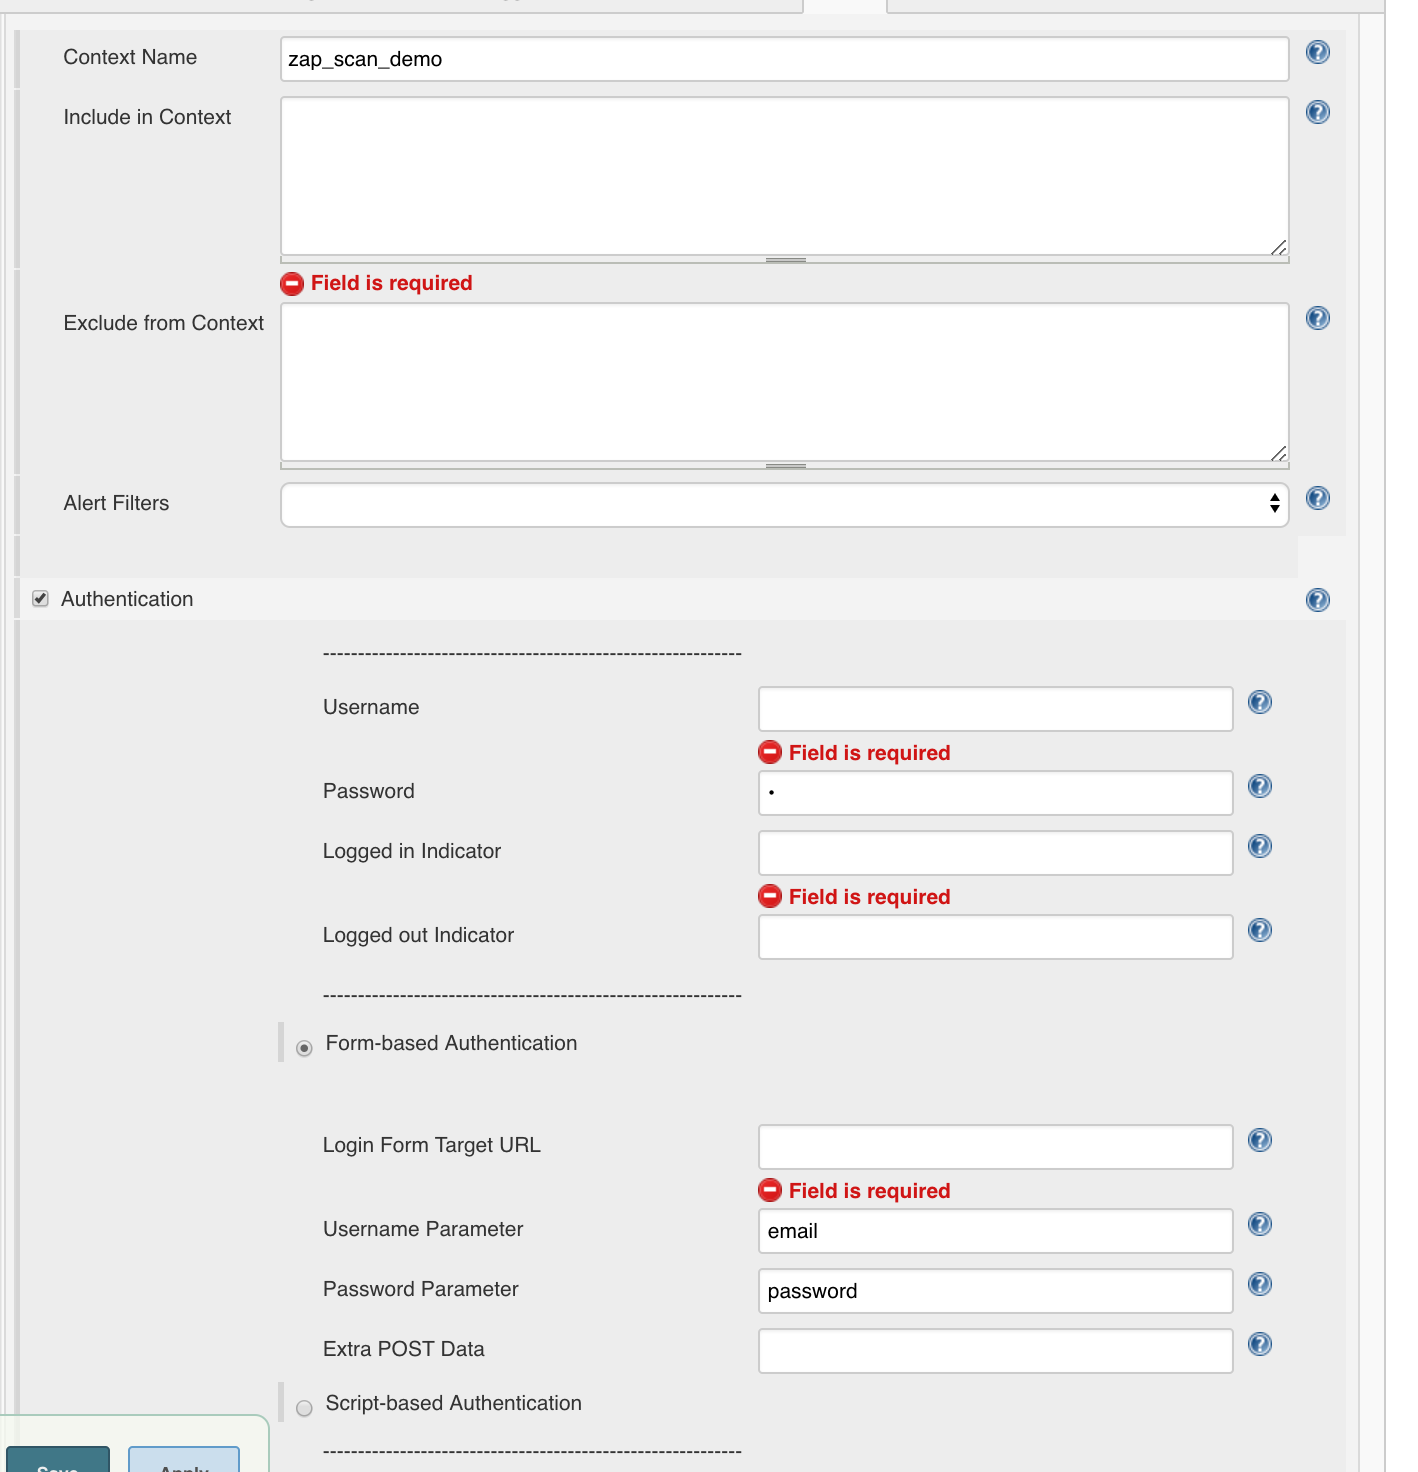
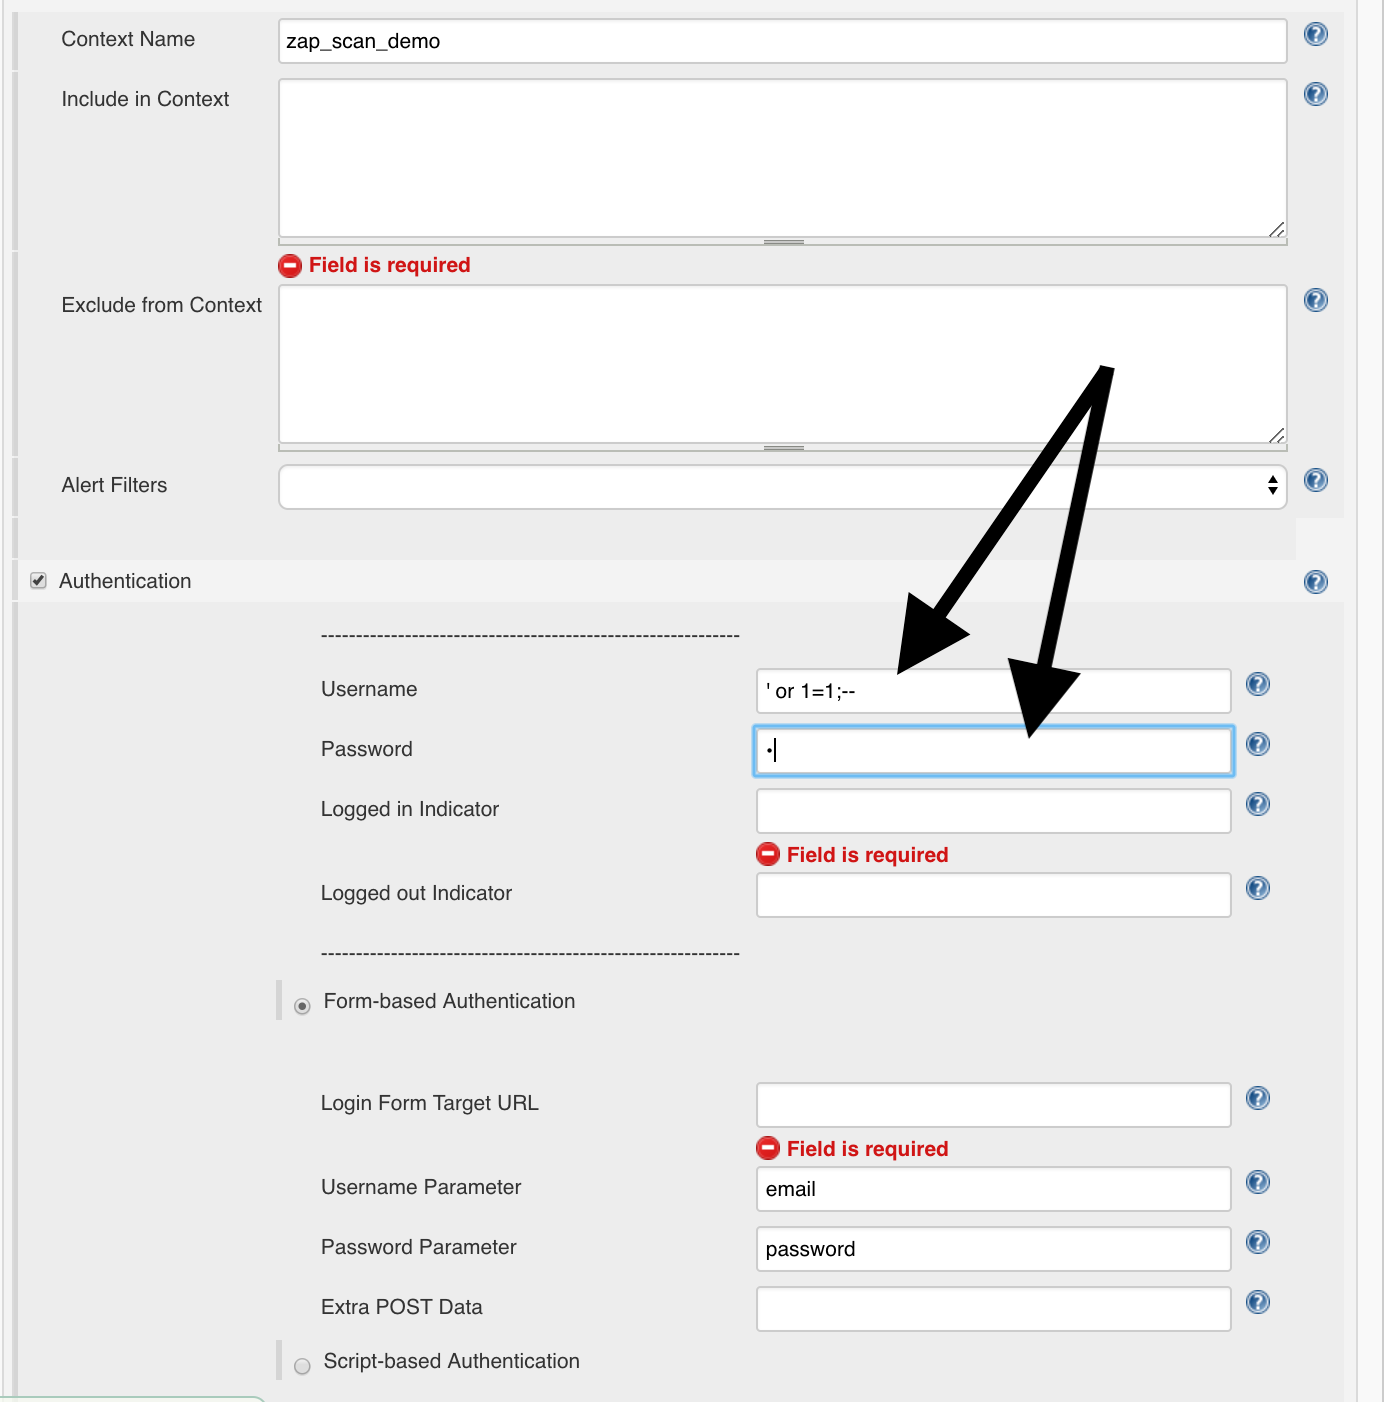
We can put that down in Jenkins:
We can also take the login credentials
- Username:
' or 1=1;-- - Password: beliebig
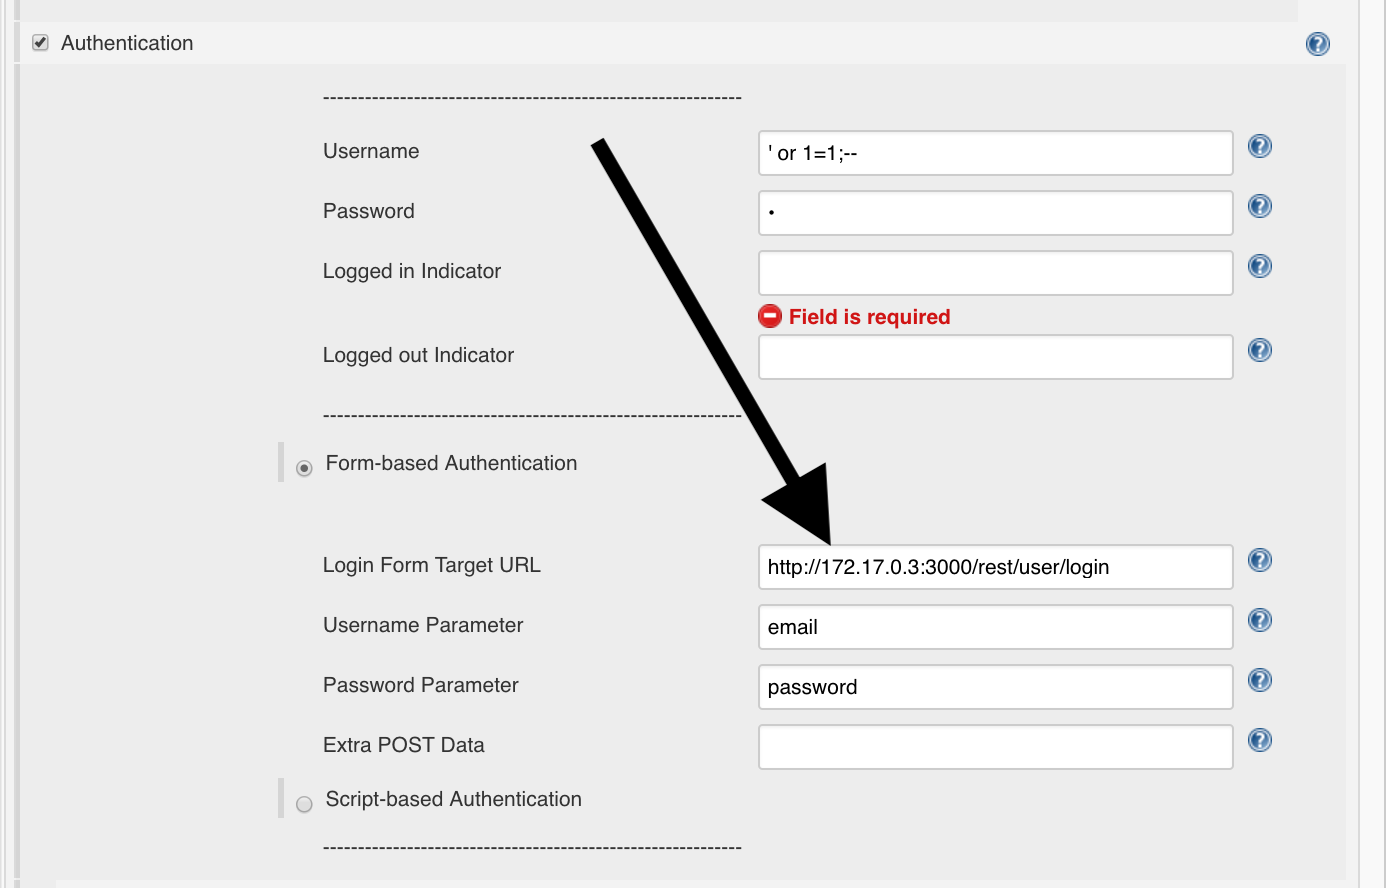
and the login URL from ZAP:
http://127.0.0.1:3000/rest/user/login
Whereby we still have to exchange the IP with the IP which is present in the Docker network, e.g.:
http://172.17.0.3:3000/rest/user/login
We’ll put that in Jenkins:
Logged-in String
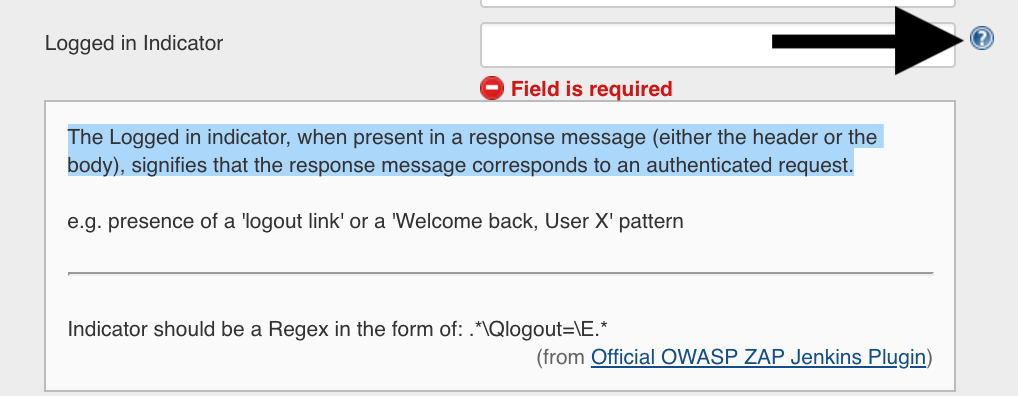
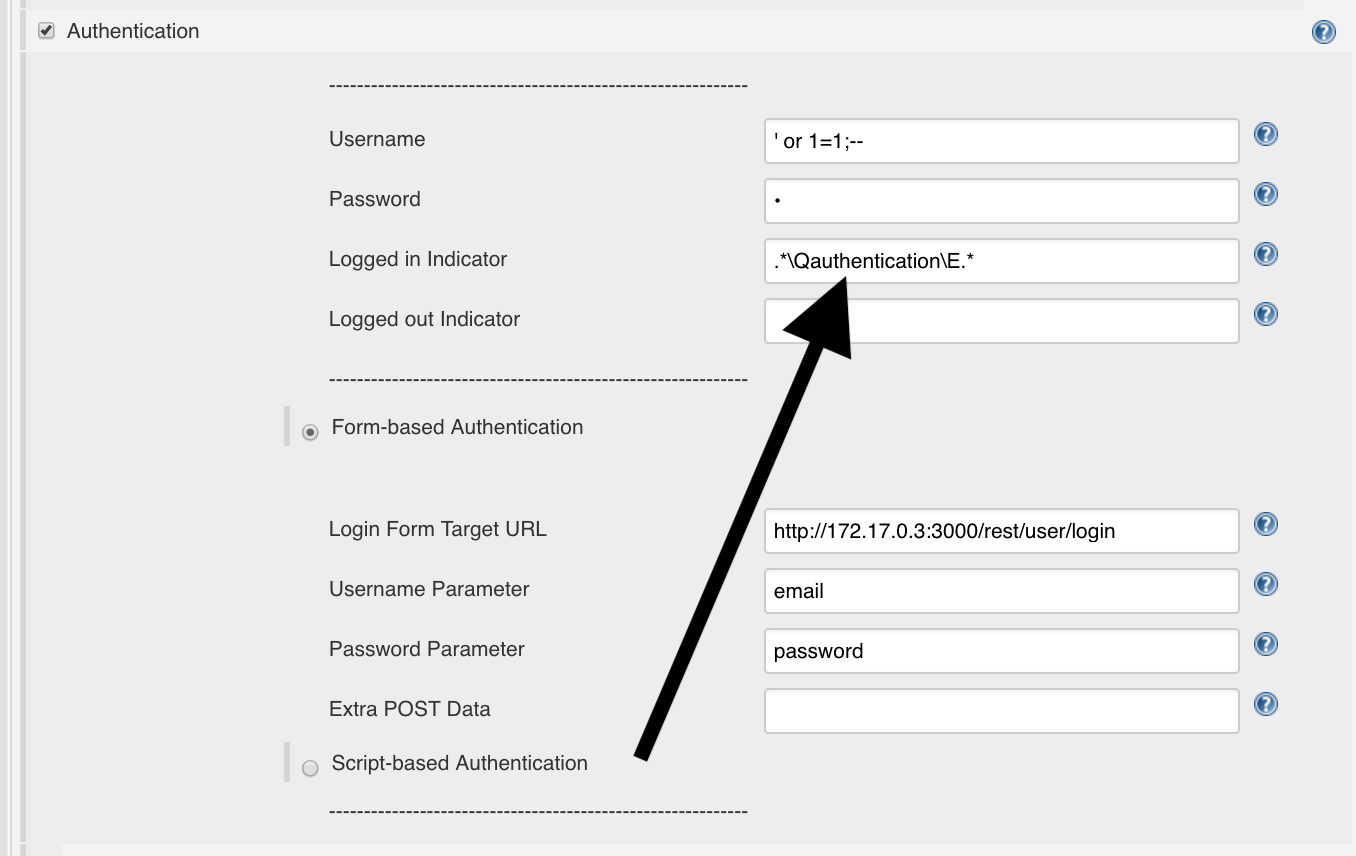
To determine when the user is logged in, a logged-in string must be specified in Jenkins:
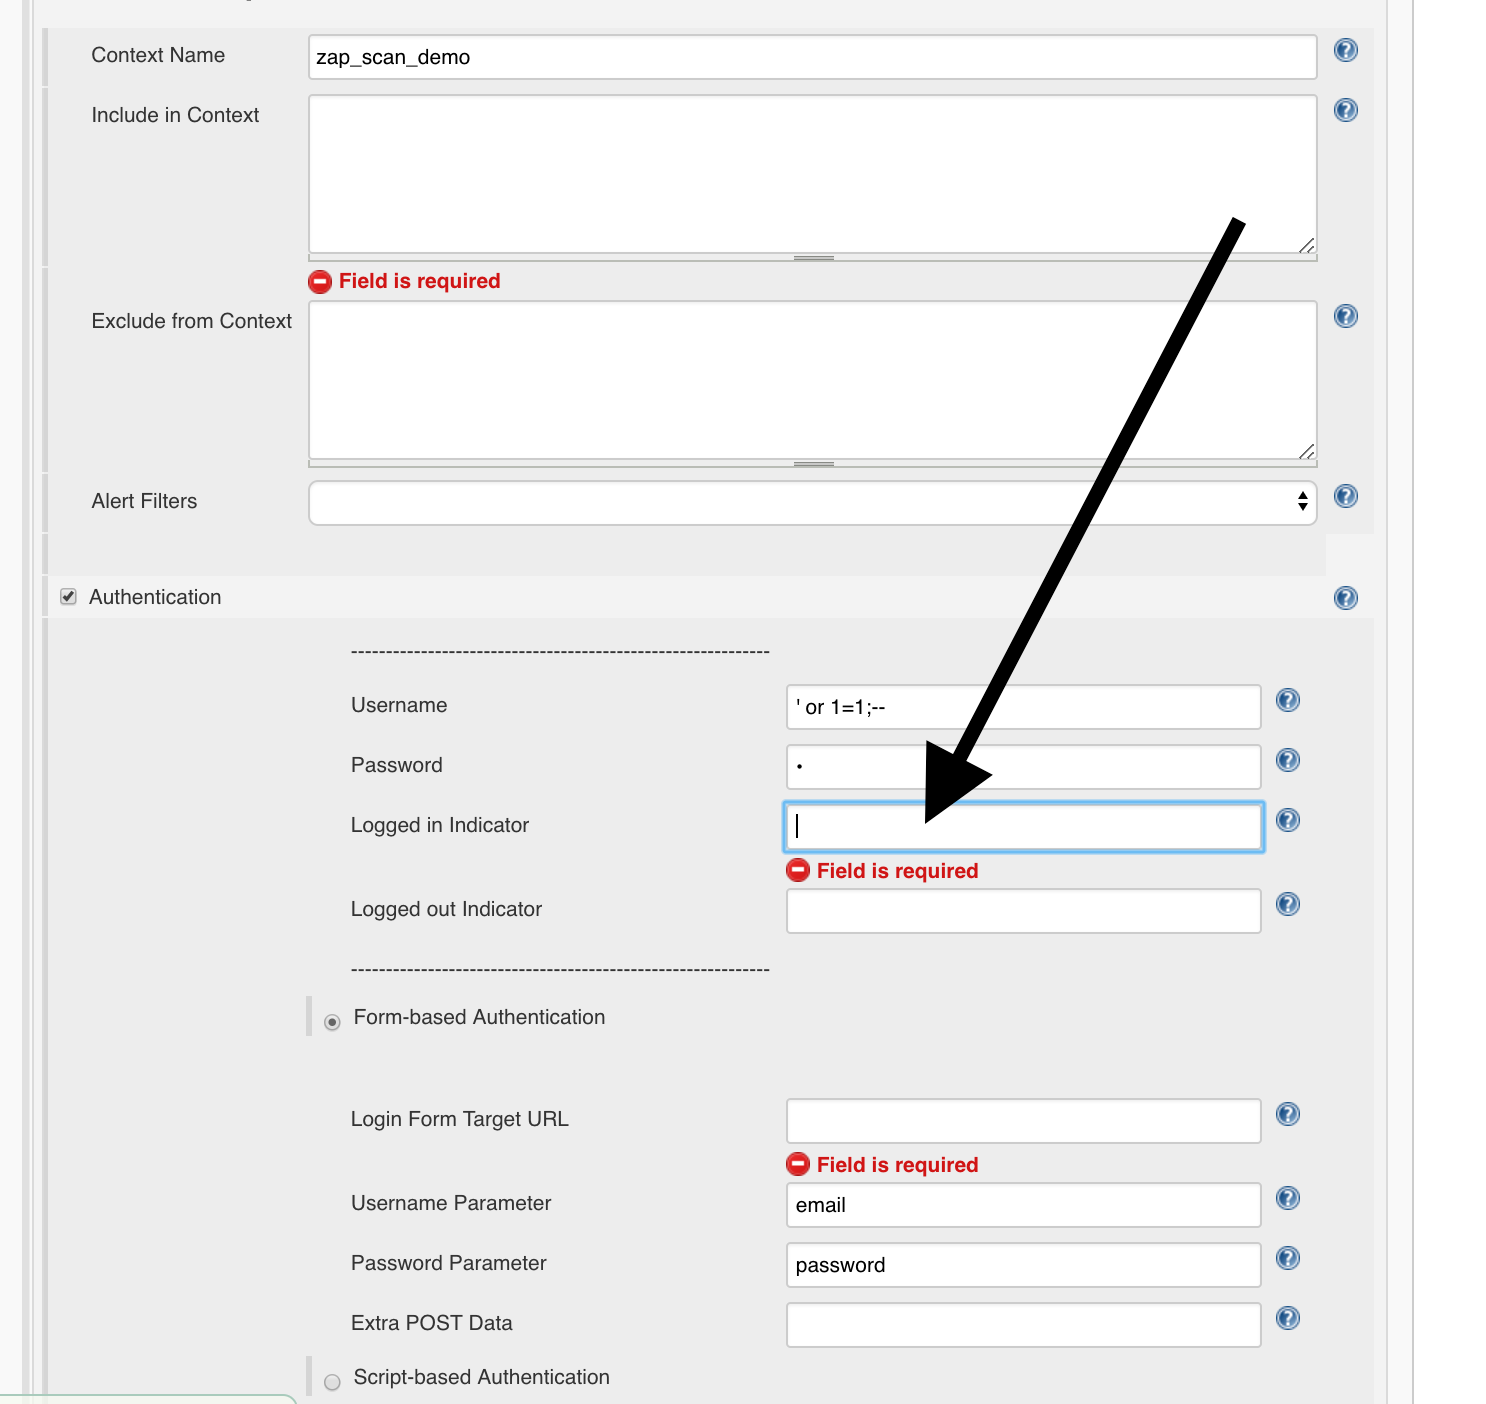
If you click on the question mark on the right you will see how it is determined:
The Logged in indicator, when present in a response message (either the header or the body), signifies that the response message corresponds to an authenticated request.
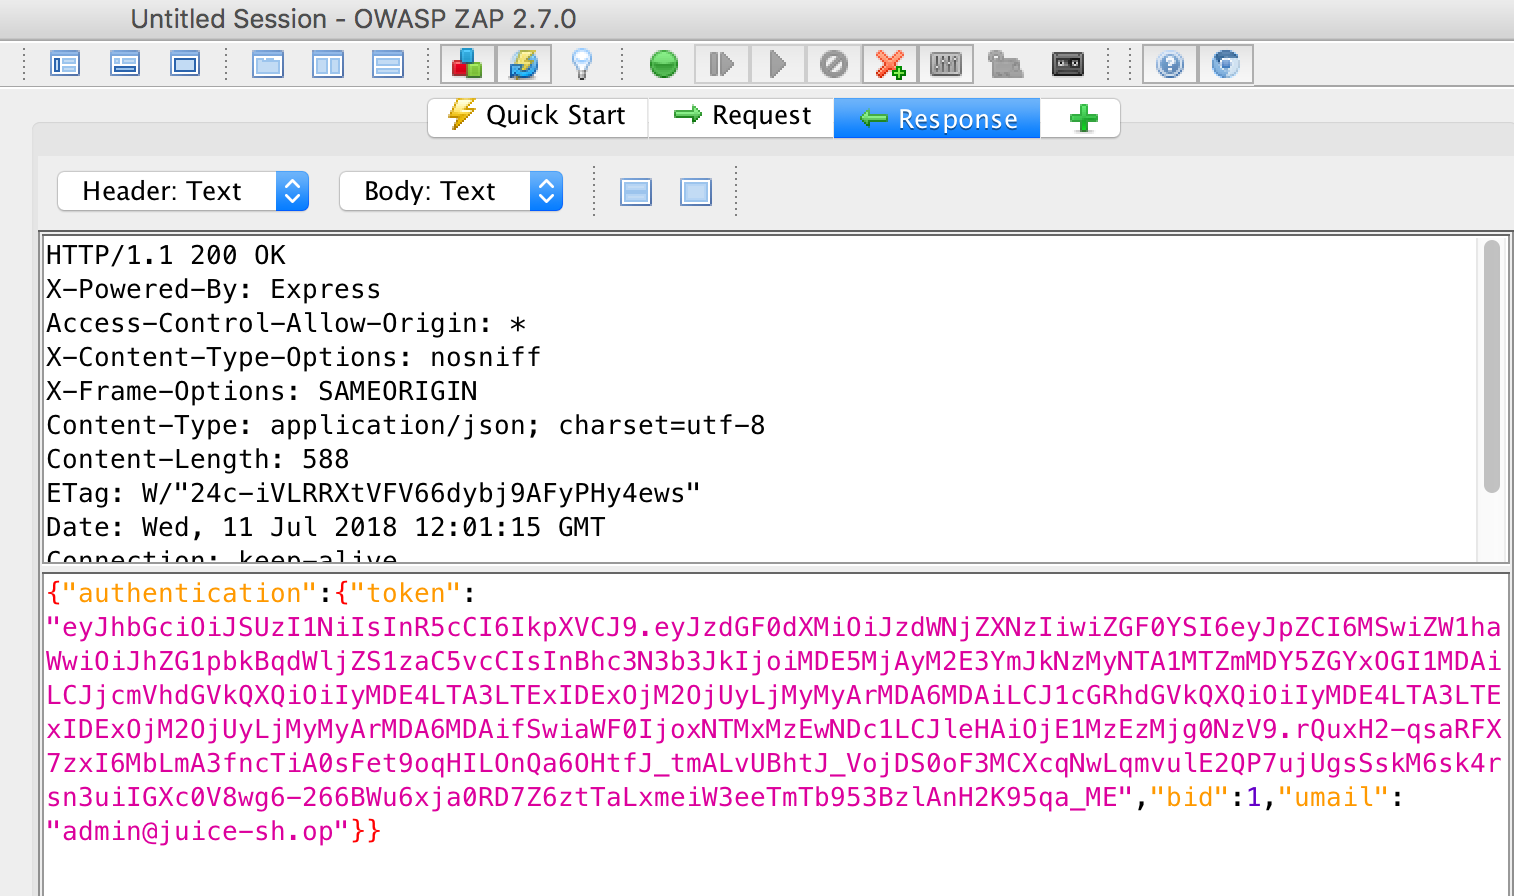
Therefore we look at the response in OWASP ZAP for a successful login:
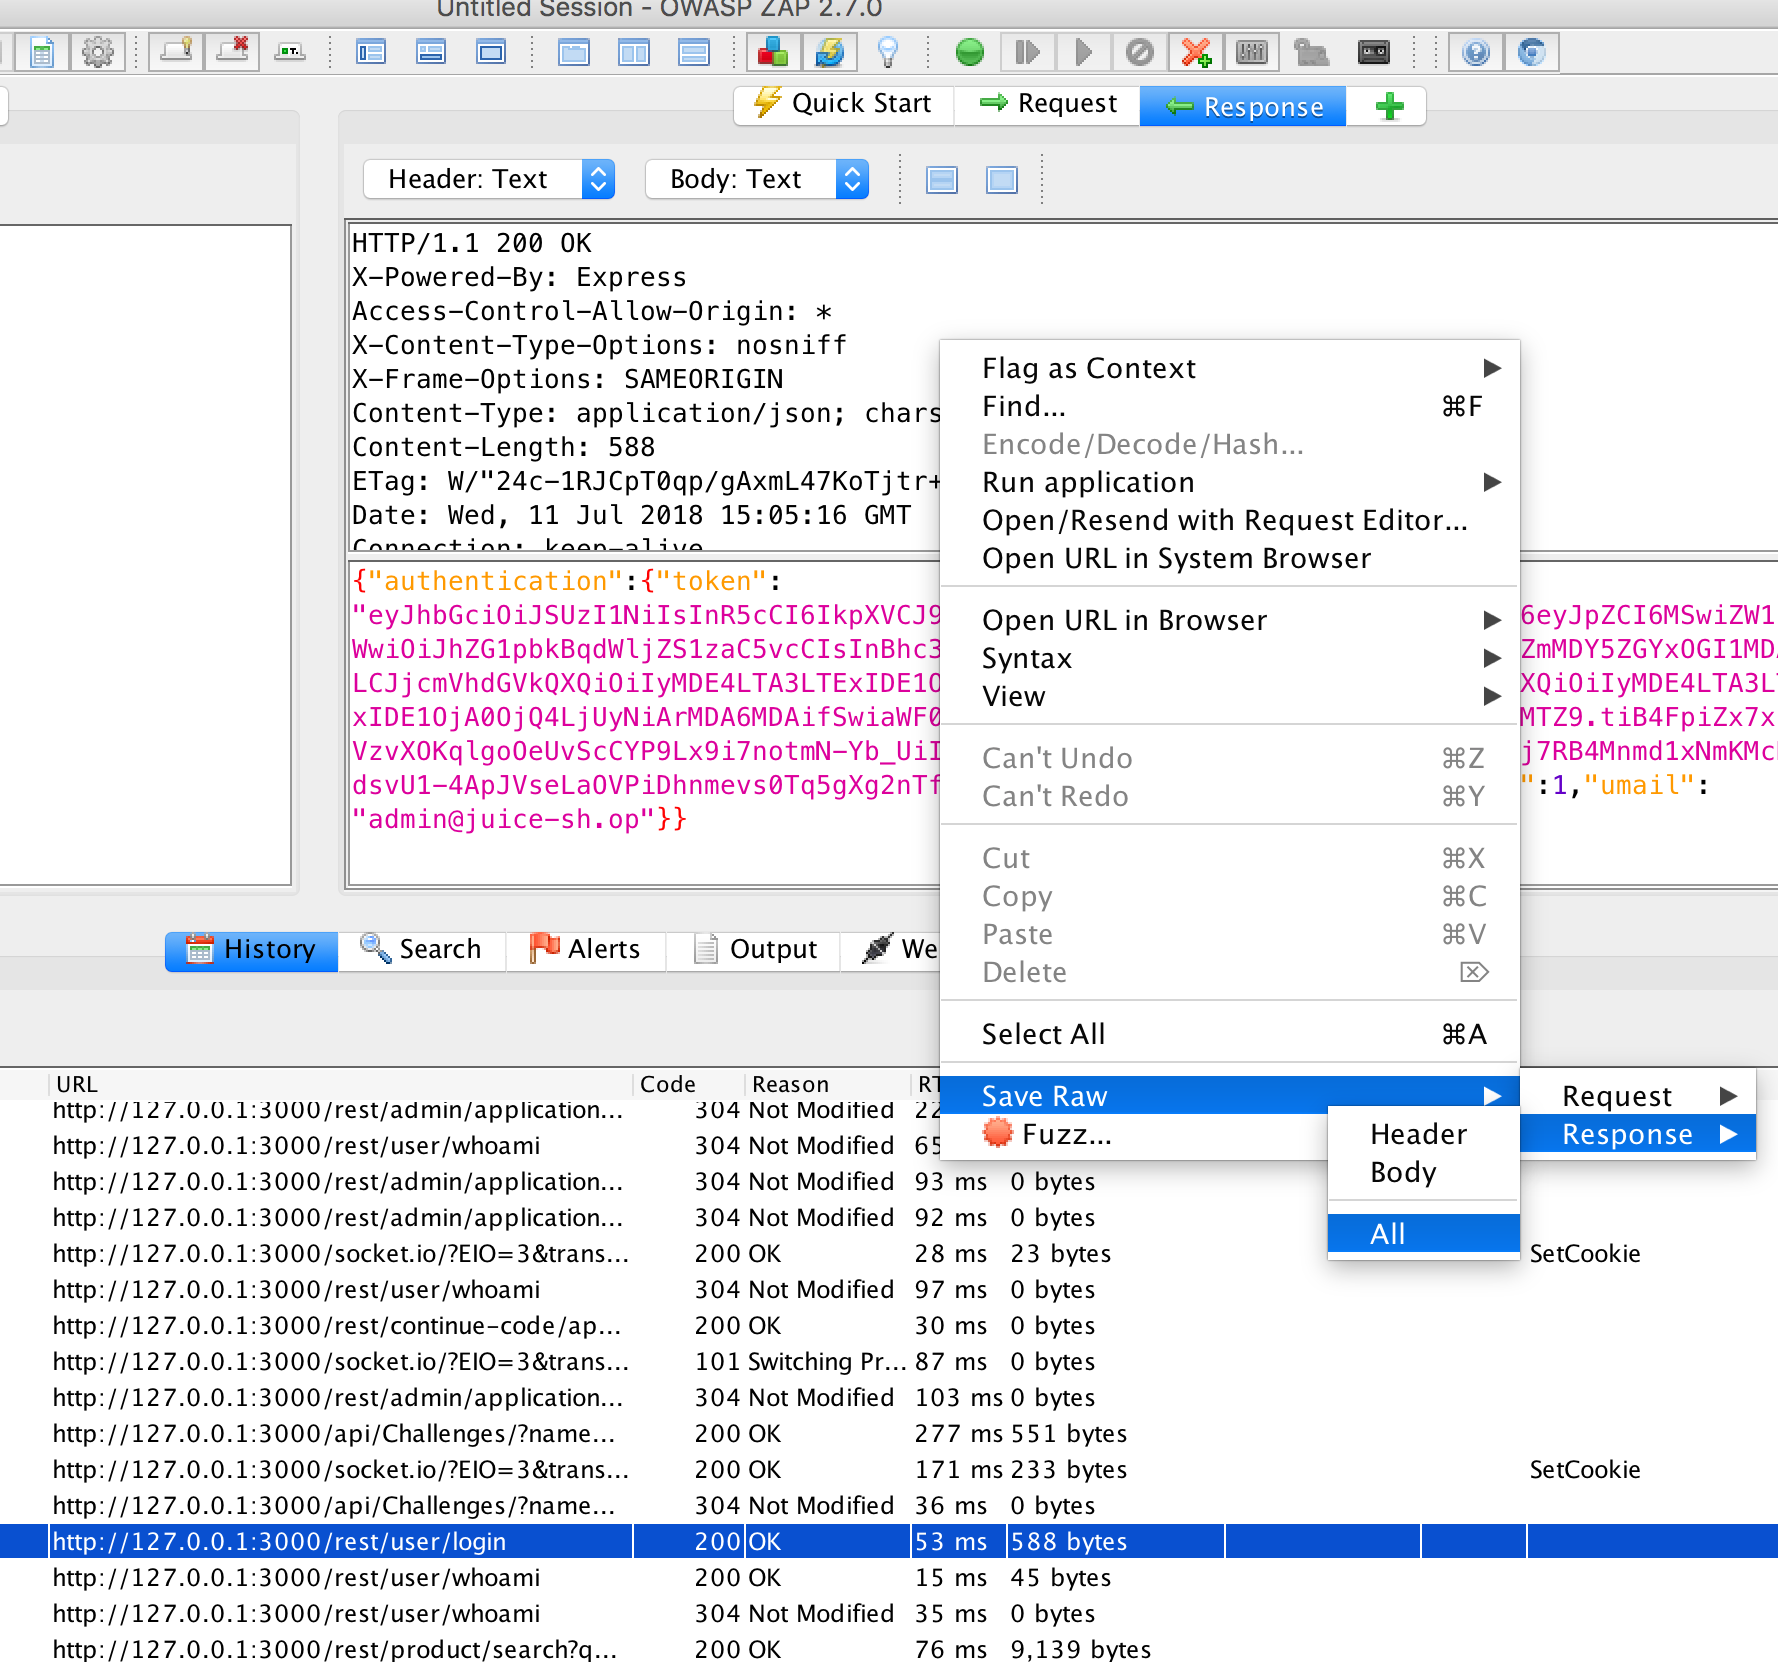
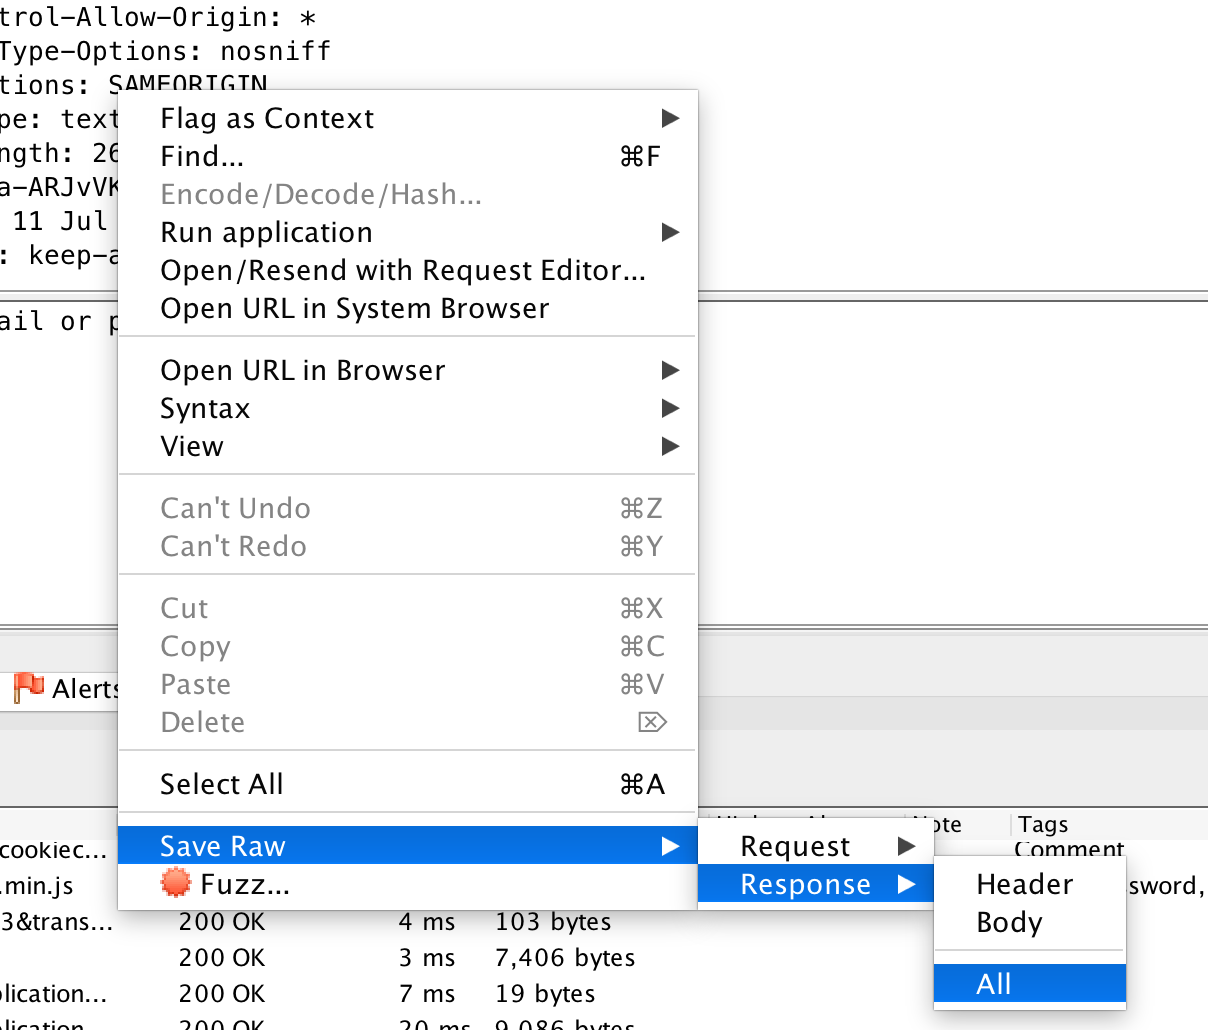
And save this response under the name response.raw.out:
Right mouse button, ‘Save raw’, ‘Response’, ‘All’:


Now we log out of Juicy Shop
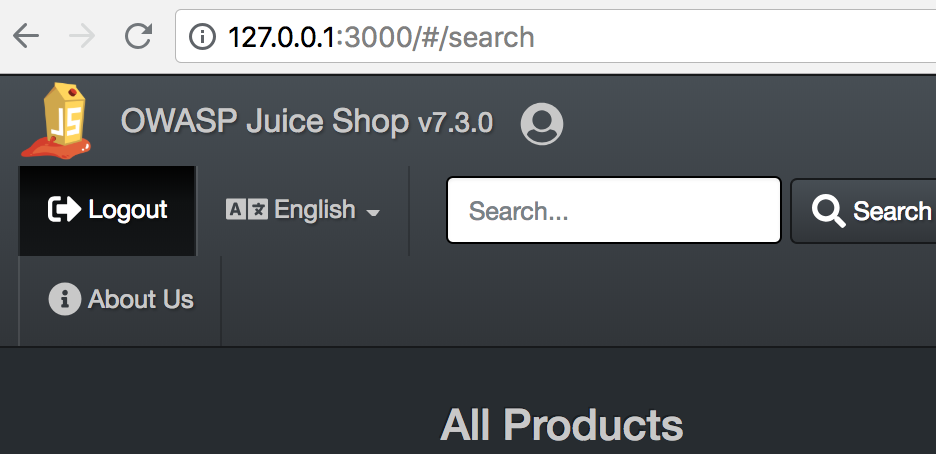
and try to log in with wrong credentials.
We use
- User name:
test - Password:
test
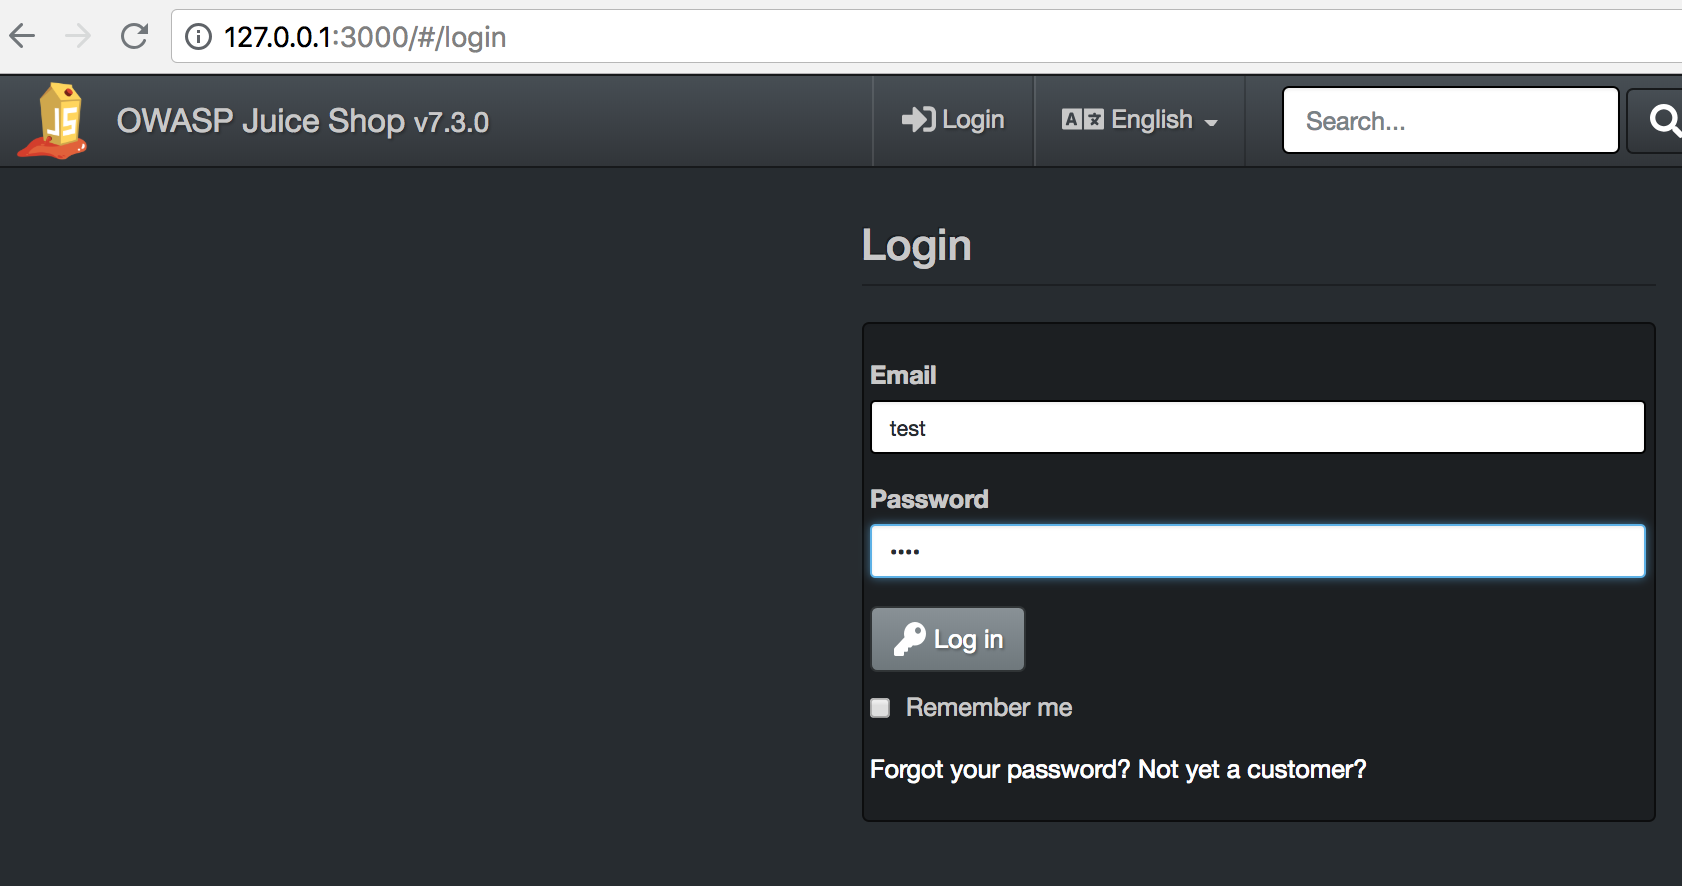
And search the POST request in ZAP:
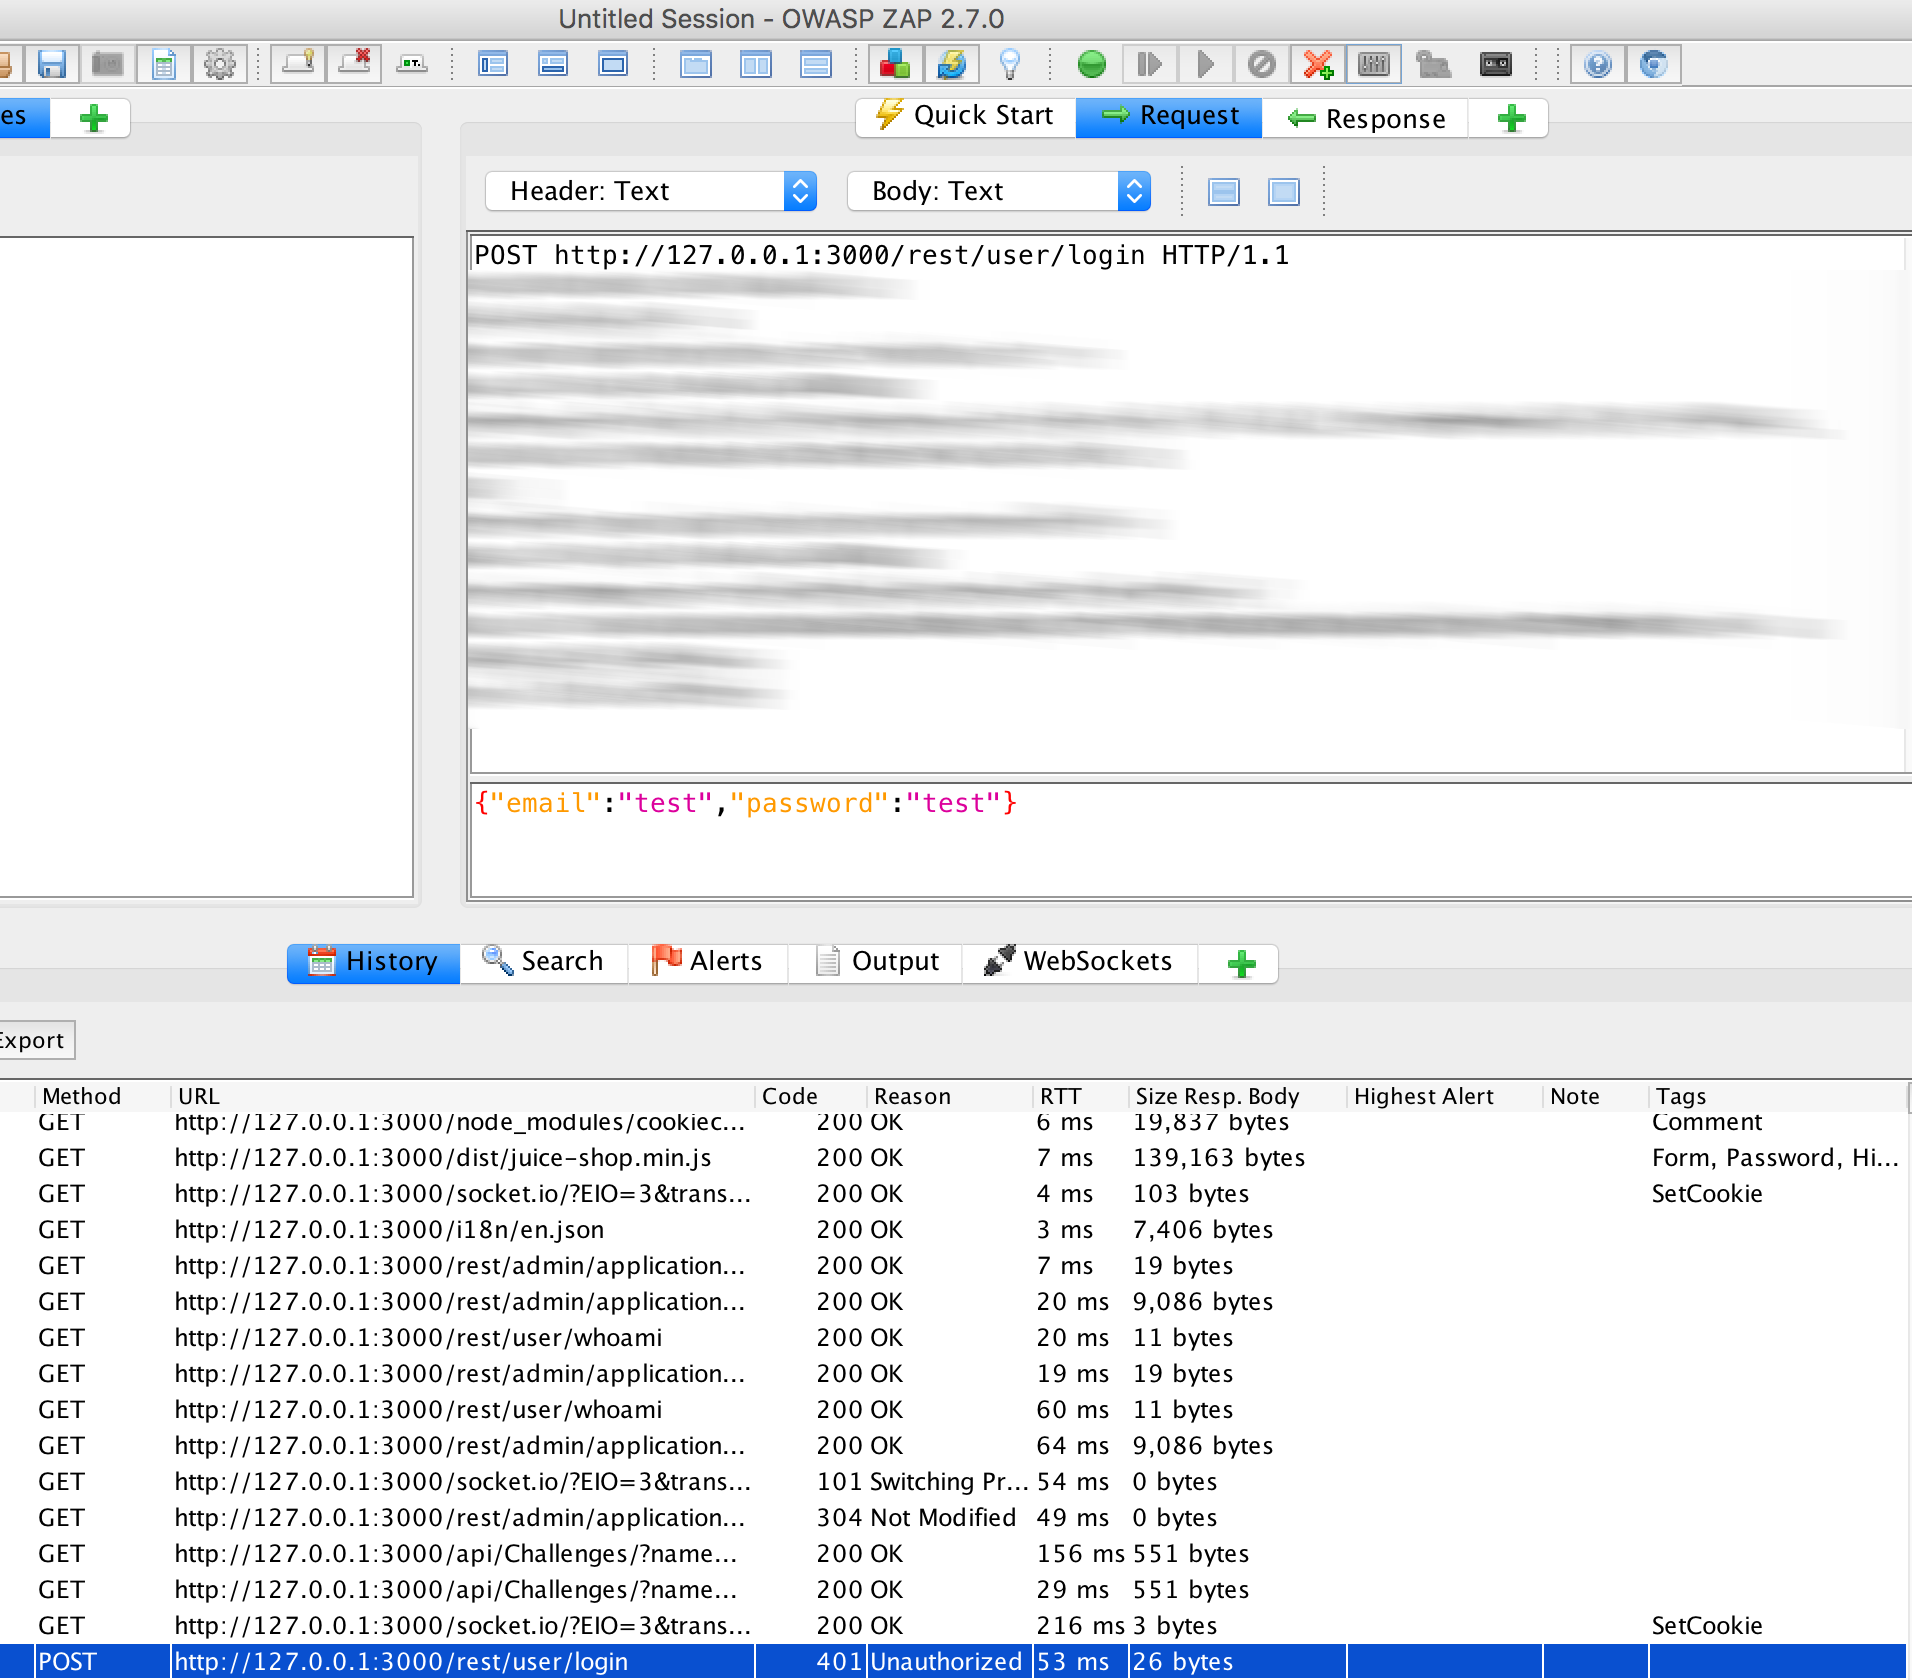
Then we click on Response:
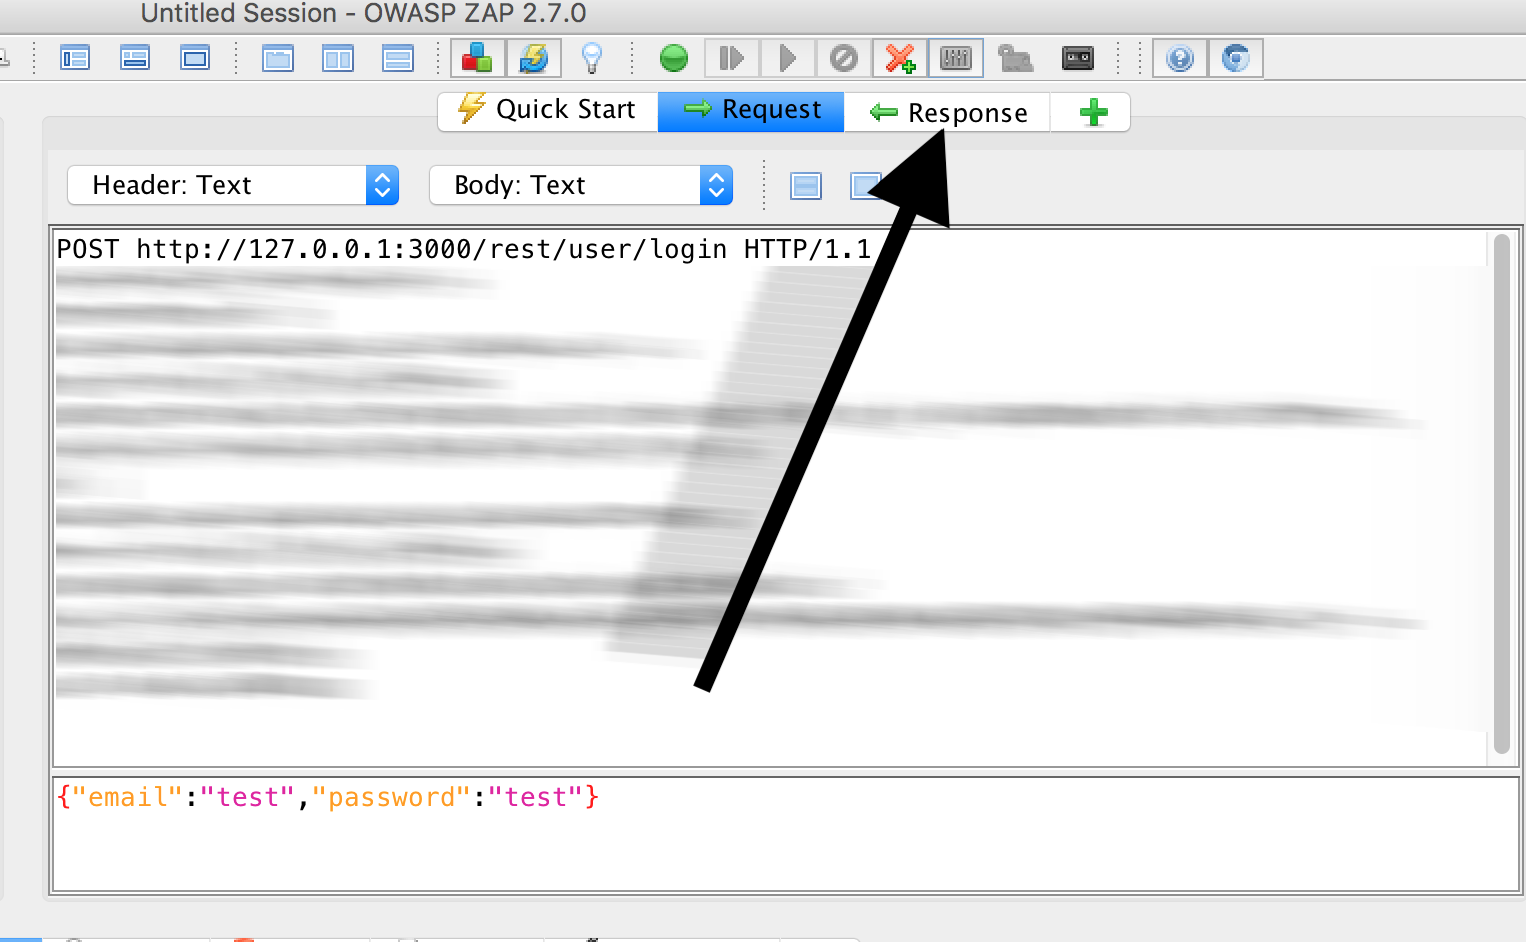
And save this one:
Right mouse button, ‘Save raw’:

‘Response’, ‘All’:
We’ll take another text file:
- Save As:
response2.out - File Format:
Raw

If we now compare the two responses (e.g. using vim tools vimdiff response.out.raw response2.out.raw),
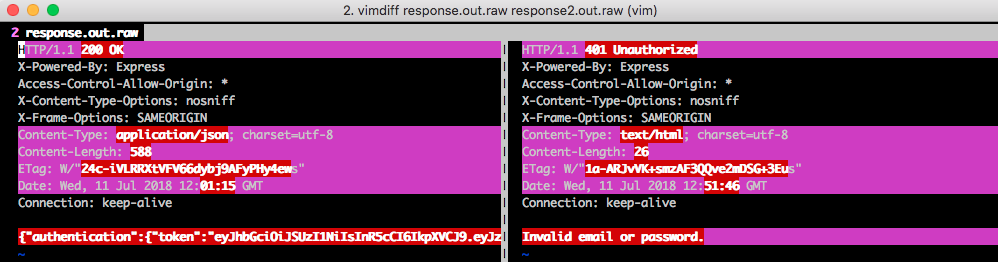
we see that a login can be recognized by the occurrence of the string authentication in the response.
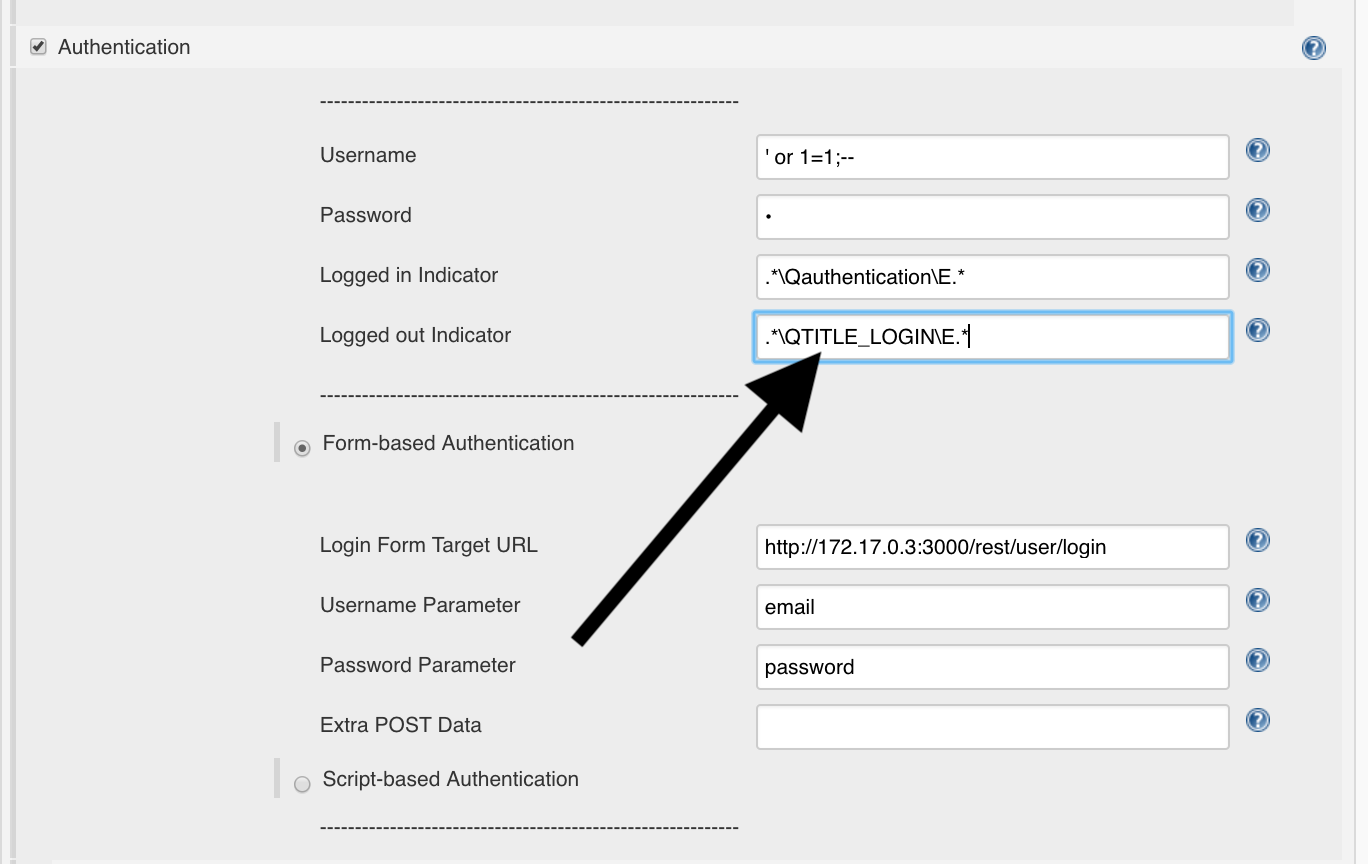
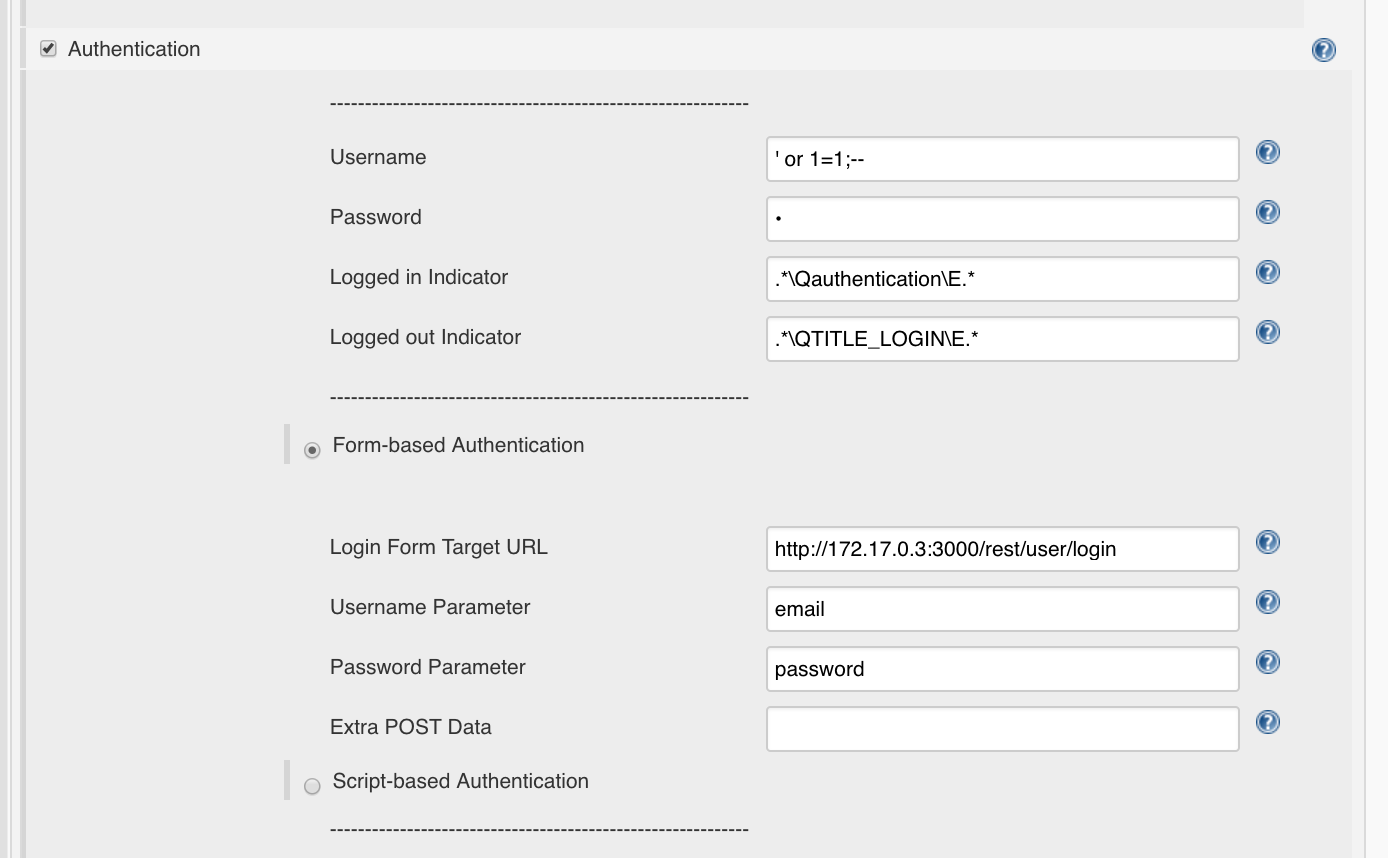
That means we set in Jenkins the following Reg-Ex for the Logged-In Indicator:
.*\Qauthentication\E.*
Logged-out String
To determine when we will be logged out, we look at which string can only be found on login page. To do this, hover the mouse over ‘Login’ in the browser, press the right mouse button and examine the element:
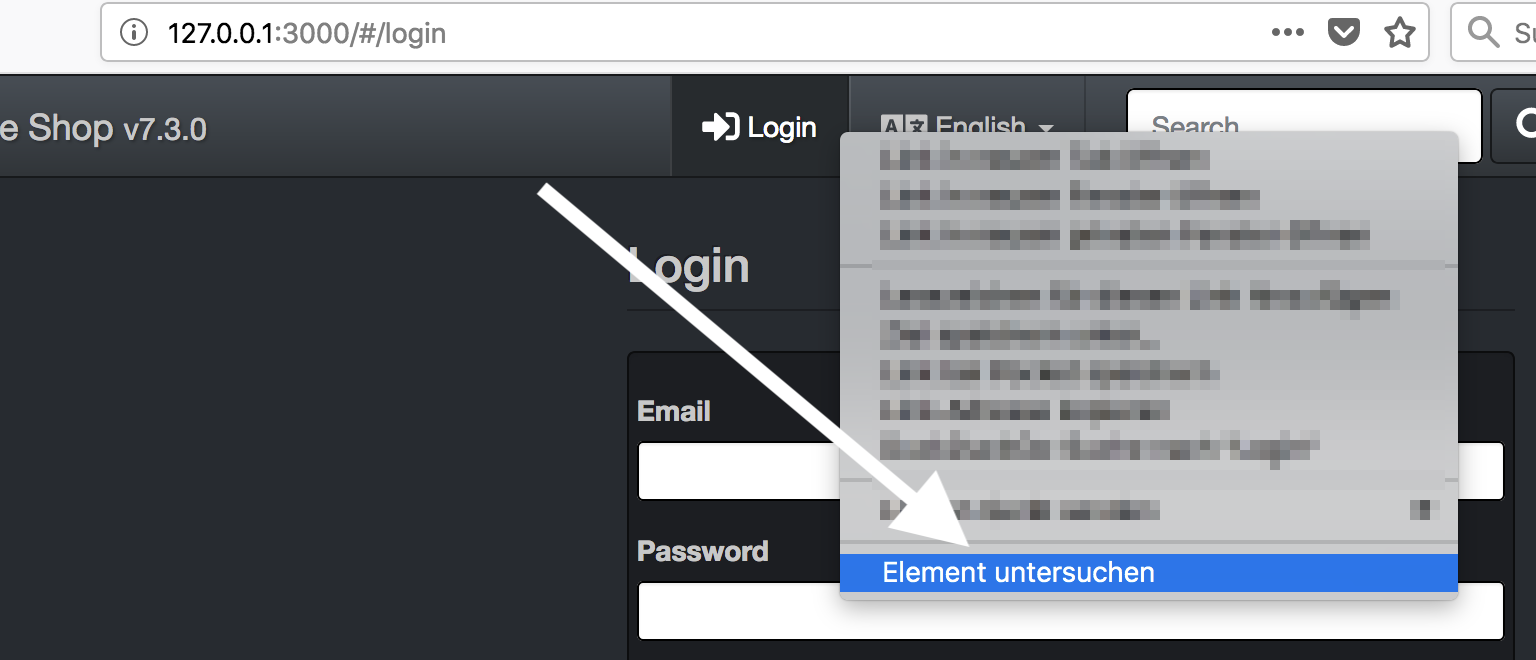
We use the string TITLE_LOGIN
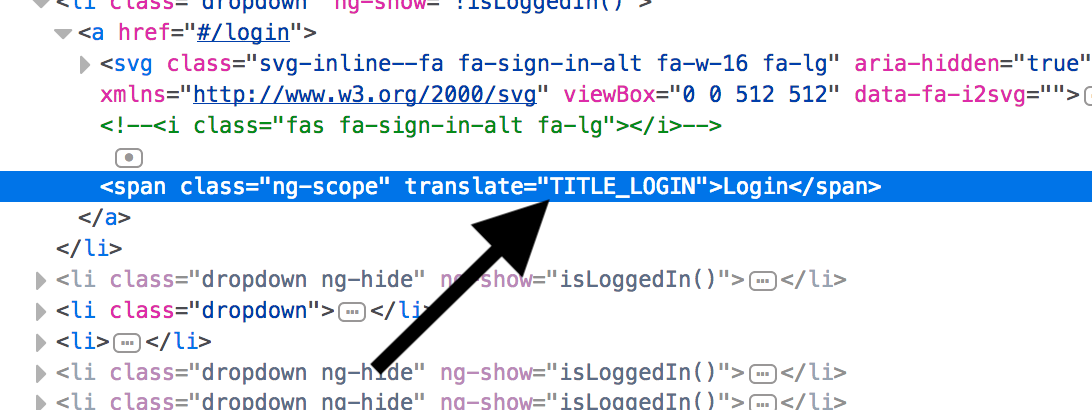
and put it in Jenkins:
.*\QTITLE_LOGIN\E.*
Missing data
To complete our scan we enter the following parameters:
- Session Properties
- Include in Context:
http://<determined_IP>:3000/.*e.g.http://172.17.0.3:3000/.*
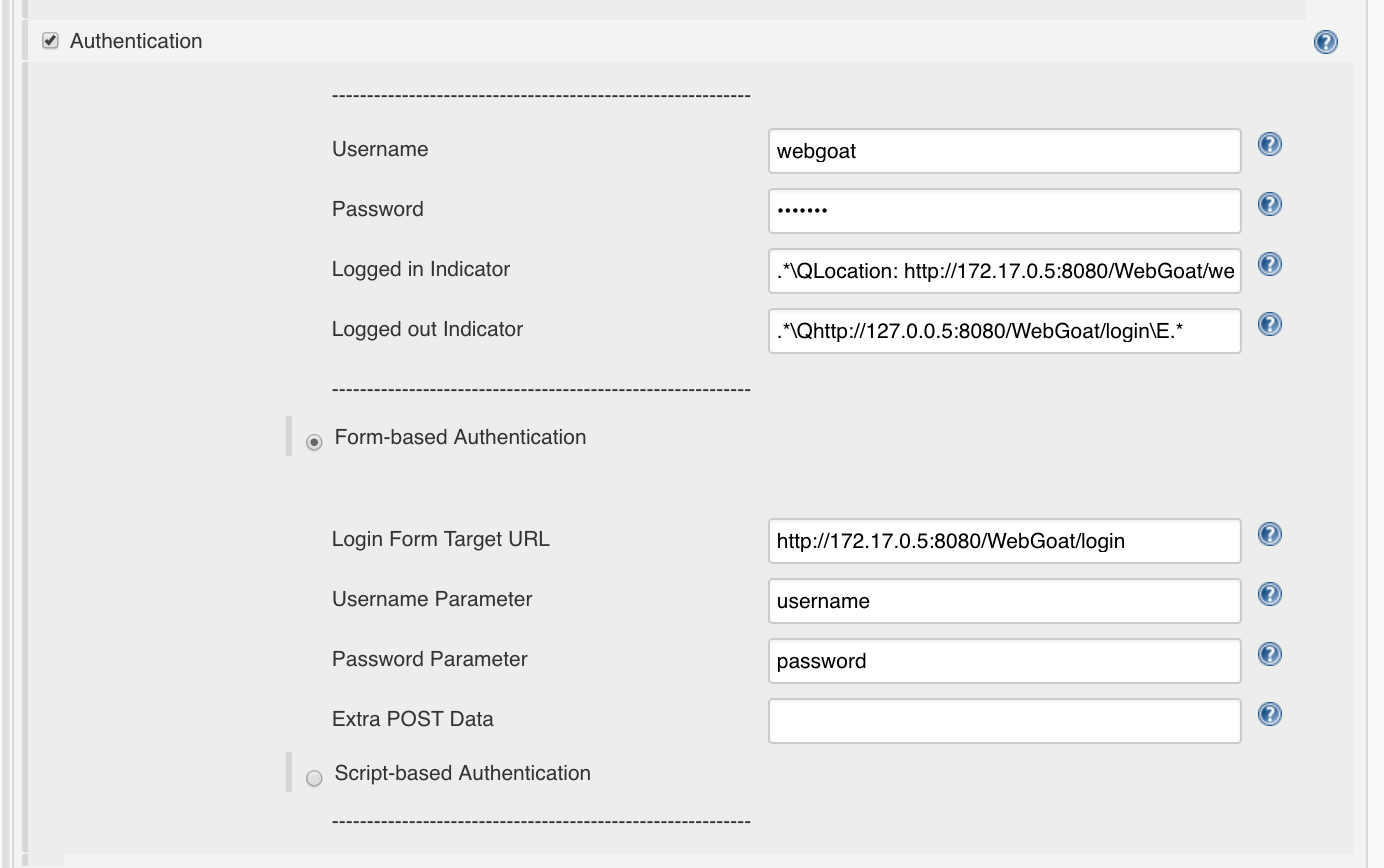
Authentication should look like this:
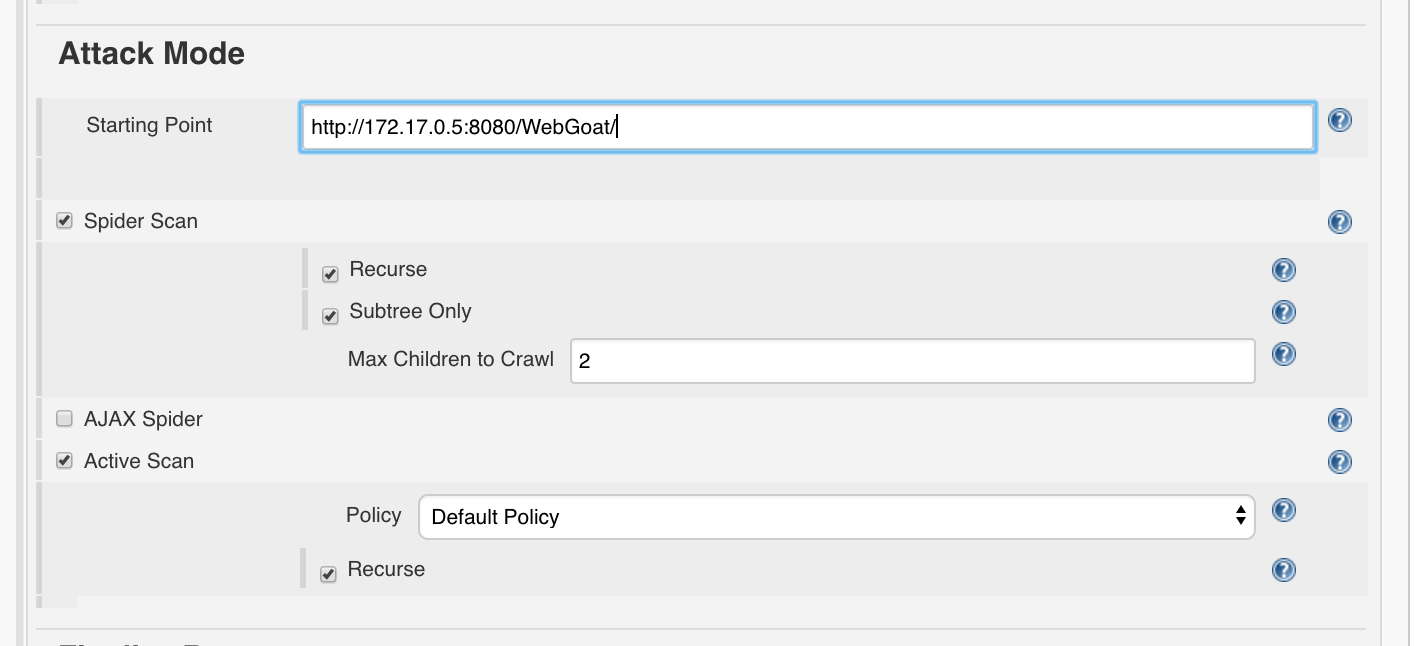
For the ‘Attack Mode’ we set:
- Starting Point:
http://<determined_IP>:3000/, e.g.http://172.17.0.3:3000/. Attention: It is important to set the final slash, otherwise the spider and scanner may not work properly. - Spider Scan
- Recurse: True
- Subtree Only: True
- Max Children To Crawl:
2 - Active Scan
- Policy:
Default Policy, which scans with MEDIUM strength - Recurse: True
Finalize Run’ and the Post-Build actions we leave as usual:
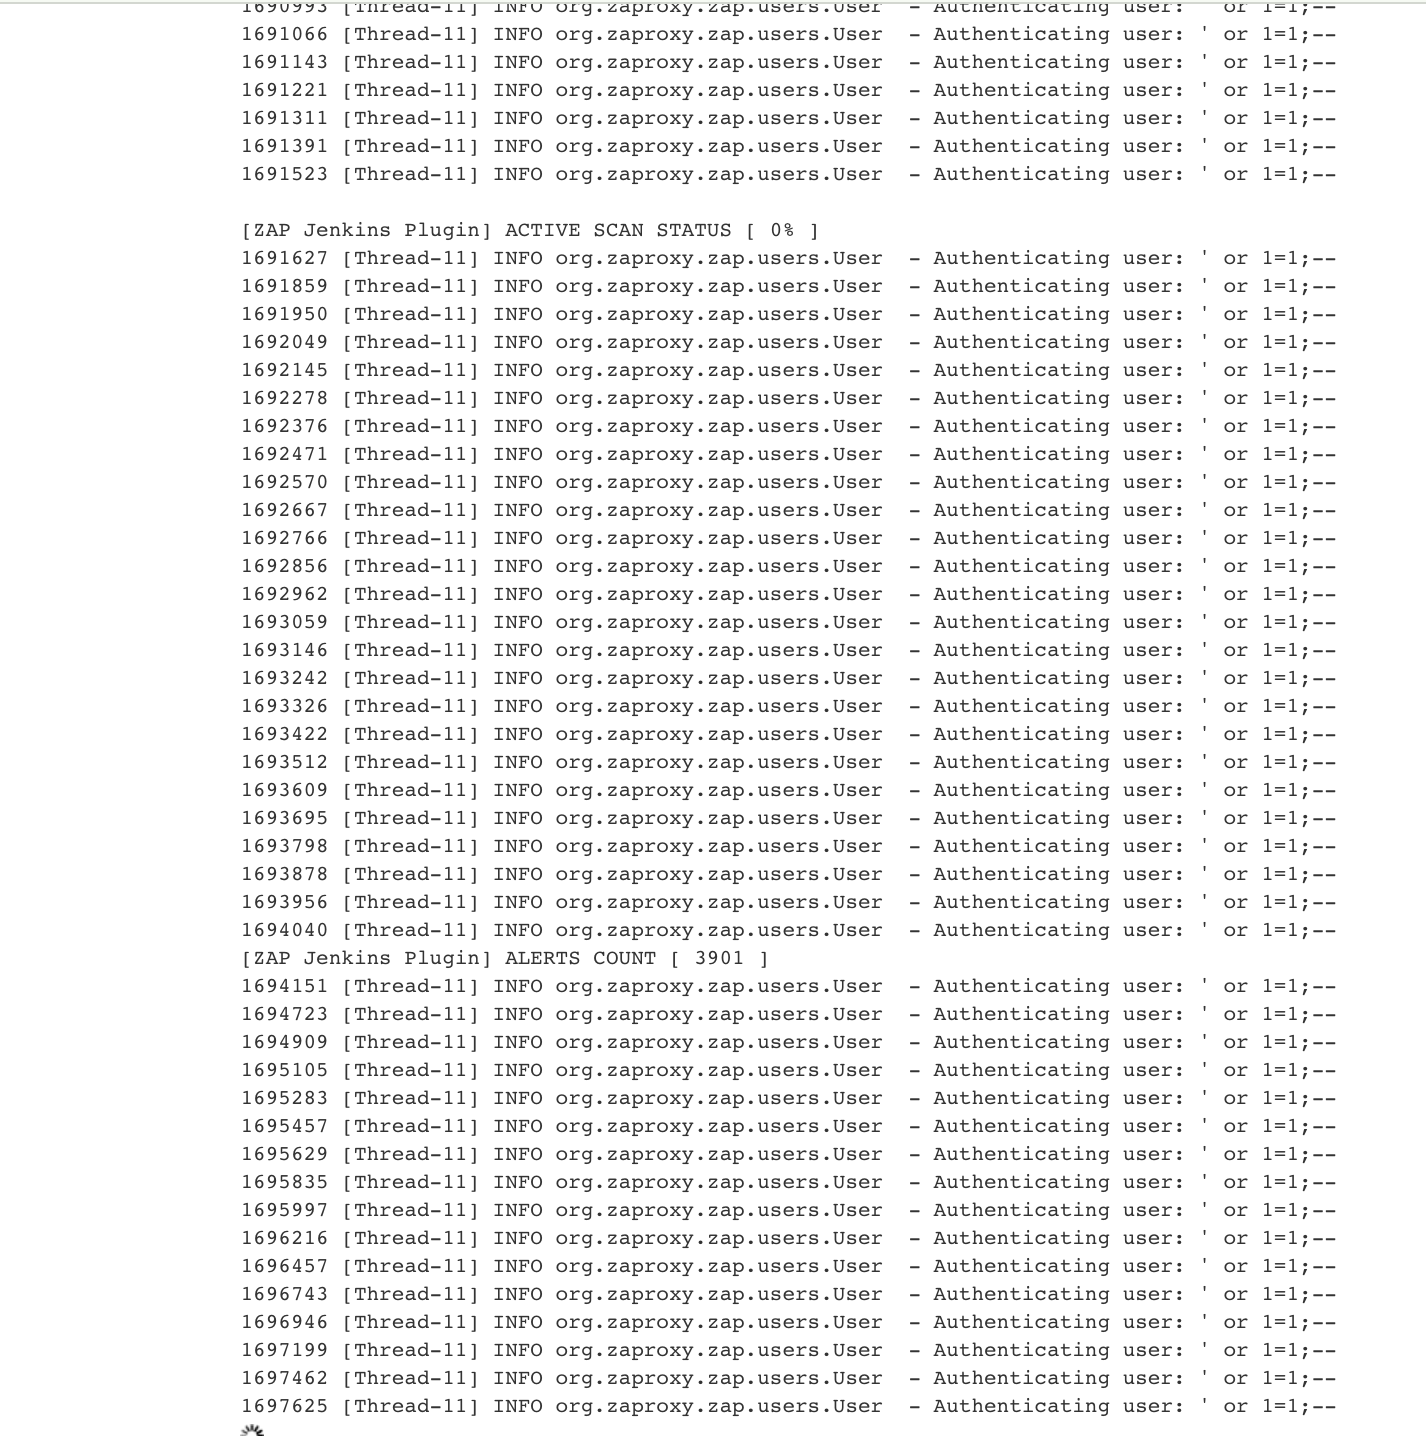
Start Scan
Now we can start the build / scan. This will take some time.
OWASP Web Goat
Another application we will use to illustrate authentication is OWASP WebGoat.
We’ll launch it with you:
docker run -p 127.0.0.1:10394:8080 -it webgoat/webgoat-8.0 /home/webgoat/start.sh
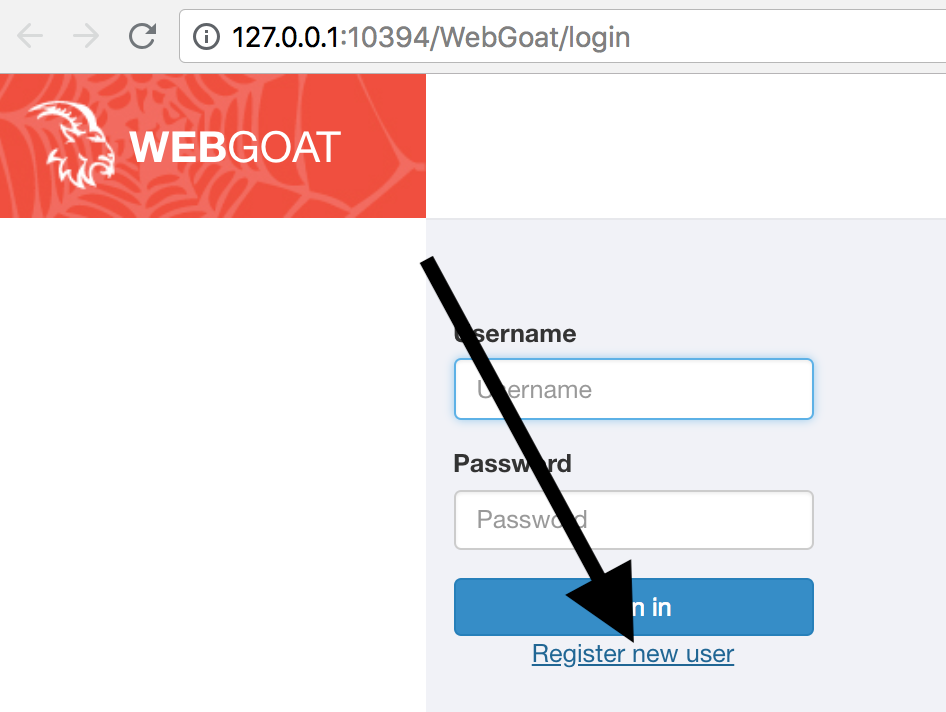
open http://127.0.0.1:10394/WebGoat/
Creating a user
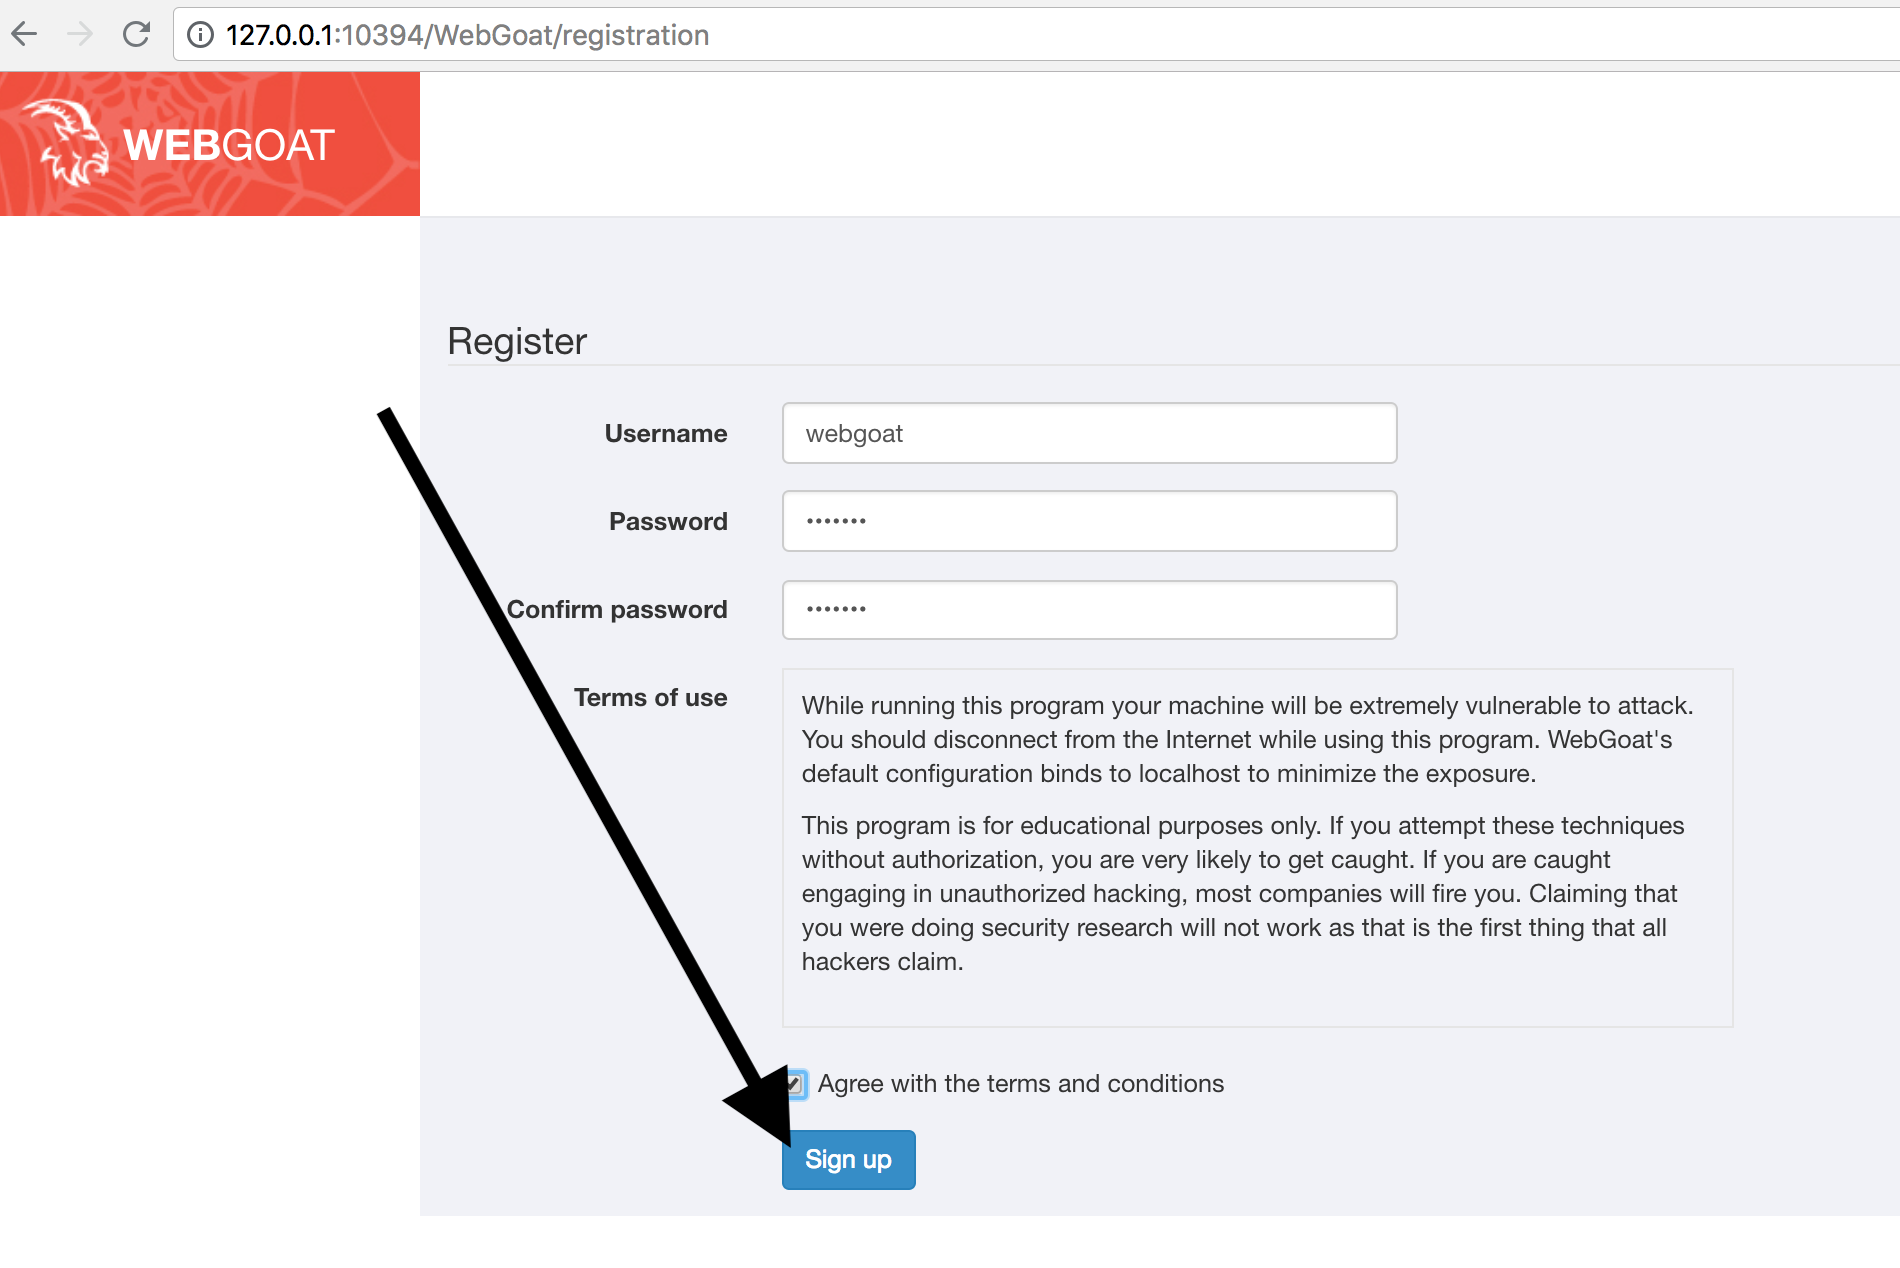
First we have to register a user:
We use
- Username:
webgoat - Password:
webgoat
accept the terms of service and click on ‘Sign up’:
Logged-in / Logged-out Indicators
When calling the URL http://127.0.0.1:10394/WebGoat/ we are redirected to http://127.0.0.1:10394/WebGoat/login.
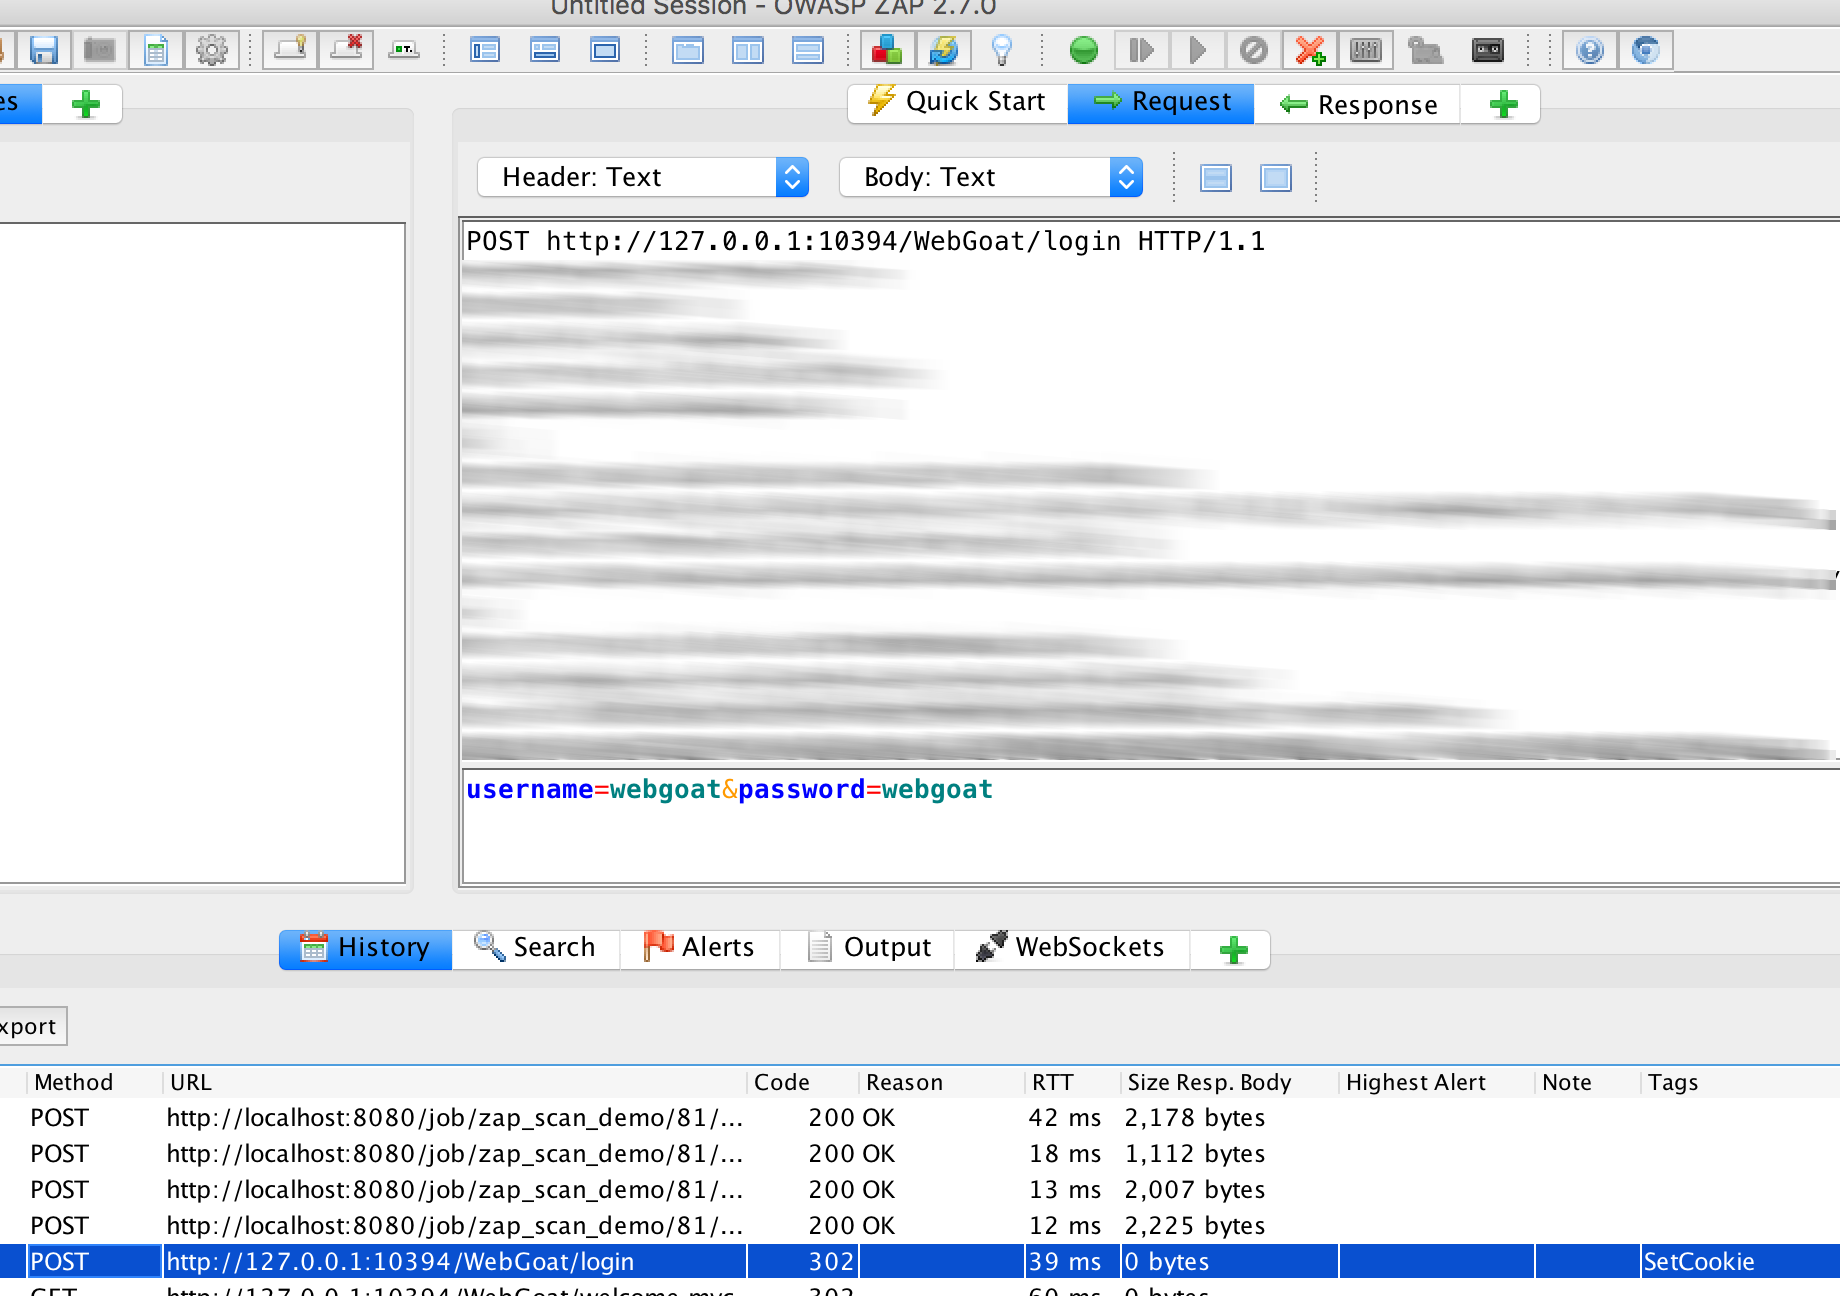
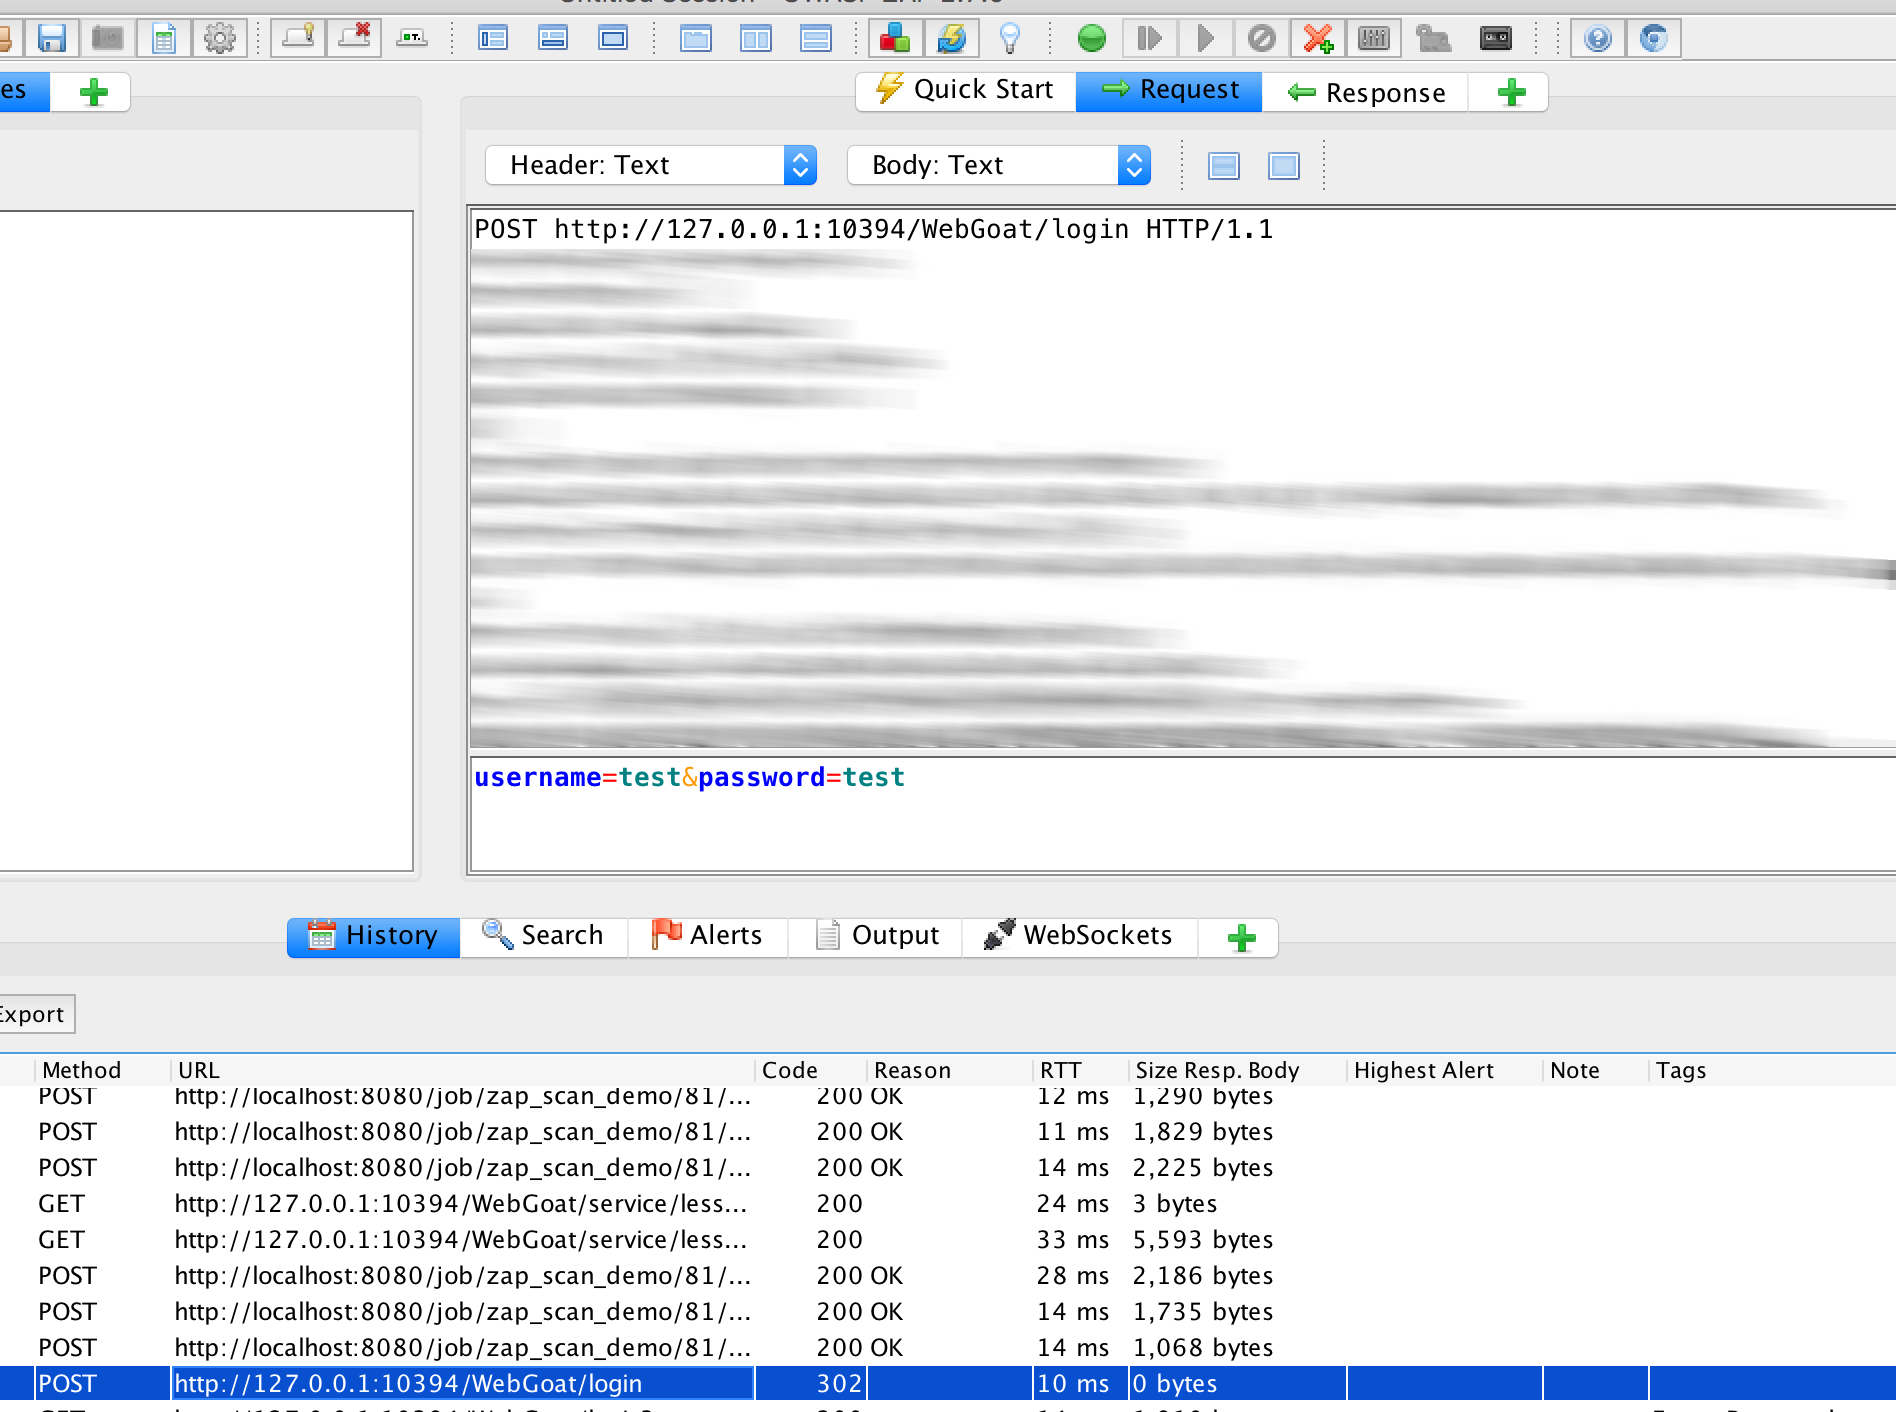
If we now log in with the credentials, have OWASP ZAP recorded, and take a closer look at requests and responses for a successful and unsuccessful login, we see:
- Login-Parameter (POST):
username=webgoat&password=webgoat - Username Parameter:
username - Password Parameter:
password - Login-URL:
http://172.17.0.5:8080/WebGoat/login, die IP und Port sind diejenigen im Dockernetz. Beides kann überdocker inspect <containerid_webgoat>|grep "IPA"(IP) bzw aus dem obigen docker-Aufruf ausgelesen werden (Port). - Username:
webgoat - Password:
webgoat
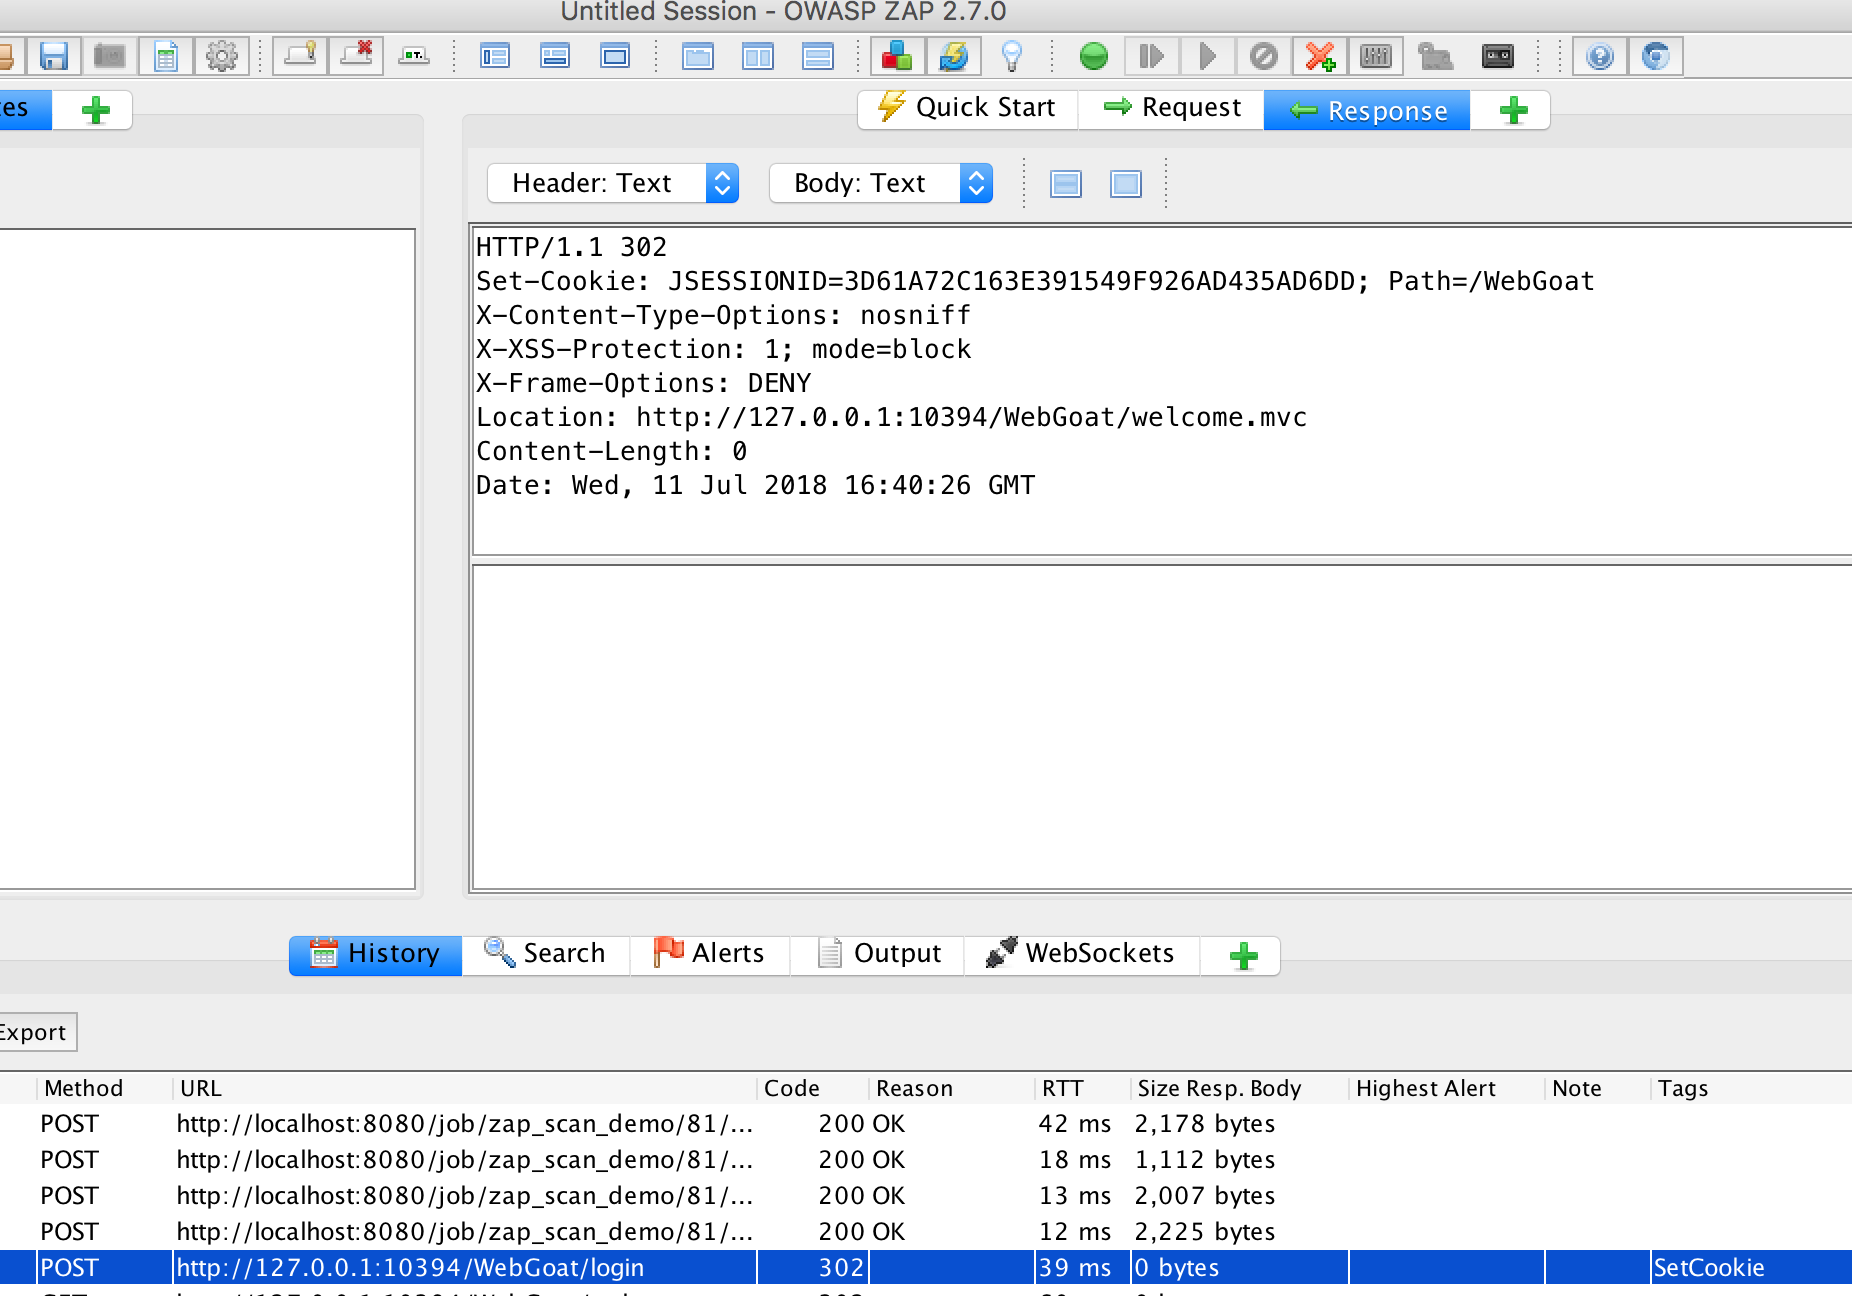
For a successful login:
For a non-successful login:
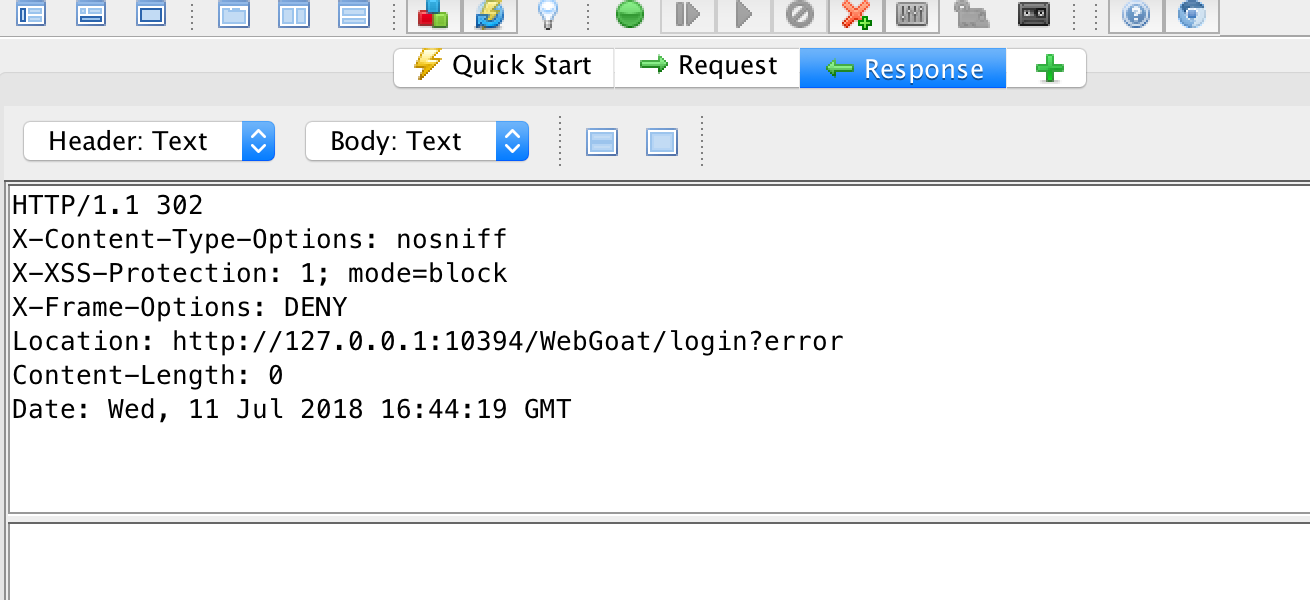
In the header the location is different:
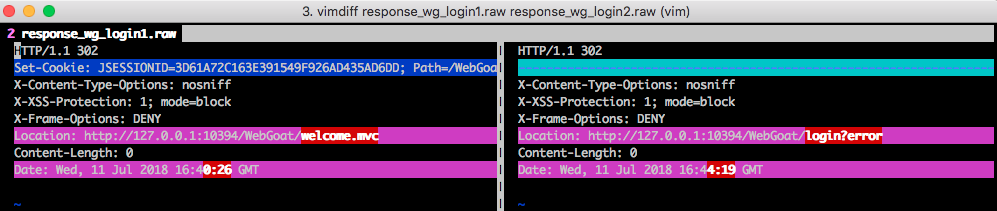
This is what we use for the Logged-In Indicator:
.*\QLocation: http://172.17.0.5:8080/WebGoat/welcome.mvc\E.*
For the Logged-out-Indicator we take the URL of the login page:
.*\Qhttp://127.0.0.5:8080/WebGoat/login\E.*
If this is in one of the responses, we assume that the system has logged out the user.
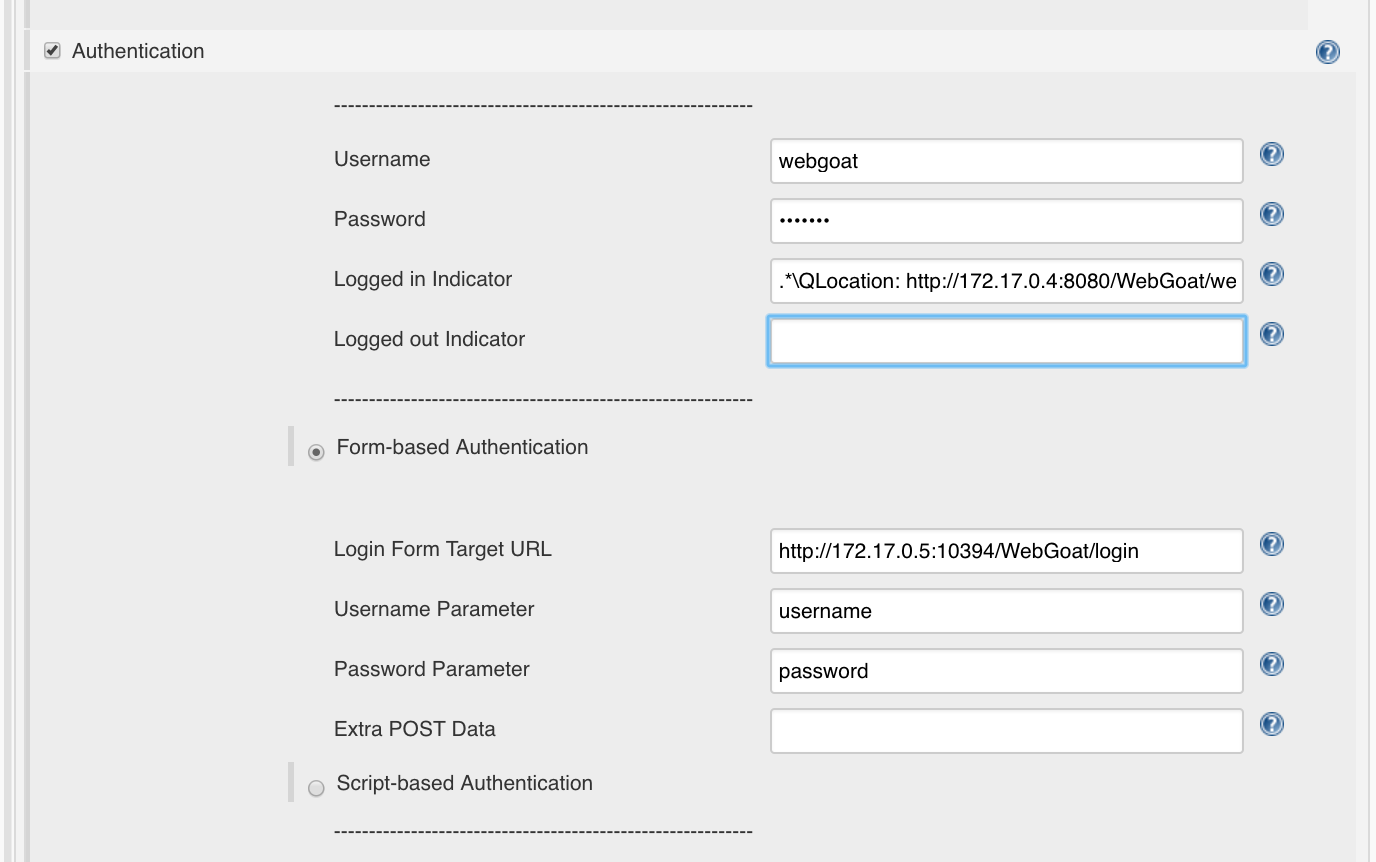
Final setting WebGoat
The final setting for the scan then looks as follows:
Best Practices
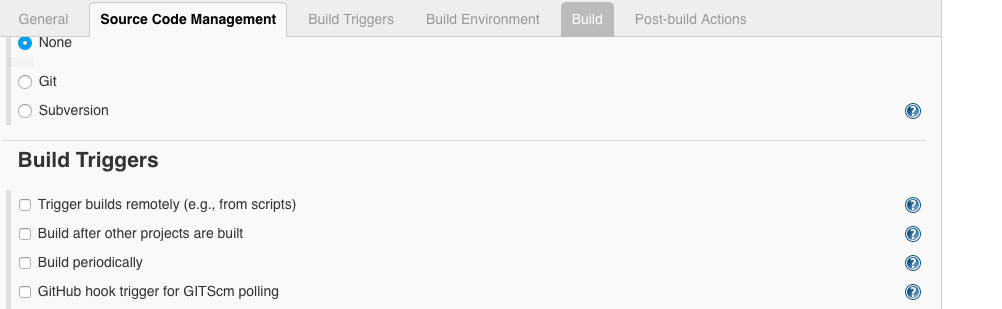
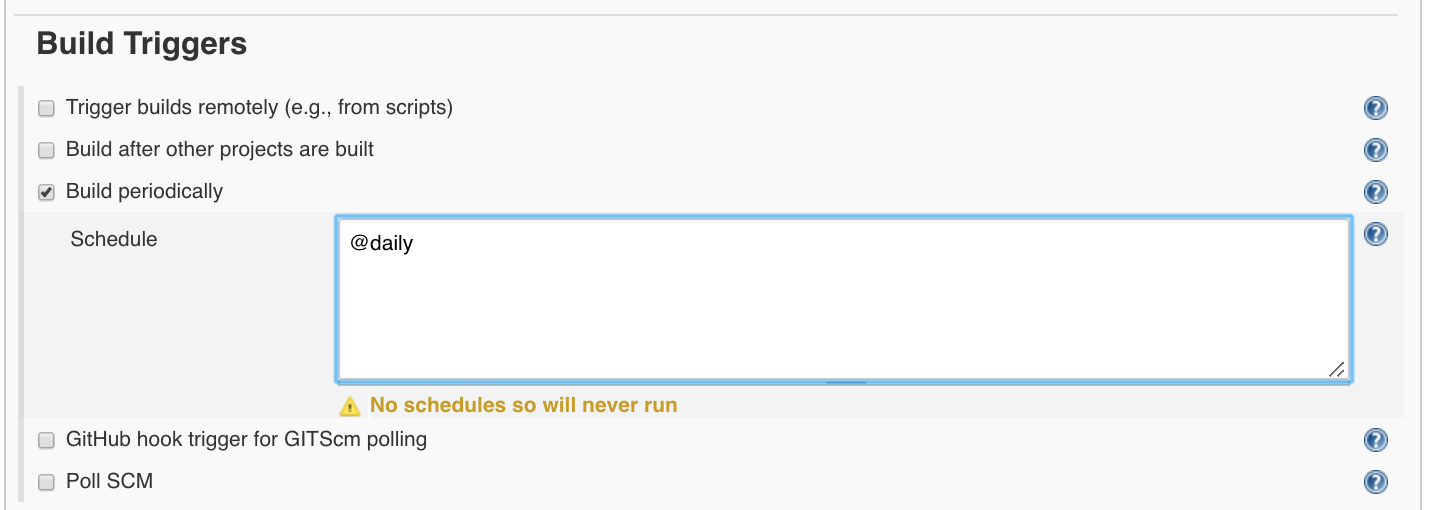
Due to the duration and traffic such a scan can take, it is recommended to run it only once overnight or once a week.
A daily scan can be set via ‘Build Triggers’:
Summary
This article summarizes how to install and use OWASP ZAP in the Continuous Integration System Jenkins.